I didn’t get cutting boards right on the first try. Or the second. There are a lot of steps—wood selection, milling and flattening, glue-ups (sometimes a few rounds), trimming, sanding, oiling—and the whole thing can stretch over days. It’s easy to make a small mistake and ruin a board you’ve invested hours into. I’ve done that.
This article is a collection of tips I wish I’d had when I started. They cover the whole journey—from picking the right wood and prepping stock, through flattening and planing, to sanding, oiling, and care. Most of these I learned the hard way, in a small workshop, trying to get cleaner glue lines, flatter panels, and a finish that actually lasts.
What helped me the most? Jigs. A good flattening sled, a reliable juice-groove jig, a handle jig, even a basic sanding block—these remove guesswork and prevent many of the mistakes below. I’ll point out the ones I use and why, so you can build once and reuse across boards.
If you’re still deciding which type to make (face, edge, or end-grain), I’ll link those builds as we go. Otherwise, dive in—use these tips on your next board and save the hours I spent figuring them out.
→ Check out my article Best Jigs for Making Cutting Boards (recommended builds, when to use them, and downloadable plans).
What I Use for Making Cutting Boards (Tools & Materials)
Here’s the core kit I actually reach for when making cutting boards. It keeps glue-ups cleaner, flattening safer, sanding easier, and the finish consistent. Use this as a quick bench checklist and add/replace with what you already have.
Clamping & Setup
Workholding & Safety
Routing & Details
Glue-Up & Finishing
Complete list: see Tools I Use. Some links are affiliates—at no extra cost to you.
📌 Found this post useful?
Save THIS PIN to your Board on Pinterest!
1. Design & Wood Selection
Pick closed-grain hardwoods for the working surface—I use walnut, ash, beech, padauk, and maple. The most important thing when selecting wood: straight, defect-free boards with stable moisture (≈8–10%) and consistent grain. Avoid knots, pith, and wide swirly grain for the glue-line edges.
Grain & pattern: For edge-grain boards, favor straight grain. When you glue up, alternate growth rings (“smiles/frowns”) to minimize cupping.
Acclimation: Let rough-cut stock acclimate in your shop before milling—usually, a couple of days is enough.
Food safety & glue: Use a waterproof PVA for glue-ups (e.g., Gorilla / Titebond III equivalents). It’s strong, food-safe once cured, and easy to clean up.
Now we can focus on milling/flattening, glue-ups, sanding, grooves, and finishing.

2. Milling & Flattening
You’ll flatten twice: first during wood prep, then again after the board is glued up. The tools overlap, but the rules change—especially with end grain. Here’s the quick call you need to make:
| Board / Task | Recommended Method | Why | Notes |
|---|---|---|---|
| Face-grain strips/panel (prep) | Planer | Fast, consistent thicknessing on long grain | Light passes, follow grain; carrier board if needed |
| Edge-grain strips/panel (prep) | Planer or Router Sled | Planer works; sled helps when grain is tricky | Use sacrificial end-caps to reduce snipe/blow-out |
| End-grain board (final flattening) | Router Flattening Sled | Prevents catastrophic tear-out | Do not plane end grain |
| Warped/twisted panel (any stage) | Router Flattening Sled | Removes wind safely and predictably | Wide base, shallow passes |
How I approach it (simple and safe)
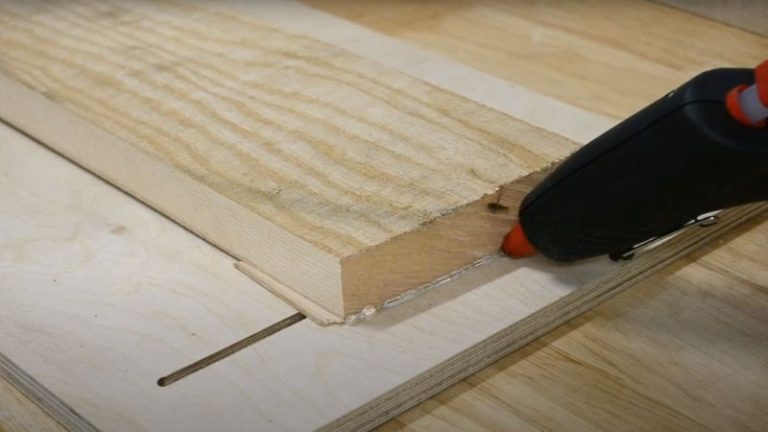
Wood prep (before glue-up): I’ll thickness face/edge-grain strips in the planer—light cuts, grain aligned. If the panel is short or fussy, I’ll ride it on a carrier board (possibly using a glue gun). To keep edges clean, I add sacrificial end-caps (little scrap strips) so any snipe/blow-out hits those, not the workpiece. Pop them off after planing.
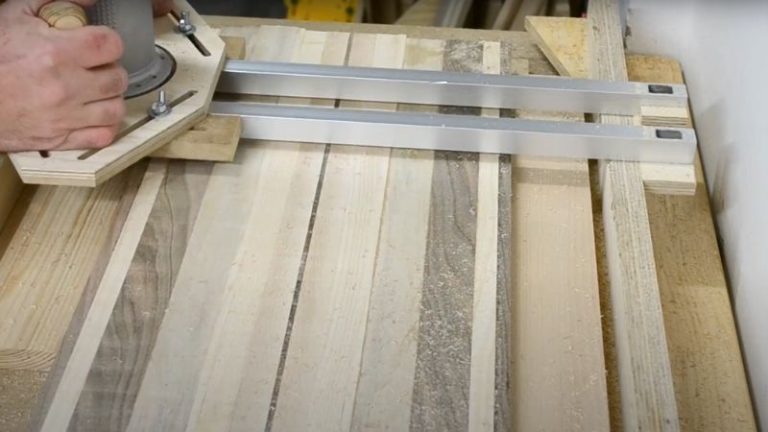
Final flattening (after glue-up): For end-grain, I go straight to the router flattening sled. That’s the safest way to get a dead-flat surface. For face/edge-grain, you can go with a planer, though I’ll often still use the sled for touch-ups—it’s controlled, predictable, and avoids surprise tear-out.
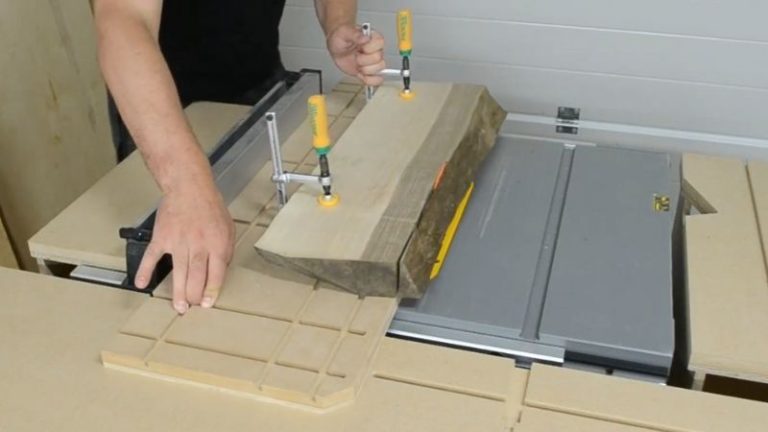
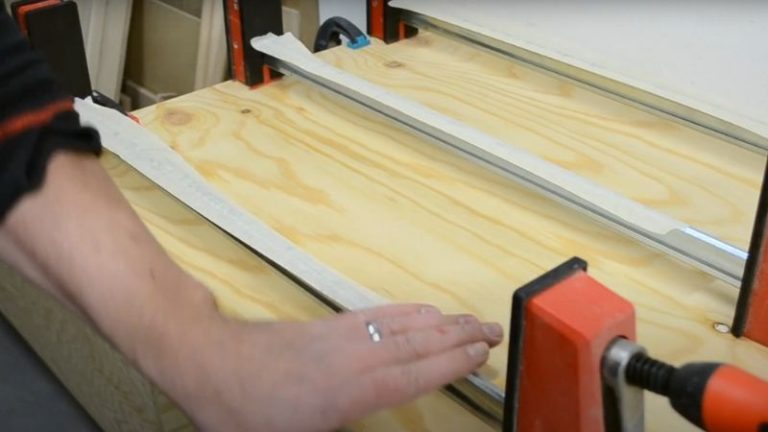
Straight edges without a jointer: To get one dead-straight reference edge—removing live edges during prep or straightening a finished board after glue-up—I use a Jointer Sled (table saw or router version). It’s my jointer when I don’t have a jointer.
Why this order works: Flat, parallel stock makes glue-ups painless and slashes sanding time. The sled protects you from the two big killers—tear-out and twist.
Learn more: For build details and step-by-step use, see my Router Flattening Jig plan and the Jointer Sled.
3. Glue-Up & Clamping (Clean, Flat, Stress-Free)
I used to struggle with glue-ups. Now I keep it simple—protect the work, set up once, and let the clamps do light, even work.
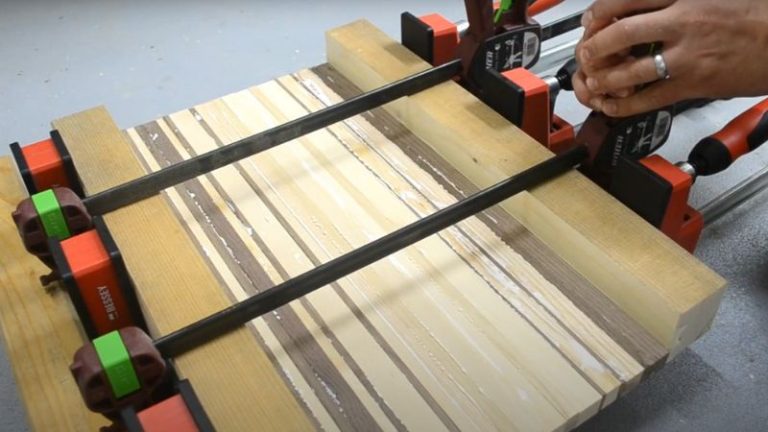
Tape the clamp bars (and cauls). A strip of masking/packing tape on the bars and on your cauls keeps glue from marking the board.
Use cauls top and bottom. Wrapped in tape, they hold the panel flat and spread pressure so everything stays aligned.
Add a flat underlay panel. Slide a thick, flat board between your work and the clamps. It spreads the load, keeps edges in line, and prevents clamp imprint—especially with pipe clamps.
Go for even pressure, not maximum pressure. Tighten until the joints close and you get a small, consistent bead of squeeze-out. Too much pressure can starve the joint or bow the panel—the underlay helps here a lot.
Catch the squeeze-out. Lay baking paper under the glue-up so any drips land on the paper, not your bench.
Cleanup: I scrape squeeze-out when it’s just turning rubbery so it comes off clean. If I miss a spot, I let it cure, use a sharp scraper, and then sand. Avoid running a board with dried glue through the planer—it can chip the blades and leave tracks.

4. Surfacing & Sanding (Flat → Finish-Ready)
After glue-ups, I surface the board the same way we decided in milling/flattening: planer for face/edge-grain, router sled for end-grain. If there’s any doubt, I default to the flattening sled—it’s controlled and safe, and it won’t surprise you with tear-out.
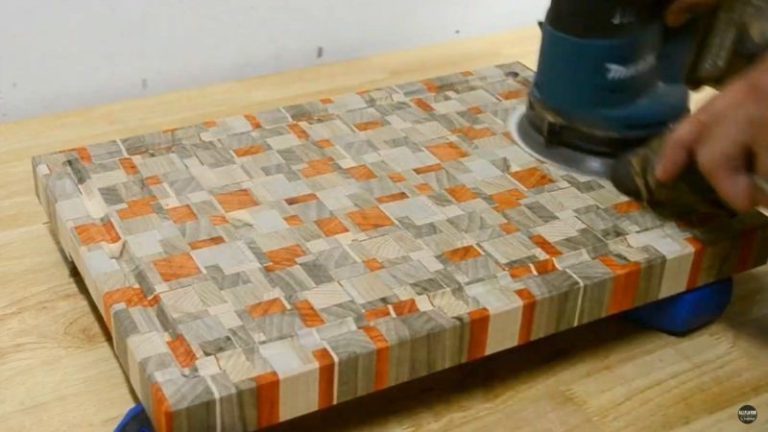
Sanding sequence: An orbital sander with variable speed helps—slower on softer woods and at higher grits. I usually go 80 → 120 → 150 → 180 → 220 → 300 (adjust to your wood). Try not to skip more than one grit or you’ll chase scratches forever.
Raise the grain: After 150–180, I lightly mist the surface with water, let it dry, and sand the next grit. This makes the tiny fibers stand up and gets you that silky, long-lasting finish once you oil the board.
Bench cookies: I rest the board on bench cookies so it stays put, is slightly elevated, and doesn’t pick up swirl marks from dust. It also keeps fingers away from the sander’s path.
Vacuum as you go: Dust clogs paper and leaves trails. I vacuum between grits—and I’m extra careful with padauk and other strong-color woods; their dust can tint maple/beech if it’s not cleared often.
For flat, controlled surfacing—especially on end grain—I use my Router Flattening Jig. For quick edge clean-up by hand, I use my DIY Sanding Block (simple build, great control on edges and corners).

5. Routing Edges, Handles & Juice Grooves
Small details make a board feel finished. I keep this part steady and repeatable with simple jigs and light passes.
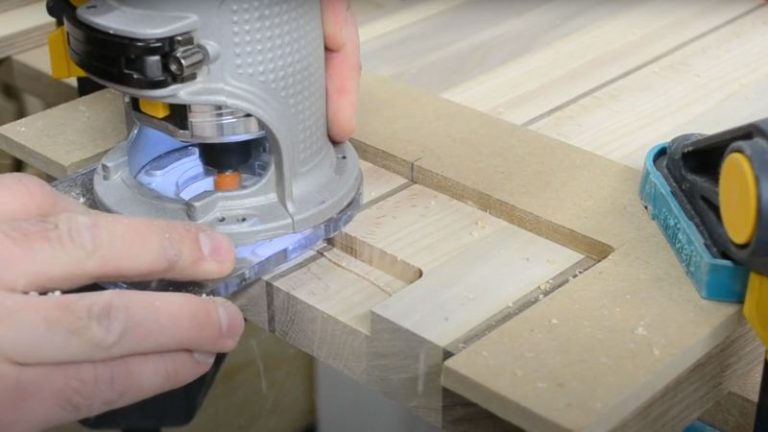
Handles (routed slots): I use a Handle Jig so every grip lands centered and repeatable. Light passes, stop blocks set, and I vacuum between cuts so the bit doesn’t skate on chips.
Juice groove: A Juice Groove Jig is worth it—multiple shallow passes give you clean walls and consistent depth. I vacuum often so dust doesn’t pack in and burn.
Router direction (handheld):
Outside a template / board perimeter: move counter-clockwise.
Inside a template (cutouts/handles): move clockwise.
Moving against the bit’s rotation keeps the cutter pressed to the guide, which reduces tear-out and gives you better control.
Routing edges: For a small round-over or chamfer, I follow the same counter-clockwise rule around the outside edge. If I just want a tiny soften, I’ll skip the router and use a sanding block—fast and safe.
Why this matters: Jigs give you repeatability and cleaner edges; correct direction means safer cuts with less burn and tear-out. After all the time in milling and glue-ups, a jig makes the juice groove the least risky part of the build.
Learn more: I use my Juice Groove Jig and Handle Jig for accuracy, and the Ruler Marking Gauge for quick, consistent layout.

6. Finishing
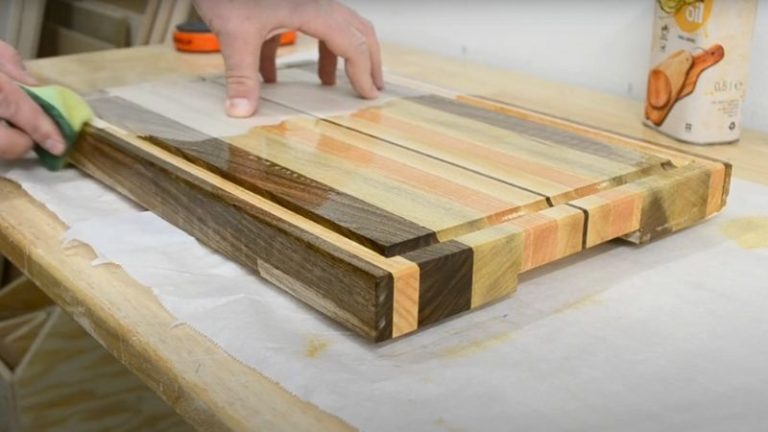
I keep finishing simple and repeatable. I flood the board with mineral oil, let it soak, wipe off, and repeat until the wood stops drinking. Then I add a thin coat of beeswax + mineral oil paste for a soft sheen and a bit of water resistance. My go-to oils are Clark’s and Belinka—there are plenty of options, the key is that they’re food-safe.
How much oil? Face- and edge-grain take a fair amount, but end grain soaks up much more. Have extra oil ready and keep flooding until the surface stays wet for a few minutes before you wipe.
Set up for clean, easy oiling: I put the board on bench cookies so it’s elevated, dries faster, and I can reach the edges without touching the surface. Oiling pads help—they don’t drink much oil and spread it evenly.
Protect the bench: Lay down baking paper (I stack a few sheets) so any drips land there, not on the table. If you oil boards often, a big plastic box works well—oil inside the box and keep the mess contained.
Color pop: Oil makes walnut go deeper and richer, beech/maple brighten with a warm tone, and padauk glow. Wipe off the excess after 15–20 minutes, let it rest, then add the wax blend and buff.
If you’re thinking about using linseed oil, read this first: Is Linseed Oil Food Safe? (Raw vs Boiled)—it explains the food-safety side of linseed oil and its variations so you know when (and if) to use it.

7. Care & Maintenance
A few simple habits keep a board flat and looking good.
Daily clean: Mild soap + warm water. Wipe, rinse, and dry upright. Don’t soak. Rubber feet help—air flows underneath so both faces dry evenly.
Re-oil: When the surface looks dry or feels fuzzy, re-oil (for most kitchens that’s about once a month). Wipe on, let it drink, wipe off.
No dishwasher, no direct heat: High heat and steam warp wood, can weaken glue lines, and strip the finish fast. Hand wash only; keep away from ovens and hot pans.
Feet vs. reversible:
Rubber feet: Better airflow, less slipping, protects the counter—great for everyday use.
Reversible (no feet): You can flip to a fresh face and keep both sides wearing evenly, but be extra careful about drying upright and keeping airflow.

8. Safety & Don’ts
A few hard rules that keep you (and your board) safe.
Never plane end grain. Running an end-grain cutting board through a planer can end badly—violent tear-out at the ends, ruined surface, and chips flying. After all that work it’s not worth the risk. Use a router flattening sled with a surfacing bit instead—controlled, flat, and safe.
Planing face/edge grain? Watch the grain. Feed with the grain so the fibers lift less and you avoid tear-out or snipe. If the fibers lean toward the outfeed, you’re going the right way; if they lean into the cutter, flip the piece.
PPE every time. Wear a dust mask/respirator and eye protection—non-negotiable. You’ll make a lot of dust and chips from milling to sanding. Hearing protection is a good habit too.
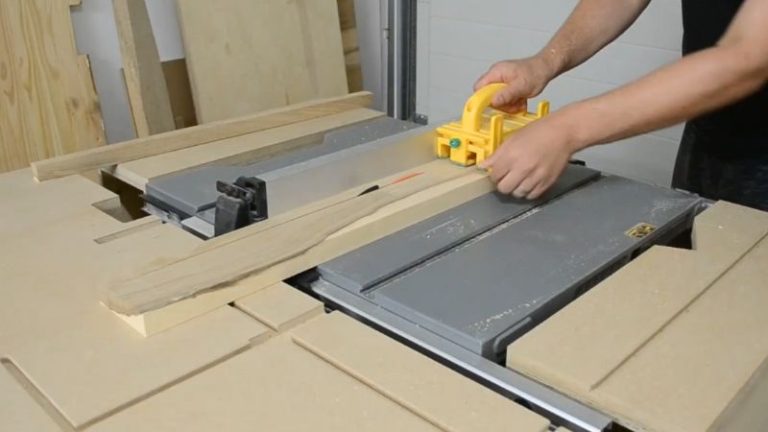
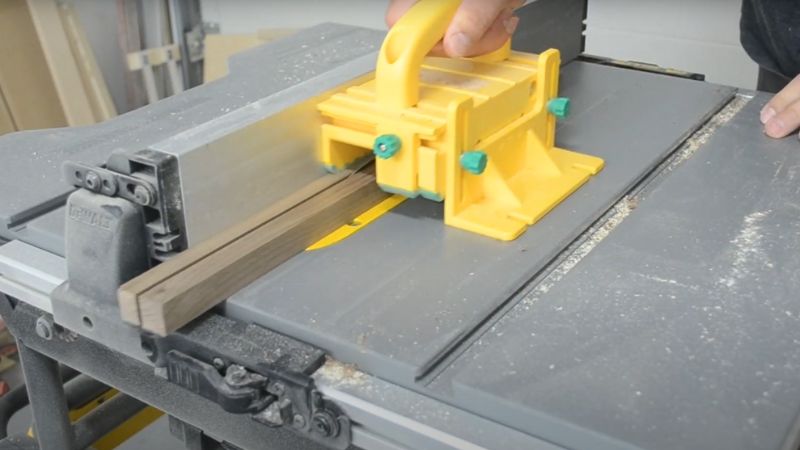
Use a push block for ripping strips. Narrow rips are safer and cleaner with a Grr-Ripper—it gives downward and sideways pressure and keeps hands away from the blade. I show how I use it here → Grr-Ripper Push Block (how I set it up and why I like it).
9. Troubleshooting (Fast Fixes)
Here’s a quick, skimmable table you can use when something goes wrong—spot the issue, fix it fast, and keep it from happening again.
| Problem | Likely cause | Quick fix | Prevent next time |
|---|---|---|---|
| Board is cupping | Uneven moisture; rings not alternated; one face sealed | Re-flatten on router sled; re-oil both faces; dry with airflow | Alternate growth rings; store upright; add feet or use spacers |
| Visible glue lines | Starved joints; poor edge prep; uneven clamping | Re-surface; wick in thin glue if minor, or re-glue strip | Joint one true edge; use even clamp pressure; tape cauls |
| Snipe at ends | Planer setup; no support; no end-caps | Trim ends square; light re-surface | Use sacrificial end-caps; infeed/outfeed support; lighter passes |
| Tear-out on routed groove | Wrong direction; too deep per pass; dull bit | Light clean-up pass; sand edges; re-route shallow | Use jig; correct router direction; shallow passes; sharp bit |
| Burn marks (router/edge) | Dull bit; too slow feed; chips packed | Sand out burns; light clean pass | Vacuum chips; steady feed; sharp bits |
| Uneven thickness after glue-up | Panel not flat; clamp imbalance | Re-flatten on sled; sand to final | Taped cauls top/bottom; underlay panel; check flat before glue |
| Twist/wind in panel | Stock twisted; rushed milling | Re-flatten on sled; skim both faces | Mill in stages; acclimate stock; check with winding sticks |
| Color bleed (padauk → maple) | Dust left between grits; cross-contamination | Sand back lightly; clean with alcohol; re-sand fine grit | Vacuum between grits; separate sanding sessions for dark woods |
| Clamp marks/black stains | Bare steel + glue; no tape on bars | Sand out or oxalic acid if light | Tape clamp bars/cauls; use stainless or covered bars |
| Rocking board on counter | No underside chamfer; uneven feet | Add a small underside chamfer; adjust/replace feet | Chamfer underside early; test on flat surface before finish |
10. Recommended Jigs & Plans
These are the jigs that make cutting boards easier and more consistent. Each one solves a specific step, helps you avoid common mistakes, and speeds things up. You can build them yourself and use them on any board style.
Table Saw Sled — Squares edges and ends; great for cleaning up a panel after glue-up.
Router Flattening Jig — Flattens large panels and all end-grain safely (no planer needed).
Jointer Sled — Gives you one dead-straight edge for tight glue lines; also handy for trimming live edges.
Juice Groove Jig — Clean, repeatable grooves with consistent depth and tidy corners.
Handle Jig — Centered, repeatable handle slots with stop blocks set once.
Router Table — Quick bevels/chamfers on edges and controlled handle shaping.
Sanding Block — Crisp edges, spot fixes, and safe softening where a router is overkill.
Ruler Marking Gauge — Fast layout, mirrored spacing, and accurate marks for rubber feet.
If you’d prefer a one-stop list, head to my Woodworking Plans page — you’ll find all my jig builds there (not just the ones above), with downloadable plans and step-by-step guides.
Wrap Up
I learned most of these tips the slow way—by making a few mistakes. Some were unnecessary, but that’s part of the process. If I’d known them earlier, I would’ve saved time and a couple of boards. Hopefully, this list does that for you.
If I had to give you one piece of advice, it’s this: start with the jigs. I know it’s tempting to jump straight into the board, but the jigs pay you back every time—precision, speed, repeatability. Build them once and you’ll use them on every board you make.
Then keep the fundamentals tight: flat stock, even clamp pressure, shallow router passes in the right direction, and vacuum between grits. Do those well and the rest—grooves, handles, edges, and finishing—falls into place with less fuss.
If you want the exact builds I use, check Best Jigs for Making Cutting Boards (And How to Use Them)—you’ll find what each jig does, when to use it, and links to the plans.
📌 Save THIS PIN to your Board on Pinterest!

