
Having a router table in the workshop is incredibly useful. It opens up many woodworking techniques that are difficult — or sometimes impossible — to do with a handheld router alone. Cuts become more controlled, repeatable, and accurate, especially when working with joinery, dados, rabbets, edge profiles, or smaller workpieces.
But full-size router tables can get expensive quickly, and they also take up a lot of space. If you’re a woodworking beginner or a DIYer like me, building a simple benchtop router table is a great alternative.
This DIY router table is compact, portable, and easy to clamp onto a workbench whenever you need it. Even though it’s small, it still gives you many of the same advantages as a larger setup — including an adjustable fence, T-tracks for accessories, and dust collection.
One thing I really like about this design is that you can easily expand it later with add-ons like a box joint jig, spline jig, tenoning jig, or other router table accessories.
👉 If you enjoy building workshop jigs like this, check out my Best DIY Woodworking Jigs for Your Workshop guide. I also now offer premium woodworking plans for selected workshop jigs and cutting board builds if you want the more complete version of the projects.
Let me show you how to build it step by step.
DIY Router Table Video
Watch the video below for the full step-by-step build of this DIY router table. I’ll show you how I built the tabletop, added the T-tracks, made the adjustable fence, and put together the dust collection system.
I appreciate every YouTube subscriber. It’s free and easy to subscribe to — just Click Here To Subscribe. Thank you!
Table of Contents
- DIY Router Table Video
- Router Table Plans
- The Material you will need
- General Questions
- What is a Router Table?
- Router vs Router Table
- How Difficult Is It to Make a Benchtop Router Table?
- How to Make a Benchtop Router Table (with Fence and Dust Collector)
- Step 1: Build a Router Table Top
- Step 2: Attach the Router to the Table Top
- Step 3: Cut the T-Tracks in the Router Table
- Step 4: Build the Router Table Fence
- Step 5: Build the Router Table Dust Collection Box
- How to Set Up and Use a Benchtop Router Table
- Tabletop Router Table – Potential Upgrades
- Wrap-up
- FAQ
- Jigs Used for this Project
*Safety is your responsibility. Make sure you know what you’re doing and take all necessary safety precautions while working with power tools. Safety comes first!
Router Table Plans
If you want the more complete version of the plans, I also now offer premium woodworking plans for selected workshop jigs and cutting board builds. This benchtop router table is also one of the jigs I use regularly when working on cutting boards — especially for edge profiles, chamfers, and handles.
What you'll need to make a Simple DIY Router Table
Here are the materials and tools I used to build this benchtop router table.
Router Table Top
- 400 mm × 300 mm × 12 mm plywood
- 400 mm × 300 mm × 9 mm plywood
DIY T-tracks
- 2× HDF strips – 400 mm × 13.5 mm × 4 mm
- 4× HDF strips – 180 mm × 13.5 mm × 4 mm
- DIY T-track bolts
Router Fence
- 300 mm × 60 mm × 12 mm plywood
- 300 mm × 7 mm × 8 mm HDF
Router Table Dust Collector – Plywood
- 47 mm × 39 mm × 18 mm plywood
- 3× 60 mm × 60 mm × 6 mm plywood pieces
Check all the Tools I Use
Tools:
- Circular Saw – https://amzn.to/4aMD0xg
- Hand Drill – https://amzn.to/3HqLEnH
- Trim Router – https://amzn.to/3HbQcOg
- Table Saw / Mini Table Saw – https://amzn.to/47mWiGf
- Narex Chisels – https://amzn.to/3tHNJrT
- One Hand Clamps – https://amzn.to/48jGxkZ
- Spring Clamps – https://amzn.to/41Nuh9D
- F-Clamps – https://amzn.to/48ArzY1
- Machinist Square / Speed Square
Other:
- Wood Glue – https://amzn.to/48ltKhJ
- Forstner Bits – 35mm – https://amzn.to/3Hd1aDb
- Router Bits – 6mm – https://amzn.to/3NQNDVX
- Drill bits – https://amzn.to/4aI47t3
- Polyurethane finish – https://amzn.to/3TOoOO3
- M4 Bolts with countersunk head – https://amzn.to/3RJd2BU
- M6 Bolts, M6 Wing Nuts, Washers, WoodScrews – https://amzn.to/41PodgQ
Some of the links above are affiliate links. If you buy through them, I may earn a small commission at no extra cost to you.
📌 Pin this to your woodworking board so you can build this DIY router table later!

What is a Router Table?
A router table is a woodworking station that holds a router upside down beneath a flat tabletop. Instead of moving the router across the wood, you move the workpiece across the router bit. This setup gives you better control, cleaner cuts, and more repeatable results — especially for smaller pieces and detailed work.
A router table is especially useful for:
- Cutting joinery such as dados, rabbets, grooves, and box joints
- Routing edge profiles with more control and consistency
- Working with smaller workpieces more safely and accurately
- Making repeatable cuts using fences, stops, or jigs
- Using additional accessories like featherboards, spline jigs, or tenoning jigs
One of the biggest advantages of a router table is precision. Once the fence and bit height are set up correctly, you can quickly repeat the same cut on multiple pieces with very consistent results.
For many woodworking projects — especially cutting boards, boxes, frames, or cabinetry — a router table becomes one of the most useful tools in the workshop.
Router vs Router Table
| Feature | Handheld Router | Router Table |
|---|---|---|
| Best For | Freehand routing and larger workpieces | Controlled, repeatable cuts and smaller parts |
| Precision | Good | Excellent |
| Ease of Repeat Cuts | Moderate | Very Easy |
| Joinery Work | Possible | Excellent |
| Small Workpieces | Harder to control | Much safer and easier |
A router table gives you better control, repeatability, and accuracy — especially for joinery and smaller woodworking parts.
How Difficult Is It to Make a Benchtop Router Table?
Building a benchtop router table is a fairly beginner-friendly project. You don’t need a large workshop or expensive materials — most of the build can be done with a circular saw or table saw, a hand drill, clamps, and a trim router.
The most important part is accuracy. Take your time when centering the router, drilling the mounting holes, and cutting the T-tracks. If these parts are aligned well, the table will be much easier and safer to use later.
What makes this build worth it is that you get many of the benefits of a full-size router table in a compact version you can clamp to a workbench and store when not in use.
💡 TIP: Build it simple first. You can always improve it later with a better fence, router plate, dust collection, or extra jigs.
Let’s Start Building!
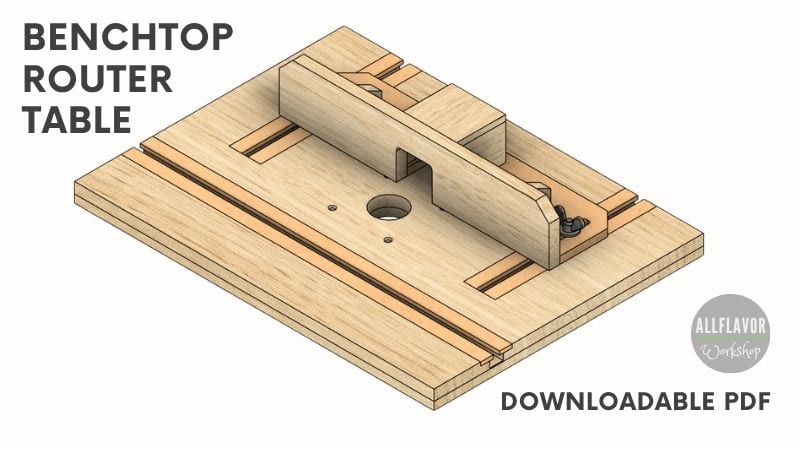
This DIY router table consists of three main parts — the tabletop, the adjustable fence, and the dust collection box. The build is compact, simple, and designed to be easy to modify later with additional jigs and accessories.
The tabletop is made from two plywood layers glued together to create a strong and stable work surface. I also added DIY T-tracks, which allow you to quickly attach the fence, clamps, featherboards, or other router table accessories.
One thing I really like about this design is its flexibility. Even though it’s a small benchtop router table, it still gives you many of the same advantages as a larger setup while taking up only a fraction of the space.
Router Table Features
- Adjustable Fence – allows more accurate and repeatable cuts
- DIY T-Track System – useful for fences, jigs, featherboards, and stops
- Dust Collection Box – helps keep the workspace cleaner
- Compact Design – easy to clamp onto a workbench and store afterward
- Expandable Setup – compatible with additional router table jigs and accessories
NOTE: This build was designed around a DeWalt trim router, but the dimensions can easily be adjusted for other router types as well.
How to Make a Benchtop Router Table (with Fence and Dust Collector)
Step 1: Build the Router Tabletop
Start by measuring and marking the plywood sheets for the tabletop. For this build, I used two pieces of Baltic birch plywood — one 12 mm thick and the other 9 mm thick. Glued together, they create a strong and stable tabletop that is still light enough for a benchtop setup.
Back when I built this router table, I didn’t have a table saw yet, so I cut the plywood using a circular saw and a straight guide. It worked well, but if you have a table saw, that will give you the cleanest and most accurate cuts.
Make sure both plywood sheets are cut square and align nicely with each other. This is important because the tabletop needs to stay flat and stable, especially once the router is mounted underneath.
Apply wood glue between the two sheets, align the edges carefully, and add weight on top to spread even pressure during the glue-up. Keep checking that the pieces don’t shift. Once aligned, add screws from the bottom to reinforce the tabletop. I placed the screws in the corners, roughly 20 mm from the edges.
💡TIP: Make sure the screw heads sit flush with the bottom surface so they don’t interfere with clamping or how the table sits on your workbench.
NOTE: Keeping both plywood layers aligned during glue-up is the most important part of this step. Take your time here — it will make the rest of the build much easier.


Step 2: Attach the Router to the Tabletop
The router is mounted from the bottom of the tabletop, but the attachment screws go in from the top. Start by finding and marking the center of the tabletop on the working surface.
Remove the router base plate and place it in the center of the tabletop. Use it as a template to mark both the center opening for the router bit and the mounting holes for the screws. Take your time here and make sure everything is properly centered and aligned with the tabletop.
Drill the mounting holes all the way through the table, then countersink them from the top. This is important because the screw heads must sit flush with the working surface.
Next, drill the center hole for the router bit using a Forstner bit or hole saw. Don’t make this opening larger than necessary — it only needs to be big enough for the largest router bit you plan to use with this table.
Lightly clean the edges of the center hole, then test the fit by mounting the router underneath the table and inserting the screws from the top.
NOTE: Depending on the thickness of your tabletop, you may need longer screws than the ones originally used for your router base plate. Make sure they are long enough to hold the router securely.
💡TIP: Before drilling, double-check the router orientation. Make sure the router controls, power switch, and depth adjustment will still be easy to access from underneath the table.


Find This Blog Post Useful?
Join my newsletter to receive the latest news, tutorials, and project plans sent directly to your inbox!
Step 3: Cut the T-Tracks in the Router Table
In this step, we’ll add three T-tracks to the tabletop. These make the router table much more versatile and allow you to attach the fence, stops, clamps, and other accessories.
There are three T-tracks in total:
- Two tracks run from the back of the table toward the front and stop roughly around 60% of the table width. These are mainly used for attaching and adjusting the router table fence.
- One track runs along the full length of the tabletop, in front of the router bit. This one can be used for additional accessories or jigs, such as a tenoning jig.
I’m making my own DIY T-tracks using MDF strips, but you can use shop-made T-tracks as well if you prefer.
Start by marking the track layout directly on the tabletop. Take your time here and make sure the tracks are straight and perpendicular, especially the two tracks used for the fence.
Cut the dadoes using a router and a dado jig. Once the grooves are routed, clean the corners with a chisel and give the tracks a light sanding. Pay extra attention to the center channel where the bolts will slide — it should be smooth enough for easy adjustment.
Next, cut the MDF strips and glue them into the routed grooves to form the T-tracks. Use only enough glue to hold the strips in place.
NOTE: Be careful not to get glue into the center track. It is difficult to remove afterward and can prevent the bolts from sliding smoothly. You can also reinforce the MDF strips with screws if needed. If you do, make sure the screw heads are properly countersunk and do not stick above the surface.
💡TIP: Once the MDF strips are installed, check that they are level with the tabletop. Any raised edge can interfere with your workpiece or fence movement.


Step 4: Build the Router Table Fence
Start by cutting all the fence parts to size — the front fence, the back support, and the reinforcing triangles.
- The front fence is the part that touches the workpiece, so it needs to be as straight and square as possible.
- The back support is used to attach the fence to the T-tracks and allows you to adjust the fence position.
- The reinforcing triangles strengthen the connection between both parts and help keep the fence rigid.
Next, cut out the center opening in both the front fence and the back support. This gives clearance for the router bit and allows dust to move toward the dust collection box later. Then cut the adjustment slots in the back support so the fence can slide forward and backward on the T-tracks.
Glue the front fence and back support together, making sure they are perfectly perpendicular. Use a square here and take your time — if the fence is not square, it will affect the accuracy of your cuts.
Add the reinforcing triangles to strengthen the fence assembly. I also recommend adding screws for extra strength. Make sure the screw heads are flush with the surface so they don’t interfere with the workpiece or fence movement.
TIP: Check the fence with a square before the glue dries. It is much easier to correct alignment now than after everything is fixed in place.
NOTE: The straighter and sturdier the fence is, the better and safer the router table will be in use.


Step 5: Build the Router Table Dust Collection Box
To keep the router table cleaner during use, add a small dust collection box to the back of the fence. It won’t remove every bit of dust, but it helps collect a lot of the chips and fine debris coming from the router bit.
Start by cutting the small plywood pieces for the dust box. Drill a hole in the center of the back piece for the vacuum hose or dust extractor attachment. Make sure the hole matches the size of your vacuum connection.
Then glue the remaining pieces together to form a small box. Once the glue dries, attach the dust collection box to the back of the router table fence, aligned with the center opening behind the router bit.
TIP: Test the fit of your vacuum hose before gluing everything permanently. It is much easier to adjust the opening before the box is attached to the fence.
NOTE: Dust collection on a small router table will never be perfect, but even a simple dust box makes a big difference in keeping the workspace cleaner and improving visibility while cutting.

Below is a picture of the finished benchtop router table. A router table will unlock new work possibilities and make it easier for you to work on your projects. I have used it on multiple occasions and it is for sure one of the most practical and useful builds for a router.

How to Set Up and Use a Benchtop Router Table
Before setting up or adjusting the router table, make sure the router is turned off and unplugged. Always use proper safety equipment, especially safety glasses, hearing protection, and push blocks or push pads when working with smaller pieces.
1. Secure the Router Table to the Workbench
Place the router table on a stable work surface and clamp it down securely. This prevents movement during cuts and makes the setup much safer and more accurate.
2. Mount the Router Under the Table
Attach the router underneath the tabletop using the mounting screws. Make sure the router is firmly secured and centered beneath the opening.
3. Install the Router Bit and Set the Height
Insert the router bit and adjust the cutting height using the router’s built-in depth adjustment. Since this build does not use a router lift, all height adjustments are done from underneath the table.
TIP: Start with shallow cuts and raise the bit gradually if needed. This gives cleaner results and puts less strain on the router.
4. Attach the Fence and Dust Collection
Install the adjustable fence using the T-tracks and connect the dust collection hose to the dust box. Position the fence according to the type of cut you want to make.
5. Make the Cut
Turn on the router and slowly guide the workpiece along the fence and across the router bit. Keep steady pressure against the fence and let the router bit do the work.
NOTE: Avoid forcing the cut. Moving too quickly can cause rough edges, burning, or loss of control — especially with larger router bits or hardwoods.


Tabletop Router Table - Potential Upgrades
You can use this benchtop router table as it is, but the nice thing about this design is that it’s easy to improve and expand later. The T-tracks make it simple to add accessories, jigs, and better support depending on the project.
Here are a few upgrades worth considering:
- Add a router plate – A router plate makes mounting and removing the router easier and gives you a cleaner, more professional tabletop setup.
- Improve the fence – You can add replaceable fence faces, a chamfer at the bottom for dust relief, or even a T-track to mount stops and featherboards.
- Add a router lift – This makes bit-height adjustments much easier, especially if you use the router table often.
- Add featherboards – Featherboards help keep the workpiece pressed against the table and fence, improving both safety and cut consistency.
- Build a stand or cabinet – If you use the table regularly, you can mount it on a dedicated stand or cabinet with storage for bits, accessories, and jigs.
- Add router table jigs – This table can also be used with additional jigs like a box joint jig, spline jig, or tenoning jig. These can be mounted on the table and removed when not needed, which keeps the setup compact but still very versatile.
TIP: Start simple and upgrade only what you actually need. A compact router table like this can grow with your workshop over time.
Wrap-Up: Why a DIY Router Table Is Worth Building
A router table is one of those workshop tools that completely changes how you work with a router. Once you start using one, it quickly becomes part of your regular workflow — especially for joinery, edge profiling, grooves, dados, and smaller detailed cuts.
What I really like about this benchtop version is that it gives you many of the advantages of a full-size router table while staying compact, portable, and affordable. It doesn’t take much space in the workshop, can be clamped onto almost any workbench, and still offers a lot of flexibility thanks to the adjustable fence and T-tracks.
I also like that this setup can grow over time. You can keep it simple or expand it with additional jigs and accessories like a box joint jig, spline jig, featherboards, stops, or a tenoning jig depending on the type of projects you build.
I use this router table regularly when working on cutting boards — especially for routing edge profiles, and making handles. It’s one of the most practical router builds I have in the workshop.
👉 If you’re building cutting boards or workshop jigs, check out my Best Jigs for Making Cutting Boards guide. Many of the jigs there work perfectly together with a router table like this one. And if you want the more complete version of the builds, you can also browse my woodworking plans page.
Frequently Asked Questions
Can I use a trim router for a router table?
Yes. A trim router works very well for a compact benchtop router table like this one. It is lightweight, easy to mount, and powerful enough for most edge profiling, dados, rabbets, and smaller joinery tasks.
What plywood is best for a DIY router table?
Baltic birch plywood is a great choice because it is strong, flat, and durable. It also holds screws well and creates a stable surface for the router table.
Do I need metal T-tracks?
No. You can use homemade T-tracks like the MDF/HDF version used in this build. They work well, are affordable, and can be made directly in the tabletop.
Is a benchtop router table stable enough?
Yes, as long as it is clamped securely to a workbench. A compact router table like this can handle many common woodworking tasks while staying portable and easy to store.
Can I add more jigs to this router table?
Yes. The T-track layout allows you to mount additional jigs and accessories such as a box joint jig, spline jig, featherboards, stops, or a tenoning jig.
Is a router table useful for cutting boards?
Absolutely. A router table is very useful for routing edge profiles, grooves, slots, and other details commonly used when making cutting boards.
Jigs Used for This Project
These are the jigs I used while building this DIY router table. Not all of them are required, but they make the build easier, cleaner, and more accurate.
- Ruler Marking Gauge
- Circular Saw Straight Edge Guide
- Router Jig for Dados and Grooves
- Adjustable Router Dado Jig
- Mini Table Saw Featherboard
- Drill Stand for Hand Drill
- Drill Press Vise
You don’t need every jig on this list to build the router table, but this is exactly why I like making workshop jigs — they keep stacking up and make future projects easier.
