
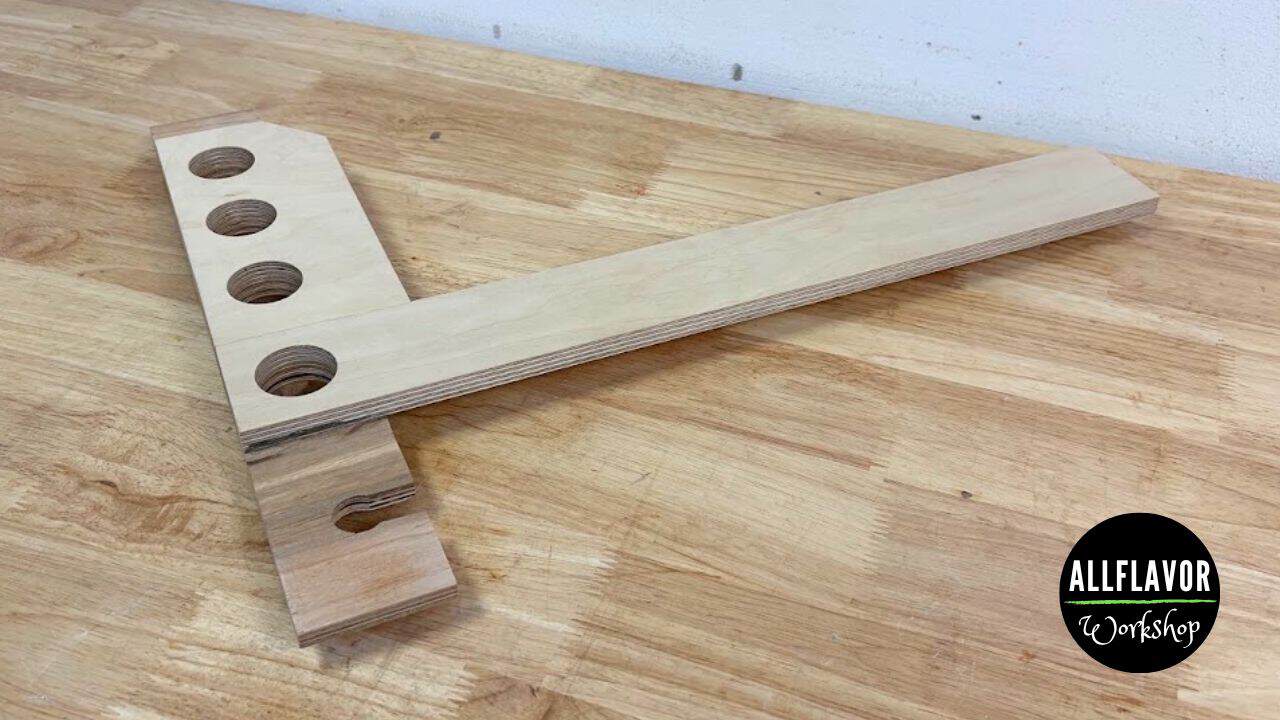
There are several ways to cut a rabbet with a router, but I wanted something quick to set up, easy to align, and flexible enough to use on both small and larger workpieces. That is why I built this router rabbet jig.
A rabbet — also called a rebate in British English — is a recess cut along the edge of a workpiece. Rabbets are useful for boxes, drawers, cabinet backs, shelves, and many other woodworking projects.
The idea behind this jig is very simple. I draw the beginning of the rabbet on the workpiece, place the jig on top, align the router opening with the cut line, clamp everything down, and make the cut.
There is no complicated measuring each time.
The built-in crosspiece also gives me a 90° reference, so once the workpiece is sitting correctly against it, I know the router cut will be perpendicular to the edge.
That is probably the biggest reason I like this jig. It is fast.
For a square or rectangular panel, I can cut one rabbet, rotate the workpiece, reposition the jig, and continue with the next side. Cutting all four edges only takes a few minutes once everything is set up.
The jig measures roughly 500 × 400 mm (19-11/16 × 15-3/4 in), which makes it useful for much more than small box parts. I can comfortably cut rabbets around 400 mm (15-3/4 in) long while keeping good support, and in practice I can stretch that to around 450 mm (17-3/4 in) when the setup is properly supported.
That makes it useful for:
- boxes
- drawers
- cabinet parts
- shelves
- larger plywood panels
- general straight router cuts
I also designed it so I can use a normal straight router bit rather than relying on a dedicated rabbeting bit. For this build, I use a 15 mm (about 5/8 in) straight bit.
And because the jig itself defines the cutting position, the width of the rabbet is not limited to the width of that bit. I can make a narrow rabbet in one pass or reposition the jig and make several passes for a wider one.
If you already use router jigs in your workshop, also have a look at my Best Router Jigs for Your Workshop and Router Jigs for Cabinet Making.
Table of Contents
- What Is a Router Rabbet Jig?
- Downloadable Router Rabbet Jig Plans
- Materials and Tools
- Why I Built This Jig
- Router Rabbet Jig Size and Capacity
- How the Router Rabbet Jig Works
- Let’s Start Building!
- Step 1: Cut the Three Main Jig Pieces
- Step 2: Glue the Guide and 90° Crosspiece
- Step 3: Add the Overlapping Clamping Section
- Step 4: Drill the Clamping Holes
- Step 5: Reinforce the Jig From Below
- Step 6: Create the Router Opening and Cutting Path
- How to Use the Router Rabbet Jig
- How to Set Rabbet Width and Depth
- What Else Can You Use the Jig For?
- Wrap-Up
- Frequently Asked Questions
*Safety is your responsibility. Make sure you know what you’re doing and take all necessary safety precautions while working with power tools. Safety comes first!
What Is a Router Rabbet Jig?
A router rabbet jig is a guide that helps position a handheld router accurately along the edge of a workpiece. My version consists of three plywood parts:
- a long upper router guide
- a shorter upper clamping section
- a lower crosspiece that registers against the workpiece
The long guide controls the router. The crosspiece creates the 90° reference. And the overlapping upper section gives me several places to clamp the jig, workpiece, and workbench together.
The result is a jig that is very quick to position. Instead of measuring the router-base offset every time, I align the actual router cutting opening with the line on my workpiece.
Downloadable Router Rabbet Jig Plans
I am currently preparing PDF plans for this jig. The plans will include:
- exact jig dimensions
- metric and imperial measurements
- complete cut list
- plywood thicknesses
- clamping-hole locations
- router-opening dimensions
- part placement
- build layout
- step-by-step assembly details
Until then, you can see all my available downloads on the Woodworking Plans page.
Materials and Tools
Wood
- 12 mm (about 1/2 in) Baltic birch plywood
- 9 mm (about 3/8 in) Baltic birch plywood
- sacrificial board
Hardware and Consumables
- wood glue
- wood screws
- sandpaper
As an Amazon Associate, I may earn from qualifying purchases at no extra cost to you.
📌 Save THIS PIN to your Board on Pinterest!
Why I Built This Jig
I already have several router jigs, including my Router Dado Jig and Adjustable Router Dado Jig. Both are useful, but I wanted something even quicker for rabbets.
The main thing I wanted was ease of use. With this jig I can:
- mark the rabbet
- position the jig
- align the router opening
- clamp it
- make the cut
The built-in 90° stop also makes positioning much faster than using a loose straightedge. Another reason is flexibility. A bearing-guided rabbeting bit is convenient, but the rabbet width is closely tied to the bit and bearing setup.
With this jig and a normal straight bit, I can make:
- narrow rabbets
- wider rabbets
- several-pass rabbets
- different rabbet depths
without changing the basic jig. That is probably the feature I use the most.
Router Rabbet Jig Size and Capacity
My jig is approximately: 500 × 400 mm (19-11/16 × 15-3/4 in) The upper parts are made from 12 mm Baltic birch plywood (about 1/2 in). The lower crosspiece is 9 mm plywood (about 3/8 in).
I intentionally used the thinner plywood for the lower section. That keeps the workpiece close to the upper guide and also makes the jig convenient when working with common 12 mm / about 1/2 in plywood.
The larger overall size is intentional. A tiny jig would work fine for a small box, but I also wanted to use this one for:
- drawer sides
- cabinet panels
- longer shelves
- larger plywood pieces
I can cut approximately 400 mm (15-3/4 in) of rabbet comfortably while keeping good jig support. With additional support and careful clamping, around 450 mm (17-3/4 in) is realistic as well.
NOTE: Bigger is not automatically better. The size works well for my projects, but if you only build small boxes, you could make the same design more compact.
How the Router Rabbet Jig Works
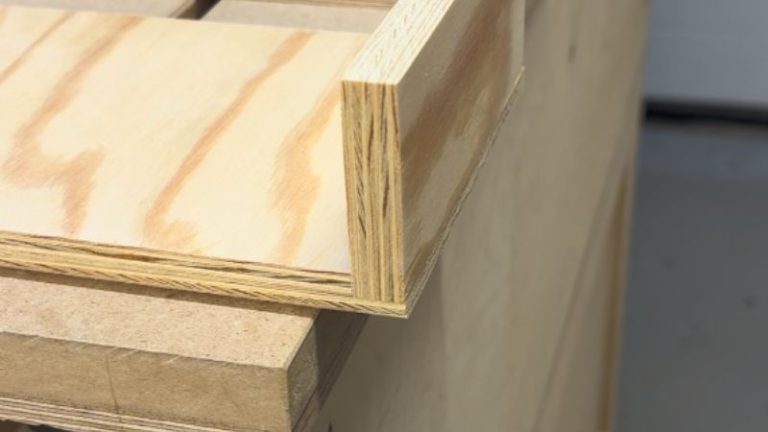
The important part of this jig is the relationship between the long guide and the lower crosspiece. They must be exactly 90° to each other.
The workpiece sits underneath the jig and against the crosspiece. Once it is registered there, the long guide automatically runs perpendicular to the edge. I then align the cutting opening with the rabbet line I marked on the workpiece.
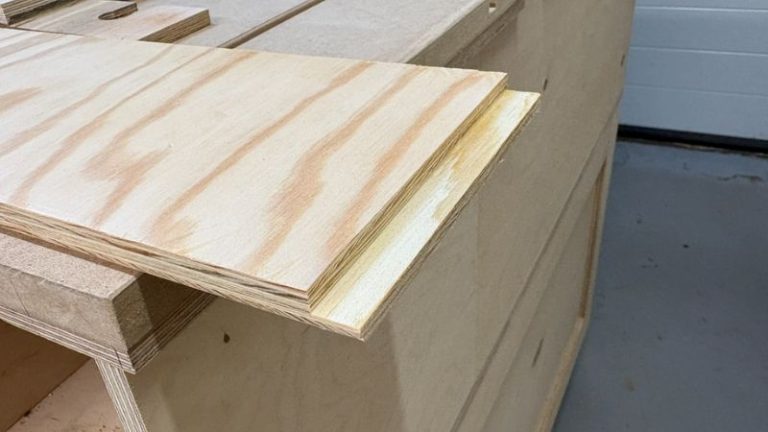
The clamping holes let me clamp everything together. The upper clamping section extends slightly over the lower crosspiece. That overlap is intentional.
It gives the clamp something solid to grab and helps sandwich the entire assembly tightly together. For smaller pieces, the four clamping holes are generally enough. For longer workpieces, I clamp through the jig and also secure the far end directly to the workbench.
💡TIP: Never rely on only one clamp with a router jig like this. The workpiece and jig should feel like one solid assembly before the router starts.
Let’s Start Building!
The jig is relatively simple. There are only three main plywood parts.
But the accuracy of the final jig depends heavily on one thing: the 90° relationship between the long router guide and the lower crosspiece. Take your time to make it right.
How to Make a Simple Router Rabbet Jig
Step 1: Cut the Three Main Jig Pieces
I start by cutting the three plywood components.
- two upper pieces from 12 mm (about 1/2 in) Baltic birch plywood
- one lower crosspiece from 9 mm (about 3/8 in) plywood
The upper pieces consist of the long router guide and the shorter overlapping clamping section. The lower piece runs across the jig and registers against the edge of the workpiece.
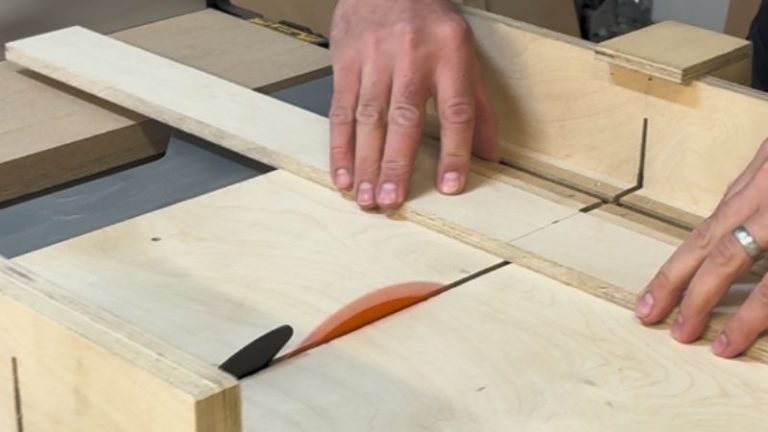
I cut the strips on the table saw. For narrow rip cuts, I use a push block. For crosscuts, I use my Table Saw Sled. Make sure the edges are clean and straight. A crooked guide edge will transfer directly into the router cut.
NOTE: The exact part dimensions and offsets are included in the downloadable plans.
Step 2: Glue the Guide and 90° Crosspiece
This is probably the most important build step.
I glue the long upper guide to the lower crosspiece. I leave some space on the router side so there is room for the router bit and cutting path later.
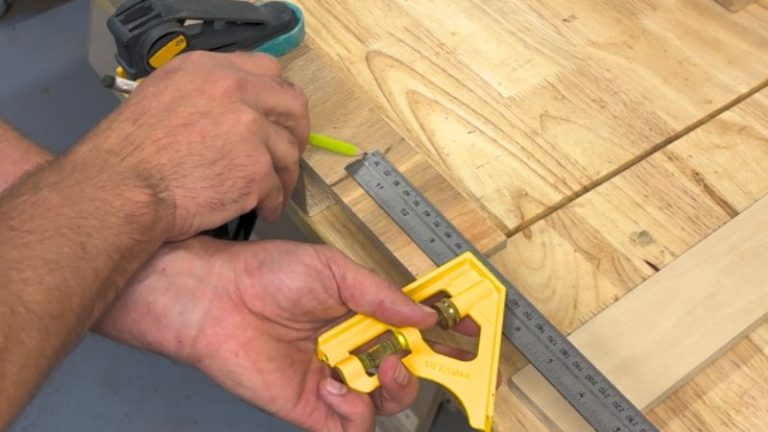
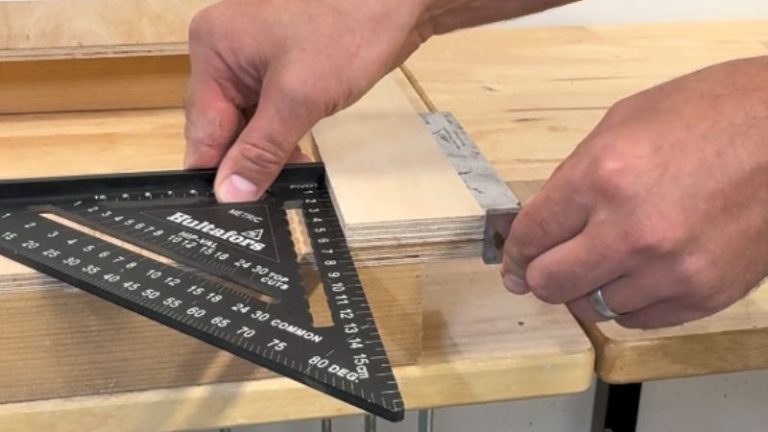
Before clamping the pieces, I use two squares to check the alignment. The long guide and crosspiece need to be as close to a true 90° angle as possible.
On a short box part, a tiny error may barely be visible. But on a longer cabinet or drawer component, that same error gets amplified over the length of the cut.
Once everything is square, I clamp the pieces lightly and let the glue dry. Do not use excessive pressure. You want enough pressure to close the joint without shifting the alignment.
💡TIP: Check the angle again after the clamps are tightened. Pieces can move slightly while the clamps are being positioned.
Step 3: Add the Overlapping Clamping Section
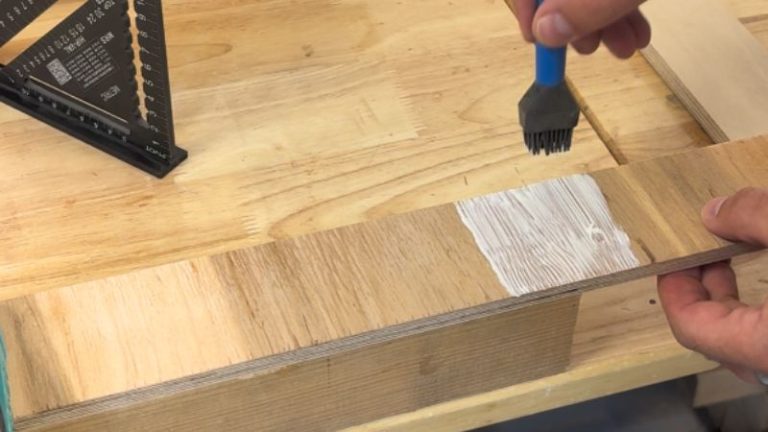
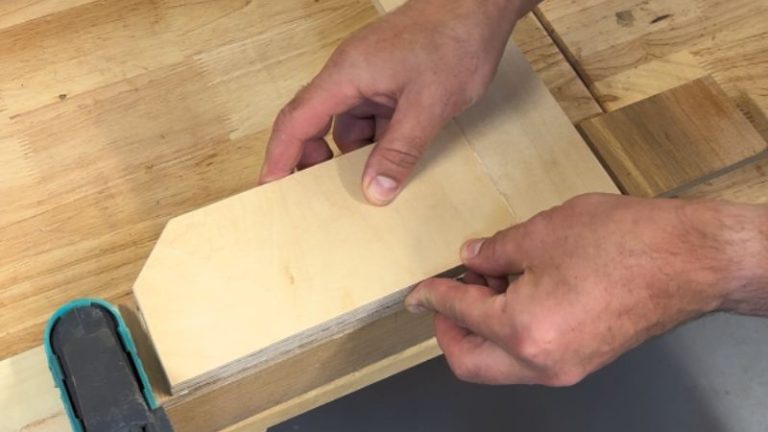
Once the first glue-up is dry, I clean away the excess glue. Then I add the second upper plywood piece. This shorter section sits next to the long guide and overlaps the crosspiece and workpiece area.
That overlap is important because it creates a strong clamping zone. I align it with the existing upper guide and crosspiece, apply glue, and clamp it in place.
After the glue dries, I clean everything again. Pay particular attention to the inside intersection near the crosspiece. Any dried glue bump here can prevent the workpiece from sitting tightly against the stop. I scrape away the excess, sand the surfaces, and remove any splinters. The workpiece should sit flat and snug against the crosspiece.
Step 4: Drill the Clamping Holes
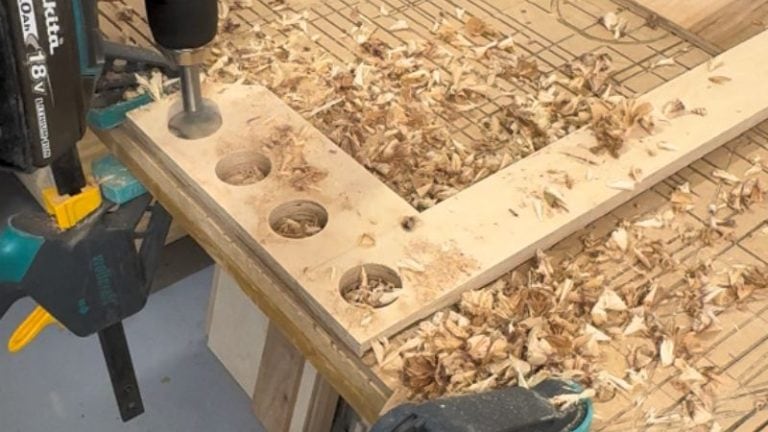
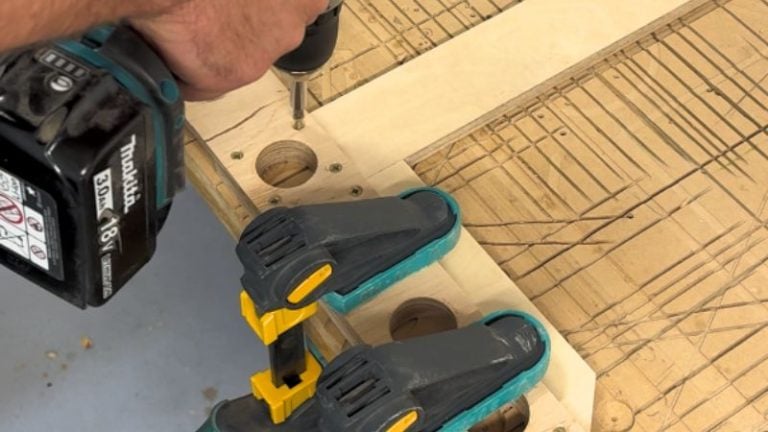
Next I add the clamping holes. My jig has four. One sits around the intersection of the long guide and crosspiece. The remaining holes are positioned in the overlapping clamping section.
I drill them with a 35 mm (about 1-3/8 in) Forstner bit. Place a sacrificial board underneath before drilling. That protects the workbench and also supports the underside of the plywood for a cleaner exit cut.
Once the holes are drilled, I lightly sand the edges. I also cut one corner of the overlapping piece at an angle. That part is mainly cosmetic, but it gives the jig a slightly cleaner shape.
💡TIP: Make the clamping holes large enough that your normal workshop clamps fit comfortably through them. A clamping hole is not useful if your clamp cannot enter at a practical angle.
Step 5: Reinforce the Jig From Below
Once the glued assembly is complete, I add several screws from the bottom to reinforce the glued joints. I predrill first. Then I drive the screws in and make sure every screw head finishes flush or slightly below the plywood surface.
Glue does most of the positioning work. The screws simply add extra mechanical reinforcement.
Step 6: Create the Router Opening and Cutting Path
The last major step is creating the router opening. This opening becomes the reference I use later when aligning the jig with a marked rabbet line.
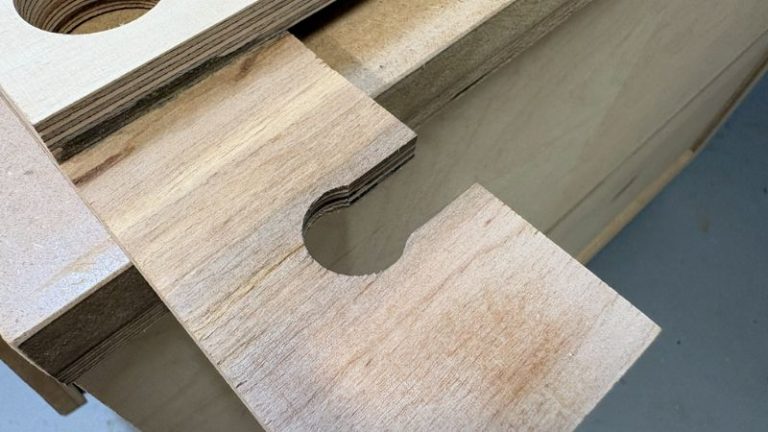
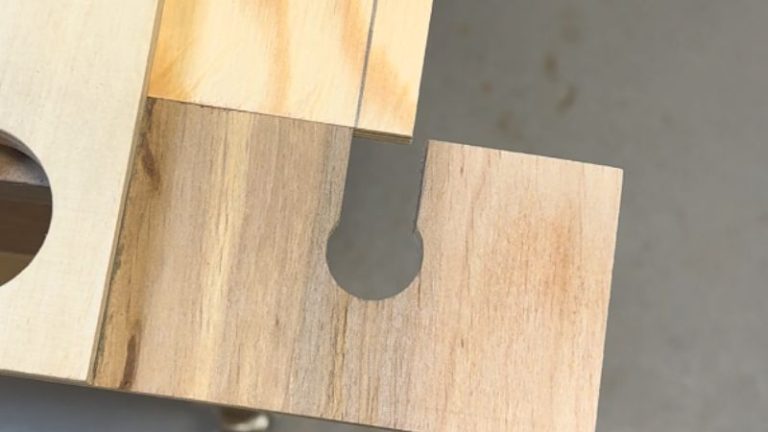
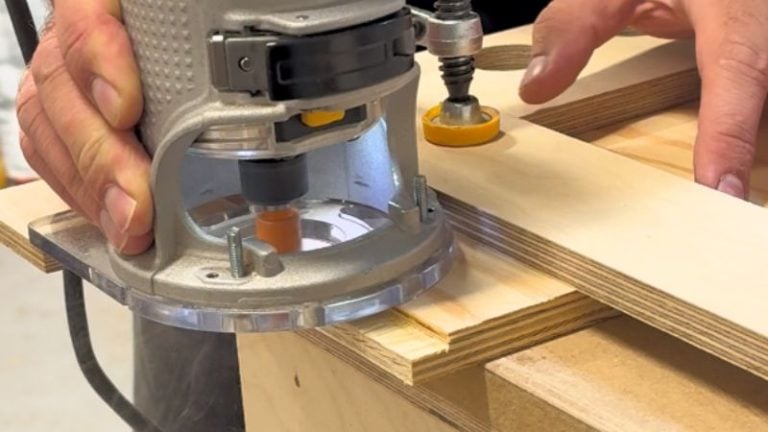
I first drill a 20 mm (about 13/16 in) starter hole near the center of the guide. Then I place the jig over a sacrificial board. Using my handheld router and 15 mm (about 5/8 in) straight bit, I gradually cut the router path from the hole to the edge of the guide.
I make several shallow passes rather than trying to cut through everything at once. This is especially useful with plywood. The sacrificial board underneath supports the bottom veneer and helps prevent splintering.
Take your time. The edge of this router opening becomes the reference for future rabbet cuts, so the path needs to stay straight. Once the opening is finished, clean up the edges and give the jig a final sanding.
Now, the jig is ready.
💡TIP: Do not create the full router opening in one deep pass. Several shallow cuts are easier on the router and normally leave a cleaner plywood edge.
How to Use the Router Rabbet Jig
Using the jig is probably easier than building it.
- First, mark the rabbet on the workpiece. You do not necessarily need to draw the entire rabbet. For many cuts, marking the beginning or edge position is enough.
- Place the workpiece underneath the jig and push it firmly against the lower crosspiece.
- Then align the edge of the router opening with the line you marked.
- Clamp the jig and workpiece to the workbench.For smaller pieces, the built-in clamping holes work very well. For longer parts, I also clamp the far end of the workpiece directly to the bench.
Before routing, check that:
- the jig cannot move
- the workpiece cannot move
- the workpiece is sitting tightly against the crosspiece
- the router has stable support throughout the cut
- the bit cannot contact any screws or clamps
Then make the cut. I usually make several depth passes rather than removing the entire rabbet at once. This gives a cleaner cut and puts less load on the router.
How to Set Rabbet Width and Depth
This is one of the things I like most about the jig. The rabbet width and depth are controlled separately
Rabbet Width
The width is controlled by the jig position. Mark where you want the rabbet to end and align the router-opening edge with that line.
- For a narrow rabbet, one router pass may be enough.
- For a wider rabbet, reposition the jig and make additional cuts.
That means I am not limited to the exact width of my 15 mm router bit.
Rabbet Depth
The depth is controlled by the router. Set the plunge or bit depth to the required rabbet depth.
For deeper rabbets, make several passes. That is normally cleaner and easier on both the bit and router. This separation of width by jig position and depth by router setting gives the jig a lot of flexibility.
Cutting Multiple Rabbets on One Workpiece
For something like a box panel, the workflow is very quick.
- Cut the first rabbet.
- Release the clamps.
- Rotate the workpiece.
- Register the next edge against the crosspiece.
- Align the line.
- Clamp again. Cut. Repeat.
Because the crosspiece is fixed at 90°, I do not need to re-create the angle each time.
This is where the jig becomes much faster than setting up a separate straightedge repeatedly.
What Else Can You Use the Jig For?
Although I built it primarily for rabbets, it is more versatile than that.
Straight Router Cuts
The long guide can be used on its own as a straight router reference. You do not always need to register the workpiece against the crosspiece. That makes the jig useful for general straight routing.
Dados
You can also use the jig to cut dados. This works especially naturally when the dado width matches the router bit used to create the cutting path.
For more flexible dado widths, though, I would still normally use my dedicated Router Dado Jig or Adjustable Router Dado Jig.
That is exactly why I keep different router jigs in the workshop. They overlap slightly, but each one is quicker for a particular job.
Router Rabbet Jig vs Router Dado Jig
The two jigs are related, but I use them differently.
| Cut | Jig I Prefer | Why |
|---|---|---|
| Rabbet along an edge | Router Rabbet Jig | Quick edge registration and built-in 90° reference |
| Internal dado | Router Dado Jig | Designed specifically for internal channels |
| Different dado widths | Adjustable Router Dado Jig | Easy width adjustment around the workpiece |
| Straight router cut | Either | Both can provide a straight router reference |
Where I Would Use This Jig
Rabbets show up in many woodworking projects. Some common examples include: wooden boxes, drawers, cabinet backs, shelves, plywood casework, recessed panels, bottoms and backs, simple frame construction.
- A good example is my How to Make a Wooden Box project, which uses rabbet joints.
- For cabinet work, the jig also fits naturally with the router setups I cover in Router Jigs for Cabinet Making.
Wrap-Up
This is one of those jigs that looks very simple, but once I started using it, I quickly realized how much time it can save. There are plenty of ways to cut rabbets — with a router table, rabbeting bit, straightedge, table saw, or another router guide — but what I like about this jig is how quickly I can set it up, clamp the workpiece, and make a clean, repeatable cut.
For me, that mix of speed, accuracy, stability, and flexibility is what makes it worth having in the workshop, especially when I need to cut several rabbets in a row. If you want to build the same jig, you can download the plans with the full dimensions, layout, and both metric and imperial measurements.
Frequently Asked Questions
What is a router rabbet jig?
A router rabbet jig is a guide that helps a handheld router cut an accurate recess along the edge of a workpiece. My version includes a long router guide, a 90° crosspiece for positioning the workpiece, and clamping holes to secure the setup.
Is a rabbet the same as a rebate?
Yes. In woodworking, rabbet is the term commonly used in the United States, while rebate is commonly used in British English. They describe the same type of edge recess.
Can I cut rabbets with a straight router bit?
Yes. That is how I use this jig. I use a standard 15 mm (about 5/8 in) straight bit, and I control the rabbet width by positioning the jig rather than relying on the router bit alone.
How do you make a wider rabbet than the router bit?
Make the first cut, reposition the jig, and make another pass beside it. The jig position controls the final width, so you can create rabbets wider than the router bit.
How deep should I cut a rabbet in one pass?
That depends on the wood, router, bit, and required depth. For deeper rabbets, I prefer several shallow passes rather than removing all the material at once.
