

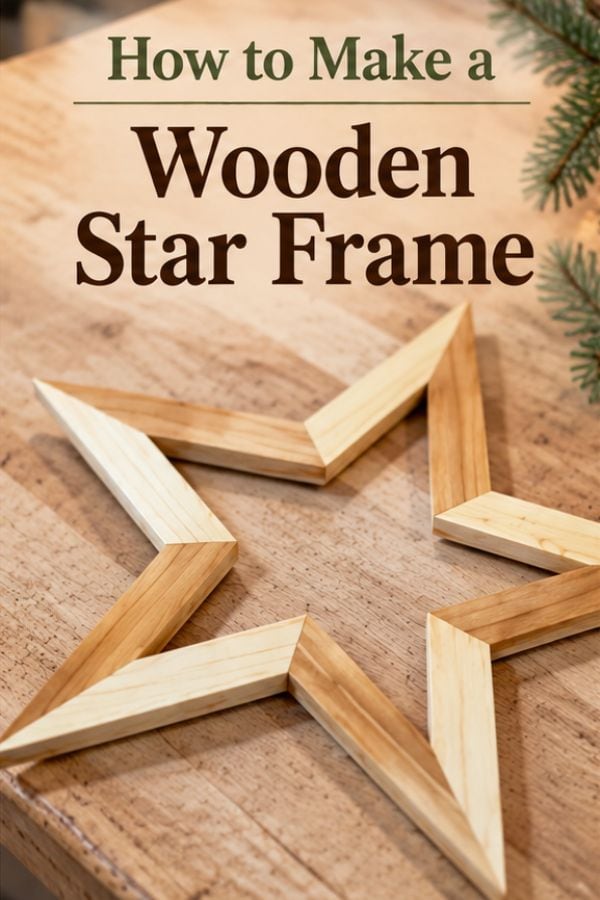
A few weeks ago, I made several solid wooden stars — 4-point, 5-point, and 6-point versions — and shared both the build process and the angles behind them.
This project looks similar at first, but a wooden star frame is actually a different build.
Instead of solid pieces meeting in the middle, the star is made from narrow wooden strips that create an open outline. That means there is no center point to work from, and the angles need to be calculated from the outer star points and the inner corners instead.
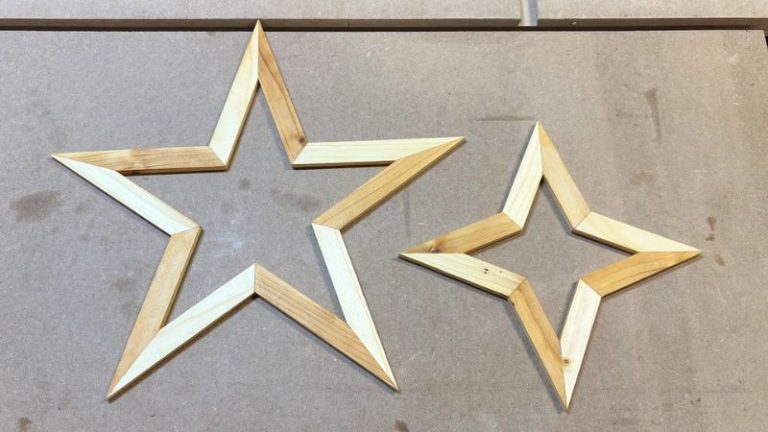
For this project, I made several versions:
5-point wooden star frames
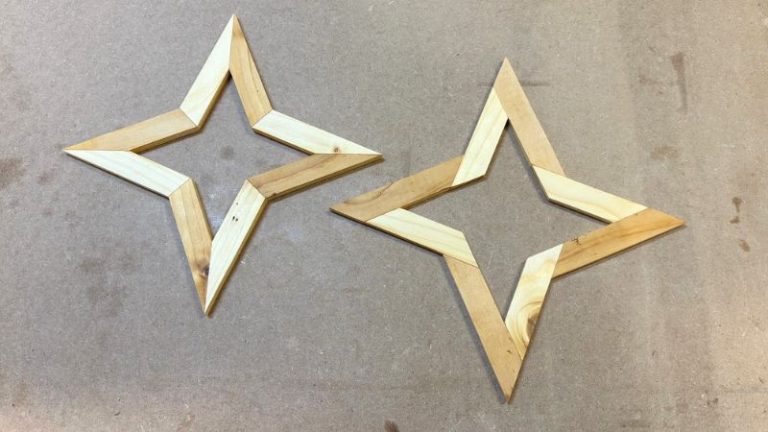
4-point wooden star frames
frames with centered miter joints
frames with offset joints
The basic method is the same once you understand how the angles work.
I made the stars from spruce and cut everything using my Table Saw Sled together with the Table Saw Angle Jig.
If you are looking for the solid version instead, see my How to Make a Wooden Star tutorial.
Table of Contents
- What Is a Wooden Star Frame?
- Two Ways to Join a Wooden Star Frame
- Wooden Star Frame Angles
- Materials and Tools
- Why Grain Direction Matters
- Let’s Start Building!
- Step 1: Prepare Ten Identical Wooden Strips
- Step 2: Cut the Outer Star Points
- Step 3: Cut the Inner Corners
- Step 4: Dry Fit the Star
- Step 5: Glue the Star Frame
- Step 6: Sand and Finish
- How to Make the Offset Joint Version
- Making a 4-Point Wooden Star Frame
- Why I Prefer the Table Saw for Star Frames
- Centered Miter vs Offset Joints
- Wooden Star Frame Plans
- Wrap-Up
- Frequently Asked Questions
*Safety is your responsibility. Make sure you know what you’re doing and take all necessary safety precautions while working with power tools. Safety comes first!
📌 Save THIS PIN to your Board on Pinterest!
What Is a Wooden Star Frame?
A wooden star frame is basically an open wooden star outline made from narrow strips instead of solid segments. That makes it visually lighter and also gives you many options for how to use it.
Depending on the size, these can work as:
wall decorations
door decorations
Christmas decorations
window decorations
fireplace or mantel decor
tabletop decorations
Christmas tree ornaments
small decorative pieces or even coasters
You can also build them in different orientations.
The wider face of the strip can point forward, which creates a flatter star, or you can rotate the strips so the narrow edge faces forward, which creates a deeper, more frame-like look.
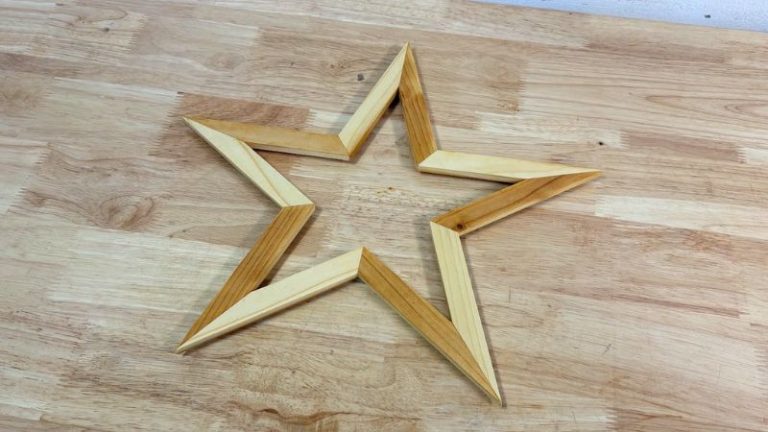
I made mine with the wider face forward.
Two Ways to Join a Wooden Star Frame
There are two useful ways to make these frames.
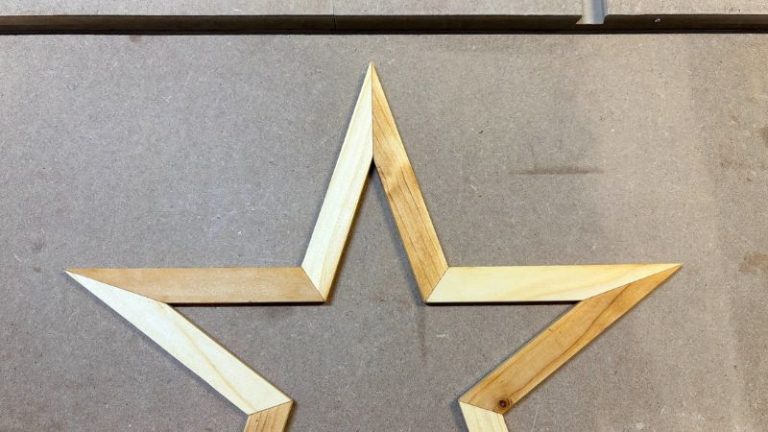
1. Centered Miter Joints
This is the cleaner and more symmetrical version.
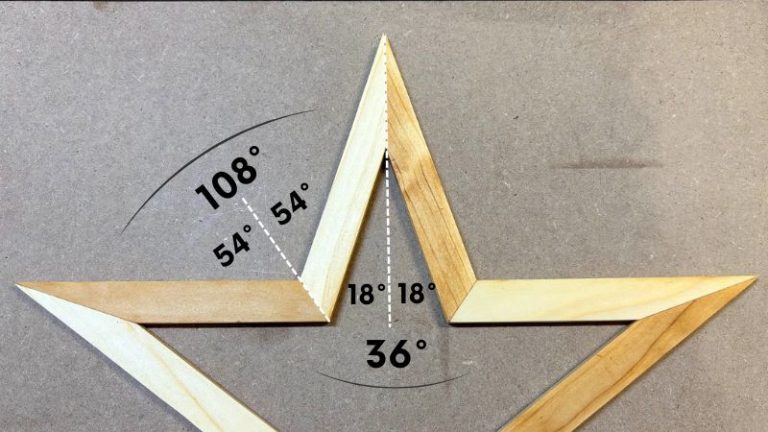
Each joint line runs through the center of the star point or inner corner, so the full angle is divided equally between the two connecting pieces. That creates a mirror-like joint.
For example, on a 5-point star:
- outer point = 36°
- each strip gets half → 18° cut
- inner corner = 108°
- each strip gets half → 54° cut
This is the version I prefer when I want a more balanced and decorative look.
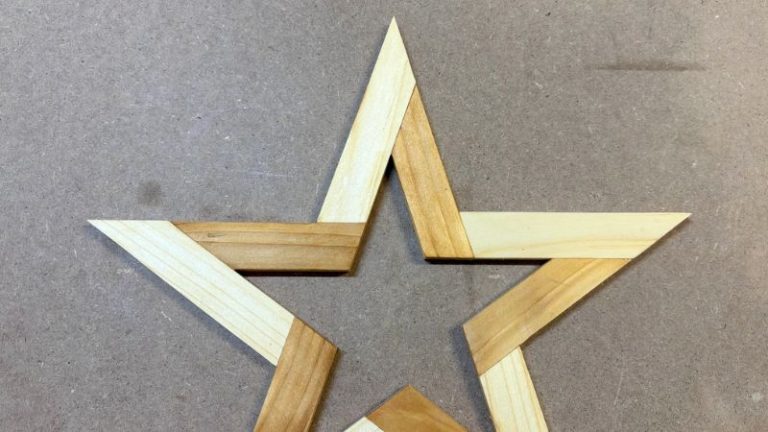
2. Offset Joints
The second version is different.
The pieces do not meet equally in the center of the angle. Instead, one strip runs farther and the next strip joins against it. Because of that, the full angle is used instead of splitting it in half.
For a 5-point star:
- outer cut = 36°
- inner cut = 108°
You still start with identical strips, but after cutting you end up with five longer pieces and five shorter pieces because every second strip needs to be shortened by approximately the width of the strip.
Both methods work. The centered miter version looks more refined, while the offset version creates a more segmented and slightly more rustic look.
Wooden Star Frame Angles
The angle calculation is one of the biggest differences between these open star frames and the solid stars I made before.
For a solid star, the geometry starts at the center.
For a star frame, we need to look at:
the outer point
the inner corner
For a deeper explanation of solid-star geometry, see my Wooden Star Angles guide.
5-Point Star Frame
For a 5-point star:
- outer point = 36°
- inner corner = 108°
For centered miter joints:
- outer cut = 18°
- inner cut = 54°
For offset joints:
- outer cut = 36°
- inner cut = 108°
4-Point Star Frame
For a 4-point star:
- outer point = 45°
- inner corner = 135°
For centered miter joints:
- outer cut = 22.5°
- inner cut = 67.5°
For offset joints:
- outer cut = 45°
- inner cut = 135°
The same logic can then be applied to other multi-point star frames.
| Star | Joint Style | Outer Cut | Inner Cut |
|---|---|---|---|
| 5-point | Centered miter | 18° | 54° |
| 5-point | Offset | 36° | 108° |
| 4-point | Centered miter | 22.5° | 67.5° |
| 4-point | Offset | 45° | 135° |
NOTE: I plan to cover the geometry in more detail in a separate Wooden Star Frame Angles article. This guide is mainly about the actual build.
Materials and Tools
Wood
I used spruce strips for all the star frames.
For the larger 5-point centered-miter version I started with:
10 identical strips
150 × 20 × 8 mm
approximately 5-7/8 × 3/4 × 5/16 in
The finished star was around:
350 × 350 mm
about 13-3/4 × 13-3/4 in
For the smaller offset version I used:
10 identical strips
100 × 20 × 8 mm
approximately 3-15/16 × 3/4 × 5/16 in
The finished star measured around:
250 × 250 mm
about 9-7/8 × 9-7/8 in
You can scale the design up or down simply by changing the strip length.
As an Amazon Associate, I may earn from qualifying purchases at no extra cost to you.
Why Grain Direction Matters
Even on narrow strips, grain direction matters. I like to keep the grain running along the length of each strip. That makes the final star look cleaner, especially with centered miter joints where the meeting pieces create a mirrored effect around the joint.
The spruce I used also had a slightly different look on each side. One face was cleaner and lighter, while the other was slightly darker and more natural.
Once the star was assembled, that variation created a nice contrast between the individual pieces. After oiling, the difference became even more visible.
💡TIP: Lay out all the strips before cutting and decide which side you want facing forward. Mark the orientation lightly with a pencil.
Let’s Start Building!
I will show the main process on the 5-point centered-miter star, because that is probably the most recognizable version.
Once you understand this one, the 4-point star and offset-joint version follow the same basic logic.
How to Make a Wooden Star Frame
Step 1: Prepare Ten Identical Wooden Strips
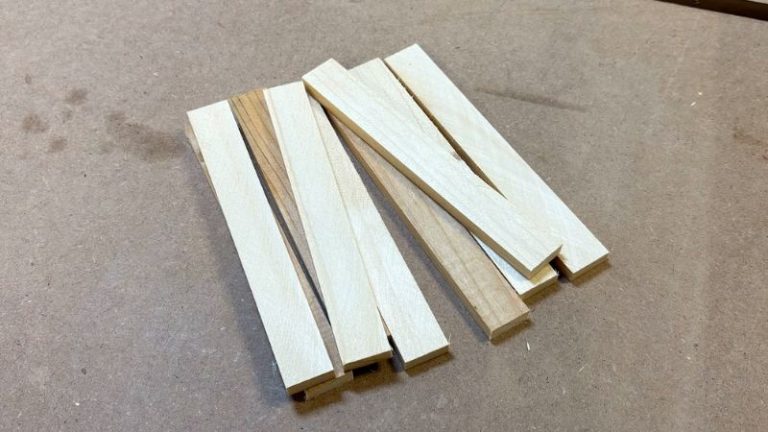
Start by cutting ten strips to exactly the same dimensions. For my larger star I used: 150 × 20 × 8 mm (about 5-7/8 × 3/4 × 5/16 in)
This part matters more than it may seem. If the strips vary in length, width, or thickness, those differences start adding up around the star, and the final joint will not close properly.
💡TIP: Batch-cut all ten strips using the same stop-block setup. It is much easier to keep everything consistent that way.
Step 2: Cut the Outer Star Points
For a 5-point star, the full outer point is 36°. Because this version uses centered miter joints, that angle is split evenly between the two pieces. That means each strip needs an 18° cut.
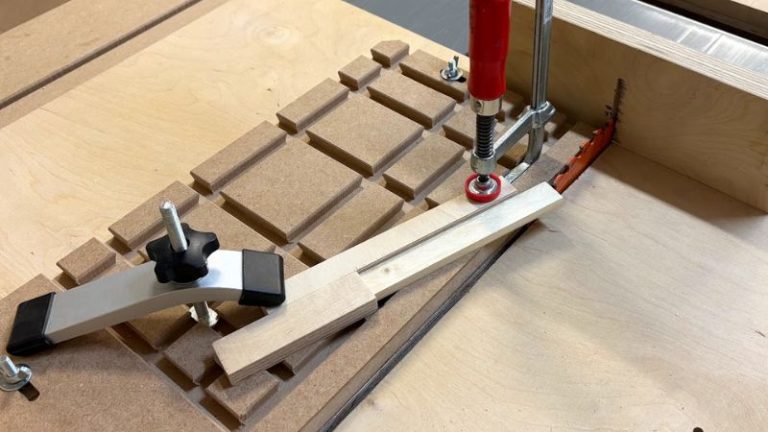
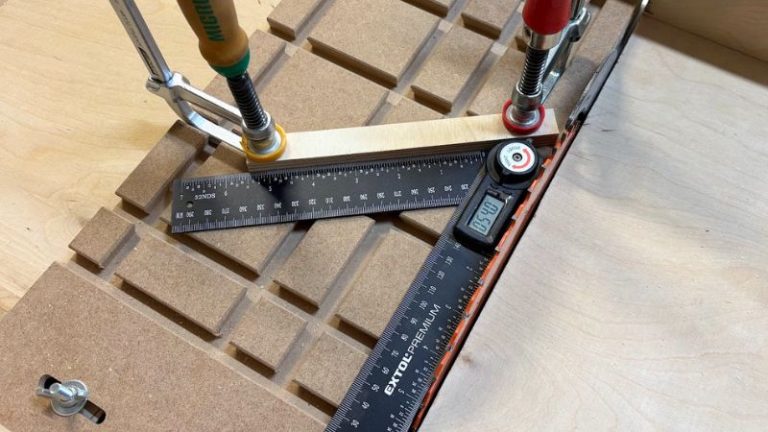
I set the Table Saw Angle Jig so the angle between the workpiece and the blade was 18°.
Then I:
- secured the guide
- added a stop block
- positioned the strip
- clamped it
- made the cut
I repeated the exact same cut on all ten strips. At this stage, I only cut one end of every strip.
NOTE: Keep the setup unchanged until all ten matching cuts are finished.
Step 3: Cut the Inner Corners
Now we need to cut the opposite ends.
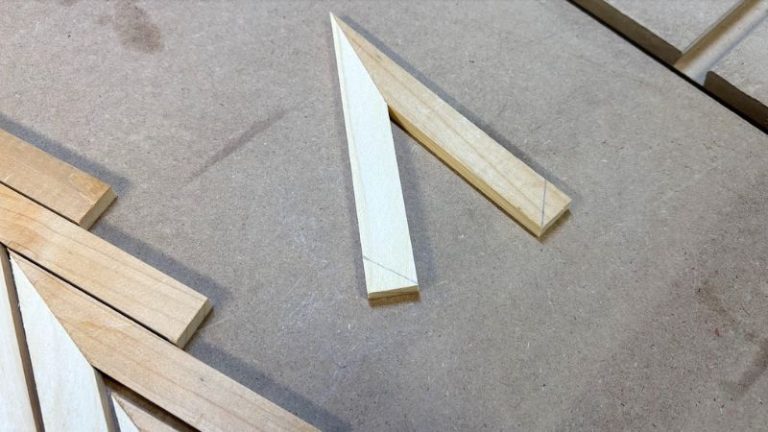
For the centered-miter 5-point star, each strip gets a 54° cut at the inner corner. I reset the angle jig to 54°, repositioned the stop block, and prepared the second cut.
The most important part here is the orientation of the strip. You need to rotate and flip the workpiece correctly so the second angle points in the right direction.
It sounds a little confusing, but the easiest solution is simple:
- loosely arrange a few pieces into the star shape
- look at how the second cut needs to run
- mark the cut with a pencil
- compare it with your saw setup
- make one test cut
Once that first piece is right, repeat the same setup for the rest.
💡TIP: Mark the waste side directly on the strip. It is much easier than trying to remember which way every piece should be flipped.
Step 4: Dry Fit the Star
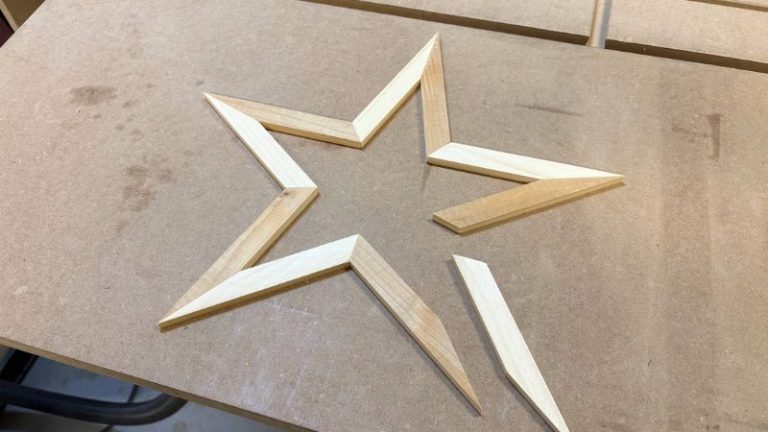
Once all ten strips are cut, arrange the complete star on a flat workbench. Do not glue yet.
Check all the outer points, the inner points, the strip alignment, the overall symmetry, and how the joints close.
This is where small cutting errors become obvious. If there is a tiny gap, lightly sand the mating surface and test again. Usually only a few passes are needed.
For very small imperfections, fine sawdust mixed with wood glue can also help during final assembly.
Step 5: Glue the Star Frame
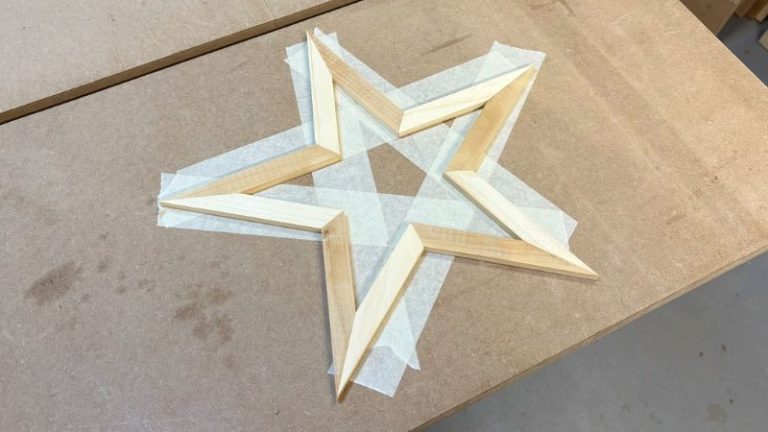
Once I am happy with the dry fit, I glue the whole frame.
I prefer assembling the entire star in one go. That gives me a little time to move the pieces and balance all five points before the glue starts setting.
Apply a small amount of glue to each mating surface and assemble the star on a flat bench. Then leave everything until the glue is fully cured. Clean excess glue while it is still soft.
Step 6: Sand and Finish
Once the glue has dried, lightly sand the entire frame. Clean the joints, remove any dried glue, and smooth the edges.
Finally, apply wood oil. This is where the grain and the subtle differences between the strips really start to stand out. Even a simple spruce star looks much more finished after oiling.
How to Make the Offset Joint Version
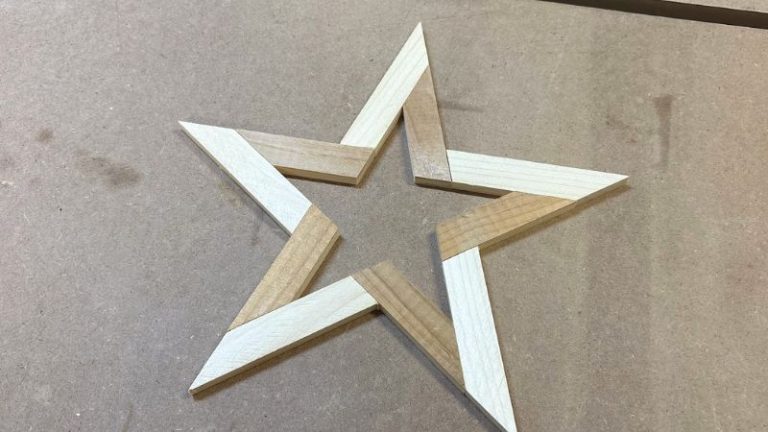
The second star uses the same overall process, but the joint geometry changes. Instead of dividing the angle between two strips, one piece effectively carries the full joint.
- For my smaller 5-point version, I started with ten strips: 100 × 20 × 8 mm (about 3-15/16 × 3/4 × 5/16 in)
- The finished star measured approximately: 250 × 250 mm (about 9-7/8 × 9-7/8 in)
Outer Point Cuts
For the outer point, I use the full 36° instead of 18°. Again, cut the same first end on all ten strips.
Inner Corner Cuts
At tfor the inner corner I use 108°.
I cut five strips directly. For the other five, the length needs to be reduced because the pieces do not meet in the middle of the angle. So although you start with ten identical blanks, you finish with:
- 5 longer pieces
- 5 shorter pieces
The shorter pieces are reduced by approximately the width of the strip. The rest of the build is the same.
-> dry fit, correct small gaps, glue, sand, and oil
Making a 4-Point Wooden Star Frame
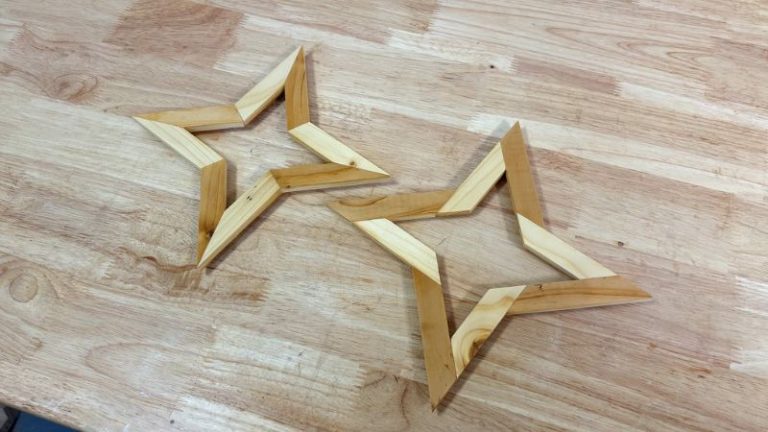
After making the 5-point frames, I used the same process to build 4-point versions. This was mainly to verify that the method works with different star geometries. -> And it does.
For a 4-point star, the outer point = 45°, and the inner corner = 135°.
| Joint Style | Outer Cut | Inner Cut |
|---|---|---|
| Centered Miter | 22.5° | 67.5° |
| Offset Joint | 45° | 135° |
The cutting, flipping, dry fitting, and shortening process is otherwise the same. This is why I think of this as a general wooden star frame method, rather than something that only works for a 5-point star.
Why I Prefer the Table Saw for Star Frames
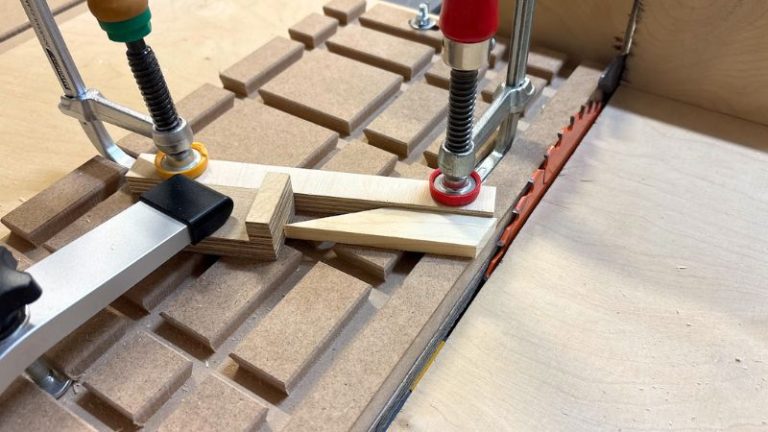
A miter saw can handle many common angled cuts, but these frames quickly move outside the most convenient range.
This project uses angles such as: 18°, 22.5°, 36°, 45°, 54°, 67.5°, 108°, 135°. Using my table saw sled with the adjustable angle jig gives me much more freedom in how I position the workpiece.
It also lets me use:
- stop blocks
- clamps
- repeatable setups
- a large flat support surface
That becomes especially useful when cutting ten identical pieces. For the four test stars I made, the full process — setup, angle checks, cutting, cleaning, fitting, and gluing — took roughly two hours.
Once the setup is dialed in, batching multiple stars becomes much faster because you can keep the same jig position and keep cutting matching pieces before changing to the next angle.
Centered Miter vs Offset Joints
| Feature | Centered Miter | Offset Joint |
|---|---|---|
| Appearance | Symmetrical and refined | More segmented and rustic |
| Angle method | Angle split between both pieces | Full angle on one piece |
| Strip lengths | All equal | Alternating long and short |
| Best for | Clean decorative stars | Rustic decorations |
| My preference | Yes | Useful alternative |
For most decorative stars, I personally prefer the centered miter version. The joints look cleaner, and the mirrored geometry works especially well with the wood grain.
But the offset version is useful to understand because it gives you another way to create the same overall star outline.
Wooden Star Frame Plans
I am also working on detailed woodworking plans for these wooden star frames. The plans would include:
- 4-point star layout
- 5-point star layout
- centered miter version
- offset joint version
- exact angles
- strip dimensions
- metric and imperial measurements
- cutting setup
- assembly sequence
Until then, you can browse my existing Woodworking Plans.
Wrap-Up
This turned out to be a really nice extension of the wooden star projects I have been making. The finished shape is simple, but there is more going on in the geometry than you might expect.
The most important thing to understand is that an open wooden star frame is not calculated the same way as a solid star. Instead of working from a shared center, you work with the outer points and inner corners of the outline.
Once you understand those two angles, the rest becomes quite repetitive. -> Cut identical strips, set the angles, keep the orientation consistent, dry fit everything, and glue the full frame together.
I also like how flexible this project is. You can make:
- small ornaments, tabletop stars, large wall decorations
- 4-point stars, 5-point stars, any other #of points
- centered joints, offset joints
- flat decorative stars, deeper frame-style versions
And if you keep your table saw setup unchanged, it is easy to make several matching stars in one batch.
For solid wooden stars, check out my How to Make a Wooden Star: 4, 5 & 6 Point Designs tutorial. For the geometry behind solid stars, see my Wooden Star Angles guide.
Frequently Asked Questions
What angle do I cut for a 5-point wooden star frame?
For a centered-miter 5-point wooden star frame, use 18° cuts at the outer points and 54° cuts at the inner corners. For an offset-joint version, use 36° and 108°.
How many pieces do I need for a 5-point wooden star frame?
You need 10 wooden strips — two pieces for each of the five star points.
Can I make a wooden star frame from different size strips?
Yes. You can change the strip length to make the star larger or smaller while keeping the same angles.
What wood is good for wooden star frames?
I used spruce because it is inexpensive, easy to work with, and works well for Christmas decorations. Other woods such as pine, oak, walnut, or beech can also work.
What is the difference between a wooden star frame and a solid wooden star?
A solid wooden star is built from pieces meeting at a shared center. A wooden star frame is an open outline, so its geometry is based on the outer star points and inner corners.
Do I need a table saw to make a wooden star frame?
No, but I prefer a table saw with an adjustable angle jig because the project uses both small and large angles, and the jig makes repeatable batch cutting easier.
