

Making a wooden box is a classic project that’s great for beginners in woodworking. You might come across various ways to build one – some use hand tools like chisels and mallets, while others might go for power tools for more precision.
In this blog, I’m going to focus on using a table saw one of the best tools for this kind of job. The process I’ll be demonstrating avoids nails or screws. Instead, I’ll show you how to use rabbet joints for assembling the box. This method ensures a neat and sturdy finish, and it’s applicable to both the body of the box and the lid.
By the end of this guide, you’ll know exactly how to make a wooden box using a table saw. This approach is straightforward, and the result is simple, yet beautiful. Once you finish it, you’ll be proud of what you’ve built. And if you’d like to take your box-making skills further, I’ll also be sharing information on how to make a box joint jig or add decorative splines to the box edges.
Make a DIY Wood Box Video
If you want to see how it is done, watch the video below for a step-by-step guide on how to craft a simple wooden box using a table saw.
I appreciate every YouTube subscriber. It’s free and easy to subscribe to — just Click Here To Subscribe. Thank you!
Table of Contents
- Simple Wooden Box Video
- Simple Wooden Box Plans
- The Material you will need
- General Questions
- What are the Different Ways of Making a Wooden Box?
- How to Make a Wooden Box (Simple Wooden Box)
- Step 1: Cut the Sides of the Box
- Step 2: Cut the Rabbets for the Sides
- Step 3: Cut the Rabbets for the Bottom
- Step 4: Glue all the Pieces Together
- Step 5: Make the Lid
- Step 6: Apply a Finish
- How to Cut Splines on a Wood Box?
- Wrapup
- Woodworking Jigs Used
*Safety is your responsibility. Make sure you know what you’re doing and take all necessary safety precautions while working with power tools. Always be cautious when using any power tool. Stay safe!
Materials you will need to build a DIY Wooden Box
Wood Box – material:
Pine (based on your preference)
2x Long Sides: 240mm x 80mm x 18mm (9.45″ x 3.15″ x 0.71″)
2x Short Sides: 120mm x 80mm x 18mm (4.72″ x 3.15″ x 0.71″)
1x Box Lid: 244mm x 160mm x 18mm (9.61″ x 6.30″ x 0.71″)
1x Box Bottom (Plywood 9mm): 222mm x 120mm x 9mm (8.74″ x 4.72″ x 0.35″)
Other:
Table Saw Blade – https://amzn.to/48maocv
Wood Glue – https://amzn.to/48ltKhJ
Sandpaper Sheets – https://amzn.to/41OMx2p
Wood Wax / Spray Laquer
Tools:
Table Saw – https://amzn.to/47mWiGf
MicroJig GRR-Ripper – https://amzn.to/3vjQSP7 (Grr-Ripper Review)
Precision Miter Gauge – https://amzn.to/48DqfTC
Picture Frame Clamp – https://amzn.to/3RODGJP
One Hand Clamps – https://amzn.to/48jGxkZ
Spring Clamps – https://amzn.to/41Nuh9D
Mini F-Clamps – https://amzn.to/3RJwNJK
Marking Gauge (Ruler Marking Gauge) – https://amzn.to/48tOvrG
Check all the Tools I Use
We may earn an affiliate commission when you buy something through our retail links. As an Amazon Associate AllFlavor Workshop earns from qualifying purchases.

What are the Different Ways of Making a Wooden Box?
There are a few different ways and approaches to making a wooden box. You can achieve great results with all of them, however, the effectiveness of each method can vary depending on the situation. Personally, I prefer crafting a box using a table saw.
- Using Hand Tools: When it comes to making a wooden box with hand tools like chisels, hand saws, and mallets, it is really about the basics. It’s a hands-on way to feel connected to your work. This approach is pretty budget-friendly. The downside is it takes more time, steady hands, and some experience to get those cuts and joints just right.
- Using a Table Saw: For me, the table saw is the preferred way. With a table saw you will get those clean, precise cuts, and you can adjust as you go to make sure everything fits perfectly. You won’t need any other tool, the entire box can be crafted with just a saw. But remember, you’ve got to be careful – a table saw needs your full attention to keep things safe.
- Using a Router: A router is another useful option for box making. You can use it to cut rabbets, grooves, decorative edges, and other joinery details. With a simple router jig, it can also be a practical alternative to the table saw for some of the box joints.
- Using a Miter Saw: Another method for making boxes is with a miter saw, which allows for precise 45-degree mitered cuts. Although these cuts can also be made on a table saw, having a double-bevel miter saw simplifies the process tremendously. A double-bevel miter saw allows you to make repetitive consistent cuts on both ends of the wood pieces.
Let's start building!
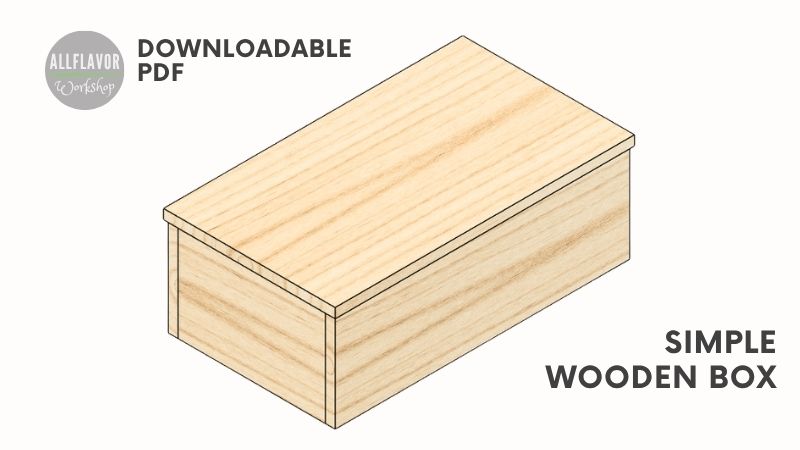
Making the box involves cutting, gluing the side pieces and the bottom together, and making the lid. All these cuts can be made easily on a table saw, eliminating the need for additional tools. The sides are joined using rabbet joints and glue. The lid is connected to the body using cut rabbets, eliminating the need for hinges.
A top flat saw blade is ideal, but a standard saw blade will also do the job. For cleaning up the cuts, use a chisel and a sanding block.
The box and lid are made from 18 mm thick pine, but you can also use thinner material, such as 12 mm, if you prefer. The entire box is assembled with glue, without screws or nails.
Box Properties:
- Material: Dry Pinewood
- Total Dimensions: 240mm x 156mm x 90mm (9.45″ x 6.14″ x 3.54″)
How to Make a Wooden Box (Simple Wooden Box)
Step 1: Cut the Sides of the Box
Before starting the cuts, make sure the board’s edges are sharp. If they’re not, make a cut to remove the rounded edge.
Then, proceed to cut the side pieces for the box: two longer pieces (240mm x 80mm x 18mm) and two shorter ones (120mm x 80mm x 18mm). For safety, use a push block or push stick when working with the table saw. Rip the board using the table saw fence, then crosscut the pieces using a crosscut sled.
NOTE: When making cuts, make sure the saw blade is set slightly higher than the thickness of the board being cut.


Step 2: Cut the Rabbets for the Sides
First, mark the rabbet width on the longer sides, which should be equal to the thickness of the wood (18mm in this case). Set the saw blade height to 9mm (possibly 10mm) to determine the depth of the rabbet.
For precise width, use a miter gauge and adjust the table saw fence to the required position. Instead of relying on the fence only, attach to it an additional stopper. This setup ensures the workpiece moves freely without binding against the fence during the back-and-forth movement. You can have the same setup by using a crosscut sled with a stopper.
To make the cut start by positioning the fence closer to the blade, allowing you to incrementally adjust and achieve the perfect width for the cut.
NOTE: If you prefer using a handheld router instead of the table saw, you can also cut these rabbets with a dedicated Router Rabbet Jig. The jig gives you a built-in 90° reference and makes it easy to position the router along the edge of the workpiece.
TIP: Use a top flat saw blade for the best result. If you don’t have one you can use a standard and clean the cut with a chisel.


Find This Blog Post Useful?
Join my newsletter to receive the latest news, tutorials, and project plans sent directly to your inbox!
Step 3: Cut the Rabbets for the Bottom
For the bottom of the box, I’m using 9mm plywood and taking a slightly different approach to cut the rabbets.
First, attach a sacrificial piece of wood to the fence. Then, move the fence close to the blade for the initial cut. Gradually adjust the fence away from the blade after each cut until you find the correct position, then lock the fence. Make a cut on the remaining three side pieces and remove the rest of the material.
Assemble the box, making sure that all four side pieces are perpendicular to each other. Then, measure the precise dimensions needed for the bottom piece and cut it accordingly. Finally, do a test fit of all the pieces. Use sandpaper to fix any imperfections.


Step 4: Glue all the Pieces Together
Apply glue to all the rabbets, and use picture frame clamps along with ordinary clamps to secure the pieces during the gluing process.
TIP: If your bottom piece is a perfect rectangle, it will help to maintain the shape of the box.


Step 5: Make the Lid
Cut the lid to the required size (244mm x 160mm x 18mm) and then make rabbet cuts around its entire perimeter. Slowly sneak up on the cuts, and make test fits between each cut until the lid fits perfectly in the box. While making the cuts, again, use a sacrificial piece of wood attached to the fence.
NOTE: You can also make these perimeter rabbets with a handheld router. For repeated edge rabbets like this, my Router Rabbet Jig is a useful alternative because you can quickly reposition the workpiece and repeat the cut around each side.


Step 6: Apply a Finish
Sand the entire box using high-grit sandpaper and, if you want, slightly round the edges for a smoother finish. Then apply your chosen wood finish. In my case, I’m applying several coats of wood wax to enhance its appearance and durability.


This is what the finished box looks like.

How to Cut Splines on a Wood Box?
To accurately cut splines on a wooden box, using a spline jig is the most effective method. This can be done either with a router and a router spline jig or with a table saw equipped with a table saw spline jig.
For the cleanest cuts, an up-cut router bit or a flat-tooth saw blade are the best tools, as they ensure no gaps between the spline and the box, allowing for a smooth transition. If you don’t have these available, a standard blade will work, though any resulting gaps might need filling. You can fix the gaps by using a paste made of wood dust and glue.
Splines serve two main purposes: reinforcing the joint and enhancing the box’s aesthetics. While spline widths can vary from very thin to thicker, a typical choice is between 2-4mm. Using wood that contrasts with the box material makes the spline nicely stand out.
Although splines are commonly used in mitered joints, they’re not limited to them; you can also use them in butt joints, rabbet joints, and others.


Wrap Up
Making a simple wooden box is a great project if you are learning how to use a table saw. You get to practice ripping, crosscutting, working with a fence and miter gauge, and cutting basic rabbet joints.
This box is intentionally simple, but there are plenty of ways to take the design further. You can add mitered corners, decorative splines, box joints, or use a router instead of the table saw for some of the joinery.
For me, projects like this are useful because they teach several basic woodworking techniques while still giving you something practical at the end.
If you want to build the same box, you can also download the wooden box plans and keep the dimensions close by while working in the shop.
If you want to take the next step and build more advanced small boxes, have a look at my Small Wooden Keepsake Box and a Decorative Wooden Box with a Patterned Lid projects.
KEEP READING:
Woodworking Jigs for a Simple Box
Woodworking Jigs for a Table Saw:
These are the tools and jigs I have used to make this simple box. Not all of them are necessary though. On the other hand, there are jigs I haven’t used but it makes sense to use them. This is the complete list of Jigs that will make the assembly easier.
Woodworking Jigs for a Router:
These jigs can be useful if you decide to use a router for some parts of the box instead of doing everything on the table saw.
Frequently Asked Questions
What is the best wood type for making a wooden box?
For beginners, softwoods like pine or cedar are recommended due to their workability and affordability.
Do I need advanced woodworking tools to craft a wooden box?
No. You can build a simple wooden box with basic hand tools, but a table saw makes it much easier to cut the parts accurately and create clean rabbet joints. A router is another useful option for cutting rabbets, grooves, and decorative details.
How do I ensure the corners of my box are perfectly square?
Using a carpenter’s square, corner clamps, or picture frame clamps during assembly ensures accuracy in corner alignments.
Can I make a wood box without nails or screws?
Yes, techniques like dovetail joints, box joints, or rabbets with wood glue can be used for a nail-free box.
Is sanding important in the box-making process?
Sanding is crucial for smoothing surfaces and rounding edges, enhancing both the box’s appearance and safety.
