
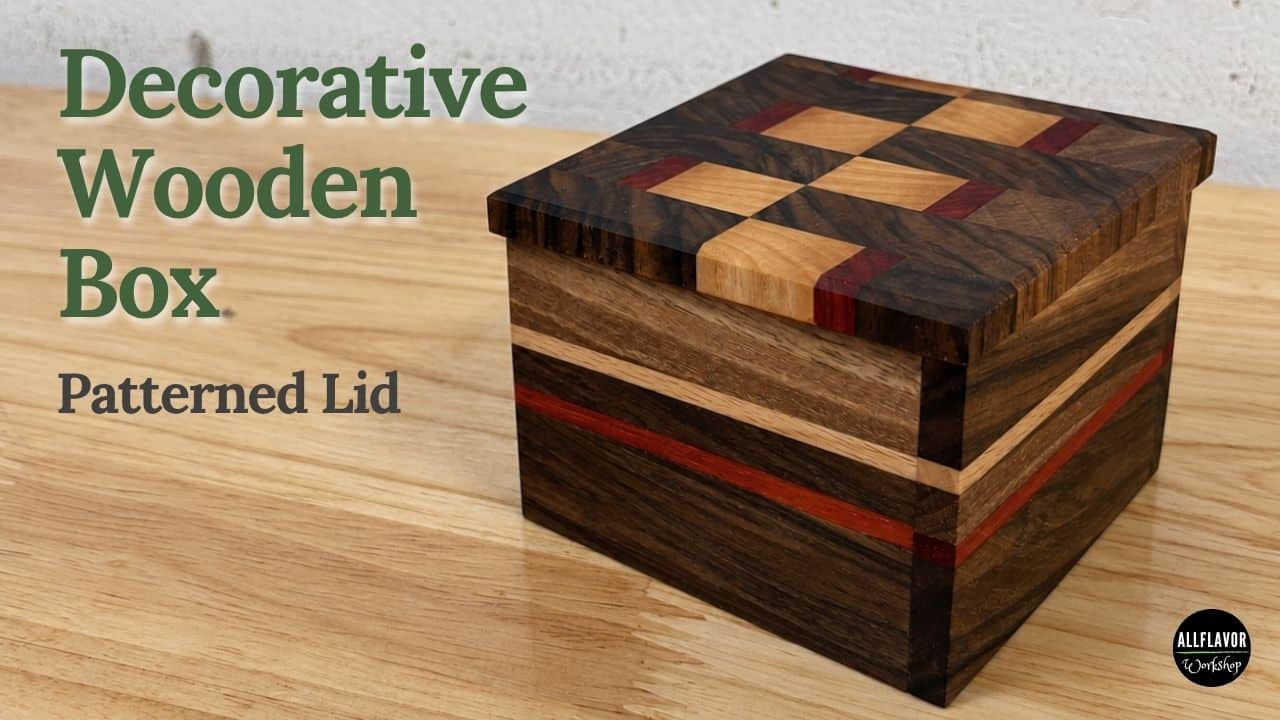
After making a couple of small walnut keepsake boxes, I wanted to take the same basic idea and push it a little further.
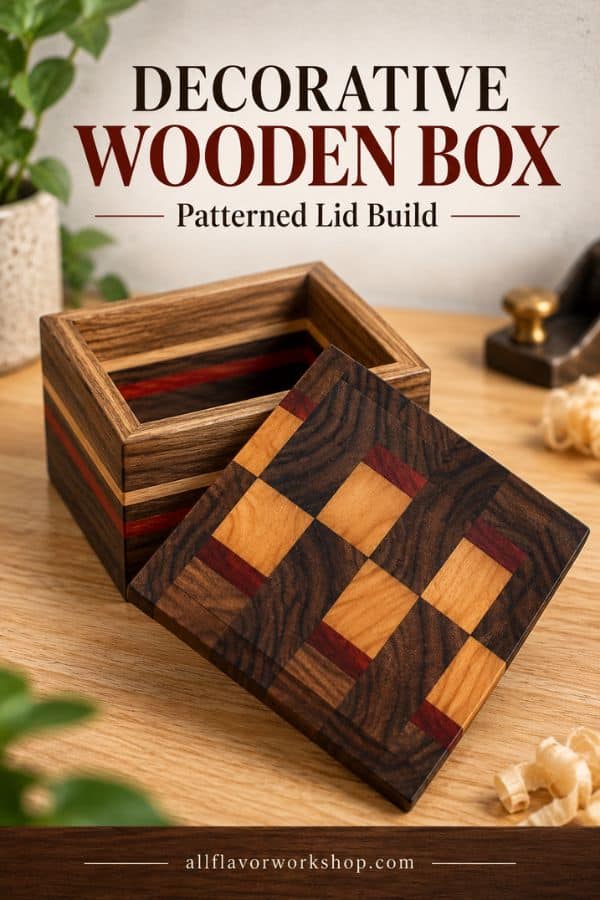
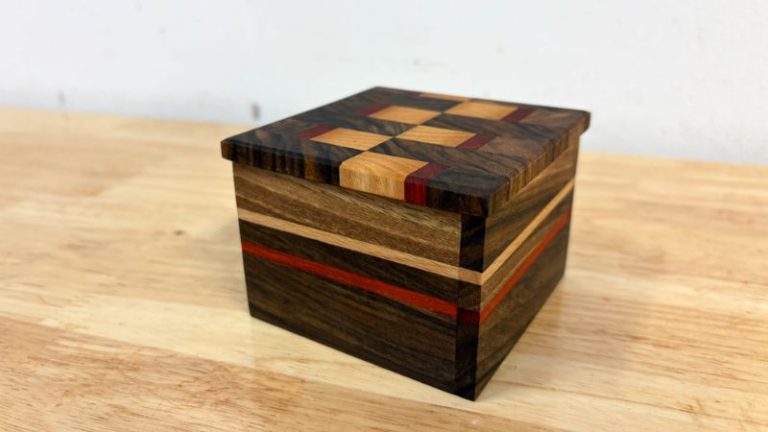
Instead of using only walnut with one light accent strip, I combined dark walnut, beech, and padauk in the box body, then made a much more decorative lid from walnut, padauk, and ash.
The basic construction is still simple.
The box uses four thin side panels, a solid glued-up bottom, simple butt joints, and a removable lid that fits slightly inside the box. There are no hinges, magnets, or other hardware.
But visually, this version is completely different.
The padauk adds a strong red line around the body, while the lid is built almost like a small end-grain cutting board. Different pieces of wood are glued together, rearranged into a pattern, flattened, centered, and then cut down to the final lid size.
The finished box measures approximately 85 × 85 × 55 mm (3.35 × 3.35 × 2.17 in) with 8 mm / 5/16 in walls. The lid is approximately 89 × 89 mm (3.50 × 3.50 in) and 10 mm / about 3/8 in thick.
If you prefer a simpler version first, have a look at my Small Wooden Keepsake Box. This project uses essentially the same box-building logic but adds more decorative laminations and a much more involved lid.
Table of Contents
- Decorative Wooden Box Dimensions
- Materials and Tools
- Designing the Wood Pattern
- Let’s Start Building!
- Step 1: Make the Laminated Side Panels
- Step 2: Cut the Box Sides and Make the Bottom
- Step 3: Glue the Box Together
- Step 4: Make the Patterned Wooden Lid
- Step 5: Fit the Lid to the Box
- Step 6: Final Sanding and Finish
- What I Would Change or Try Next
- Wrap-Up
- Frequently Asked Questions
*Safety is your responsibility. Make sure you know what you’re doing and take all necessary safety precautions while working with power tools. Safety comes first!
Decorative Wooden Box Dimensions
The larger decorative box uses the same thin-wall construction as the smaller keepsake boxes, but everything is scaled up.
| Part | Dimension |
|---|---|
| Finished box size | 85 × 85 × 55 mm 3.35 × 3.35 × 2.17 in |
| Wall thickness | 8 mm 5/16 in |
| Lid size | 89 × 89 mm 3.50 × 3.50 in |
| Lid overlap | About 2 mm per side about 5/64 in |
| Lid thickness | 10 mm about 3/8 in |
The exact dimensions are not important.
What matters is keeping the four walls equal, keeping the decorative strips aligned, and leaving enough thickness in the lid to create the fitted section underneath.
Materials and Tools
Wood
- Walnut
- Beech
- Padauk
- Ash
- Wood glue
The box body uses:
walnut → padauk → walnut → beech → walnut
The lid uses walnut, padauk, and ash arranged into a decorative pattern.
Finish
- Cutting board oil, mineral oil, or another suitable woodworking finish
I used Clark’s cutting board oil again because I already had it in the workshop and it brings out the contrast between all four woods extremely well.
Tools
- Table saw – Link
- Router – Link
- Chamfer router bit – Link
- Router flattening bit – Link
- Table saw blade – Link
- Push block – Link
- Parallel clamps – Link
- F-clamps – Link
- One-hand clamps – Link
- Double-sided woodworking tape – Link
✅ Check all the tools I use here
Jigs I Used
The table saw sled gives me repeatable side lengths, the router jig lets me flatten thin laminated parts without sending them through a planer, and the router table is what I use to fit the lid accurately.
As an Amazon Associate, I may earn from qualifying purchases at no extra cost to you.
Designing the Wood Pattern
This box is really about contrast.
The dark walnut gives the whole project a strong base, but the thin padauk and beech strips make the sides much more interesting.
I did not place the strips exactly in the center of the wall. They sit closer to the upper part of the box, which helps the box look less symmetrical and gives the side pattern a little more movement.
The lid is different again. Instead of repeating the side layout, I used walnut, padauk, and ash and arranged the pieces into a small end-grain pattern.
There is no single correct layout here. You can rotate and rearrange the pieces until the pattern looks balanced.
For me, the important part is to decide on the pattern before cutting the final lid square.
That way you can center the most interesting part of the design directly over the box rather than simply taking whichever section happens to sit at the edge of the glued-up panel.
💡TIP: Before applying glue, take a quick photo of your chosen pattern. Once the small pieces are moved around for glue-up, it is surprisingly easy to forget the exact arrangement you liked.
📌 Save THIS PIN to your Board on Pinterest!
Let’s Start Building!
The body construction is similar to my smaller keepsake boxes, but this version adds another contrasting strip and a more complicated bottom and lid.
I start by making the sides as laminated panels slightly thicker than their finished size.
Once they are glued and completely flat, I cut the four walls to identical dimensions, make the bottom, glue the box together, and only then build and fit the lid.
How To Make a Decorative Wooden Box With a Patterned Lid
Step 1: Make the Laminated Side Panels
I started with planed walnut, beech, and padauk.
The finished walls are 8 mm thick, but I initially prepared the laminated side stock to around 10 mm. That gives me material to remove after glue-up so I can flatten both faces properly.
For the colorful box, the basic side layout is:
walnut → padauk → walnut → beech → walnut
The visible accent strips are much narrower than the original pieces used during glue-up — only around 3–4 mm remains visible once the panel is finished.
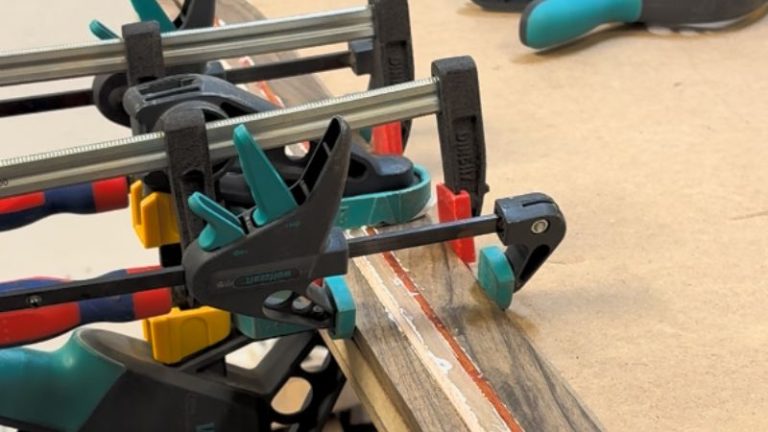
Apply glue along the edges and clamp the strip assembly together.
Take your time here. The strips are narrow, and if one piece slides upward or downward during clamping, the decorative line around the finished box will no longer align properly.
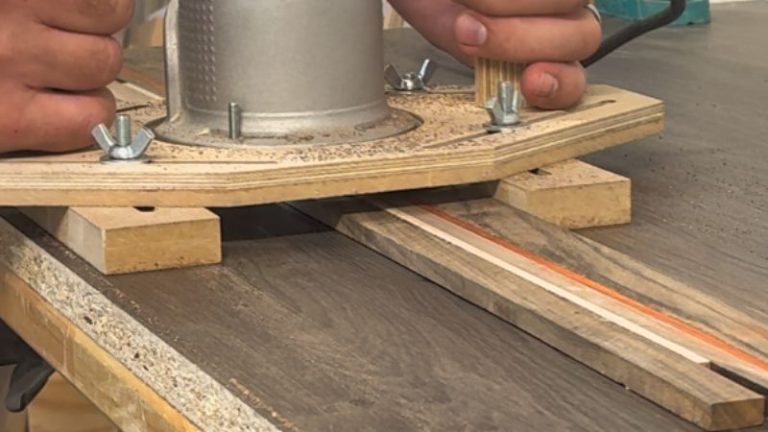
After the glue cures, scrape away the larger glue squeeze-out. I then flatten both faces with my Multi-Purpose Router Jig and a flattening bit until I reach the final wall thickness of approximately 8 mm.
I deliberately did not use the planer because these panels are thin and I did not want to risk breaking them. Finish with light orbital sanding.
💡TIP: Flatten both faces gradually instead of trying to remove all the extra thickness from one side. That makes it easier to keep the decorative strip where you intended it.
Step 2: Cut the Box Sides and Make the Bottom
Once the panels are flat and sanded, the four box sides can be cut to final length.
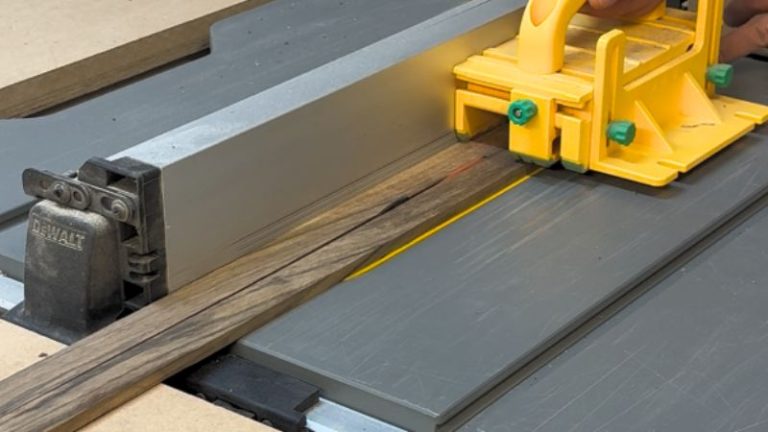
Because the box is square, all four pieces need to match exactly. I use my Table Saw Sled with a stop block for this. Set the stop once and cut all four walls from the same setup.
Before making the bottom, dry assemble the sides. This gives you the real inside dimensions of the box. The bottom for this version is a little different from the smaller boxes.
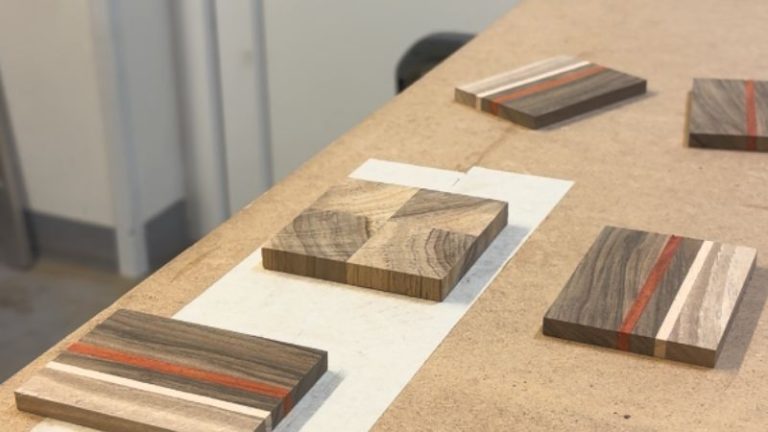
Instead of using a single walnut piece, I made it from four walnut squares glued together, with the meeting point of those pieces positioned directly in the center of the box.
Once the bottom blank is glued and flat, find its center. Measure out equally in all four directions and cut the final square. I still sneak up on the fit slowly.
The goal is for the bottom to sit neatly inside the dry-assembled sides without forcing them apart.
NOTE: Leave a tiny amount of room for glue. A bottom that already needs force during a dry fit is too tight.
Step 3: Glue the Box Together
The box uses simple butt joints, just like the smaller keepsake boxes. Dry assemble the sides and bottom one more time before applying glue.
Check:
- all sides are the same length
- the bottom fits correctly
- the box is square
- the beech strip lines up
- the padauk strip lines up
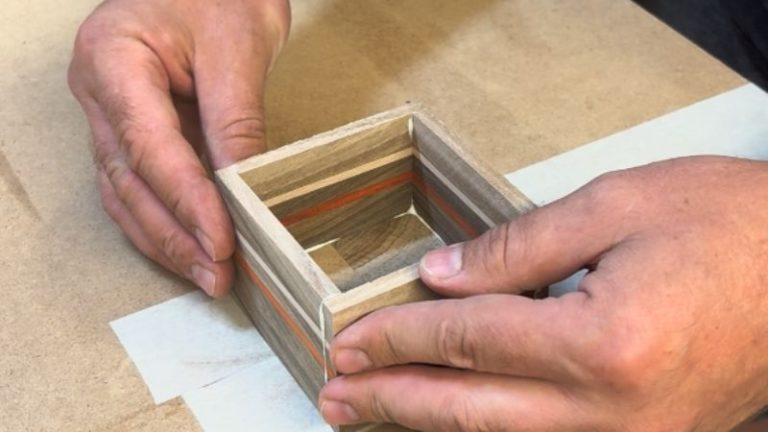
Then apply glue to the sides of the bottom and the mating ends of the box walls. Assemble everything and check the corners with a small square.
I use small clamps to hold the box together while the glue dries. Painter’s tape can also work well on a box this size.
Do not overtighten the clamps. These parts are thin, and excessive pressure can easily shift one wall or move the decorative strips out of alignment.
Clean the glue squeeze-out as early as possible. This is particularly important inside the corners. Removing completely dried glue from such a small box is much harder than wiping or scraping it away while it is still manageable.
Once everything is dry, remove the clamps and sand the entire box smooth.
💡TIP: Focus first on strip alignment and squareness. A tiny difference in the corner joint can be sanded later; a padauk stripe that jumps several millimeters at the corner will always be visible.
Step 4: Make the Patterned Wooden Lid
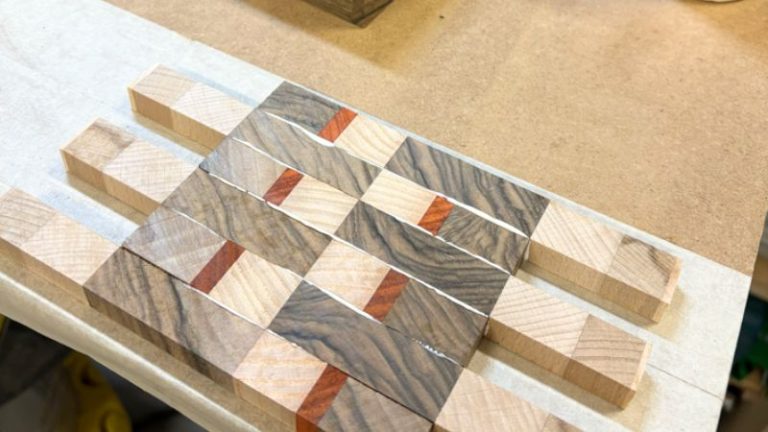
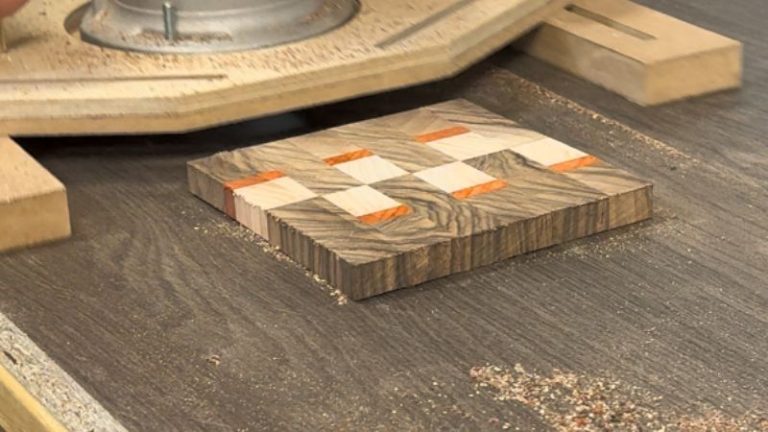
This is the part that really makes the box different. I built the lid using essentially the same construction logic I use for an End Grain Cutting Board.
The exact strip arrangement can be changed however you like. For my lid, I combined:
- dark walnut
- padauk
- ash
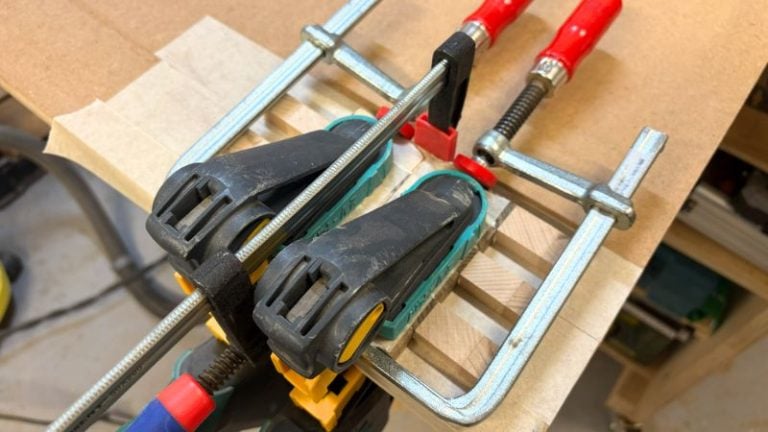
The first step is to create the laminated blank.
Glue the strips together, let them dry, cut and rearrange the pieces into the pattern you want, then glue everything together again. The exact pattern is less important than making sure the final blank is large enough to give you room for centering and final trimming.
Once the lid blank is complete, I flatten it with the Multi-Purpose Router Jig. Again, I prefer the router jig over the planer for a small patterned piece like this.
Now look at the entire pattern and decide what you want directly in the center of the finished lid. Mark that center point. Measure equally from it in all four directions and cut the final lid to approximately 89 × 89 mm (3.50 × 3.50 in).
That gives me about 2 mm of overhang on each side of the box. This centering step makes a big difference.
If you simply cut the final lid starting from one edge of the patterned blank, the pattern may look obviously shifted once the lid is placed on the box.
💡TIP: Do not trim the patterned panel to its final size too early. The extra material gives you freedom to choose the strongest-looking part of the pattern and place it exactly in the center.
Step 5: Fit the Lid to the Box
The lid closes in exactly the same way as the smaller keepsake boxes.
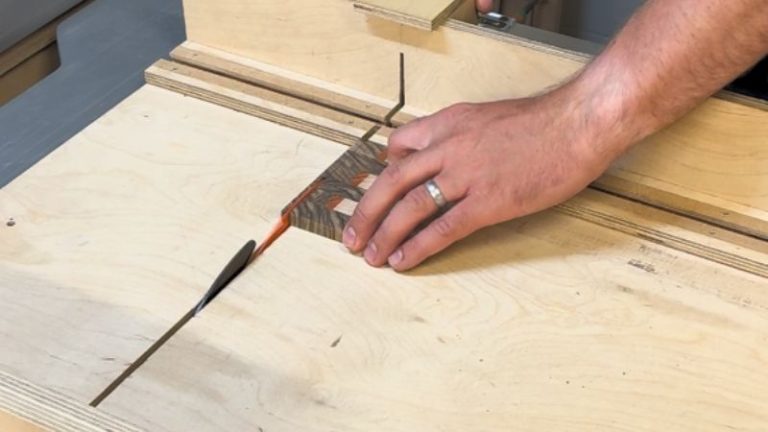
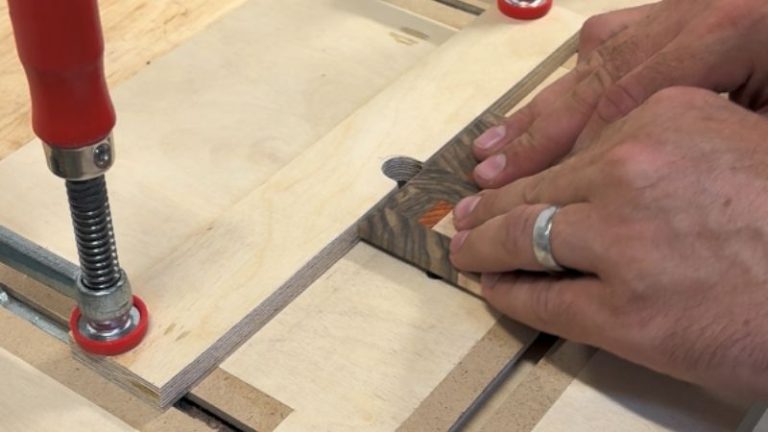
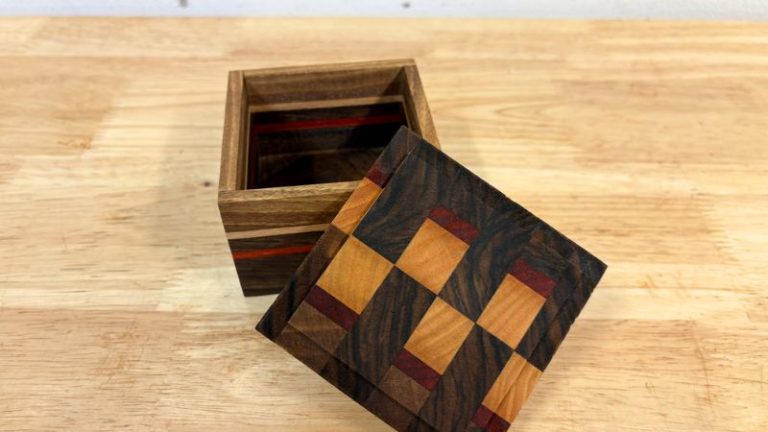
There are no hinges or magnets. Instead, a shallow section on the underside of the lid fits down inside the finished box. I cut that section on my Benchtop Router Table.
The important part is to sneak up on the fit. I make a small cut from each side, test the lid, then remove a little more. Repeat until it feels right.
A good fit for me is when:
- the lid enters the box without force
- there is almost no side-to-side movement
- the lid remains in place when I turn the box upside down
- it still comes off comfortably by hand
Do not chase the final dimension using measurements alone. Use the finished box itself as the reference. The actual glued and sanded opening is what matters.
Once I am happy with the fit, I sand the lid and add a small chamfer around the upper edges. That removes the sharp corner and gives the patterned lid a much cleaner finished appearance.
💡TIP: When the lid is getting close, make extremely small adjustments. A fraction of a millimeter can change the fit from perfect to loose on a small box.
Step 6: Final Sanding and Finish
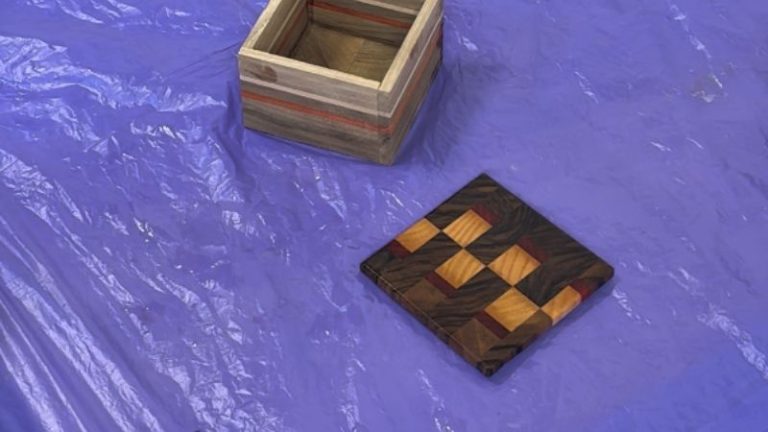
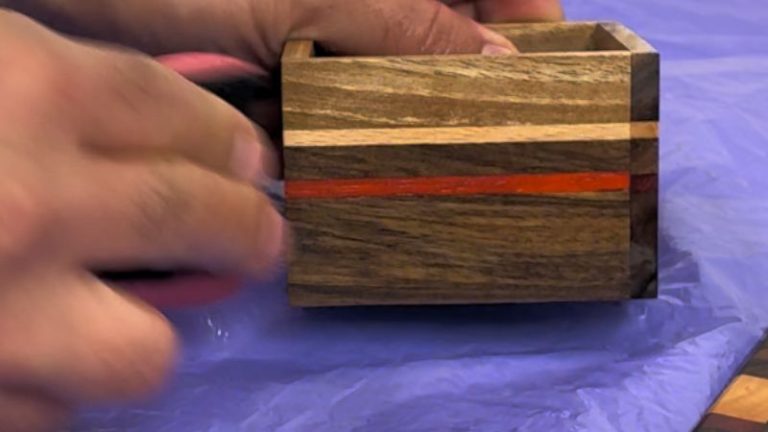
Once the lid fits properly, I prepare both pieces for the finish. I lightly spray the wood with water to raise the grain. Let everything dry completely.
Then sand the surfaces again until they feel smooth. After the final sanding, I apply oil to the box and lid. I used Clark’s cutting board oil, although mineral oil or another suitable finish can also be used depending on what you plan to store inside.
This is where the whole project changes. The walnut becomes much deeper and darker. The padauk turns into a much stronger red. The ash and beech stay light.
And suddenly all those narrow laminations and the patterned lid become much more visible.
Apply the finish evenly, let it soak in, remove the excess as needed, and allow the box and lid to dry separately.
💡TIP: Do not put the lid back on while the finish is still wet. Oil between the fitted surfaces can make the lid feel tighter and may leave uneven marks.
What I Would Change or Try Next
The basic construction worked well, so I would not change much structurally.
What I would experiment with is the pattern. You could easily create a completely different box by changing only:
- the number of accent strips
- strip thickness
- strip position
- wood species
- lid pattern
- lid overhang
- chamfer size
I also like the idea of making several boxes using the same walnut body but giving each one a different lid. That would let you test more elaborate patterns without changing the entire build.
Another option would be to reverse the colors — use a lighter main wood such as ash or beech and add dark walnut and padauk as the accents.
The construction stays the same, but visually it would look like a completely different project.
Wrap-Up
This decorative box uses a lot of the same techniques as my simpler walnut keepsake boxes, but the result feels completely different.
The actual box construction is still straightforward: laminated sides, four walls, a bottom, simple butt joints, and a fitted removable lid.
Most of the character comes from how the different woods are arranged.
The thin padauk and beech strips give the body a strong horizontal detail, while the end-grain style lid turns a very small surface into the focal point of the entire project.
I also like how many of my workshop jigs come together in one small build.
- The Table Saw Sled keeps the sides equal.
- The Multi-Purpose Router Jig lets me flatten thin laminated parts without risking them in a planer.
- And the Benchtop Router Table lets me slowly sneak up on the fitted lid.
It is a good example of why I build these jigs in the first place.
They are not just standalone workshop projects — I keep reaching for them when I want to build something else accurately.
If you prefer a simpler version with fewer wood species, start with my Small Wooden Keepsake Box.
And if you want to see the construction method behind the patterned lid in more detail, my DIY End Grain Cutting Board uses the same basic cut, rearrange, and glue-up principle on a larger scale.
Frequently Asked Questions
What woods did you use for the decorative wooden box?
The main box is made from dark walnut with thin beech and padauk accent strips. The patterned lid combines walnut, padauk, and ash.
How thick are the walls of the box?
The finished side walls are approximately 8 mm / 5/16 in thick. I initially make the laminated side panels about 10 mm thick and flatten them down after glue-up.
How did you make the patterned wooden lid?
I used the same basic construction approach as an end-grain cutting board. Different hardwood strips are laminated together, cut and rearranged into a pattern, glued again, flattened, and then trimmed around the visual center to create the final lid.
How does the lid stay closed without hinges or magnets?
A shallow step is routed around the underside of the lid. This fitted section sits slightly inside the box and creates enough friction to hold the lid in place while still allowing it to be removed easily.
Can I make the box using different woods?
Yes. The design can be adapted to many hardwood combinations. I would choose stable woods that machine and glue well, then use contrasting colors or grain patterns for the strips and lid.
