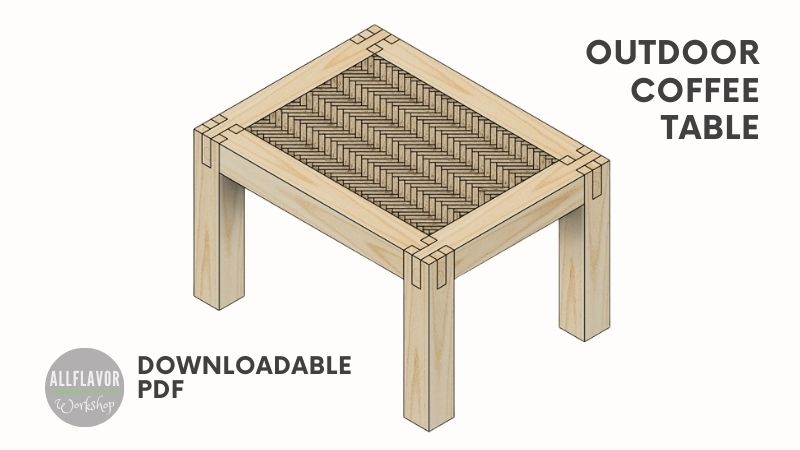
DIY Outdoor Coffee Table with Castle Joints and Herringbone Top
Build a DIY outdoor coffee table with castle joint legs and a herringbone tabletop. Follow the step-by-step tutorial, video, and tips to make a sturdy table for your patio or terrace.
I wanted to build an outdoor coffee table that was simple in shape, strong enough for daily use, but still had a few details that make it stand out. That is why I went with castle joint legs and a herringbone tabletop.
The castle joint is one of those joints that looks great and is also very strong. It connects three pieces of wood together and works really well for tables, benches, beds, and other furniture builds. You can cut it with traditional hand tools, but for this project, I made the joints on the table saw using a tenoning jig and a crosscut setup.
For the tabletop, I used plywood strips arranged in a herringbone pattern. It takes a bit of patience to keep the pattern straight and centered, but the result is worth it. The herringbone top gives the table a much nicer look than a plain panel and adds a lot of character to a simple outdoor build.
In this article, I’ll walk you through how I built this DIY outdoor coffee table step by step — from cutting the castle joints, assembling the frame, and making the herringbone tabletop, all the way to the final finish. I also have downloadable plans available if you want the dimensions and build details in a cleaner format while working in the shop.
If you want to see the full build process, watch the video below. I walk through the castle joint frame, the herringbone tabletop, and the final assembly so you can see how everything comes together.
If you enjoy the video, I’d really appreciate it if you subscribed to my YouTube channel. It helps me keep creating more woodworking projects, jigs, and build guides.
*Safety is your responsibility. Make sure you know what you’re doing and take all necessary safety precautions while working with power tools. Safety comes first! Always be cautious when using any power tool.
Outdoor Coffee Table Plans
If you want the more complete version of the plans, I also now offer premium woodworking plans for selected projects and workshop jigs.
For this coffee table, I used spruce posts for the frame and plywood for the herringbone tabletop.
You can adjust the material depending on where the table will be used. Spruce works fine, but if the table will stay outside most of the time, cedar or another outdoor-friendly wood is also worth considering.
Disclosure: Some of the links above are affiliate links. If you purchase through them, I may earn a small commission at no extra cost to you. Thanks for supporting AllFlavor Workshop.
DIY outdoor coffee table with castle joint legs and a herringbone tabletop — a sturdy weekend woodworking project for the patio or terrace.
Quick Build Overview
Here is a quick overview of the coffee table build before we get into the step-by-step process. The table itself is not complicated, but the castle joints and herringbone tabletop add a few details where accuracy really matters.
Item
Details
Project
DIY outdoor coffee table
Main features
Castle joint legs, herringbone tabletop
Material
Spruce posts and plywood tabletop
Joinery
Castle joints, tenons, and half-lap joints
Main tools
Table saw, tenoning jig, miter gauge, router, orbital sander
Difficulty
Beginner to intermediate
Best for
Patio, terrace, balcony, or garden seating area
Before You Start: Castle Joints and Herringbone Pattern
Before jumping into the build, it helps to understand two main parts of this coffee table: the castle joints and the herringbone tabletop. Both details make the table look more interesting, but they also require a little bit of planning and accuracy.
1. Herringbone vs. Chevron: What’s the Difference?
Herringbone and chevron patterns are often confused, but they are not the same.
In a herringbone pattern, each piece is cut with straight 90-degree ends and placed perpendicular to the next piece. This creates the broken zigzag pattern you see on the tabletop.
In a chevron pattern, the pieces are cut at an angle so they meet in a continuous V-shape.
For this project, I used a herringbone pattern because the pieces are easier to cut, and the final look still gives the tabletop a nice decorative detail.
Herringbone pattern - plywood panel
2. Ways to Cut a Castle Joint
A castle joint is a three-way woodworking joint that connects the leg and two aprons together. It is strong, practical, and also looks great, which is why it works so well for tables and benches.
With power tools — using a table saw, tenoning jig, crosscut sled, router, or other setup that helps you make repeatable cuts. (👉How to Cut a Castle Joint on a Table Saw)
For this build, I cut the castle joints on the table saw using a tenoning jig. It is faster, more repeatable, and works well when you need to make the same joint on all four legs.
Castle Joint cut on a table saw
3. How to Center the Herringbone Pattern
Centering the herringbone pattern is one of the most important parts of the tabletop. If the pattern starts off crooked or off-center, it becomes more visible as you add more pieces.
There are two common ways to find the center:
Center by the short side of the pieces — the center line passes through the ends of the herringbone pieces.
Center by the long side of the pieces — the center line passes through the longer side of the pattern layout.
The best option depends on your final tabletop size and the size of the strips you are using. I recommend testing the layout first before gluing anything down. This helps you avoid ending up with very small pieces along the edges.
Draw a few guide lines on the plywood base and use a straight reference strip to keep the first row aligned. Once the first pieces are placed correctly, the rest of the pattern is much easier to build.
How to center a herringbone pattern
Let’s Start Building
For this DIY outdoor coffee table, I used 70 × 70 mm spruce posts for the legs and aprons. Square posts make the castle joints easier to mark and cut because all sides are equal, and once the tools are set up, you can repeat the same cuts accurately.
The tabletop is made from a 9 mm plywood base with 12 mm plywood strips glued on top in a herringbone pattern. After flattening and trimming, the final tabletop thickness is about 19 mm.
Accuracy is the most important part of this build. Keep the same settings on your marking gauge, combination square, and table saw until each matching set of cuts is finished.
I glued the frame permanently because there is no real reason to take it apart again, and glue also helps strengthen the joints. For outdoor use, consider cedar or another outdoor-friendly wood, and make sure the plywood tabletop is well protected from moisture.
DIY Outdoor Coffee Table with Castle Joint Legs
Step 1: Cut the Castle Joints in the Table Legs
Start by cutting the table legs to length. I used 70 × 70 mm spruce posts, and each leg is 400 mm long. To keep all legs identical, cut them on the table saw sled or a miter gauge with a stop block.
Next, mark the castle joint on the top of each leg. I use a ruler marking gauge and a combination square for this. The joint is divided into thirds, and the middle section is removed. The depth of the cut equals the width of the post, so in this case 70 mm.
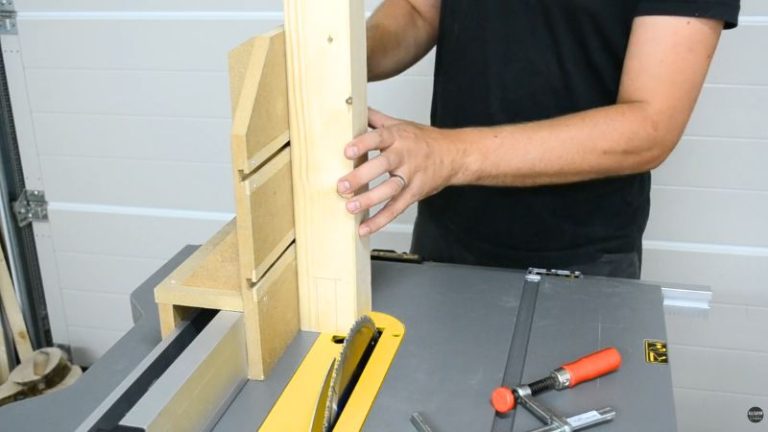
Once the layout is marked, set the blade height to match the depth of the joint and use a table saw tenoning jig to make the cuts. Cut one side, rotate the post 90 degrees, and repeat until all four sides are cut. Do the same for all four table legs.
To remove the waste from the middle, I used a coping saw first and then cleaned the joint with the tenoning jig. You can remove all the waste directly on the table saw, but it creates a lot of sawdust and mess.
At this point, the “castle” part of the castle joint is ready.
TIP: Save some of the sawdust from these cuts. You can mix it with wood glue later to fill tiny gaps and imperfections in the castle joints.
NOTE: Make sure your posts are straight and square before cutting the joints. Square 70 × 70 mm posts make the layout and repeat cuts much easier.
Mark the castle joint carefully before cutting — keeping the layout consistent is the key to a clean fit.
Using a table saw tenoning jig to cut the castle joints.
Cut castle joint patter - ready to remove the the waste with a coping saw.
The finished castle joint cut in the table leg, ready to receive the table aprons.
Step 2: Cut the Tenons in the Table Aprons
Now cut the matching tenons on the table aprons. Use the same marking gauge and combination square settings from the previous step so the layout matches the castle joints in the legs.
For the aprons, the process is the opposite of the legs. Instead of removing the middle section, you remove the two outer sections and leave the center tenon. The depth of the tenon is again the same as the width of the post — in this case 70 mm.
Set the blade height the same as before and use the tenoning jig to make the cuts. Cut one side, rotate the apron 180 degrees, and cut the opposite side. Repeat the process for all aprons.
Start slightly away from your final line and slowly sneak up on the fit. It is much better to remove a little material at a time than to cut too much and end up with a loose joint.
Once the tenon fits nicely into the castle joint, cleanly cut the shoulders using a miter gauge or crosscut sled. If you use a miter gauge with the table saw fence as a reference, use a stop block and do not crosscut directly against the fence.
TIP: Sneak up on the cut slowly. A tight joint can always be adjusted, but a loose joint is much harder to fix.
NOTE: Keep the same layout settings until all matching tenons are cut. This helps the aprons fit consistently into all four legs.
Cutting a Castle Joint with a Table Saw
Using a hand saw to cut the outer sections.
Cleaning up the tenon shoulders after sneaking up on the final fit.
Test fitting the tenon into the castle joint before cutting the remaining aprons.
Find This Blog Post Useful?
Join my newsletter to receive the latest news, tutorials, and project plans sent directly to your inbox!
Once the tenons fit into the table legs, you need to cut the half-lap joints where the two aprons cross inside the castle joint.
To mark the cut, place one apron into the table leg and then position the second apron across it. Mark where the two tenons overlap inside the joint. Also mark the middle of the apron height — this is the section that will be removed so both tenons can interlock.
I cut these half-lap joints on the table saw using a miter gauge and a stop block. Make a series of small cuts until the waste is removed, then test the fit. The two aprons should sit flush inside the castle joint and cross cleanly without forcing them together.
Repeat the same process for all four aprons. Once the half-lap joints are cut, you should be able to assemble the full castle joint with the leg and both aprons fitting together.
TIP: Test the fit after each joint. If the aprons do not sit flush, remove a little more material rather than forcing the joint together.
NOTE: Use a stop block when cutting the half-lap joints so all matching cuts stay consistent.
Mark the overlap where the two apron tenons cross inside the castle joint.
Test fitting the half-lap joint before moving on to the remaining aprons.
The finished castle joint — the leg and both aprons lock together cleanly.
Step 4: Assemble the Coffee Table Frame
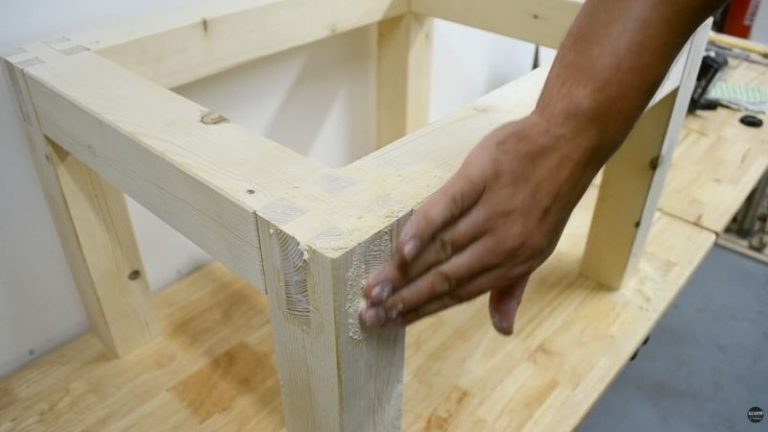
Once all the castle joints are cut and test-fitted, you can assemble the coffee table frame. Connect the legs and aprons together and check that all the joints sit properly before adding glue.
I decided to glue the joints permanently. The frame does not need to come apart again, and the glue adds extra strength to the castle joints. Since the joints are also a visible part of the design, take your time here and make sure everything is aligned before the glue sets.
If you have small gaps or tiny imperfections in the joints, mix some wood glue with sawdust from the same wood and rub the paste into the gaps. After sanding, it helps the joints look much cleaner.
TIP: Dry-fit the whole frame before adding glue. This gives you one last chance to adjust the joints and check that the table sits square.
NOTE: Glue mixed with sawdust works well for tiny gaps, but it is not a replacement for a badly fitting joint. Try to get the fit as clean as possible before assembly.
Dry-fitting the castle joint frame before adding glue.
A glue-and-sawdust paste helps hide small imperfections in the joints before sanding.
The assembled coffee table frame with castle joint legs, ready for the herringbone tabletop.
Step 5: Make the Herringbone Tabletop
Now it’s time to make the tabletop. I used a 510 × 360 × 9 mm plywood base and glued 12 mm thick plywood strips on top in a herringbone pattern.
Start by checking that the plywood base fits nicely on the coffee table frame. Then cut enough plywood strips for the pattern. I used strips about 60 × 11 × 12 mm. Sand the edges lightly to remove splinters before gluing them down.
TIP: Spend extra time setting the first herringbone pieces straight. The first row controls the rest of the pattern.
NOTE: Plywood is not fully waterproof. If the table will stay outside, protect the tabletop well and avoid leaving it exposed to standing water.
Cutting plywood strips for the tabletop using a crosscut sled.
1. Make the Herringbone Pattern
Before gluing, decide where the center of the herringbone pattern will be and draw a few guide lines on the plywood base. This is important because if the first pieces are not straight, the whole pattern will slowly drift.
I also like to attach a straight piece of wood along one of the guide lines. It works as a simple reference fence and helps keep the first row aligned.
Start gluing from the center. Place the first two pieces perpendicular to each other, then continue building the pattern outward. Take your time here and keep checking the alignment as you go.
Start the herringbone pattern from the center and keep checking the alignment.
2. Flatten and Finish the Tabletop
Once the glue dries, flatten the tabletop with a router sled. Take light passes with the router — if you cut too deep, the router can leave stronger marks that are harder to sand out later.
After flattening, sand the surface smooth. I usually start around 80 grit and work up to 300 grit. This removes the router marks and gives the tabletop a clean, even surface.
Tape the edges with painter’s tape, trim off the excess pattern pieces, and optionally bevel the tabletop edges for a cleaner look.
Flattening the herringbone tabletop with a router sled after the glue dries.
Sanding removes the router marks and smooths the herringbone tabletop.
Trimming the excess strips after the herringbone pattern is glued and flattened.
Finished tabletop.
3. Install the Tabletop
To install the tabletop, turn both the frame and the tabletop upside down so they sit flat in one plane. Mark the position of the tabletop from underneath.
Then cut two plywood strips and attach them along the marked lines to the inside of the frame. These strips help hold the tabletop in place. You can also secure the tabletop from below with small metal angles if needed.
Once the tabletop is installed, the coffee table is almost finished.
Installing the finished herringbone tabletop onto the castle joint frame.
This is what the finished coffee table looks like.
Finished outdoor coffee table with castle joint legs and a herringbone tabletop.
What to Pay Attention to When Building This Table
There are a few things that really matter when building this coffee table. The project is not too difficult, but the final result depends a lot on accuracy, especially around the castle joints and the herringbone tabletop.
Keep your layout settings the same Once you set your marking gauge, combination square, and table saw, don’t change the settings until all matching cuts are finished. This helps keep the castle joints consistent.
Sneak up on the joint fit When cutting the tenons, start a little away from the final line and slowly work your way to the perfect fit. A slightly tight joint can be adjusted, but a loose joint is much harder to fix.
Use the right jig for repeatable cuts A table saw tenoning jig makes the castle joint cuts much more repeatable. A crosscut sled or miter gauge with a stop block also helps when cutting the tenons and half-lap joints.
Don’t rush the herringbone pattern The first few pieces are the most important. If they are straight and centered, the rest of the tabletop will be much easier to assemble.
Protect the tabletop if used outside The frame can be made from outdoor-friendly wood, but the plywood tabletop needs proper protection from moisture. Finish it well and avoid leaving standing water on the surface.
Use sawdust and glue for small imperfections If you have tiny gaps in the castle joints, mix sawdust with wood glue and rub it into the joint. After sanding, it helps the joint look cleaner.
Wrap-Up
I really like how this outdoor coffee table turned out. The shape is simple, but the castle joint legs and herringbone tabletop make it feel much more special than a basic patio table.
The castle joints give the frame strength and a nice visible detail, while the herringbone pattern adds character to the tabletop. It takes a bit more time than making a plain top, but in my opinion, it is worth the extra effort.
This is a nice weekend woodworking project if you want to build something useful for your terrace, patio, or garden seating area. Just take your time with the layout, keep the joints accurate, and protect the table well if it will stay outside.
If you want to build the same table, you can download the current outdoor coffee table plans and keep the main dimensions close by while working in the shop. I’m also preparing a more detailed version of the plans with cleaner drawings, dimensions, and build references, so this project will be easier to follow directly from the workshop.
Finished DIY outdoor coffee table with castle joint legs and a herringbone tabletop — a strong and decorative build for the patio or terrace.
FAQ
What wood should I use for an outdoor coffee table?
For this build, I used spruce posts for the frame, but if the table will stay outside most of the time, cedar is a better option because it is naturally more resistant to moisture and decay. You can also use other outdoor-friendly woods, but make sure the whole table is properly protected with a suitable finish.
Can plywood be used for an outdoor tabletop?
Yes, but it needs to be protected well. Plywood is not fully waterproof, so if you use it for an outdoor table, seal the surface and edges properly and avoid leaving standing water on top. For longer outdoor use, keep the table under cover when possible.
Is a castle joint strong enough for a coffee table?
Yes, a castle joint is a strong three-way woodworking joint and works very well for table legs. It connects the leg and two aprons together, which makes the frame sturdy and also gives the table a nice visible detail.
Is a herringbone tabletop difficult to make?
The herringbone tabletop is not too difficult, but it takes patience. The most important part is keeping the first pieces straight and centered. Once the first row is aligned, the rest of the pattern is much easier to continue.
Do I need a tenoning jig to cut the castle joints?
You do not absolutely need one, but a table saw tenoning jig makes the cuts more accurate and repeatable. You can also cut castle joints with traditional tools, but for this project the table saw method is faster and easier when making the same joint several times.
Meet the creator of AllFlavor Workshop! As a passionate DIYer and woodworking enthusiast, Lukas is always looking for ways to make things himself rather than buying them off the shelf. With a keen eye for design and a knack for working with wood, Lukas enjoys sharing his craft with others and helping them discover the joy of building. Whether you're an experienced woodworker or a novice looking to try your hand at a new hobby, you're sure to find plenty of inspiration and tips on AllFlavor Workshop.