
If you want to make crosscuts on a table saw the best way how to do it is by using a crosscut sled. In this blog post, I’ll show you how to build one, using common materials that are probably already scattered around your workshop.
When it comes to crosscut sleds, you might encounter a few different designs – large ones, and small ones, with/without a supporting base. Some sleds have only one supporting runner and operate on just one side of the table saw blade, similar to a miter gauge. On the other hand, there are sleds that use both runners, and the table saw blade runs across the sled. The latter design provides superior stability and support for your workpiece and allows you to use a stop block for precise and repeatable cuts. For our project, we’ll be building a mini crosscut sled, without a base using two runners.
In this article, I’ll walk you through step-by-step how to build a simple crosscut sled (a crosscut fence). Plus, I’ll show you how to set it up and how to use it for your projects. So let’s start and let’s build this great table saw jig.
DIY Simple Crosscut Sled Video
If you want to see how it is done, watch the video below for a step-by-step guide on how to make a simple small crosscut fence.
I appreciate every YouTube subscriber. It’s free and easy to subscribe to — just Click Here To Subscribe. Thank you!
Table of Contents
- Simple Crosscut Sled Video
- Download Table Saw Crosscut Sled Plans
- The Material you will need
- General Questions
- What is a Table Saw cross-cut sled?
- Benefits of a Mini Table Saw Sled
- How to Build a Simple Mini Cross-Cut Sled for Your Table Saw
- Step 1: Cut Wooden Strips for the Fence
- Step 2: Build the Fence and Make a T-track
- Step 3: Build the Sled Base Support
- Step 4: Add a Stop Block
- Step 5: Add Miter Slot Runners
- Step 6: Add a Self-adhesive Measuring Tape
- How to Set Up and Use a Mini Table Saw Crosscut Sled
- Conclusion
- Woodworking Jigs Used
- Frequently Asked Questions
*Safety is your responsibility. Make sure you know what you’re doing and take all necessary safety precautions while working with power tools. Safety comes first!
The material you will need to build it
Mini Crosscut Fence
Plywood – 445mm x 65mm x 12mm (17.52″ x 2.56″ x 0.47″)
Plywood (back support) – 445mm x 90mm x 12mm (17.52″ x 3.54″ x 0.47″)
Oak Strips – 295mm x 19mm x 9mm (11.61″ x 0.75″ x 0.35″)
Other:
Table Saw Blade – https://amzn.to/48maocv
Wood Glue – https://amzn.to/48ltKhJ
Sandpaper Sheets – https://amzn.to/41OMx2p
Sanding Discs – https://amzn.to/4aGaY6r
Straight Router Bit – 6mm – https://amzn.to/3NQNDVX
Self Adhesive Measuring Tape – https://amzn.to/3TTjGZb
M6 Bolts, Washers, T-Nuts, Wood Screws
Hardware Assortment Kit – https://amzn.to/41PodgQ
DIY T-track Bolts
Tools:
Table Saw – https://amzn.to/47mWiGf
MicroJig GRR-RIPPER Push Block – https://amzn.to/3vjQSP7
Trim Router – https://amzn.to/3HbQcOg
Orbital Sander – https://amzn.to/48G9cjL
Cordless Hand Drill – https://amzn.to/3HqLEnH
F-Clamps – https://amzn.to/48ArzY1
T-track Clamps – https://amzn.to/3tEKaCW
One Hand Clamps – https://amzn.to/48jGxkZ
Large Square – https://amzn.to/4aGaT2D
Japanese Dozuki Saw – https://amzn.to/3NS5viZ
Machinist Square / Speed Square
Check all the Tools I Use
We may earn an affiliate commission when you buy something through our retail links. As an Amazon Associate AllFlavor Workshop earns from qualifying purchases.
What is a Table Saw CrossCut Sled?
A table saw crosscut sled is a woodworking jig, created to enhance the precision and safety of crosscutting on a table saw. Its design typically includes a sturdy platform with runners that fit securely into the miter slots of the saw. The primary function of a crosscut sled is to offer stability and control, enabling accurate crosscuts (at different angles), resulting in clean and perfectly square cuts. It proves particularly useful for cutting smaller workpieces and ensuring consistent and repeatable cuts.
Benefits of a Mini Table Saw Sled
There are several benefits to using a table saw crosscut sled. Regardless of the size, a saw sled offers increased safety by keeping your hands away from the blade and minimizing kickback. It improves the overall accuracy of your cuts and reduces the chance of mistakes. The advantages mentioned below are specific to a small table saw sled.
- Precise Cutting: A mini table saw sled is perfect for cutting smaller wood pieces with exceptional accuracy and control.
- Easy to Carry and Set Up: Thanks to its small size, a mini table saw sled is easily portable, making it an ideal tool for on-the-go projects.
- Quick Cross Cuts: With a mini table saw sled, you can make quick and repeatable cross cuts, saving you time and effort.
The best feature of this mini sled is its portability and user-friendliness. Whenever I need to cut small pieces of wood, especially narrow wooden strips, I can easily place the sled on the table saw, adjust the stop block, and start cutting. Having both a large table saw sled for bigger tasks and a small one for quick cuts has proven to be a great setup in my woodworking projects.
Let's start building!
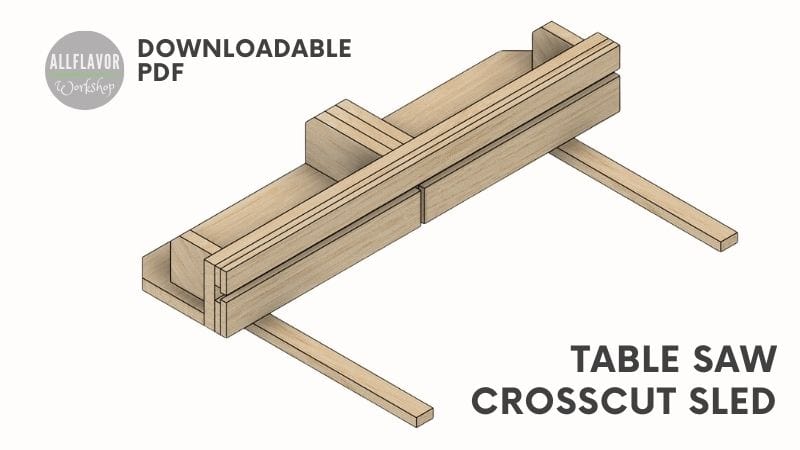
Making a small crosscut sled involves making the front fence, a t-track for accessories, and the miter slot runners. This one is specifically built for the DWE7491RS table saw.
The fence is made of plywood (as well as the stop block) and the runners are made of oak strips. Although other materials like aluminum or plastic can be used for runners, hardwoods such as oak or maple have proven to provide great results. These materials are less prone to expanding in response to workshop humidity and are also cost-effective compared to other alternatives.
Properties:
- Material: Baltic birch plywood, Oak strips
- Total dimensions: 445mm x 65mm x 120mm (17.52″ x 2.56″ x 4.72″)
- Clamping and attachment: DIY T-track bolts, Slot Clamps
How to Build a Simple Mini Cross Cut Sled for Your Table Saw
Step 1: Cut Wooden Strips for the Fence
Rip and crosscut the plywood strips to the desired dimensions. The length of the fence is 650mm, which is sufficient for any smaller cuts you want to make on the table saw.
Use a push stick or a push block when cutting narrow strips of wood. I am using a grr-ripper – you can easily adjust it and make all your cuts quickly.

Step 2: Build the Fence and Make a T-track
Glue all the plywood strips on top of each other. That will create a T-track which allows you to add additional accessories. Be careful not to let glue into the track during the gluing process. If any glue spills into the track, make sure to clean it up before it dries.
Fix the fence in a vise, smooth the edges, and route a shallow groove on top of the fence for a self-adhesive measuring tape. It is better to do it at this moment while the top of the fence is easily accessible.


Step 3: Build the Sled Base Support
Take a plywood strip (445mm x 90mm x 12mm) and attach it to the back of the fence using glue. This simple step provides support to the fence and significantly improves its stability. As a result, the fence slides smoothly and effortlessly in the miter track.
To make sure the fence is perfectly square, include two small square plywood cutoffs at each end of the fence. Additionally, add a few more cutoffs to the center of the fence for support (use glue or screws). These extra cutoffs also act as a protective cover for the blade, ensuring safety and preventing any potential injuries.


Step 4: Add a Stop Block
A stop block significantly helps with repeated cuts and makes crosscutting on a table saw much easier.
Cut 2 small plywood pieces. Glue them together at 90 degrees and add an extra screw for a better fix. To install the stopper use a t-bolt and a wing nut.
NOTE: If you are not planning on making a T-slot in the fence you can simply use a clamp to attach the stopper.


Step 5: Add Miter Slot Runners
First, cut two oak strips that will serve as runners in the miter slots. Make sure their thickness is slightly less than the height of the miters. The key is to get the right width for the runners—they should slide smoothly in the miter slots without any wobble, fitting perfectly. To achieve this, cut them slowly and gradually sneak up on the cut until you achieve a perfect fit.

Next, place a few washers in the miters and insert the runners. They should protrude just a little bit above the table. Apply glue on the ends of the runners (you can use ca glue for a quick fix) and position the crosscut fence on top of them.
Ensure the crosscut fence is square to the blade using the table saw fence. If your table fence is parallel to the blade, you can use a large square to position the miter sled correctly.


Once the glue has dried, flip the sled, and add a few screws from the bottom, remembering to countersink them. Round the edges of the runners with sandpaper and sand the bottom of the sled for smoother sliding.

TIP: Depending on your table saw, consider using paste wax for an even better slide
Step 6: Add a Self-adhesive Measuring Tape
Raise the blade to the middle of the crosscut fence and cut the kerf. Then attach the self-adhesive measuring tape on top of the fence based on the kerf thickness.


Now it is finished!

How to Set Up and Use a Mini Table Saw Crosscut Sled
Here are the steps on how to set up a mini saw sled and how to use it, explained in a few simple points:
- Align the Runners: Place the crosscut sled on the table saw and ensure the runners fit snugly in the miter slot.
- Attach and Set Up a Stop Block: Add a stop block to the sled for consistent cuts and set it to your desired length.
- Test the Cut: Before cutting your workpiece, do a test run with a scrap piece of wood to check the sled’s smooth movement and blade alignment.
- Position Your Workpiece: Place your wood piece on the sled, against the fence, and align it with the stop block if needed. Secure it before cutting.
- Start the Cut: Push the sled through the blade steadily and in control, letting the sled guide your workpiece smoothly.
Take your time to familiarize yourself with the crosscut sled. Every table saw works a bit differently, and so does a crosscut sled.
NOTE: Always keep safety in mind, using a blade guard and keeping hands away from the blade while cutting. The crosscut sled adds an extra layer of safety, but it’s essential to take proper precautions.


Conclusion
In conclusion, a crosscut sled is undoubtedly one of the must-have jigs for your table saw. Both a large sled to tackle bigger tasks and a small one for quick cuts are an invaluable addition to your workshop.
Setting up a mini sled is very easy, and once you have it in place, you’ll see what a great jig it is.

Build a Crosscut Sled
Woodworking Jigs I used to build it
These are the tools and jigs I have used to build the sled. Not all of them are necessary but they make the building process easier:
Frequently Asked Questions
What is the 5 cut method?
The 5 cut method is a technique to ensure perfect square cuts using your crosscut sled. You make five cuts on the same piece of wood, and by adjusting your sled, you aim for all five cuts to measure exactly the same, achieving precise 90-degree angles. A feeler gauge helps with those fine adjustments.
Do I need a crosscut sled for my table saw?
Absolutely! A crosscut sled is one of the basic table saw jigs you should have. It makes your woodworking life so much easier by giving you precise and safe crosscuts.
What is the best material for a table saw crosscut sled?
For the best results, go for quality materials like Baltic birch plywood, MDF, or HDF. These materials are strong, flat, and won’t warp easily, ensuring your sled stays sturdy and reliable.
What is the best material for crosscut sled runners?
You have a few options for runners that fit into the table saw miter slots. Hardwood strips like oak or maple work great, as does aluminum or high-density polyethylene (HDPE). They provide smooth and consistent movement for your sled.
Is a table saw sled safe?
Yes! A table saw sled increases safety significantly. It keeps your hands away from the blade, reducing the risk of accidents. Plus, it minimizes kickback, giving you more control over your cuts and adding that extra layer of safety to your woodworking projects.
