A mobile table saw workbench like this can make a big difference in a smaller workshop or garage. That was exactly why I built mine. I wanted something compact enough to fit the space, but still practical enough to support the saw properly, add storage, and make everyday work around the table saw easier.
This build is designed around the DeWalt 7491, but with small adjustments it can fit other table saws too. What makes it really useful is the modular design. The movable base, the frame, the storage, and the top are all built separately, so parts can be removed, replaced, or upgraded later if needed.
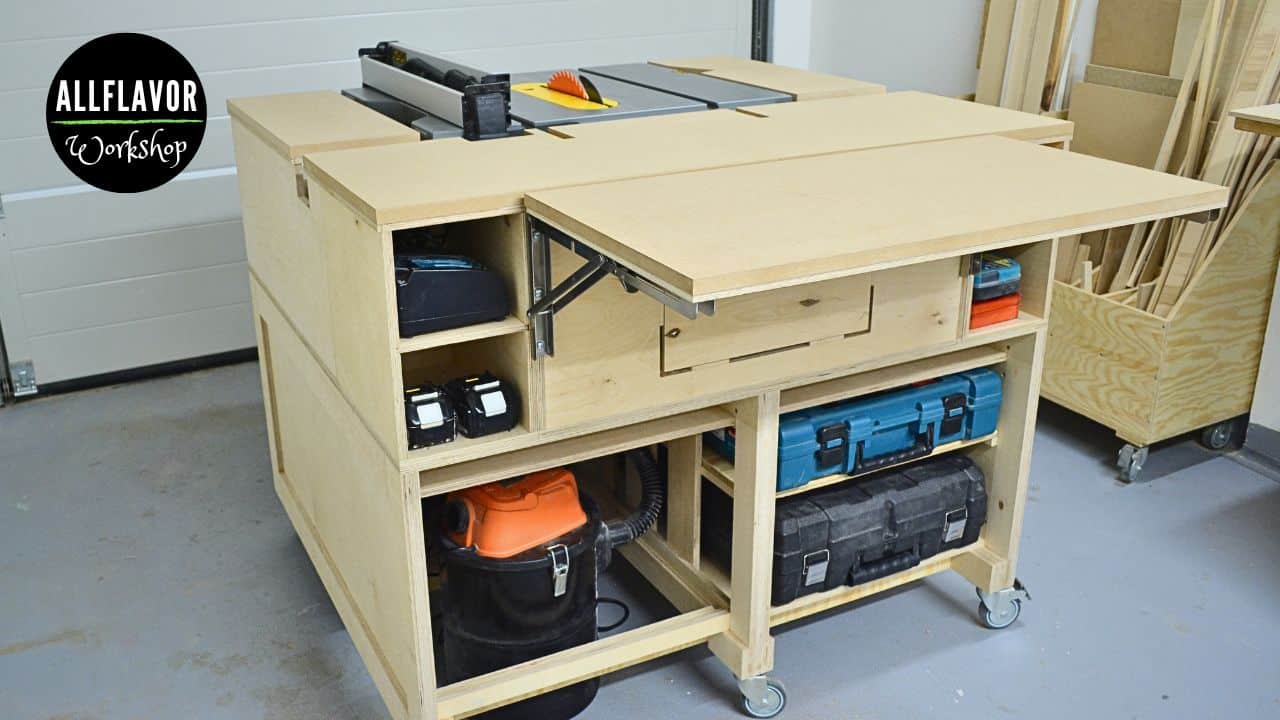
The structure is made from Baltic birch plywood, while the tabletop is MDF so it stays smooth, flat, and easy to replace once it wears out. The top sits flush with the saw, there is space for a vacuum and extra tools, and the workbench also includes an extendable folding outfeed table for extra support when needed.
The full size is 110 × 100 × 93 cm (43.3″ × 39.4″ × 36.6″), including the casters, so it still fits well in a smaller shop while giving you much more than just a saw stand.
If you want to see more workshop builds and table saw ideas like this, have a look at my woodworking plans page or check out Best Table Saw Jigs for Your Workshop.
Video: Watch the Build
If you want to see how the workbench comes together, watch the video below. It shows the overall build, the main parts, and how the modular setup works in practice.
And if you enjoy projects like this, feel free to subscribe to my YouTube channel for more woodworking jigs, workshop builds, and table saw projects.
- DIY Mobile Table Saw Workbench 1: Base Frame
- DIY Mobile Table Saw Workbench 2: Upper Cabinet Level
- DIY Mobile Table Saw Workbench 3: Tabletop and Outfeed Table
- DIY Mobile Table Saw Workbench – Addon: Tabletop T-tracks
Table of Contents
- Downloadable Table Saw Workbench Plans
- Materials and Tools
- Why Build a Mobile Table Saw Workbench?
- Let’s Start Building!
Step 1: Build the Base Frame
Step 2: Build the Upper Cabinet Level
Step 3: Build the Tabletop and Outfeed Table
Step 4: Final Assembly and Finishing Touches - Wrap-Up
- Frequently Asked Questions
*Safety is your responsibility. Make sure you know what you’re doing and take all necessary safety precautions while working with power tools. Safety comes first!
Table Saw Workbench Plans
Plans for this mobile table saw workbench are coming soon. I am currently working on them, and once they are ready, I will add them here.
The plans will include the key dimensions, main parts, materials, and the overall build layout to make the project easier to follow and build.
Materials Needed
For this build, I used Baltic birch plywood for the main body, a thicker MDF top, and sturdy locking casters to make the workbench mobile but stable. I’ll list all the materials and tools I used below so you can adjust the build to your own workshop and planer if needed.
Some of the links below may be affiliate links. If you buy through them, I may earn a small commission at no extra cost to you.
Wood
- Baltic Birch Plywood
- MDF
Hardware
- Caster Wheels – https://amzn.to/3Od2Qki
Other Materials
- Varnish – https://amzn.to/3TOoOO3
- Wood Glue – https://amzn.to/3RDDWLi
- Silicon Brush – https://amzn.to/3NPlgaq
- Sanding Discs – https://amzn.to/4aGaY6r
- Sandpaper Sheets – https://amzn.to/41OMx2p
- Protective Gloves – https://amzn.to/3TPCVT7
- Dust Rspirator – https://amzn.to/3H3hKWi
- Respirator Cartridge – https://amzn.to/48GCBKJ
- Eye Protection – https://amzn.to/3S9tD3q
Tools
- Table Saw – https://amzn.to/47mWiGf
- Orbital Sander – https://amzn.to/48G9cjL
- Cordless Hand Drill – https://amzn.to/3HqLEnH
- Table Saw Blade – https://amzn.to/48maocv
- Grr-Ripper Push Block – https://amzn.to/3vjQSP7
- Narex Chisels – https://amzn.to/3tHNJrT
- Wolfcraft L-Angle – https://amzn.to/4aGaT2D
- Spring Clamps – https://amzn.to/41Nuh9D
- F-Clamps – https://amzn.to/48ArzY1
- Bessey Parallel Clamps – https://amzn.to/3TNpa7p
- Piher Quick Clamps – https://amzn.to/48rmFMU
- WolfCraft Quick Clamps – https://amzn.to/48jGxkZ
- T-Track Clamps – https://amzn.to/3tEKaCW
- Bench Cookies – https://amzn.to/48iPHhn
- Drill Bit Set – https://amzn.to/48Kaaf7
- Forstner Bit Set – https://amzn.to/3Hd1aDb
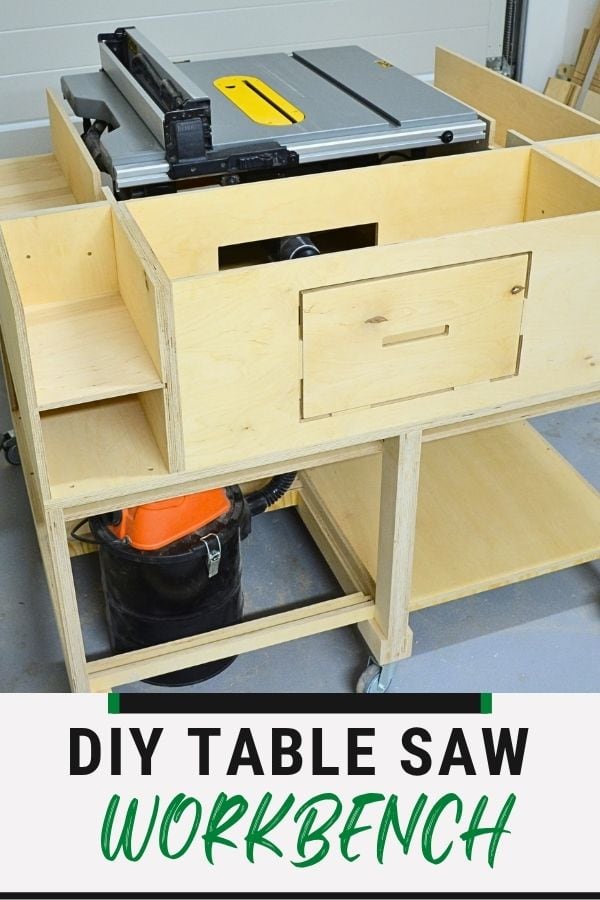
📌 Save THIS PIN to your Board on Pinterest!
Why Build a Mobile Table Saw Workbench?
A mobile table saw workbench makes a lot of sense if you work in a smaller workshop or garage and want to get more out of the space you have. Instead of having just a saw stand, you get one compact setup that gives you support for the saw, extra storage, more working surface, and the flexibility to move it when needed.
That is what I wanted from this build. I did not want a huge fixed station that would take over the whole shop, but I also did not want to keep working with the table saw as a standalone tool without proper support around it. This workbench sits somewhere in between — compact enough to fit a smaller space, but still practical enough to make daily work easier.
A few of the main benefits are:
- Mobility – you can move the whole workbench around the shop when needed
- Compact footprint – it fits a smaller workshop or garage much better than a large fixed station
- Flush support surface – the top sits level with the table saw, which helps when handling longer or wider pieces
- Extra storage – there is room for larger tools, smaller accessories, and even a vacuum
- Modular design – parts are built separately, so they can be removed, replaced, or upgraded later
- Extendable outfeed support – the folding outfeed table gives you extra support only when you need it
- Replaceable top – the MDF top is smooth and easy to swap out once it gets worn
For me, that combination is what makes this build worth it. It is not just a stand for the saw — it becomes a more complete workstation that helps you work better, stay more organized, and get more use out of the table saw in a smaller shop.
Let’s Start Building!
The idea behind this build is to make a compact but practical mobile table saw workbench that does more than just hold the saw. It combines a strong base frame, tool storage, a flush tabletop, and extra support through the folding outfeed section, all in one setup that still fits a smaller workshop.
The build is made in separate modular parts, which makes the whole process easier and also gives you more flexibility later on. The movable base carries the structure, the saw sits flush with the top, the shelves and boxes add storage, and the MDF top can be replaced when needed. That modular approach is one of the biggest strengths of this workbench.
How to Make a Mobile Table Saw Workbench
Step 1: Build the Base Frame
The first step is building the base frame, which is the main structure the whole workbench sits on. This part carries the weight of the table saw, the storage, the top, and everything else, so it needs to be strong, square, and well assembled. The finished base frame measures 110 × 100 × 60 cm (43.3″ × 39.4″ × 23.6″).
I built this part from Baltic birch plywood, cutting all the pieces to size first and then sanding and cleaning them a bit before assembly. The main goal here is to build three supporting frames and then connect them together with the larger deck pieces to form one solid rectangular base. I used glue and screws for the assembly, and once the frame was together, I cleaned up the joints with sandpaper and a chisel where needed.
This step is really about getting the structure right. Take your time and make sure the frames are square and the full base ends up as a clean rectangle. A quick check of the diagonal measurements helps a lot here. Once the frame is assembled, I add the heavy-duty locking casters to support the weight and make the whole workbench mobile. After that, I add the top made from two plywood boards, which creates the platform where the table saw will sit. You can also add varnish here if you want a bit more protection.
This base frame is one of the most important parts of the whole build. If it is solid, square, and stable, the rest of the workbench comes together much more easily.
TIP: Check the diagonals before fully locking everything in place. It is one of the easiest ways to make sure the base frame is truly square.
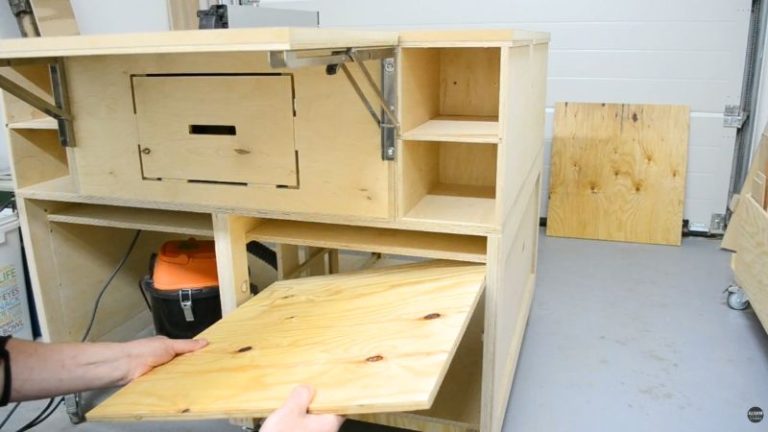
Step 2: Build the Upper Cabinet Level
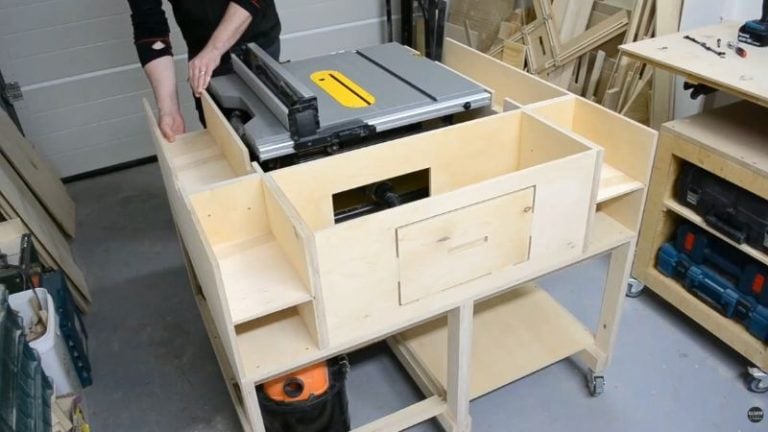
The second step is building the upper cabinet section, which brings the workbench up to the same level as the table saw and adds a lot of the storage and functionality around it. This part sits on top of the base frame and supports the upper work surface, while also creating space for shelves, tool storage, and access around the saw.
I made this section from Baltic birch plywood, cutting all the cabinet parts to size first and then assembling them with glue and screws. Some of the cabinets include dadoes for shelves, which helps with both strength and alignment. One important thing here is to make sure all cabinets end up at the same height, because they need to sit flush and support the upper workbench surface evenly.
In the back cabinet, I added a cutout for the dust hose and made a removable access door attached with magnets, which makes it much easier to reach in when needed. After that, I screwed all the cabinets to the base frame and checked that they sat properly in line with each other. I also made a few cutouts in the upper cabinet parts so the table saw fence can move freely and so there is access around the riving knife release handle.
TIP: Before fixing the cabinets in place, double-check that they are all at the same height and that the fence and handle cutouts give you enough room for smooth movement.
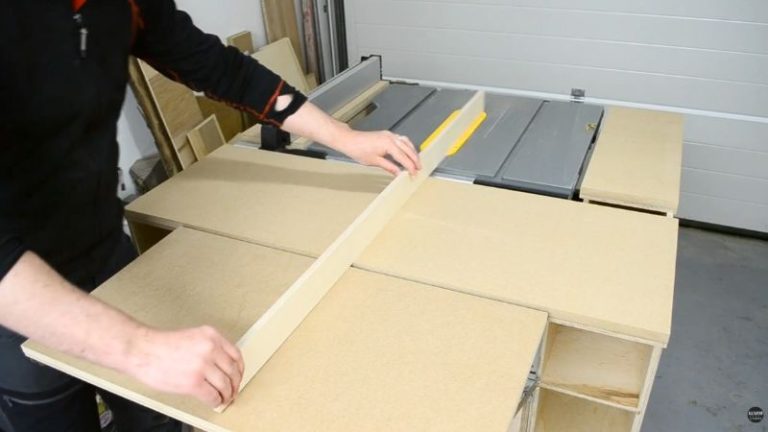
Step 3: Build the Tabletop and Outfeed Table
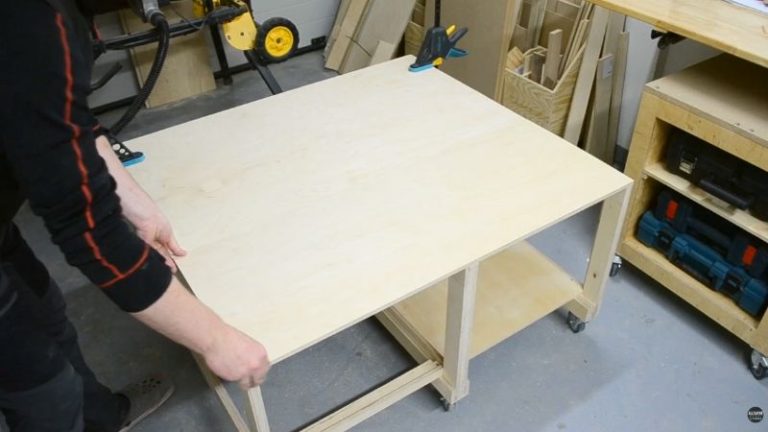
The next step is building the tabletop and the folding outfeed table, which turn the workbench into a much more usable table saw station. This is the part that creates the main support surface around the saw, helps with handling larger workpieces, and makes the whole setup feel like one continuous workstation.
For the top, I used a combination of plywood underneath and MDF on top. I like this approach because the plywood gives the structure support, while the MDF creates a smooth, flat, replaceable work surface. I first cut all the pieces to size, attached the plywood sections to the middle cabinet layer with screws, and then temporarily fixed the MDF tops in place with clamps before screwing them from below. That makes it easier to align everything properly and keep the separate top sections level with each other.
Once the main top was in place, I installed the table saw and adjusted its height so it sits flush with the surrounding workbench surface, or even just a tiny bit higher. I used a few plywood support pieces underneath the saw to fine-tune that position. It is also important here to check that the fence still slides freely after the saw is set in place.
At the back, I added the collapsible outfeed table, which gives extra support for longer boards when needed. Just like the main top, the outfeed section should sit level with the rest of the workbench so the material can pass smoothly across it.
TIP: Take your time with leveling here. Even small height differences between the saw, the main top, and the outfeed table can affect how smoothly material moves across the workbench.
Step 4: Final Assembly and Finishing Touches
The last step is about bringing the whole mobile table saw workbench together and adding the final details that make it practical to use every day. At this point, the main structure is already done, so now it is about fitting the remaining parts properly and making sure the table saw can still be used comfortably inside the workbench.
One of the important finishing details is cutting slots in the tabletop so a table saw sled can slide further without being blocked by the surrounding surface. I also add the needed cutouts in the top for access to things like the riving knife release lever and for removing or adjusting the table saw fence more easily. These small details matter a lot, because they keep the workbench from getting in the way of how the saw is actually used.
After that, I cut and install the shelves and add the side panels, which help finish the build visually and make the storage sections more usable. If you want, this is also a good point to install an electrical outlet extender, which can make the whole setup even more practical in a small workshop.
TIP: Before making the last cutouts in the tabletop, test the saw fence, sled, and main controls once more. It is much easier to adjust openings now than after everything is fully finished.
Wrap Up
This mobile table saw workbench is exactly the kind of shop build I like having around. It does not just hold the saw — it gives you a better work surface, more storage, extra outfeed support, and the flexibility to move the whole setup when needed. In a smaller workshop or garage, that makes a big difference.
What I like most is that it stays compact and modular. The main parts are built separately, the top is replaceable, there is room for storage and dust collection, and the whole workbench can still be adjusted or improved later. So even though it is a fairly simple build in principle, it gives back a lot in daily use.
If you use your table saw often and want a setup that feels more complete without taking over the whole shop, this is definitely a project worth building. It makes the saw easier to use, keeps more things close at hand, and helps the whole workspace feel more organized.
And if you want to see more workshop builds, jigs, and plans like this, have a look at my woodworking plans page.
Frequently Asked Questions
Can I build a mobile table saw workbench for a saw other than the DeWalt 7491?
Yes. This build is designed around the DeWalt 7491, but with small adjustments you can adapt it to fit other table saws as well. The main thing is to measure your saw carefully and make sure the top and support structure match its size and height.
Why use MDF for the top instead of plywood?
I like using MDF for the top because it is smooth, flat, and easy to replace once it gets worn out. The plywood underneath gives the structure strength, while the MDF creates a better work surface around the saw.
Do I really need an outfeed table on a mobile table saw workbench?
You do not absolutely need one, but it makes the setup much more practical. A folding outfeed table gives extra support for longer boards and panels, and because it folds away, it does not take up permanent space in the shop.
What are the main benefits of a mobile table saw workbench?
The biggest benefits are mobility, storage, better support around the saw, and a more complete workstation. Instead of using the saw on its own stand, you get a setup that is easier to work with, better organized, and more useful in a smaller workshop or garage.
Can I add more features to this table saw workbench later?
Yes, that is one of the nice things about this build. Because it is modular, you can upgrade or adjust parts later. You can add things like more drawers, T-tracks in the top, extra storage, or other features that fit the way you work.
