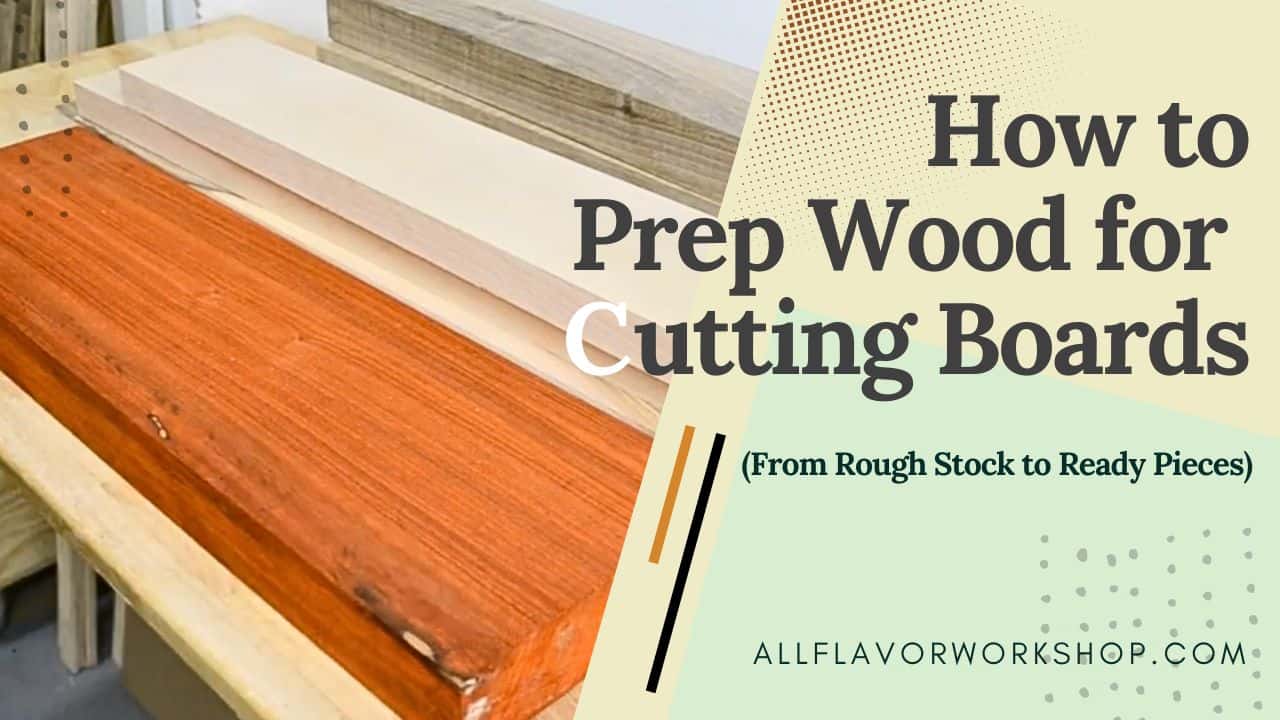
When people talk about making cutting boards, they usually focus on the glue-up, the pattern, or the final look. But before any of that happens, there is one step that makes a huge difference — prepping the wood properly.
In my workshop, I usually do not start with perfectly prepared stock that is ready to glue up right away. More often, I start with rough boards, slabs, or pieces that still need a bit of work before they can become part of a cutting board. That means checking the wood, cutting away bad sections, flattening it, straightening an edge, and getting everything into a shape that is actually usable for the build.
That is what this guide is about. I’ll walk through how I prep wood for cutting boards before the actual glue-up starts, what techniques I use, and where simple jigs can make the whole process easier and more reliable.
And if you want to see the jigs that help most with cutting board work, take a look at my Best Jigs to Make Cutting Boards article.
Table of Contents
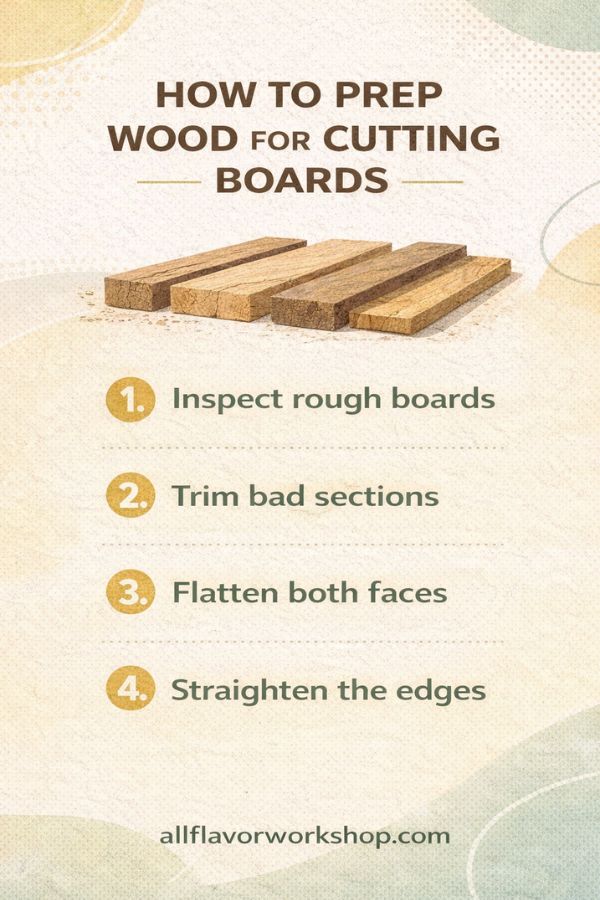
- What Prepping Wood for Cutting Boards Actually Means
- Start by Checking the Board
- Remove What Should Not Stay
- Flatten the First Face
- Straighten an Edge
- Plane to Consistent Thickness
- Rip the Stock and Get It Ready for Glue-Up
- Planer vs. Router Flattening Jig: When to Use Which
- Common Mistakes When Prepping Wood for Cutting Boards
- Wrap-Up
- FAQ
📌 Save THIS PIN to your Board on Pinterest!
What Prepping Wood for Cutting Boards Actually Means
Before getting into the process, it helps to define what I mean by prepping wood for cutting boards. I am not talking about cutting a log into slabs or drying lumber from scratch. I start later — when I already have rough boards, slabs, or leftover stock that could work for a cutting board, but is not ready to use yet.
At that point, the goal is simple: turn that rough stock into wood that is flat, straight, clean, and ready for glue-up. That can mean trimming cracked ends, removing bark, flattening a warped face, straightening one edge, planing to thickness, or ripping the wood into usable strips.
This part is not the flashy one, but it makes a big difference later. If the stock is not prepped properly, the glue-up becomes harder and small problems tend to follow you through the rest of the build.
NOTE: The goal here is not to make the wood perfect right away. The goal is to make it workable, safe to machine, and ready for the next stage.
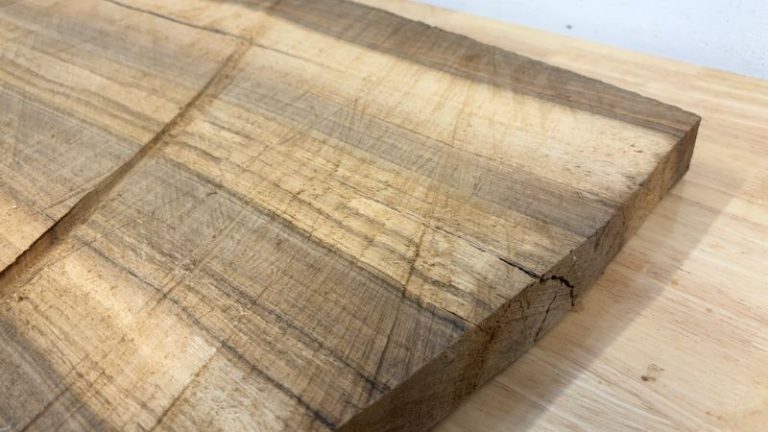
Start by Checking the Board
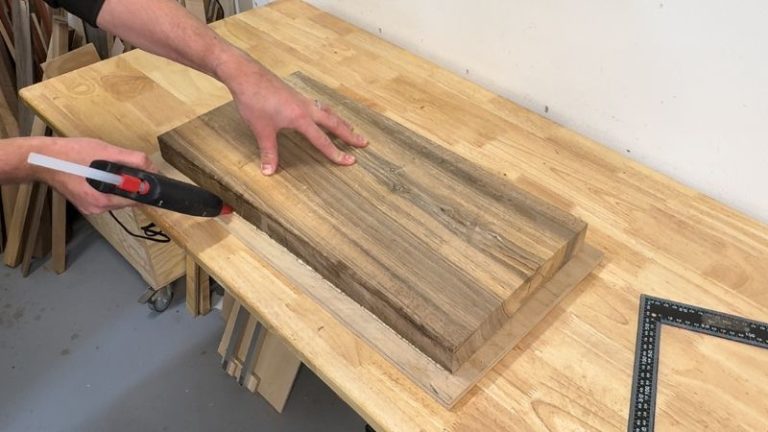
Before I cut, plane, or flatten anything, I first take a good look at the board itself. This is the point where I check for cracks, knots, bark, live edges, twist, cup, or any sections that clearly should not stay in the final piece. Sometimes the board is mostly fine and just needs light prep. Other times, it is obvious right away that I need to cut away a bad section before doing anything else.
I also try to think a step ahead here. Not every part of the board needs to be saved, and sometimes it makes more sense to break a longer rough piece into smaller usable sections first. That can make the rest of the prep much easier and safer.
This quick check also helps me decide what method I will use next. If the board is only rough, I might move straight to flattening. If it has a live edge or no clean reference side, I already know I’ll probably need my DIY Jointer Sled. If the board is badly warped, I know I need to be more careful before sending it through the planer.
TIP: Do not look only at the surface. Sight down the board and check how it sits on a flat surface. That usually tells you much more than the rough face alone.

Remove What Should Not Stay
Once I know what I am working with, the next step is getting rid of the parts that will only cause problems later. That can mean trimming off cracked ends, cutting around defects, removing bark, or simply cutting the board down into smaller sections that are easier to handle.
I try not to force a bad piece into the build just because it looks usable at first glance. If a crack is likely to spread, or an edge is too rough to work from, it is usually better to remove it early and work with clean stock from the start.
This is also where I decide whether a live edge stays or goes. For most cutting boards, especially if I want straight strips and a clean glue-up, I remove it. But on some simpler or more decorative builds, keeping more of the original shape can still make sense.
NOTE: Removing a little more material early is usually better than fighting the same defect through the rest of the build.

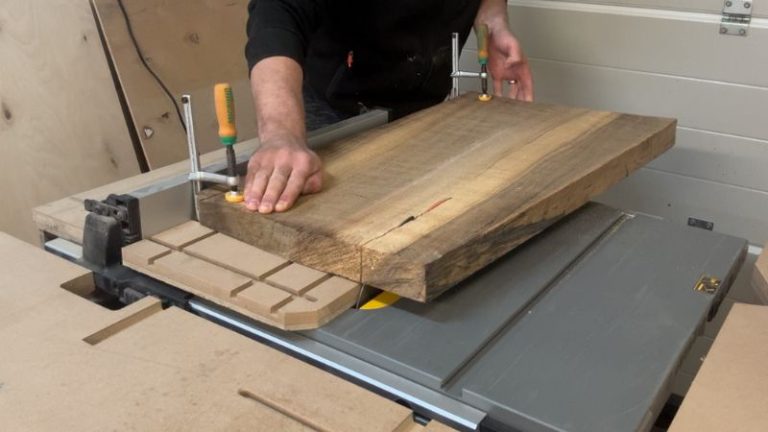
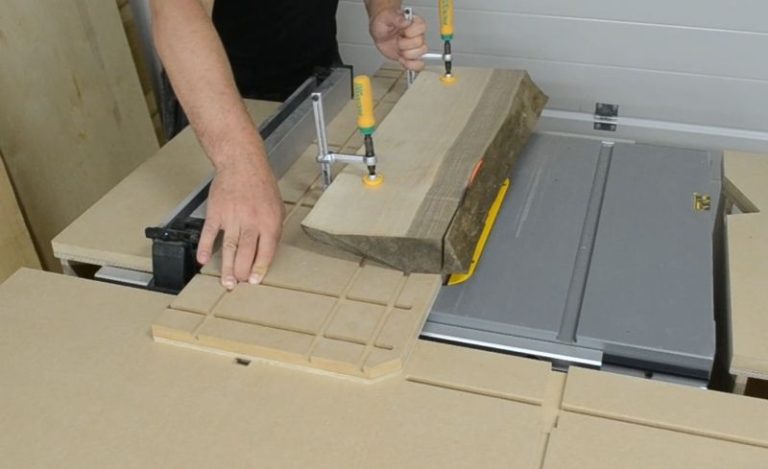
Flatten the First Face
After trimming the board down, I usually move to flattening the first face. This is one of the most important steps, because everything else builds from it. If the first face is not reasonably flat, it gets much harder to plane the board properly, keep thickness consistent, or get a clean glue-up later.
If the board is only a little rough and sits fairly well, I can usually start with the planer. But if it is twisted or rocking, I first secure it to a flat support board so it can go through the planer more safely. That gives me a stable base and helps me create the first usable flat face.
In some cases, a Router Flattening Jig makes more sense, especially when I am working with a wider piece, a more awkward board, or a surface I do not want to send through the planer right away. I do not use the exact same method every time, but the goal is always the same: get one reliable flat face that I can reference from the next steps.
Once that first face is flat enough, the board becomes much easier to work with.
TIP: Do not try to force a badly warped board straight through the planer on its own. If it is rocking, support it first.


Straighten an Edge
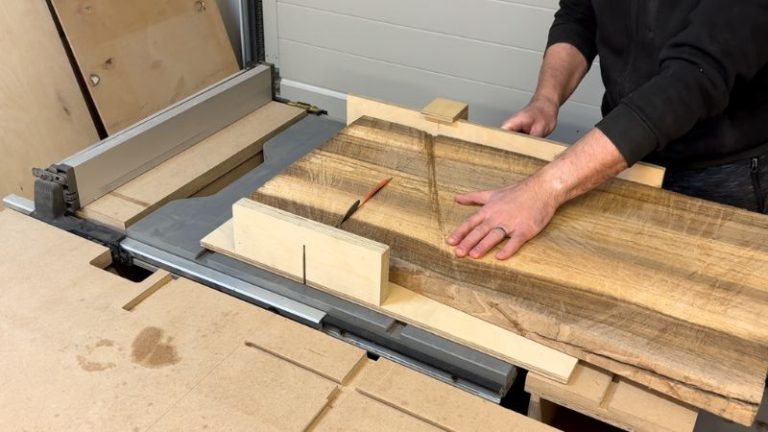
Once I have one flat face, the next thing I want is one straight edge. That edge becomes the reference for ripping the board to width, cutting cleaner strips, and keeping the rest of the stock more accurate.
If the board already has a decent factory edge or one side is straight enough, this part can be quick. But when I start with rough stock, live edges, or uneven pieces, I usually use my DIY Jointer Sled to create that first clean reference edge on the table saw. It is one of the simplest jigs, but for this kind of work it is really useful.
After that first edge is straight, I can rip the opposite side parallel and move on with much more control.
TIP: You only need one good reference edge to make the next cuts easier and more accurate.
Plane to Consistent Thickness
With one face flat and one edge straight, the board is in much better shape to finish the prep properly. At this point, I run it through the planer until I get a consistent thickness across the piece. That does not always mean taking off a lot of material — sometimes it is just enough to clean up the second face and make the board uniform.
This step matters because once I start cutting strips or preparing pieces for glue-up, I want the stock to match as closely as possible. If the thickness is inconsistent, that usually shows up later in the glue-up, flattening, or sanding.
I still try to be careful here and remove only what makes sense. Especially with nicer hardwood, it is easy to lose more material than you expected if you rush the process.
NOTE: Consistent thickness is usually more important than chasing the absolute maximum yield from every piece.

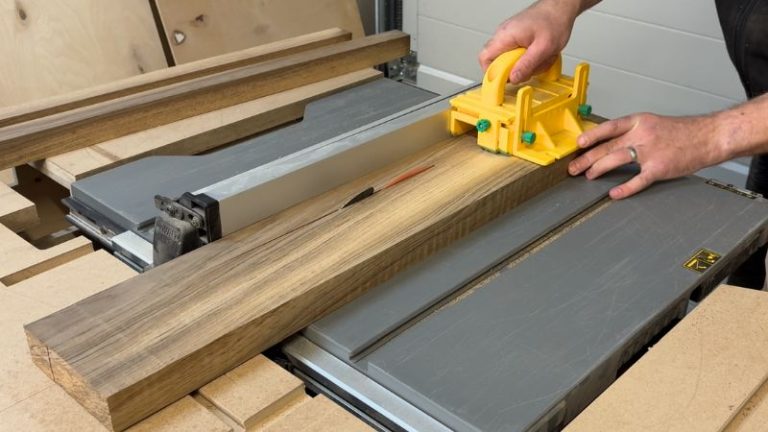
Rip the Stock and Get It Ready for Glue-Up
Once the board is flat, straight, and planed to thickness, I can start cutting it into the pieces I actually need for the cutting board. Most often, that means ripping it into strips on the table saw. At this point, the stock is much easier to work with, and the cuts are more predictable because I already have good reference faces and edges.
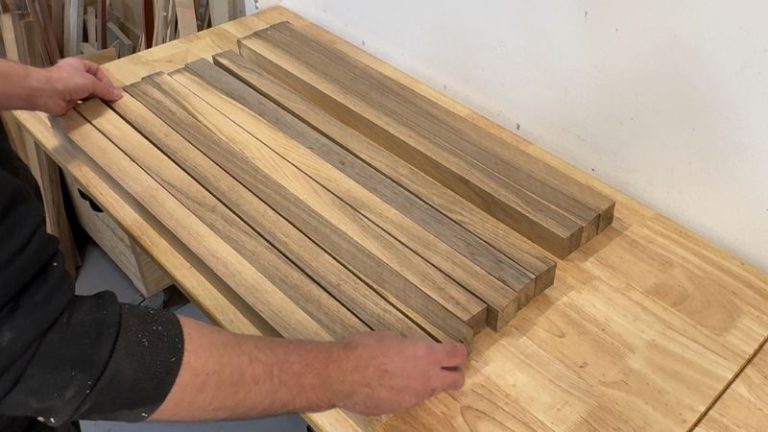
This is also the stage where I start thinking more about the final board. Depending on the build, I may keep the strips simple and uniform, or I may arrange them by color, grain, or overall look before the glue-up. For a more visual build, this planning can make a big difference.
The important part is that by the time I get here, the wood is finally ready for the actual cutting board process — not just rough lumber that still needs fixing.
TIP: Before glue-up, lay the pieces out dry first. It is the easiest way to check spacing, color balance, and whether anything still needs a small adjustment.
Planer vs. Router Flattening Jig: When to Use Which
Both the planer and the Router Flattening Jig can be useful when prepping wood for cutting boards, but I do not see them as interchangeable. Most of the time, if the board is manageable and safe to run through the planer, that is the faster and simpler option. It is great for cleaning faces, bringing stock to thickness, and preparing pieces for a more standard glue-up.
The router flattening jig becomes more useful when the board is too awkward, too wide, badly warped, or simply not something I want to send through the planer yet. It is also a very practical option later in the process for end grain cutting boards, where planing can be risky and tear-out becomes a bigger concern.
If you want a deeper comparison of both methods, I also wrote a full guide on How to Flatten a Cutting Board: Planer vs Router Flattening Jig.
So for me, the planer is usually the first choice for regular prep work, while the router flattening jig is the better choice for more difficult situations or special cases.
| Situation | What I’d Use | Why |
|---|---|---|
| Board is rough but mostly stable | Planer | Fast and efficient for cleaning the faces and bringing the stock to thickness |
| Board is twisted or rocks too much | Planer + support board | Creates a safer and more controlled way to flatten the first face |
| Board is wide, awkward, or difficult to machine | Router Flattening Jig | Gives more control when the planer is not the best option |
| End grain board after glue-up | Router Flattening Jig | Avoids the risk of tear-out that can happen in the planer |
NOTE: In many builds, it is not really planer vs. router flattening jig. Sometimes both have their place, just at different stages of the project.
Common Mistakes When Prepping Wood for Cutting Boards
Prepping the wood well makes the whole cutting board build easier. And when something feels off later in the process, it often comes back to this stage. These are some of the most common mistakes I would watch out for:
- Starting with a board that is too rough or unstable
If the board is heavily twisted, cracked, or rocking on the machine bed, do not treat it like regular stock right away. It usually needs a different approach first. - Trying to skip the first flat face
This is one of the biggest ones. If you do not get one usable flat reference face first, everything after that becomes less accurate and harder to control. - Working without a straight reference edge
Before ripping strips or sizing pieces, it helps a lot to have one clean straight edge. That is exactly where something like a Jointer Sled can save time and frustration. - Removing too much material too quickly
Especially with hardwood, it is easy to lose more stock than you wanted. I usually try to remove only what is necessary to get the board flat, straight, and workable. - Ignoring the final purpose of the board
A simple edge grain board and a more decorative or [end grain cutting board] do not always need the exact same prep strategy. It helps to think a step ahead before deciding how far to take the stock at each stage. - Using the planer where a different method would be safer
Sometimes the planer is the best tool, and sometimes it is not. Wide, awkward, badly warped, or later-stage end grain pieces often make more sense with a Router Flattening Jig or another more controlled setup.
TIP: The goal is not to make the wood perfect as fast as possible. The goal is to make it safe, predictable, and ready for glue-up.
Wrap-Up
When I make cutting boards, I do not usually start with perfectly prepared stock. Most of the time, I begin with rough boards or slabs that still need some work before they are ready for the actual build. And over time, I have found that this prep stage makes a much bigger difference than it may seem at first.
If the wood is flat, straight, and clean, everything that comes after gets easier — cutting strips, glue-up, flattening, and final sanding. If the prep is rushed, those problems usually come back later. That is why I try to slow down here and get the stock into a shape that is actually workable before moving on.
For me, this is not the most exciting part of making a cutting board, but it is one of the most useful things to get right. A well-prepped piece of wood gives you a better start, more control, and usually a much cleaner final result.
And if you want to make that whole process easier, have a look at my Best Jigs to Make Cutting Boards article. It covers the jigs I use most often when building, flattening, and finishing cutting boards in the workshop.
FAQ
1. How do you prep wood for cutting boards?
To prep wood for cutting boards, start by checking the board for cracks, bark, twist, cup, or other defects. Then remove any bad sections, flatten one face, straighten one edge, plane the stock to a consistent thickness, and cut it into pieces that are ready for glue-up.
2. Do I need perfectly flat wood before making a cutting board?
You do not need the wood to be perfect right away, but you do want it to be flat enough, straight enough, and consistent enough for the next step. The goal is to create reliable reference faces and edges so the glue-up and later flattening are easier.
3. Can I use rough lumber for cutting boards?
Yes, you can use rough lumber for cutting boards, as long as you prep it properly first. That usually means trimming defects, flattening the board, straightening an edge, and planing it before starting the cutting board build.
4. Should I use a planer or a router flattening jig?
It depends on the board. A planer is usually the faster option for stock that is stable and manageable. A Router Flattening Jig makes more sense for boards that are too wide, badly warped, awkward to machine, or for later-stage end grain flattening.
5. What is the most important step when prepping wood for cutting boards?
The most important part is creating good reference surfaces. In practice, that means getting one flat face and one straight edge before moving further. Once you have those, the rest of the prep becomes much easier and more accurate.
