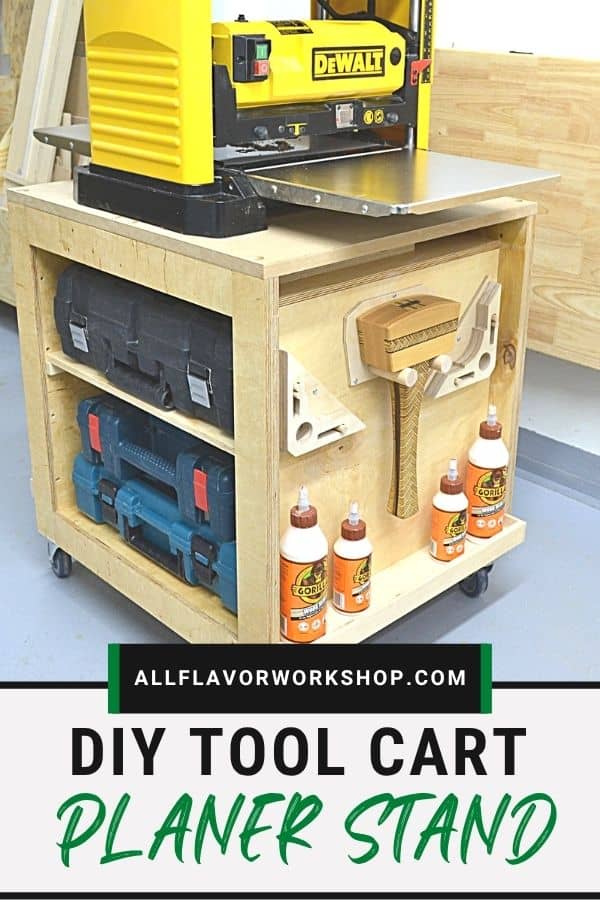
I built this DIY planer stand because my planer had been sitting on the floor for way too long, and I was getting pretty tired of it. Every time I wanted to use it, I had to bend down, move a heavy machine around, and set it up again. It was inconvenient, impractical, and honestly just annoying to work that way.
At the same time, I needed a bit more storage in the workshop, so it made sense to combine both into one build — a mobile planer stand with storage that also works as a rolling tool cart.
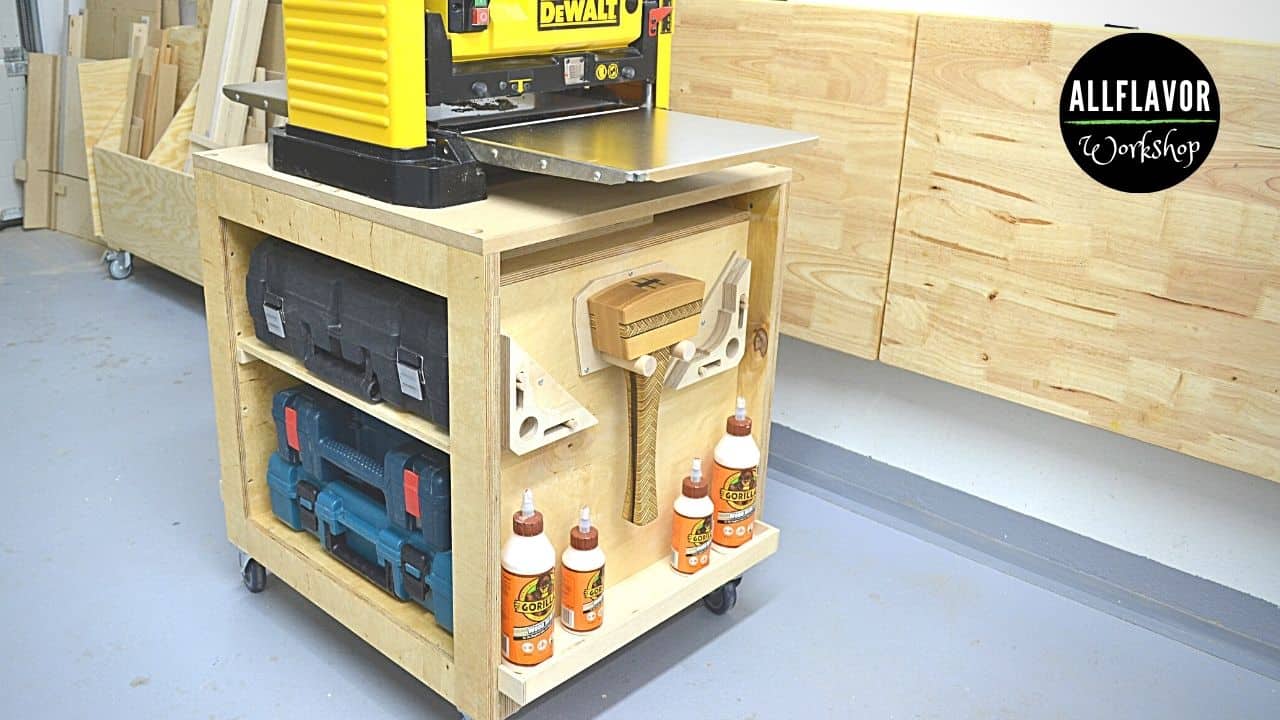
The cart is made from Baltic birch plywood, with a thicker MDF top and sturdy locking casters, which are a must if you want the planer to stay stable while running. The final size is 72 × 56 × 72 cm (28.3 × 22 × 28.3 in), including the casters, so it doesn’t take up too much space but still gives you a useful work surface and storage.
Inside, there are two larger shelves accessible from both sides, plus a narrow shelf right below the top. On the two closed sides, I added a few hooks and small shelves for extra shop accessories and tools. So in the end, this build is not just a planer stand — it’s a practical cart that helps keep the workshop more organized.
👉 If you want to see more shop builds and jigs like this, check out my woodworking plans page.
Video: How to Build a DIY Planer Stand with Storage
If you want to see the full build in action, you can watch the video below. It follows the whole process and gives a better look at how the cart comes together in the workshop.
I appreciate every YouTube subscriber. It’s free and easy to subscribe to — just Click Here To Subscribe. Thank you!
Table of Contents
- Plans: Coming Soon
- Materials Needed
- Before You Start: Why Build a DIY Planer Stand?
- Let’s Start Building!
Step 1: Build the Two Main Support Frames
Step 2: Glue and Finish the Two Frames
Step 3: Add the Inside Panels
Step 4: Add the Casters and Finish the Cart Core
Step 5: Make and Install the Tabletop
Step 6: Add the Shelves and Side Storage - Wrap-Up
- FAQ
*Safety is your responsibility. Make sure you know what you’re doing and take all necessary safety precautions while working with power tools. Safety comes first!
Plans: Coming Soon
The plans for this DIY planer stand are not available yet, but I’m working on them now. Once they’re ready, I’ll add them here so you can build the same cart more easily in your own shop.
Materials Needed
For this build, I used Baltic birch plywood for the main body, a thicker MDF top, and sturdy locking casters to make the stand mobile but stable. I’ll list all the materials and tools I used below so you can adjust the build to your own workshop and planer if needed.
Some of the links below may be affiliate links. If you buy through them, I may earn a small commission at no extra cost to you.
Wood
- Baltic Birch Plywood
- MDF
Hardware
- Caster Wheels – https://amzn.to/3Od2Qki
Other Materials
- Varnish – https://amzn.to/3TOoOO3
- Wood Glue – https://amzn.to/3RDDWLi
- Silicon Brush – https://amzn.to/3NPlgaq
- Sanding Discs – https://amzn.to/4aGaY6r
- Sandpaper Sheets – https://amzn.to/41OMx2p
- Protective Gloves – https://amzn.to/3TPCVT7
- Dust Rspirator – https://amzn.to/3H3hKWi
- Respirator Cartridge – https://amzn.to/48GCBKJ
- Eye Protection – https://amzn.to/3S9tD3q
Tools
- Table Saw – https://amzn.to/47mWiGf
- Orbital Sander – https://amzn.to/48G9cjL
- Cordless Hand Drill – https://amzn.to/3HqLEnH
- Corded Drill (Press) – https://amzn.to/3NSA3Bo
- Dewalt Planer – https://amzn.to/3vAiNut
- Table Saw Blade – https://amzn.to/48maocv
- Grr-Ripper Push Block – https://amzn.to/3vjQSP7
- Narex Chisels – https://amzn.to/3tHNJrT
- Wolfcraft L-Angle – https://amzn.to/4aGaT2D
- Spring Clamps – https://amzn.to/41Nuh9D
- F-Clamps – https://amzn.to/48ArzY1
- Bessey Parallel Clamps – https://amzn.to/3TNpa7p
- Piher Quick Clamps – https://amzn.to/48rmFMU
- WolfCraft Quick Clamps – https://amzn.to/48jGxkZ
- T-Track Clamps – https://amzn.to/3tEKaCW
- Bench Cookies – https://amzn.to/48iPHhn
- Drill Bit Set – https://amzn.to/48Kaaf7
- Forstner Bit Set – https://amzn.to/3Hd1aDb
📌 Save THIS PIN to your Board on Pinterest!
Before You Start: Why Build a DIY Planer Stand?
A planer is one of those tools that works great when it has a proper place in the shop. If it sits on the floor, or if you have to keep moving it around, using it quickly becomes a hassle. That was exactly my situation, and it was one of the main reasons I decided to build this stand.
For me, the goal was not just to get the planer off the floor, but also to make better use of the space around it. This build gave me a stable mobile base, a proper working height, and extra storage at the same time. If you have a benchtop planer and want it easier to move, easier to use, and less in the way when you are not working with it, a DIY planer stand like this makes a lot of sense.
Let’s Start Building!
The build itself is pretty straightforward, but it gives you a very useful result. We’ll make a sturdy plywood body with open storage from both sides, add a solid MDF top for the planer, and finish it off with locking casters so the whole cart can move around the shop when needed.
The goal here was simple: make something strong enough for a heavy benchtop planer, practical enough to add storage, and compact enough to fit into a small workshop without wasting space.
How to Make a Planer Stand
Step 1: Build the Two Main Support Frames
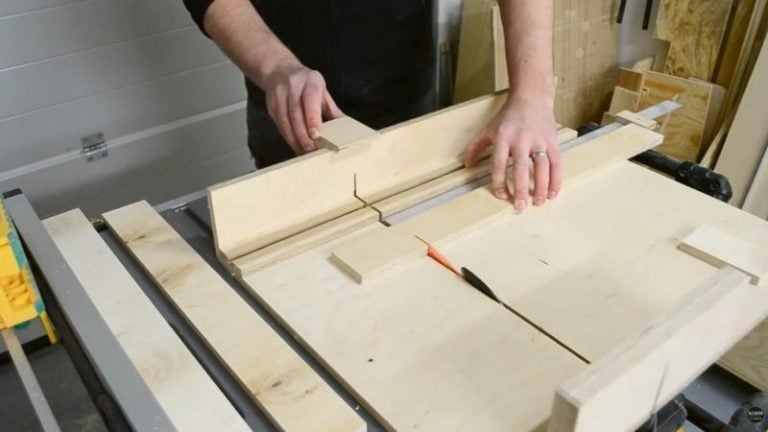
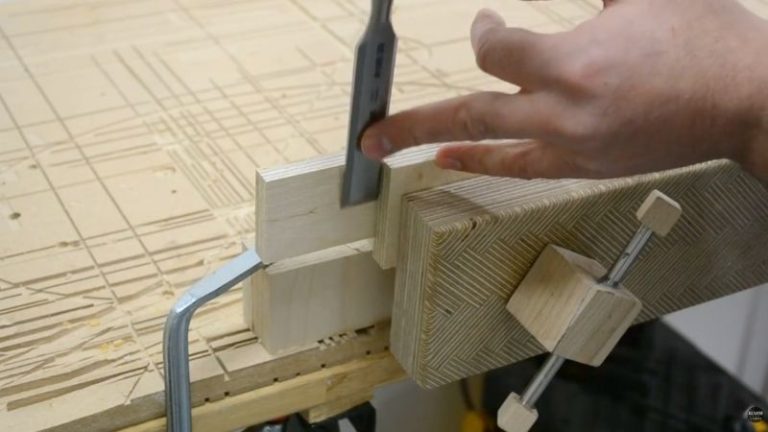
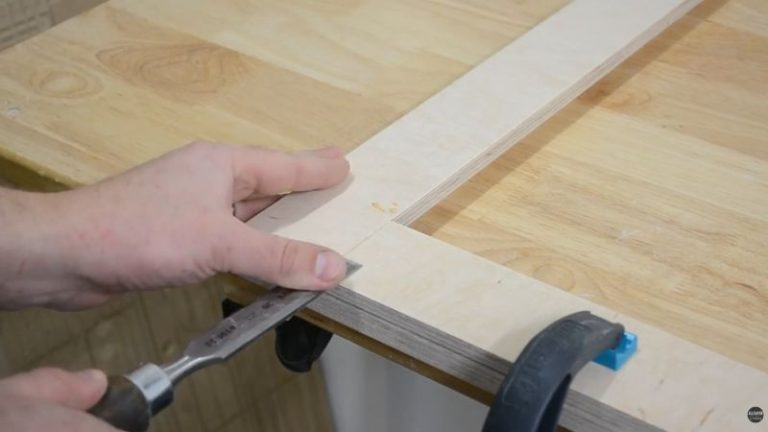
I started the build by making the two main rectangular support frames that form the core of the cart. These frames carry most of the structure, so I wanted them to be solid and accurate from the start.
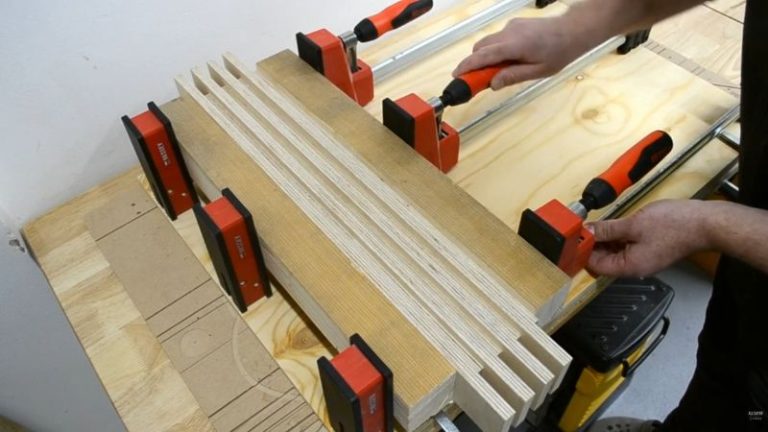
To make them stronger, I built each frame piece by laminating two layers of Baltic birch plywood together. That gives the frame more rigidity, but it also makes the corner tenons stronger and more durable. In the end, I cut 16 identical parts in total — two matching pieces for each frame member — then glued them together to end up with 8 final parts, with 4 parts per frame.
After gluing, I cleaned off the excess glue while it was still damp, then used a chisel to remove any dried residue that could get in the way of a tight joint. Once that was done, I lightly sanded the pieces with an orbital sander and a sanding block, and did a dry fit of the frames to check that everything lined up well and stayed square.
TIP: Clean up glue squeeze-out before it fully hardens. It saves time later, and more importantly, it helps the joints fit together properly.

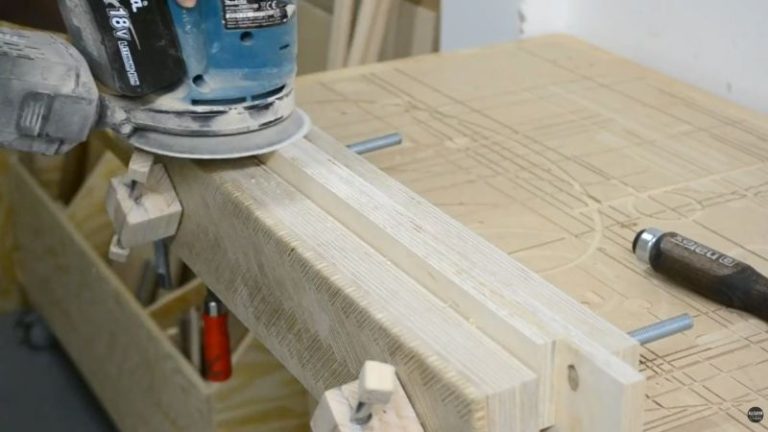
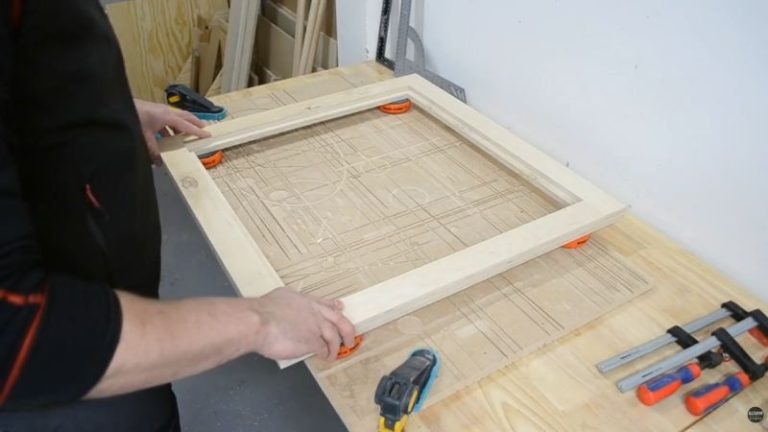
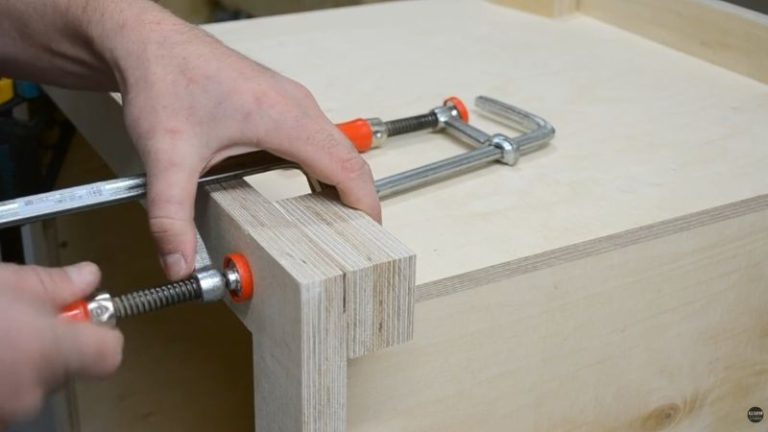
Step 2: Glue and Finish the Two Frames
Once all the frame parts were ready, I glued the ends, brought each rectangle together, and clamped everything in place. I used large clamps across the frame to pull it tight, and smaller clamps on the corners to apply pressure from multiple directions. This part is worth taking slowly — tighten the clamps bit by bit and keep checking the frame for squareness as you go.
After the glue dried, I cleaned up the joints with a chisel to remove any hardened squeeze-out, then sanded the corners and the whole frame with an orbital sander. To make the construction even stronger, I also added two screws into each corner.
TIP: Label each frame clearly as top and bottom before moving on. It makes the final assembly much easier later.

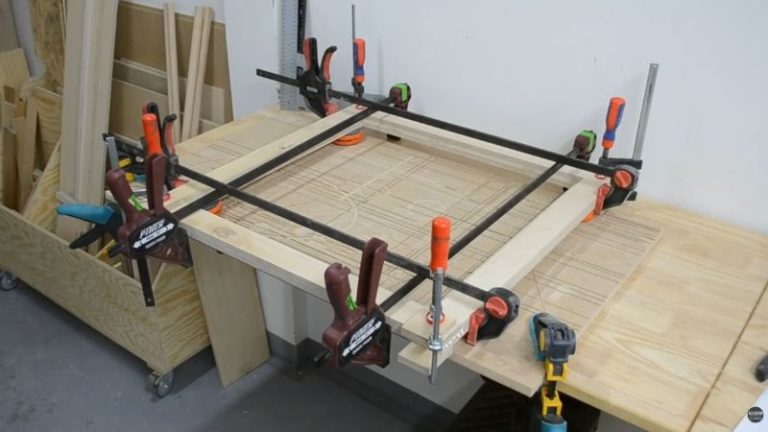
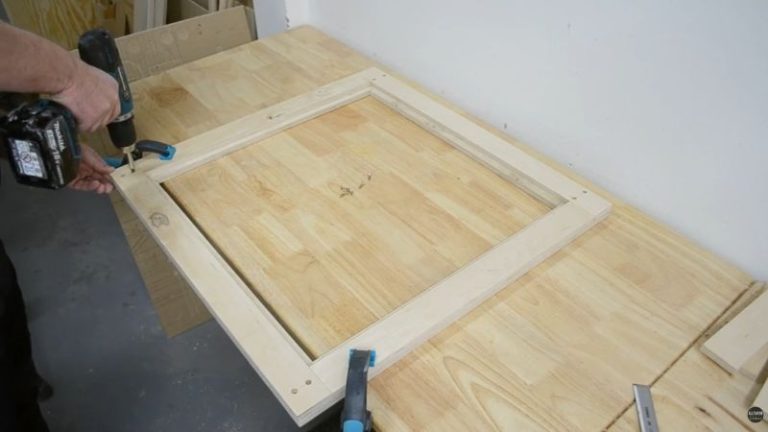
Step 3: Add the Inside Panels
With both support frames finished, the next step was to connect them with the inside panels and turn them into the main body of the cart. I cut all the panels to size on the table saw, then started fitting them one by one between the frames.
I clamped the first panel in place with large clamps to hold everything steady, then screwed it in. I didn’t use glue here — screws are enough, and it also makes things easier if you ever want to adjust something later. It’s a good idea to predrill the holes first and sink the screw heads slightly below the surface for a cleaner result.
I repeated the same process for the other three inside panels. Once they were all in place, I checked that everything lined up nicely and gave the assembly a light sanding. At this point, the cart already starts to feel solid, and you’re left with the main core of the stand.
NOTE: Predrilling really helps here, especially near the panel edges. It keeps the plywood from splitting and makes the assembly cleaner.
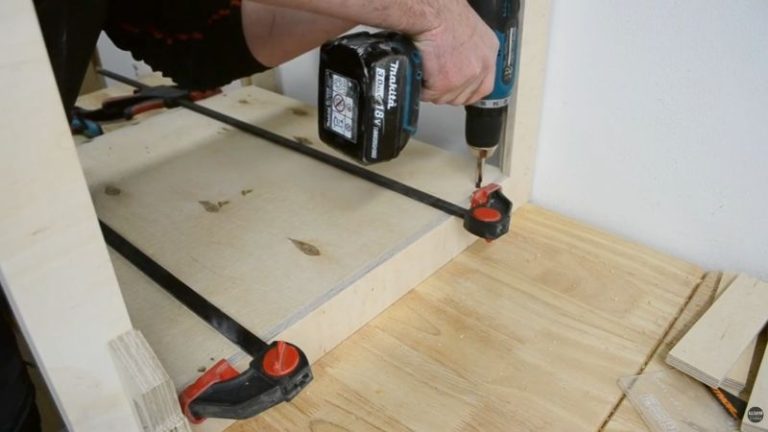

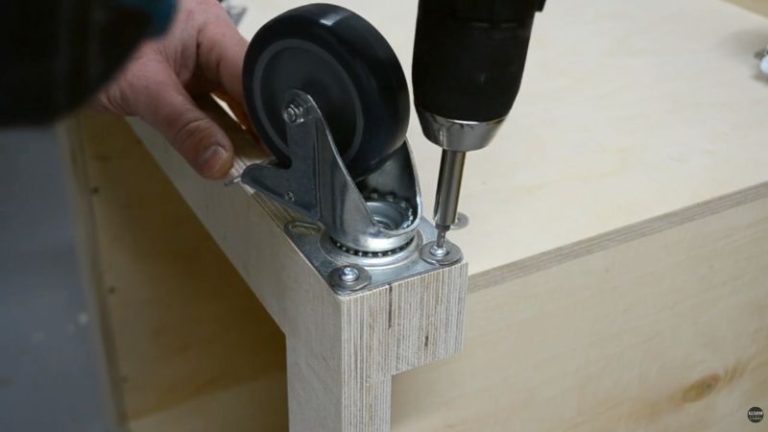
Step 4: Add the Casters and Finish the Cart Core
Next, I added the casters and finished the main body of the cart. Since the casters need a solid place to mount to, I first glued a few plywood blocks to the bottom of the construction where each caster would go. Once the glue dried fully, I predrilled the holes and screwed the casters in place.
After that, I checked that the cart rolled properly and made small adjustments where needed. That part is worth doing before moving on, especially if you want the stand to move smoothly and sit stable once the planer is on top.
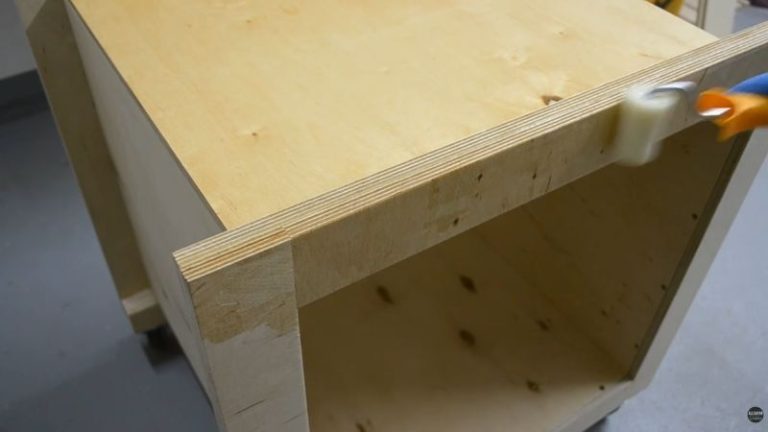
With the casters installed, I finished the core with a few coats of varnish. It gives the cart a cleaner look and helps protect the plywood from everyday workshop wear.
TIP: Test the cart on a flat floor after installing the casters. If something feels off, it’s much easier to fix it now than later when the cart is fully finished and loaded.
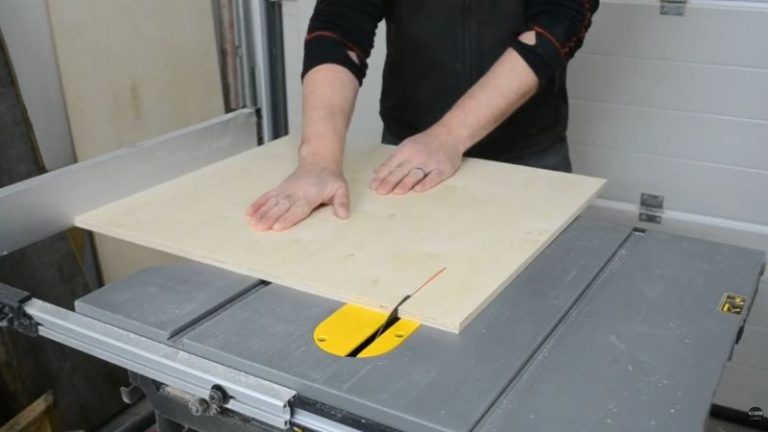
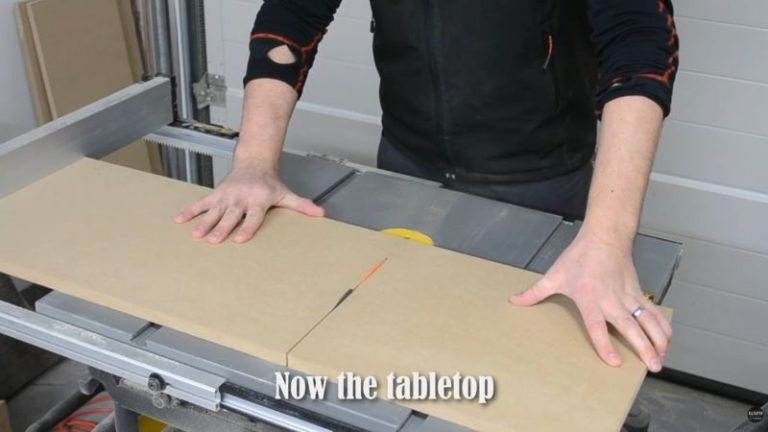
Step 5: Make and Install the Tabletop
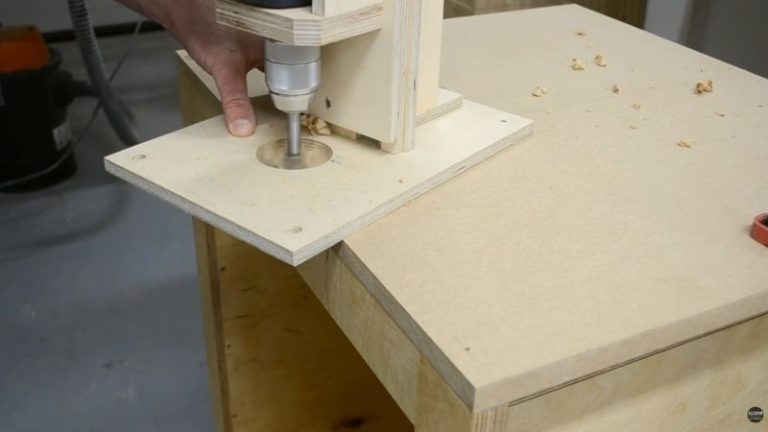
With the cart core finished, the next step was to add the tabletop. I cut two thicker MDF pieces on the table saw, aligned them on top of the cart, and fixed them temporarily in place with clamps. Then I predrilled the mounting holes using my portable drill stand and screwed the top down to the core.
I used only screws here, with no glue, because that gives me the option to replace the tabletop later if it gets worn out or damaged. Just make sure the screw heads sit flush with the surface so the planer rests flat on top.
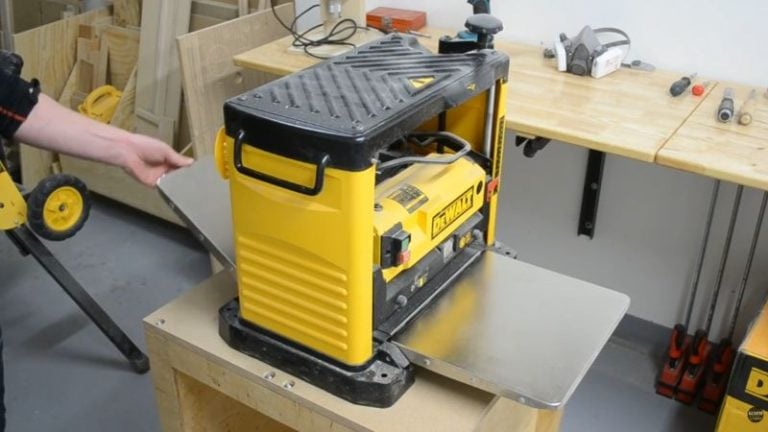
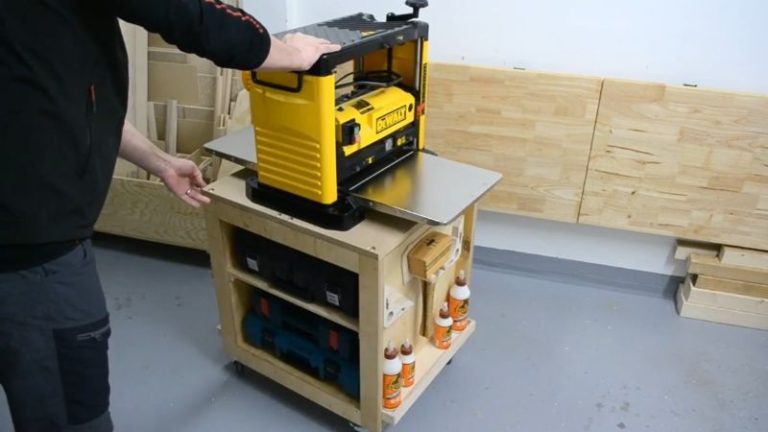
As a rough test, I placed the planer on the tabletop to see how everything felt and whether the stand worked as intended. If you want, you can also drill mounting holes in the top and bolt the planer down so it stays fixed in place during use.
NOTE: Using screws only is a nice option for workshop furniture like this. The top is the part that will take the most wear, so being able to replace it later is practical.
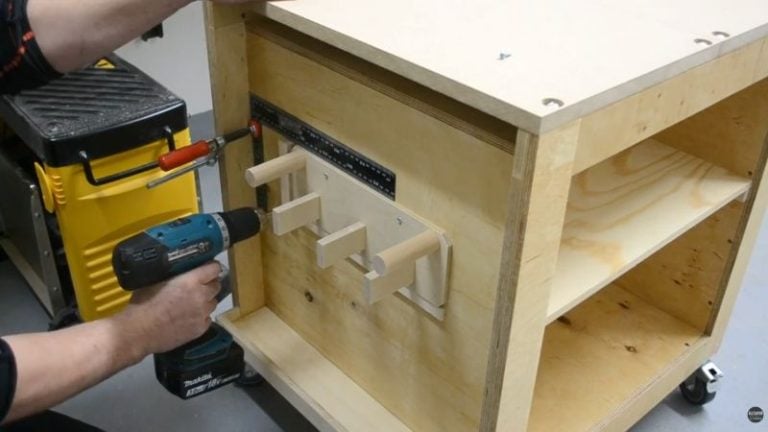
Step 6: Add the Shelves and Side Storage
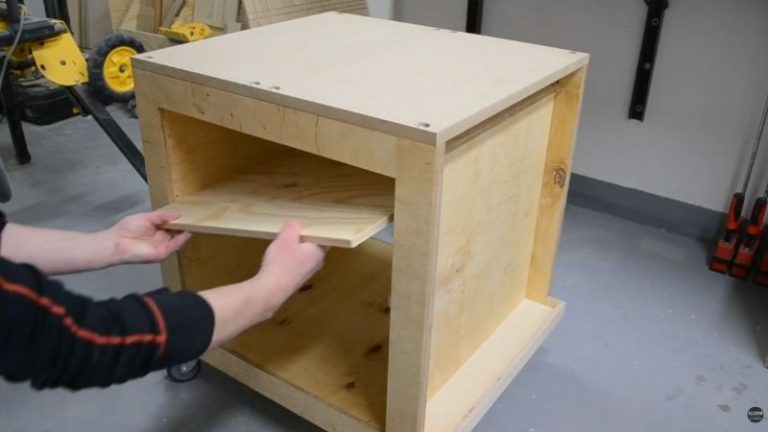
The last step was to finish the cart with a few simple storage additions. I cut one shelf to size and installed it in the middle of the cart, which split the inside into two larger storage spaces. That gave me enough room for some of the tools I use often, mainly things like my drill or trim router.
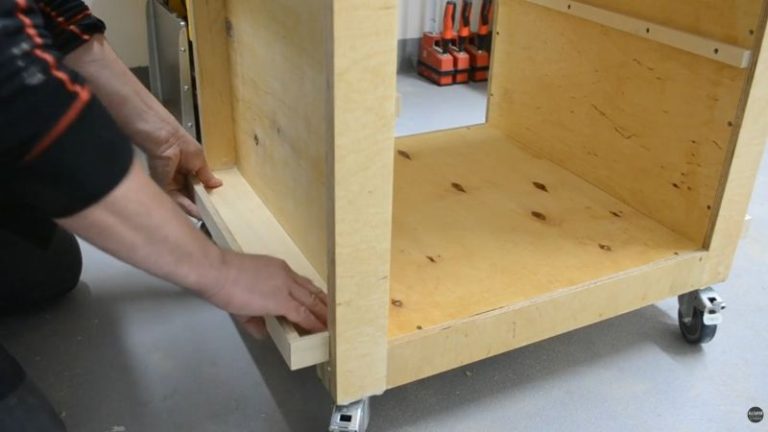
After that, I added two smaller side shelves for things I like to keep close at hand, such as glue bottles and drill batteries. On the outside panels, I also mounted a few simple storage racks to hold different shop accessories — things like spring clamps, corner clamps, my table saw crosscut sled, router table, or even a wooden mallet.
That’s the nice thing about a cart like this — once the main structure is done, you can customize the outside storage however it fits your workshop. At this point, the planer stand is finished and ready to use.
TIP: Think about the tools you reach for most often before adding the side storage. It’s better to build the shelves and racks around your own workflow than to copy a layout that may not fit your shop.
Wrap-Up
This build solved a real problem I had in the workshop. My planer had been sitting on the floor for way too long, and every time I wanted to use it, it was a hassle. I had to move it around, set it up, and bend down to work. Building this cart finally gave it a proper place, while also adding some extra storage I needed anyway.
What I like most about it is that it does more than one job. It works as a DIY planer stand, a rolling tool cart, extra shop storage, and even as a small mobile work surface if there’s no planer on top. You could also swap the planer for another benchtop tool, like a belt sander, which makes it even more useful in the long run.
I didn’t bolt the planer to the tabletop, but it definitely makes sense if you want it fixed in place. And one thing I wouldn’t save money on here is the casters. They carry all the weight, and they need to lock properly so the cart stays still while the planer is running.
Overall, this is one of those workshop builds that really earns its space. If you want to see more shop builds and jigs like this, check out my woodworking plans page.
FAQ
1. What is the best height for a DIY planer stand?
The best height depends on both your planer and your own working comfort. In my case, I built the stand so the planer sits at a practical height for feeding boards in and out without bending down too much. If you are building your own, it is worth checking the final height with the planer already in mind, especially if you use it often.
2. Should you bolt a planer to the stand?
Yes, in many cases it makes sense. I did not bolt mine down, but if you want the planer to stay permanently in place, bolting it to the tabletop is a smart idea. It adds stability and keeps the machine from shifting, especially when planing longer or heavier boards.
3. What kind of casters should I use for a planer stand?
Use strong casters that can handle the full weight of the cart and the planer together. Locking casters are especially important, because you do not want the stand moving while the planer is running. This is one of those parts where it is worth spending a bit more for something reliable.
4. Can a planer stand also work as a rolling tool cart?
Yes, and that is exactly why I built mine this way. A planer stand with shelves and side storage can easily do double duty as a rolling tool cart. It saves space, keeps tools organized, and can still be moved around the workshop when needed.
5. What else can you use a planer stand for?
If the planer is not mounted permanently, the cart can be used for other benchtop tools as well, like a belt sander or similar workshop tools. It can also work as a small mobile work surface or storage cart, which makes it a very practical build for smaller workshops.
