
If you’re building woodworking jigs regularly, you’ve probably noticed how quickly they start piling up — each one made for a single purpose, taking up space until you need it again (if ever). That’s exactly why I started moving toward modular jig designs in my own workshop.
Modular jigs are flexible systems made from reusable components. Instead of building a brand-new jig every time, you create interchangeable parts — like a base, adjustable fence, stops, or T-track runners — that can be combined in different ways depending on the project. This saves time, reduces waste, and gives you a huge amount of control over how your jigs function.
They’re also ideal if you’re working in a small shop like I do. With limited space, having a few multi-purpose, adjustable jig modules is far more efficient than keeping a dozen different full jigs on the shelf.
In this post, I’ll walk you through how to build modular woodworking jigs that are:
- Adaptable – Easily swap or reconfigure parts for different uses
- Compact – Store flat or in smaller containers
- Precise – Designed to hold tolerances even when reused
These jigs work great for everything from router table add-ons to circular saw guides, and can evolve over time as you build new parts or find new needs.
🛠️ You’ll also find tips, a comparison table, and links to detailed plans if you’d like to build your own modular jig system.
Table of Contents
- Planning Your Modular Jig System
- Modular Jig Examples: Base + Add-on Systems
- Table Saw Sled as a Modular Base
- Router Table as a Modular Base
- Key Components of a Modular Woodworking Jig
- Benefits of Modular Jigs for Small Workshops
- Modular vs Fixed Jigs: Key Differences
- Final Thoughts
- FAQ: Modular Woodworking Jigs
Planning Your Modular Jig System
Before you start cutting parts, it helps to step back and think about what you actually want your modular jigs to do. A good system isn’t just a set of fancy parts — it’s a way to build faster, adapt more easily, and reduce clutter in your workshop.
Here’s how I approach the planning phase:
1. Start With Core Functions
Think about the most common tasks you do — crosscuts, dados, routing grooves, repetitive drilling, etc. These become your “modules.”
Ask yourself:
- Can one jig base support multiple tasks?
- Can a fence or stop block be reused across builds?
- Will the jig work for different tools (router, circular saw, drill press)?
2. Choose a Shared Base Design
A consistent base size helps keep things compatible. You can:
- Use 12mm (15/32″) plywood or MDF as the base for strength and stability
- Add T-tracks or predrilled holes for attaching different modules
- Use inserts or dowels for quick alignment and repeat setup
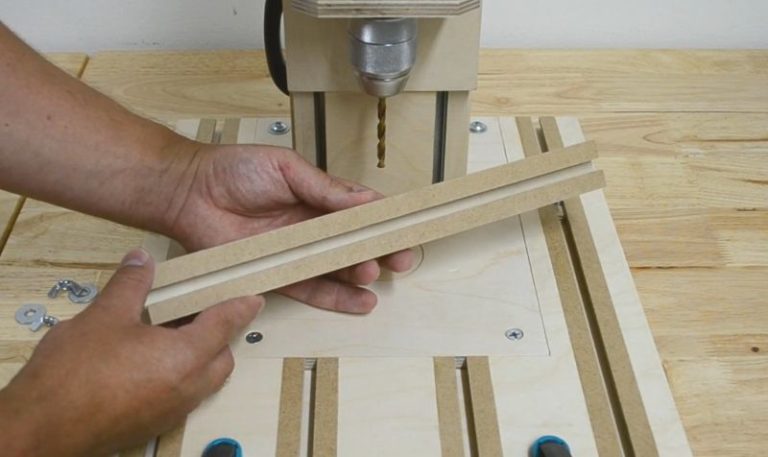
Precision Matters
When you’re building a base that will serve as the foundation for multiple jigs, accuracy is everything. Misaligned holes or crooked tracks won’t just throw off a single jig — they’ll carry over to every addon you attach. A few mm off on your base can mean a full project ruined later.
Take your time squaring edges, measuring hole spacing, and laying out T-tracks or alignment points. It’s worth it. This is one of those areas where a quick drawing or CAD sketch can really pay off — even simple ones help avoid mistakes.
3. Design With Adjustability in Mind
Modular doesn’t mean fixed — you want pieces that move, slide, rotate, and adjust.
For example:
- Adjustable fences using T-bolts and knobs
- Sliding templates for router cutouts or dados
- Stop blocks with repeatability settings
4. Think Reusability and Expansion
This system should grow with you. That’s the beauty of modular jigs — they don’t need to be finished or perfect. You can:
- Add new pieces later
- Swap in different runners or attachments
- Use the same fence for multiple tools
💡 TIP: Sketch it out first — even a rough hand drawing helps avoid layout problems later. If you use CAD, save your parts separately so you can mix and match them later.
Modular Jig Examples: Base + Add-on Systems
One of the biggest advantages of modular jigs is that you don’t have to build everything from scratch each time. You start with a solid, precise base — and build on it with smaller add-ons for specific tasks.
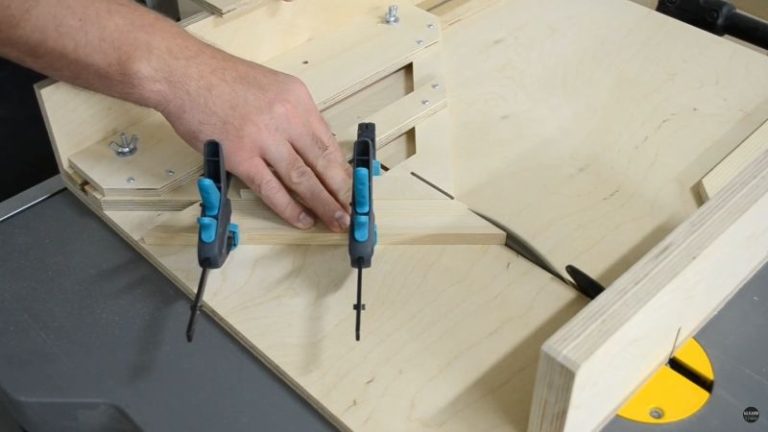
Table Saw Sled as a Modular Base
The table saw crosscut sled is more than just a sled — it’s a platform.
I use mine as a foundation for several add-ons, including:
- Miter Sled – for cutting clean 45° angles or custom frame joints
- Spline Jig – fits onto the sled and helps reinforce miters
- Hexagon jig– ideal for accurate multi-sided cuts
You can also incorporate a stop block system, T-tracks, or clamps to increase repeatability and versatility.
Router Table as a Modular Base
Router tables are one of the best candidates for modular jig setups — especially when designed with adjustability in mind.
I built mine to support several jigs that slide along the fence or clamp to the top:
- Box Joint Jig – for evenly spaced, repeatable joints
- Router Table Spline Jig – used for strengthening picture frame corners
- Tenon Jig for Router Table– allows for controlled vertical routing and angled tenons
Add in adjustable featherboards, a fence with T-tracks, and fence stop blocks, and you’ve got a full modular system that adapts to almost any project.

Key Components of a Modular Woodworking Jig
Building modular woodworking jigs means designing with flexibility, repeatability, and precision in mind. The key is creating components that can adapt to different builds — without needing to start over every time.
Here are the elements I always focus on when making my modular jigs:
| Component | Function | My Tip |
|---|---|---|
| Flat, Accurate Base | Provides a stable and square foundation for all add-ons | Use MDF or Baltic birch plywood for consistency |
| T-Tracks & Slots | Allow fences, stops, and add-ons to slide or lock into place | Add tracks early — they expand your jig’s potential |
| Mounting Points | Enable quick add-on attachments or reconfigurations | Pre-drill holes and use T-nuts where needed |
| Consistent Sizing | Ensures compatibility between all jig parts | Keep alignment holes, runners, and spacings standardized |
| Quality Hardware | Keeps everything tight and secure | Invest in T-bolts, wing nuts, and wooden knobs |
🛠️ Want to start modular? Check out my simple crosscut sled or router table build — great modular bases.
Benefits of Modular Jigs for Small Workshops
When space is limited, every tool and jig needs to earn its keep. That’s where modular jigs really shine — they pack flexibility and precision into a compact footprint.
Here’s why I rely on them so much in my own small workshop:
📌 Save THIS PIN to your Board on Pinterest!

Save Space
Instead of building (and storing) 10 different jigs, you can create one base and add on as needed. Modular jigs take up less wall, shelf, and bench space, which is gold in a tight shop.
Work More Efficiently
Modular setups help you work faster because you’re reusing components you already trust. Once your system is dialed in, you’ll spend less time reinventing and more time building.
Increase Accuracy
Precision improves when parts fit together reliably. A flat base + known alignment points + secure clamps = repeatable, clean results.
Easier to Upgrade Over Time
Modular jigs grow with your skills. As your needs change, you can swap out parts, build new accessories, or refine old ones — all without starting from scratch.
I’ve added to my router table setup at least four times, and I still use the same base. That kind of longevity makes modular jigs worth the initial effort.
Modular vs Fixed Jigs: Key Differences
When it comes to woodworking jigs, you generally have two options: modular or fixed-purpose. Modular jigs are built to adapt — they allow you to reuse parts and expand functionality as needed. Fixed jigs, on the other hand, are purpose-built for one specific task, which can be great for simplicity but less flexible in the long run.
Here’s a quick comparison that might help.
| Feature | Modular Jig | Fixed Jig |
|---|---|---|
| 🔄 Flexibility | Can be reconfigured, expanded, or repurposed | Built for one specific task only |
| 📏 Precision | Requires consistent layout for add-on compatibility | Can be highly accurate for a single job |
| 🛠️ Ease of Building | Takes more time and planning upfront | Often quicker to build and use right away |
| 📦 Storage | Saves space by combining multiple jigs into one | Requires more space for multiple individual jigs |
| 🔧 Maintenance & Tweaks | Easier to modify or upgrade with new parts | Harder to adjust once built |
| 💰 Material Cost | Slightly higher due to reusable components and fixtures | Lower per jig, but adds up with multiple builds |
| 🧠 Learning Curve | Requires more design thinking and precision | Easier for beginners to get started |

Bottom line: Modular jigs require more thought but offer long-term value, especially in small workshops where versatility matters most.
Final Thoughts
My workshop is small — actually, it’s my garage — so I’ve learned to make every jig, tool, and square inch count. That’s where modular jigs truly shine. Being able to build one solid base and expand it with precise, task-specific add-ons has saved me time, space, and a lot of frustration.
Over the years, I’ve made several modular builds that work across different tools — like a crosscut sled that also fits a spline jig or miter sled, or a router table that supports box joints and mortising. They all rely on one thing: precision. If the layout is spot-on and the jig is square, everything that comes after fits and works exactly as it should.
Yes, building modular jigs takes a bit more effort upfront — you need to plan, measure, and test. But the payoff is huge. It’s one of the best systems I’ve built into my workshop routine.
If you’re thinking about building your own modular setup, I’ve made detailed plans available for many of the jigs mentioned in this article (and more). They include step-by-step instructions and measurements.
FAQ: Modular Woodworking Jigs
What is a modular woodworking jig?
A modular woodworking jig is a jig designed to be part of a larger system. Instead of building a new jig from scratch for each task, you create a base (like a crosscut sled or router table) and then add interchangeable components or extensions as needed.
Why should I build modular instead of standalone jigs?
Modular jigs save space, reduce material waste, and are more versatile in the long run. Once you’ve built a precise base, you can reuse it with multiple add-ons — making your workflow more efficient and your shop setup more compact.
How important is precision when building modular jigs?
Extremely important. If the base jig or mounting points are even slightly off, the add-ons won’t fit correctly, and the jig may not work as intended. Always take the time to measure, mark, and test-fit everything carefully.
Can I use modular jigs with different tools?
Yes, especially if you build your jig components around standard attachment points like T-tracks or fence slots. I’ve used modular setups with my router table, circular saw guides, table saw sleds, and even drill press jigs.
Do you offer plans for any of these modular jigs?
Yes! I offer detailed, downloadable plans for many of the jigs mentioned in this post — including modular-compatible builds. Each plan includes full measurements in both metric and imperial units, step-by-step instructions, and tips for adapting them to your own setup.
