DIY End Grain Cutting Board: Complete Step-by-Step Build Guide

Learn how to make a DIY end grain cutting board step by step. This advanced woodworking project will teach you how to cut, glue, flatten, and finish a durable board that looks incredible and lasts for years.

An end grain cutting board is one of those projects that instantly feels like a step up. Instead of the fibers running along the surface like on a face-grain or edge-grain board, the grain points straight up. That makes the board more knife-friendly, durable, and naturally resistant to wear, which is why end grain is often the go-to choice for a “forever” cutting board.

In this build, I’m making a basic end grain cutting board from rough walnut slabs. The board is made from walnut only, with a mix of heartwood and sapwood that gives it a natural color variation and a really high-end, prestige look once it’s oiled and waxed. The final dimensions are roughly 48 × 32 cm (18 7/8″ × 12 5/8″) and 3.5 cm (1 3/8″) thick, so it’s solid, heavy, and feels very stable on the counter. I’m starting from raw slabs, so you’ll also see the full process of prepping the wood before we even start building the actual board.

Throughout the build, I’m using several of my own jigs to keep everything safe and repeatable: a table saw sled, jointer sled, router flattening jig, juice groove jig, handle jig, and a sanding block. This board is the “core” end grain build – more advanced patterns like an ombré or chaotic board add extra cutting and glue-ups, but the foundation is exactly what you’ll see here.

If you want a quick overview of all the jigs that make cutting board builds easier, check out my guide to the best jigs for making cutting boards before you dive in.

Table of Contents

  1. Tools and Materials
  2. Why Build an End Grain Cutting Board?
  3. Let’s Start Building!
     Step 1: Preparing and Cleaning the Boards
     Step 2: Cutting Wood Strips and Arranging the Final Design
     Step 3: Gluing Up the Edge Grain Panel
     Step 4: Crosscutting the Panels and Preparing the End Grain Layout
     Step 5: Flattening and Trimming the Cutting Board
     Step 6: Cutting the Juice Groove, Routing the Handles, and Beveling the Edges
     Step 7: Sanding, Oiling, Waxing, and Adding Rubber Feet
  4. How to Care for an End Grain Cutting Board
  5. Wrap-Up: A Solid First End Grain Cutting Board
  6. End Grain Cutting Board FAQs

Materials and Tools

Here’s everything I used to build the walnut end grain cutting board. Some tools are optional, but they definitely make the job easier.

Materials:

Tools:

Tools:

Check All the Tools I Use

This post contains affiliate links. If you buy through them, I may earn a small commission at no extra cost to you. Thanks for supporting AllFlavor Workshop!

📌Ready to build it?
Save THIS PIN to your Board on Pinterest!

DIY end grain cutting board step-by-step guide — build a walnut cutting board from rough slabs to finished oiled surface.
DIY End Grain Cutting Board — step-by-step walnut cutting board build from rough slabs to finished board.

Why Build an End Grain Cutting Board?

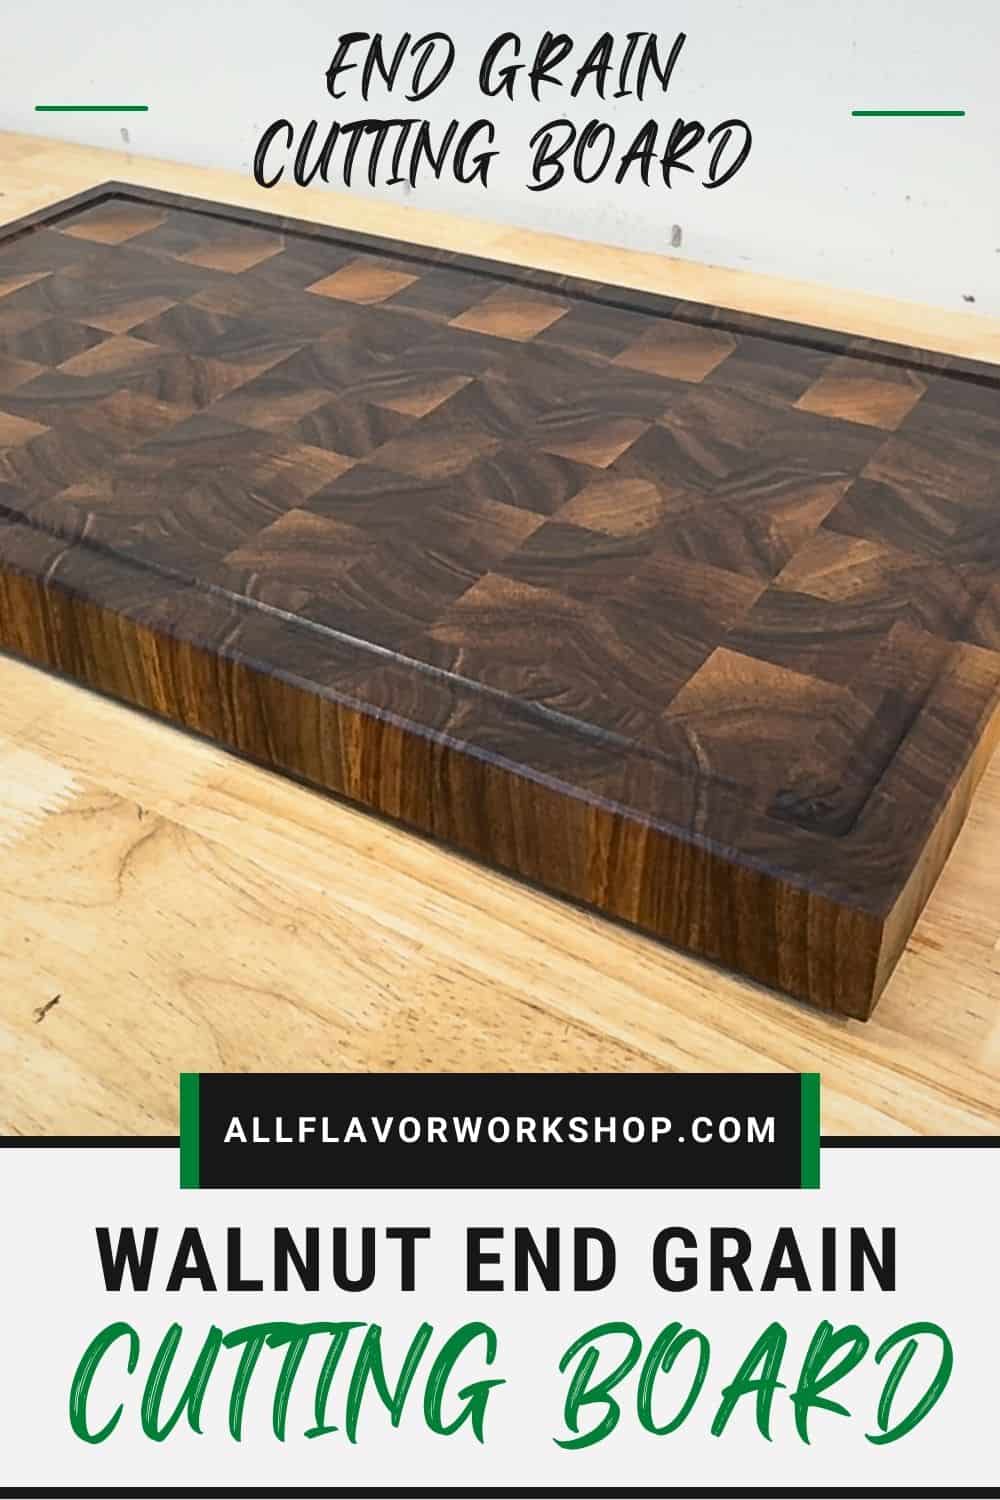
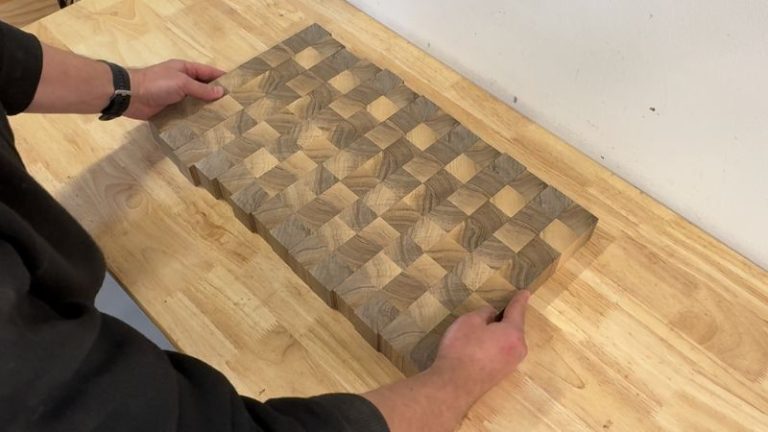
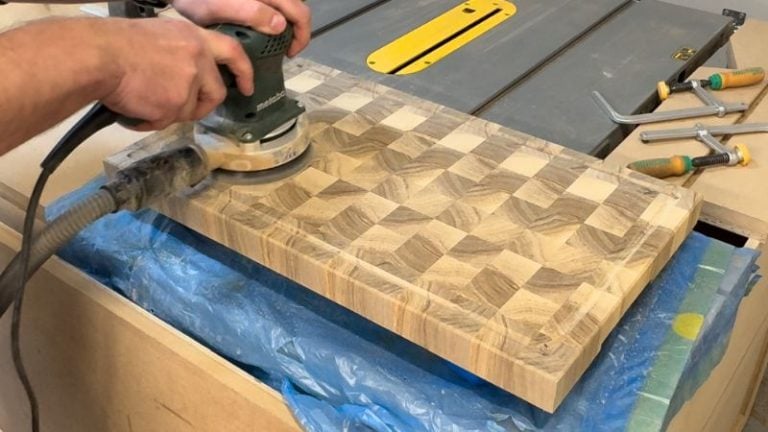
If you already have a simple face-grain or edge-grain board, an end grain cutting board is a natural next step. With the grain pointing up, the knife slides between the fibers instead of cutting across them, so the surface is gentler on knife edges, more durable, and less likely to show deep cuts.

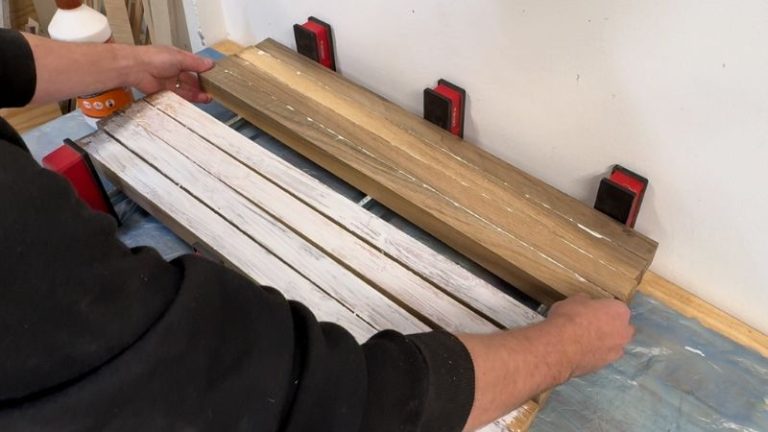
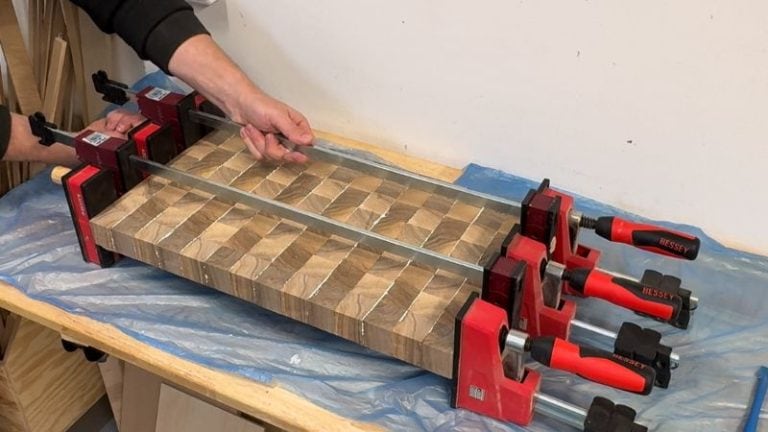
It does take more time and a couple of extra glue-ups, but you get a heavier, more stable board that feels “pro” on the counter and can be resurfaced and re-oiled for years. If you’re still deciding which style to start with, have a look at my guide Face vs. Edge vs. End Grain: Which Cutting Board Should You Make? – it walks through the main differences, pros, and cons of each type.

For a first end grain project, this build is a good choice because:

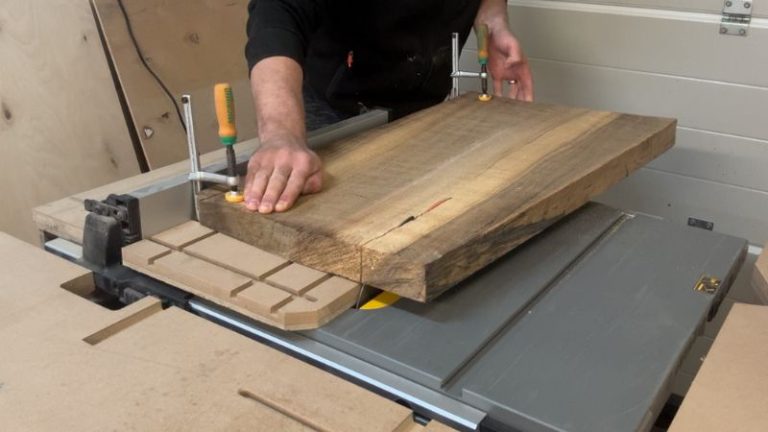
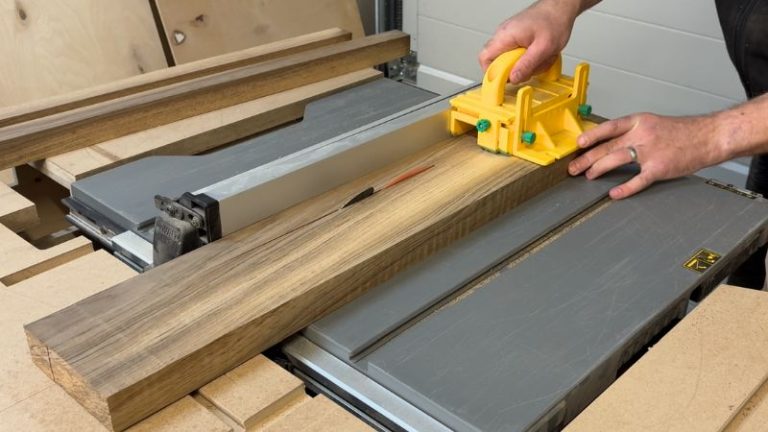
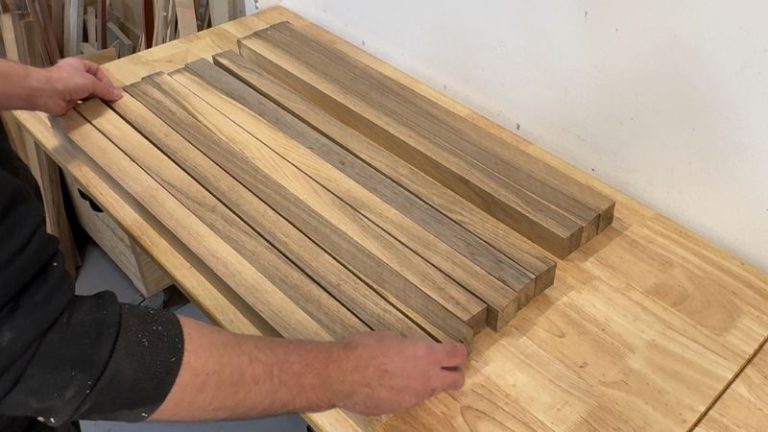
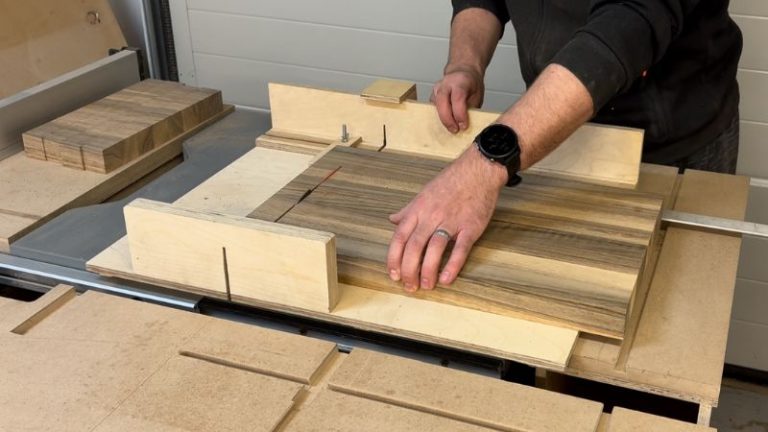
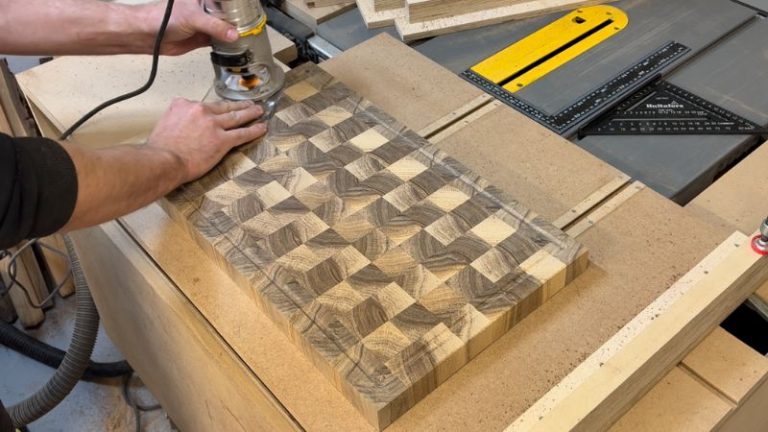
  • You’re working with one species (walnut), so layout stays simple.

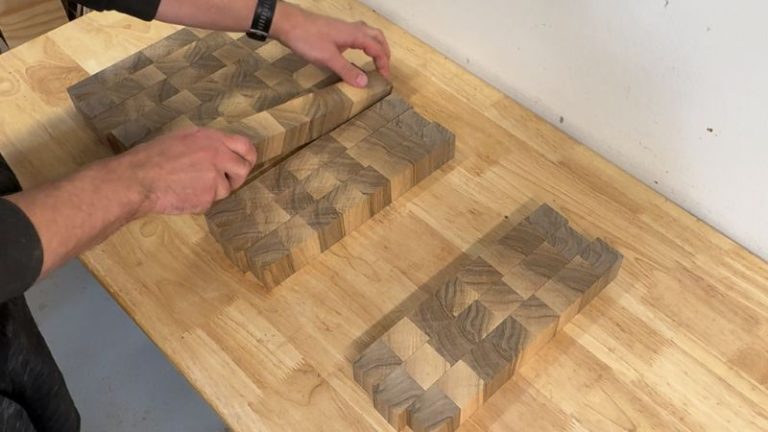
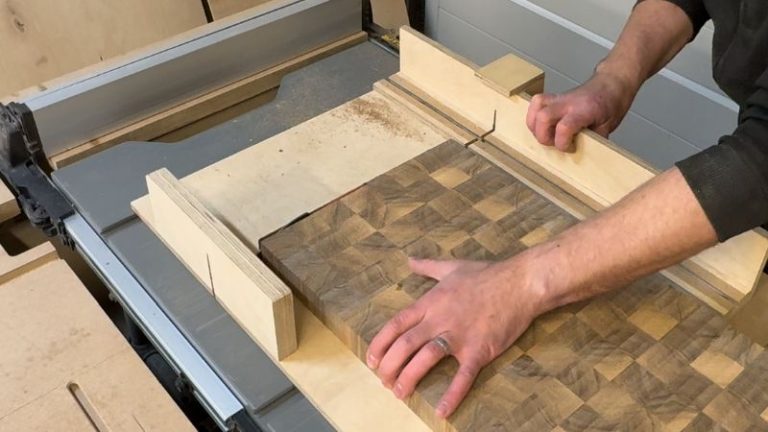
  • The pattern is clean and classic, without complex re-cuts.

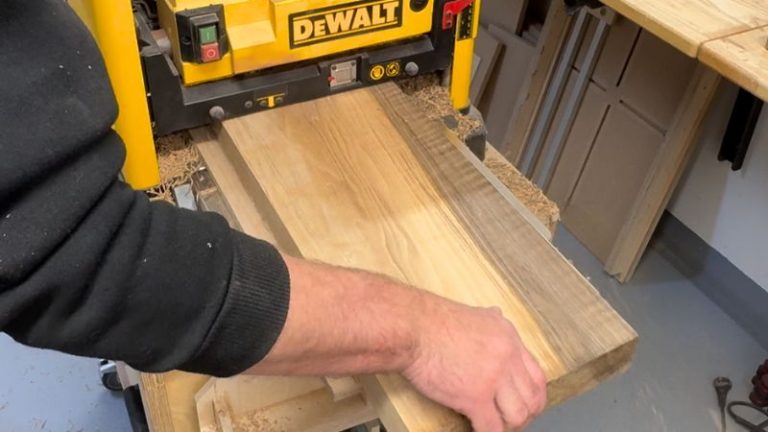
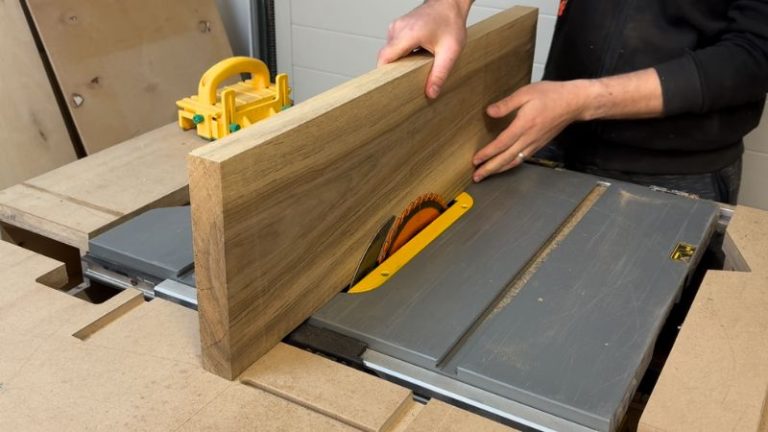
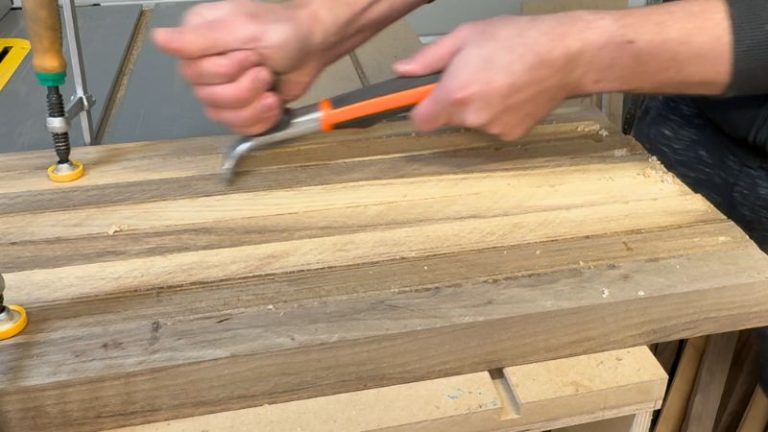
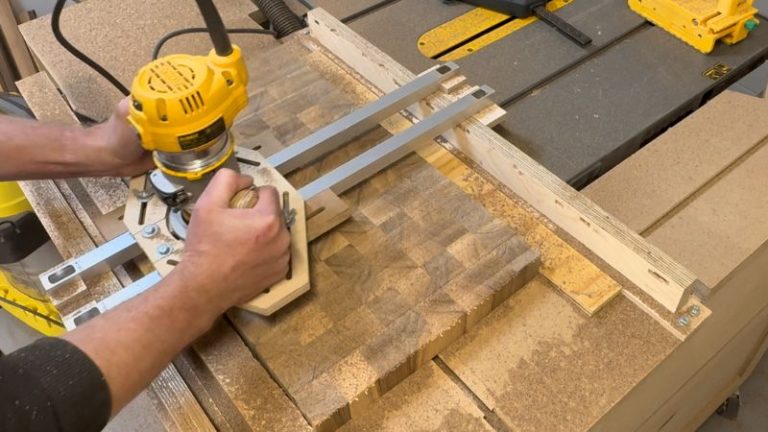
  • You learn the core end grain workflow you’ll reuse later for ombré, chaotic, or more advanced boards.

Let’s Start Building!

For this project, I’m starting with rough walnut slabs, so the first part of the build is all about preparing the stock: cleaning up the edges, getting a straight reference side, and bringing everything to a consistent thickness. Once the slabs are milled, we rip them into strips, plane them, glue up an edge-grain panel, then crosscut it into blocks, rotate them so the end grain faces up, and glue everything again into a solid end grain blank.

When the blank is dry, we flatten it with a router flattening jig, trim it to final size, and focus on the details that make the board feel finished: cutting a juice groove, routing two underside handles, beveling the edges with a chamfer bit, and sanding everything smooth. In the last step, we bring the walnut to life with food-safe oil and wax and add rubber feet so the board stays stable on the counter and can dry properly between uses.

How to Make an End Grain Cutting Board (Step-by-Step Guide)

Step 1: Preparing and Cleaning the Boards

I’m starting with two rough walnut slabs. They’re thick, a bit twisted, and have a few cracks, so the first step is all about getting them into a clean, workable state before we cut any strips. I begin by crosscutting the slabs into shorter pieces, cutting out the worst cracks and defects so I’m left with solid sections that are easier to handle.

Next, I focus on getting a straight reference edge. I use my jointer sled to straighten one side of each board, which makes a big difference later when ripping consistent strips. Once I’m happy with the edge, I hot-glue each board to a larger, flat carrier board and run it through the planer. The carrier board keeps everything stable, prevents the piece from rocking, and helps remove any warp or twist. After one face is flat, I peel the boards off, flip them, and plane the other side down to final thickness.

If needed, I’ll give the edges one more light pass on the jointer sled so everything is straight and square. At this point, the walnut boards are clean, flat, and ready to be cut into strips for the first glue-up.

TIP: I don’t cut off the cracked ends at this stage, even if they’re not usable in the final board. Any snipe from the planer usually happens at the ends, so I let it hit the sections I’ll sacrifice anyway and trim them off later.

Rough walnut slabs with cracks and twist on the workbench before milling for an end grain cutting board.
Starting with rough walnut slabs that need cleaning up, straightening, and flattening before the build.
Walnut board clamped on a jointer sled to straighten one edge before planing.
A jointer sled helps me get a straight reference edge on each board, which is key for accurate ripping later.
Ripping walnut slabs into shorter sections to remove cracked and damaged areas.
I first rip the slabs into shorter pieces and remove the worst cracks and defects.
Walnut boards hot-glued to a flat carrier board and passed through the planer.
I hot-glue the boards to a carrier board and plane both faces so they come out flat, stable, and ready for cutting into strips.
Close-up of walnut board showing light planer snipe on the cracked sacrificial end.
Any planer snipe lands on the cracked ends I’ll cut off later, so the usable part of the board stays clean.

Step 2: Cutting Wood Strips and Arranging the Final Design

With the walnut boards flat and clean, it’s time to rip them into strips. I set up the table saw so the width of each strip matches the current thickness of the boards, aiming for a square profile in the final glue-up. I actually add a tiny bit of extra width to account for flattening later – we’ll lose a bit of material when we level the board, so it’s better to be slightly oversize at this stage. Then I run all the boards through the saw and cut them into consistent strips.

Once all the strips are cut, I lay them out on the bench and start playing with the pattern. Because these slabs include both heartwood and sapwood, it’s easy to build a nice contrast just by shuffling the strips around. Here I also pay attention to the “smiles and frowns” in the grain – alternating the orientation of the growth rings helps balance internal tension and reduces the risk of cupping later on. When I’m happy with the layout, I double-check the transitions between light and dark pieces and make sure the overall look feels balanced.

Note: Once you apply oil and wax, the colors and grain will really pop, so even a simple pattern in walnut can look surprisingly rich and detailed.

Close-up of a table saw fence being set to the same dimension as the board thickness for cutting walnut strips.
I set the table saw fence to match the board thickness, aiming for strips that will end up close to a square profile.
Walnut board being ripped into uniform strips on the table saw.
The milled boards are ripped into consistent strips, with a little extra width to allow for flattening later.
Walnut strips laid out on the bench, alternating heartwood and sapwood to form a cutting board pattern.
After ripping, I lay out all the strips and start arranging the pattern, mixing heartwood and sapwood for a balanced look.

Step 3: Gluing Up the Edge Grain Panel

With the pattern set, it’s time to glue the strips into an edge grain panel. I start by getting all my clamps ready – I like using Bessey clamps because they’re strong and keep the pressure nice and even (and they are actually parallel 😊). Before I lay the strips down, I run masking tape along the clamp bars. When the glue squeezes out, it tends to drip on the bars and can be a pain to remove; with tape, you just peel it off when you’re done.

I place the strips on the clamps in the exact order of the design, then apply wood glue to each edge and spread it evenly with a silicone brush. Once everything is coated, I bring the strips together, tighten the clamps gradually, and check that the panel stays flat and the joints are tight. After the glue has fully cured, I remove the panel from the clamps and use a scraper to clean off the dried squeeze-out.

Only then do I run the panel through the planer to flatten both faces and bring it to the same thickness.

TIP: Remove as much dried glue as you can before planing. Hardened glue can damage planer knives or leave tracks on the surface.

Wood glue being spread along the edge of walnut strips with a silicone brush before clamping.
Each strip gets an even coat of glue along the edge to ensure tight, gap-free joints in the panel.
Walnut edge grain panel clamped up in parallel clamps with glue squeeze-out along the seams.
The strips are pulled together in parallel clamps, forming a solid edge grain panel that will become the base for the end grain board.
Close-up of a cabinet scraper removing dried glue squeeze-out from the walnut panel.
After the glue cures, I scrape off the squeeze-out before sending the panel through the planer.
Walnut edge grain panel being flattened in a thickness planer.
A few light passes in the planer flatten the panel and bring it to a consistent thickness for the next stage.

Step 4: Crosscutting the Panels and Preparing the End Grain Layout

With the edge grain panel flattened, it’s time to turn it into end grain blocks. I start by cutting off the sacrificial ends of the panel using my table saw sled – this removes any planer snipe and cracked sections we left on purpose earlier. Then I set the fence and crosscut the panel into strips about 3.8 cm (1 1/2″) wide. After final flattening, the board will end up a little thinner, but this gives us a good starting point for a solid, chunky end grain board.

Once all the strips are cut, I stand them on edge with the end grain facing up and begin laying out the final pattern. Each strip can be flipped and rotated, which gives you a certain number of combinations even with a simple walnut-only build. You can keep the pattern very clean and regular, or mix in a bit of variation by flipping every second or third strip. When I’m happy with the layout, I bring in the clamps, add glue to all mating faces, and glue up the final end grain panel.

Note: During this glue-up, take your time to align the blocks as tightly and as flat as possible. The squares should sit neatly next to each other with minimal offset, and the panel should stay as flat as you can manage in the clamps. The better the alignment now, the less flattening and sanding you’ll need later.

If you want to see the sled I use for these cuts, check out my build of the table saw sled I use for crosscutting panels like this.

Edge grain walnut panel on a table saw sled with the sacrificial end being trimmed off.
I first trim off the sacrificial ends on the table saw sled to remove any snipe or damaged sections.
Crosscutting the walnut edge grain panel into equal-width strips for the end grain layout.
The panel is crosscut into 3.8 cm strips, which will become the end grain blocks of the cutting board.
Close-up showing flipped and rotated walnut strips creating subtle changes in the end grain pattern.
Flipping and rotating strips gives you several design options, even with a simple walnut-only board.
Walnut end grain blocks stood on edge and arranged into a pattern on the workbench.
With all the strips cut, I stand them on edge and start experimenting with the final end grain layout.
End grain cutting board panel in parallel clamps with the blocks aligned tightly and glue squeeze-out visible.
Once I’m happy with the pattern, I glue up the final end grain panel, keeping the blocks tight and the surface as flat as possible.

Step 5: Flattening and Trimming the Cutting Board

Once the final glue-up is fully cured, it’s time to flatten the board and bring it to final size. This is the step where the rough, blocky panel turns into a clean, squared cutting board. I start by removing as much dried glue as possible with a scraper so I don’t hit hardened glue with the bit. Then I place the board in my router flattening jig – for end grain, this is the safest and most reliable way to flatten a board. Running an end grain board through a planer can cause nasty tear-out or even damage the machine, so I avoid that completely here.

Using a router flattening bit, I take shallow passes and slowly work across the surface until the entire top is flat. Then I flip the board and repeat the process on the other side so both faces end up even and parallel. To square the board, I’ll use a jointer sled if the edges are still too rough, just to get one clean reference edge.

From there, I move to the table saw sled to trim the ends and square up the remaining sides. By the end of this step, all corners are clean, the board is perfectly rectangular, and it’s ready for the detail work in the next stages.

If you’d like to build the same jigs I’m using here, check out my builds for the Router Flattening Jig and the Jointer Sled for the Table Saw – both make this part of the process much safer and more accurate.

Scraping dried glue squeeze-out from an end grain cutting board panel before flattening.
I scrape off as much dried glue as possible before flattening so the router bit doesn’t hit hardened glue.
Router with flattening bit making shallow passes across the end grain cutting board.
I take shallow, overlapping passes with a flattening bit until the entire surface is flat and level.
End grain board being squared on a table saw to get a straight reference edge.
A table saw (jointer sled) helps me get one straight reference edge before trimming the board to final size.
End grain cutting board on a table saw sled, trimming the end to square the corners.
A table saw sled is perfect for squaring the ends so all corners are clean and the board is perfectly rectangular.

Step 6: Cutting the Juice Groove, Routing the Handles, and Beveling the Edges

I start by sanding the surface to remove the router marks. End grain takes longer to sand than face or edge grain, so it’s worth taking your time and working through the grits.

Next, I clamp the board in my juice groove jig and cut the groove with a router. I take slow, controlled passes and always move clockwise when routing inside the border to keep the router from grabbing.

TIP: On end grain, use lower RPMs and several shallow passes—it’s tougher material and burns easily, especially in the corners.

After the groove is done, I switch to a 45° bevel (chamfer) bit and ease the outside edges, routing counter-clockwise around the board and taking light passes to avoid tear-out. Once the bevels are cut, I flip the board over and cut the handles using my router handle jig. I center the jig on the underside, align it with the edges, and use a straight bit to rout recesses about 8 mm deep, just enough for a comfortable grip once the rubber feet are on. I repeat the same process on the opposite side and finish up with a sanding block and higher-grit paper.

Check out my DIY Juice Groove Jig, which makes this step much more controlled and repeatable on heavy end grain boards.

End grain cutting board being sanded with a random orbital sander to remove router marks.
I start by sanding the board to clean up any router marks and get the surface ready for the juice groove.
Router cutting a juice groove on an end grain board, taking shallow passes along the inside border.
I route clockwise inside the border and use shallow passes at lower RPMs to avoid burning the end grain.
Bevel bit chamfering the cutting board edge, followed by hand sanding with a sanding block.
After beveling the edges with a 45° bit, I finish with a sanding block to soften all corners and transitions.
Router handle jig on the underside of a cutting board, routing a finger hold with a straight bit.
The handle jig makes it easy to add even, comfortable finger holds on the underside of the board.

Step 7: Sanding, Oiling, Waxing, and Adding Rubber Feet

With all the routing done, I move on to the final surface prep and finish. I sand from 80 up to 600 grit, adjusting the sander speed as I go and vacuuming dust between grits. After about 200 grit, I lightly mist the surface with water to raise the grain, then continue sanding through the higher grits until the board feels soft and smooth. Using bench cookies here makes it much easier to reach all sides while keeping the board stable and in place.

Then I oil the board. This is where the walnut really comes alive—dark tones deepen, lighter areas pop. I use Clark’s (food-safe) cutting board oil, and it’s good to remember that end grain drinks a lot of oil, so expect several generous coats. Once the oil has soaked in and any excess is wiped off, I flip the board over, mark the positions for the rubber feet with a ruler marking gauge, pre-drill, and install the feet.

As a final step, I apply wax, buff it to a soft sheen, and the end grain cutting board is ready for the kitchen.

End grain cutting board being sanded on bench cookies with a random orbital sander.
I sand from 80 up to 600 grit, vacuuming between grits and using bench cookies to make the board easier to handle.
Light mist of water sprayed on an end grain cutting board to raise the grain before final sanding.
A quick mist of water raises the grain so the last sanding passes leave the surface soft and smooth.
Clark’s cutting board oil being poured and spread across a walnut end grain cutting board.
Oiling is where the walnut really comes to life—end grain soaks up a lot of oil, so don’t be shy with it.
Ruler marking gauge used to mark hole positions for rubber feet on the underside of a cutting board.
I use a ruler marking gauge to position the rubber feet consistently on the underside of the board.
Underside of an end grain cutting board with rubber feet installed and the surface freshly waxed.
After installing the feet and applying wax, the board sits slightly elevated and is ready for daily use.

And this is what the finished board looks like.

Finished walnut end grain cutting board with juice groove and beveled edges ready for use.
The finished walnut end grain cutting board—solid, heavy, and ready for everyday chopping and serving.
Close-up of the walnut end grain cutting board showing the rich grain pattern and oiled surface.
A close-up of the end grain shows how the oil and wax deepen the color and highlight the grain pattern.

How to Care for an End Grain Cutting Board

A well-made end grain cutting board can last for years, but it does need a bit of regular care. After each use, wipe it down with warm water and a small amount of mild dish soap, then rinse quickly and dry it with a towel. Don’t soak it in the sink and never put it in the dishwasher—heat and standing water are the fastest ways to warp or crack any wooden board. When you’re done, let it dry standing up or on its feet so air can circulate around both sides.

Over time, the surface will start to look a bit dry or lighter in color. That’s your sign it needs more oil and wax. How often depends on how much you use it—anything from once a month to every few months is normal. When the board starts to feel rough or “fuzzy” after washing, you can give it a quick refresh:

  • Lightly sand with a fine grit (220+).

  • Vacuum or wipe off the dust.

  • Re-apply cutting board oil until the surface stops soaking it in.

  • Finish with a thin coat of wax and buff.

Keep up with regular sanding and oiling, avoid standing water, and let the board dry properly between uses.

Wrap-Up: A Solid First End Grain Cutting Board

End grain cutting boards are a step up from face grain and edge grain—both in durability and in how they look and feel on the counter. There are lots of designs you can explore later (ombré, chaotic, basket weave…), but this build is the core pattern they all start from. The “fancier” versions simply add extra cuts and glue-ups on top of what you did here.

A walnut end grain board is hard to beat. The moment you pour oil on it, the grain and color jump out—deep browns, lighter sapwood, and all the tiny end grain details suddenly come alive. If you build and use a few simple jigs (flattening jig, juice groove jig, handle jig, sanding block, table saw sled, jointer sled), the whole process becomes easier, safer, and more repeatable.

If you’re brand new to cutting boards, it still makes sense to start with a face grain or edge grain board, then move up to this basic end grain. Once you’re comfortable with the workflow, you can push into more advanced end grain patterns. With a bit of care, a board like this can easily last for many years.

👉 To see all the jigs I rely on for cutting boards, take a look at my guide to the Best Jigs for Making Cutting Boards.

📌 Save THIS PIN to your Board on Pinterest!

How to make an end grain cutting board — walnut board with juice groove, routed handles, and beveled edges.
How to Make an End Grain Cutting Board — walnut board with a juice groove, routed handles, and beveled edges.

End Grain Cutting Board FAQs

1. What is an end grain cutting board and why is it popular?

An end grain cutting board is made from blocks with the grain pointing up, so your knife slides between the wood fibers instead of cutting across them. That makes the board more knife-friendly, durable, and naturally self-healing compared to face grain or edge grain.

2. What is the best wood for an end grain cutting board?

Hard, tight-grained hardwoods are best: walnut, maple, beech, and cherry are all great choices. They’re hard enough to hold up in the kitchen, but not so hard that they destroy your knives. Avoid very soft woods and open-pore species that can trap moisture and food.

3. How thick should an end grain cutting board be?

For most kitchen boards, a thickness of around 3–4 cm (1 1/4″–1 1/2″) works really well. It feels solid on the counter, resists warping, and is still light enough to move and clean without too much effort.

4. What glue should I use for an end grain cutting board?

Use a water-resistant, food-safe wood glue, such as Titebond III or an equivalent. It’s designed for cutting board and outdoor use, handles repeated washing, and is widely used by woodworkers for butcher blocks and end grain boards.

5. How often should I oil and wax an end grain cutting board?

It depends on how often you use it. As a general rule, oil and wax the board whenever it starts to look dry, dull, or feels rough—for many kitchens, that’s about once a month at first, then less often as the board gets saturated. End grain absorbs more oil than face or edge grain, so don’t be afraid to apply several generous coats.

6. Can I run an end grain cutting board through a planer to flatten it?

It’s not recommended. Running end grain through a planer can cause severe tear-out or even damage the machine. Instead, use a router flattening jig or hand tools (and sanding) to bring the board flat in a controlled way.

Share this post with your friends
About the author, Lukas

Meet the creator of AllFlavor Workshop! As a passionate DIYer and woodworking enthusiast, Lukas is always looking for ways to make things himself rather than buying them off the shelf. With a keen eye for design and a knack for working with wood, Lukas enjoys sharing his craft with others and helping them discover the joy of building. Whether you're an experienced woodworker or a novice looking to try your hand at a new hobby, you're sure to find plenty of inspiration and tips on AllFlavor Workshop.

Leave a Reply

Your email address will not be published. Required fields are marked *