In this tutorial, I’ll walk you through the process of making an edge grain cutting board from walnut, ash, and beech — step by step. An edge grain board is made by gluing together strips of wood with the edges facing up, creating a strong, durable surface that’s more resistant to warping than a face grain board while still being easier to make than an end grain board.
This project is a bit more advanced than a simple face grain board. You’ll be working with multiple strips of wood, doing a glue-up, and then flattening and finishing the surface. The beauty of this type of board is in its customization — by combining strips of different widths and wood tones, you can create completely unique patterns. The contrast between dark walnut and the lighter ash and beech gives the board a clean, classic look that fits almost any kitchen.
Throughout the build, I’ll be using a few homemade woodworking jigs — some essential, some optional — that make each step more accurate and easier to manage. You’ll see me use a router flattening jig, a juice groove jig, and a handle jig for shaping, along with a few standard shop tools.
If you’re comfortable with the basics and want to move one step beyond your first face grain cutting board, this is the perfect next project.
👉 Before you start, check out Best Jigs for Making Cutting Boards (And How to Use Them) — it covers all the jigs I’ll be using in this tutorial and includes links to the plans.
Video: How to Make a DIY Edge Grain Cutting Board
Watch the full build below — from cutting and planing the slabs to adding handles and oiling the final board.
If you enjoy the video, don’t forget to subscribe to my YouTube channel for more woodworking projects, jig builds, and workshop ideas.
Table of Contents
- Video: How to Make a DIY Edge Grain Cutting Board
- Materials and Tools
- Why Choose an Edge Grain Cutting Board?
- Let’s Start Building!
Step 1: Prepare and Plane the Wood Slabs
Step 2: Cut the Wood Strips and Arrange the Final Design
Step 3: Glue Up the Cutting Board Panel
Step 4: Flatten the Board and Square the Ends
Step 5: Cut the Juice Groove
Step 6: Route the Handles and Bevel the Board Edges
Step 7: Sand, Oil, and Add Rubber Feet - Care Tips for Your Cutting Board
- Wrap-Up
- FAQs
Materials and Tools
Before starting, gather all the tools and materials you’ll need. The list below includes everything I used for this build — feel free to adjust it depending on what you already have in your workshop.
Wood
- Walnut, Ash, and Beech (cut into slabs or planks)
Hardware / Other
- Wood glue – Wood Glue
- Cutting board rubber feet – Cutting Board Feet
- Cutting board oil (food-safe finish) – Cutting Board Oil
- Painter’s tape – Painter’s Tape
- Double-sided woodworking tape – Double-Sided Tape
- Silicon glue brush – Silicon Brush
💡 You can find all the tools I use in my workshop on my Tools Page.
Tools
- Table saw – Table Saw
- Table saw blade – Table Saw Blade
- Planer – Planer
- Router – Router
- Router flattening bit – Flattening Bit
- Router juice groove bit – Juice Groove Bit
- Router straight bit – Straight Bit
- Chamfer router bit – Chamfer Bit
- Orbit sander – Orbit Sander
- Sandpaper sheets – Sandpaper Sheets
- Sanding discs – Sanding Discs
- Grr-Ripper push block – Grr-Ripper Push Block
- Bench cookies – Bench Cookies
- Hand drill – Hand Drill
- Machinist square – Machinist Square
- Wood scraper – Wood Scraper
- Glue gun – Glue Gun
- F-clamps – F-Clamps
- Bessey parallel clamps – Bessey Clamps
- Piher one-hand clamps – Piher Clamps
- T-track clamps – T-Track Clamps
- Wolfcraft one-hand clamps – Wolfcraft Clamps
Disclosure: Some of the links above are affiliate links. If you purchase through them, I may earn a small commission at no extra cost to you. Thanks for supporting AllFlavor Workshop.
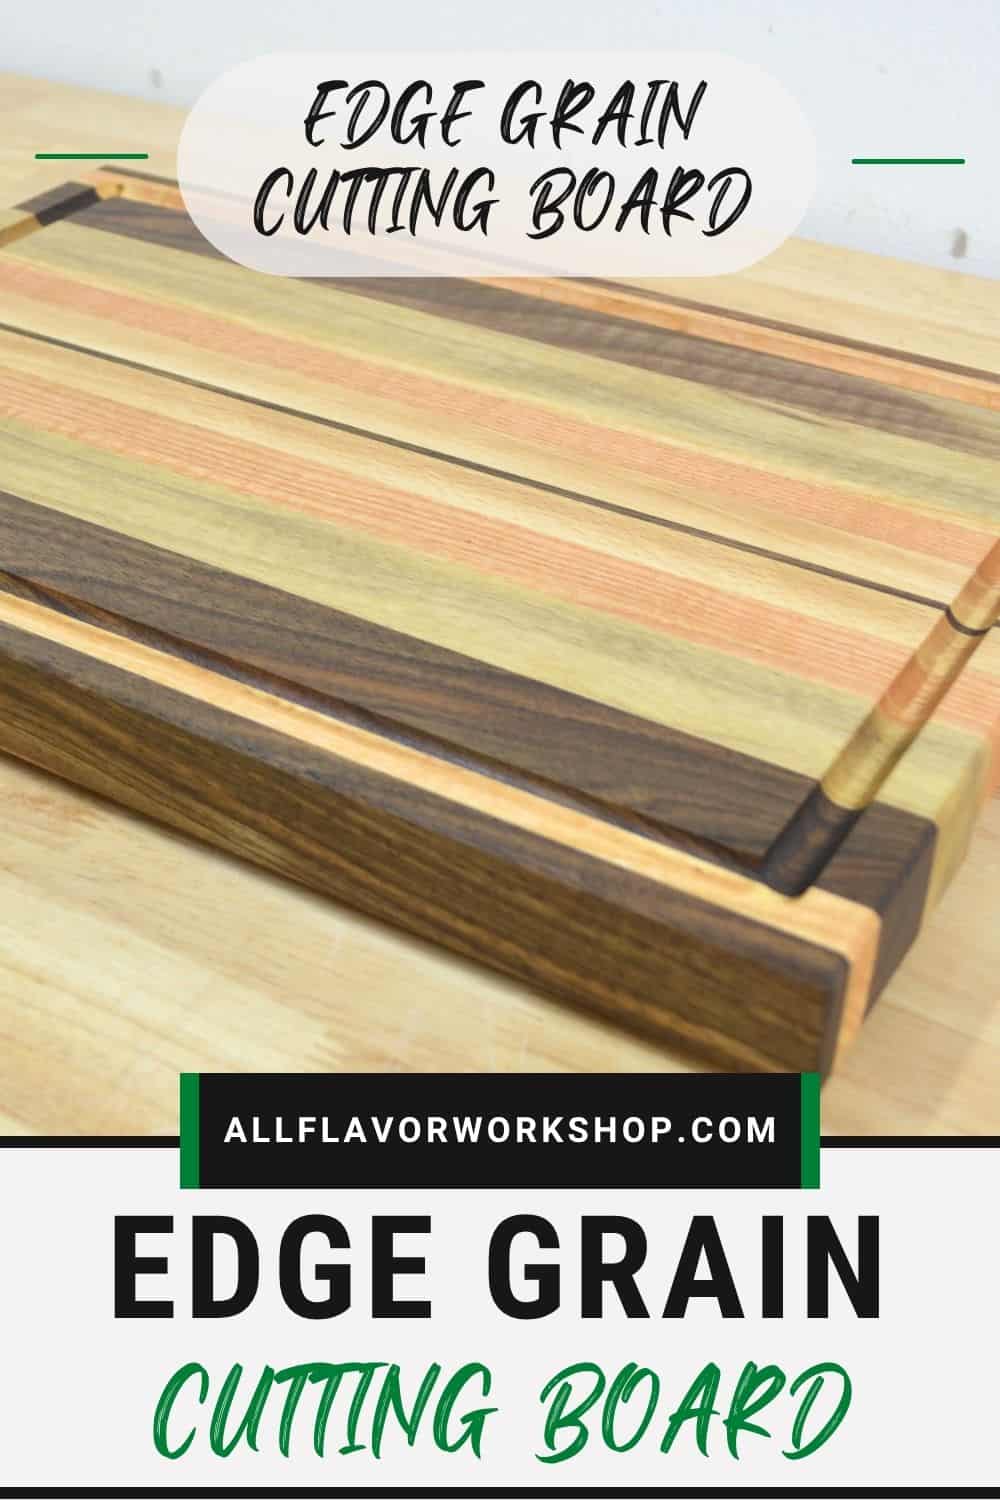
📌 Found this post useful and inspiring?
Ready to build it? Save THIS PIN to your Board on Pinterest!
Why Choose an Edge Grain Cutting Board?
If you’ve already built a face grain board and want to take the next step, an edge grain cutting board is a great upgrade. It’s stronger, more durable, and less likely to warp over time — yet still easier to make than an end grain board.
Edge grain boards are made by gluing together wood strips with the edges facing up. This exposes the long, tight wood fibers, creating a surface that’s harder and more resistant to knife marks while keeping the beautiful grain visible.
They also let you get creative — by combining strips of different widths and colors, you can design unique patterns and add real personality to your board.
Let's start building!
The final thickness of the board will be around 3.4 cm (1 3/8″), which gives it a solid, heavy feel — thick enough for any kitchen job and sturdy enough to last for years. The length isn’t as critical; you can make the board as long as you like, though mine is about 50 cm (20″).
When planning your dimensions, keep one thing in mind: after running the glued panel through a planer, the ends usually get planed a bit more than the center. That means you’ll likely need to trim off a few centimeters from each end once everything is flat — around 4 cm (1 1/2″) per side. So if you’re aiming for a specific final length, be sure to account for that extra material before you start cutting.
I’ll begin by cutting and planing the wood slabs into clean strips, arranging them into the final pattern, and getting the panel ready for glue-up.
How to Make an Edge Grain Cutting Board: Step-by-Step
Step 1: Prepare and Plane the Wood Slabs
The first step is to prepare all the wood slabs before cutting them into strips. I’m using walnut, ash, and beech, but at this stage, the exact thickness doesn’t matter.
The beech board is already in good shape, so it just needs a light pass through the planer to clean the surface. The walnut and ash, on the other hand, need a bit more attention.
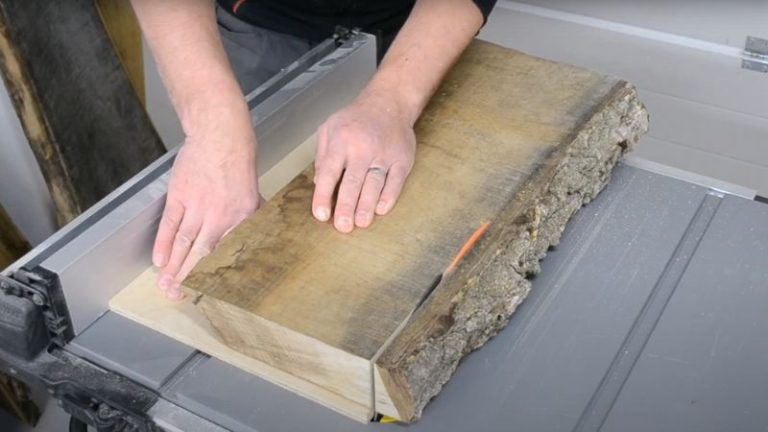
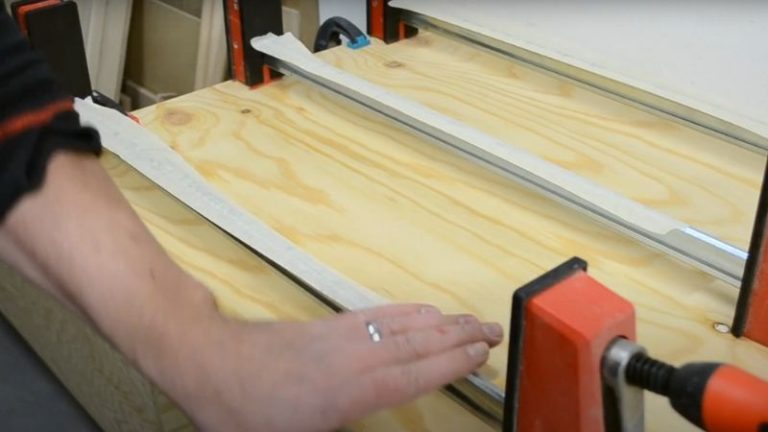
The walnut slab has live edges and needs both sides straightened before planing. To do that, I use a jointer sled.. Once both edges are straight, I run the walnut through the planer to smooth both faces.
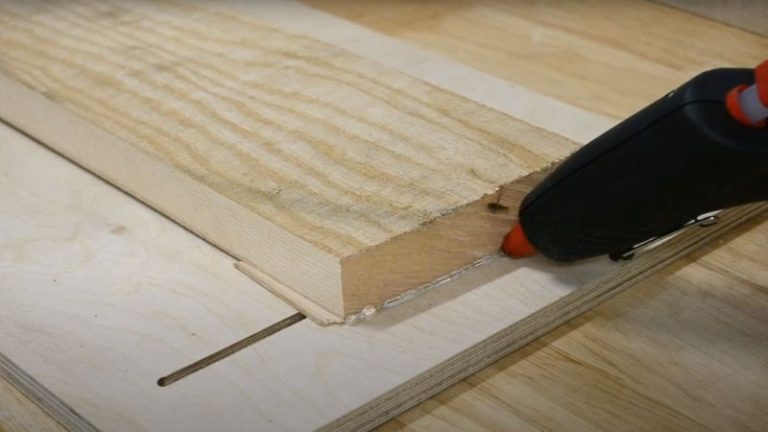
The ash plank is twisted and slightly warped, so I first attach it to a larger board with a glue gun, keeping it steady and preventing it from rocking during planing. Then I run it through the planer to flatten one face, flip it over, and plane the other side. Finally, I straighten the edges with the jointer sled just like I did with the walnut.
After this step, all the boards are clean, flat, and perfectly ready for cutting into strips for the glue-up.
👉 If you don’t have a jointer, a DIY Jointer Sled is a great alternative for straightening live edges or warped boards.

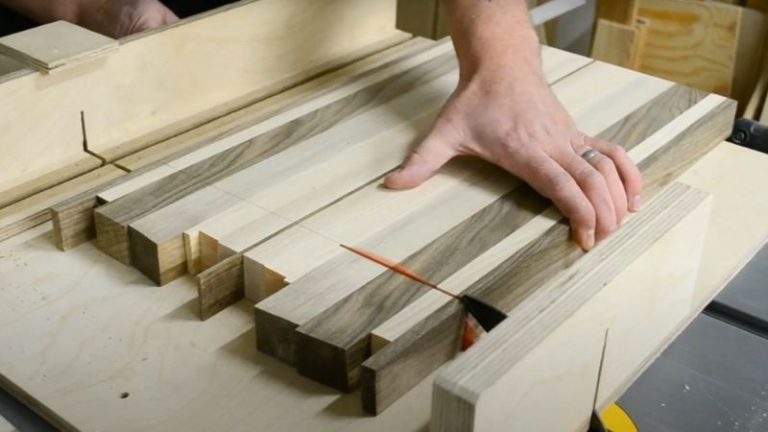
Step 2: Cut the Wood Strips and Arrange the Final Design
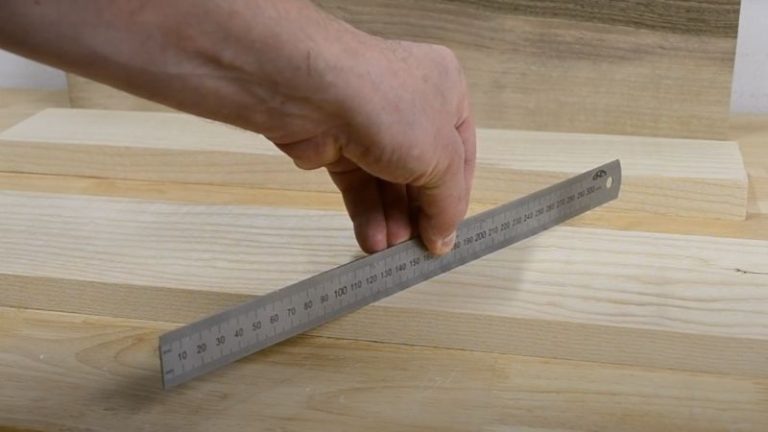
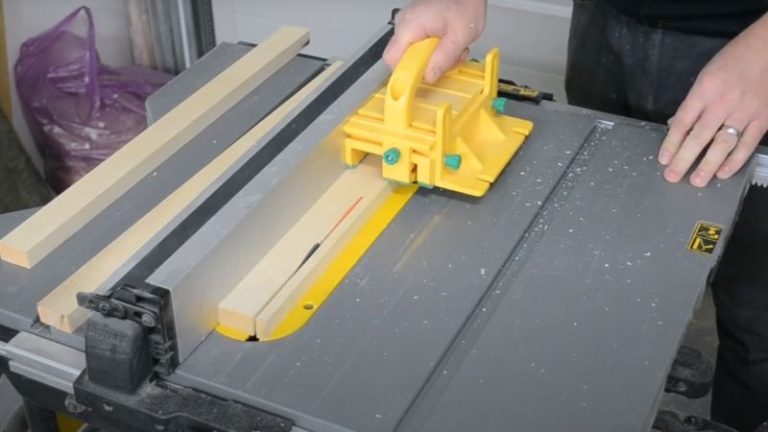
Now that all the boards are planed and straight, it’s time to cut them into strips. I set my table saw to cut strips that are 3.5 cm (1 3/8″) thick — this will be the final thickness of the cutting board (actually a little bit less after resurfacing).
After setting the blade height and fence, I cut all the boards — walnut, ash, and beech — into clean, even strips. If you want more variation in your final pattern, you can also cut a few thicker or narrower strips and mix them in. Just remember to run every strip through the planer (or a drum sander) after cutting — that way, all the pieces are perfectly flat and there won’t be any gaps during glue-up.
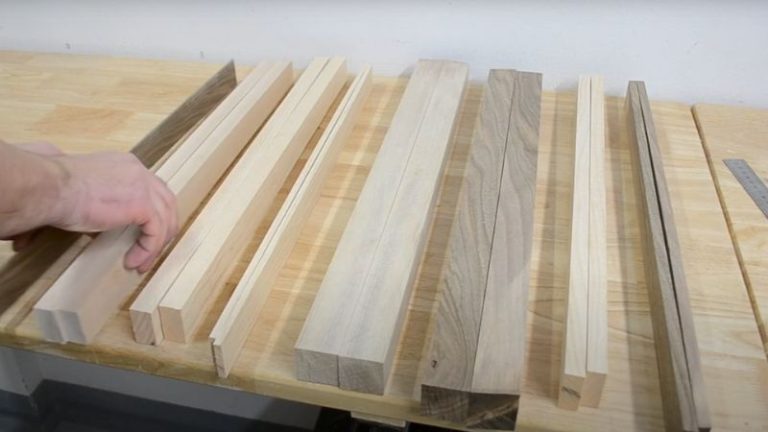
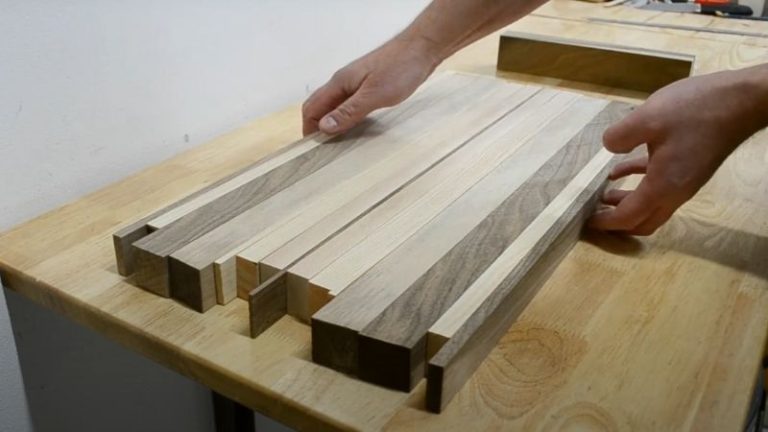
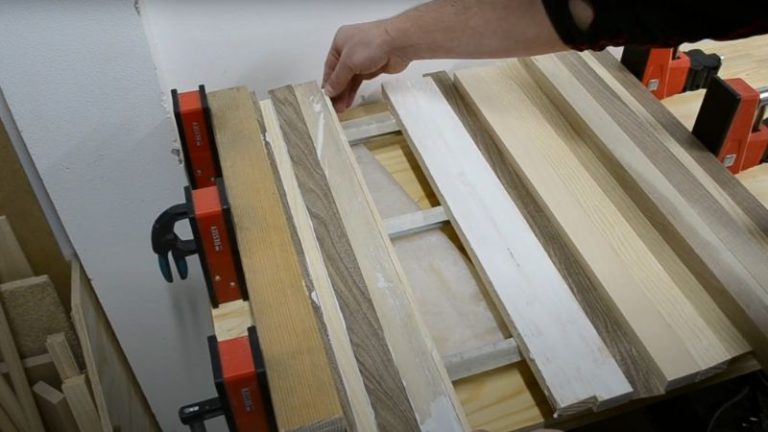
Once all the strips are ready, I start arranging them into the final design. This is the fun part — you can mix darker walnut with the lighter tones of ash and beech, combine different widths, and play with the wood grain direction. Keep in mind that once you apply oil, the colors will really pop, so aim for contrast and balance rather than perfection.
💡 A router flattening jig will come in handy later when you surface the glued panel to the final thickness.

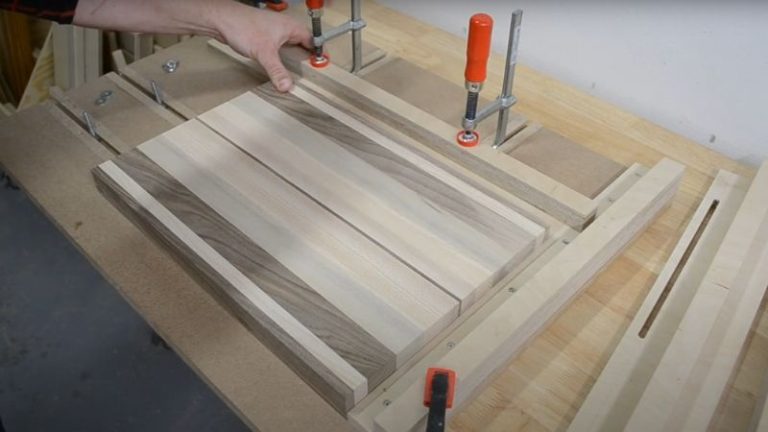
Step 3: Glue Up the Cutting Board Panel
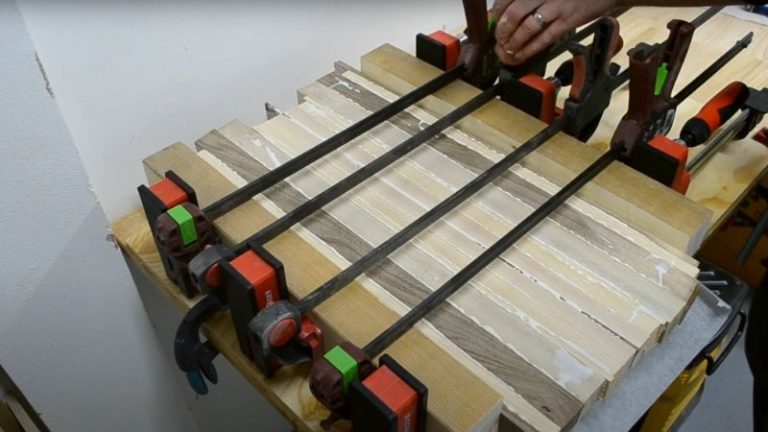
Now that you have your final design laid out, it’s time to glue the strips together. Prepare all your clamps — I like using Bessey parallel clamps for this step. They’re strong, easy to adjust, and keep the panel perfectly flat while the glue dries.
Before you start, add a strip of masking tape along each clamp bar. It’s a small thing, but it makes cleanup much easier later — any glue that drips down won’t stick to the metal and can be peeled right off once it’s dry.
Place the strips on the clamps in the same order as your design, then apply wood glue evenly along each edge. Spread the glue with a silicone brush to cover the full surface. Once all the strips are coated, tighten the clamps gradually, checking that the board stays aligned and the joints close tightly.
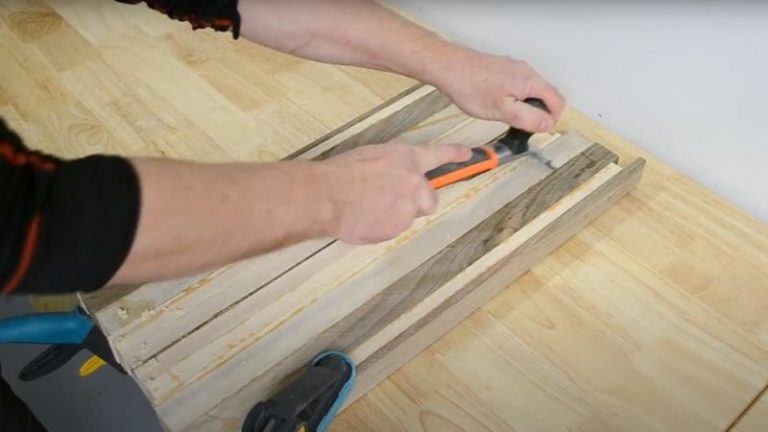
Let the glue cure completely (it can take several hours). When dry, remove the panel from the clamps and use a wood scraper to remove any dried glue from the surface.
💡 Pro Tip: Don’t overtighten the clamps — too much pressure can squeeze out too much glue and weaken the joints.
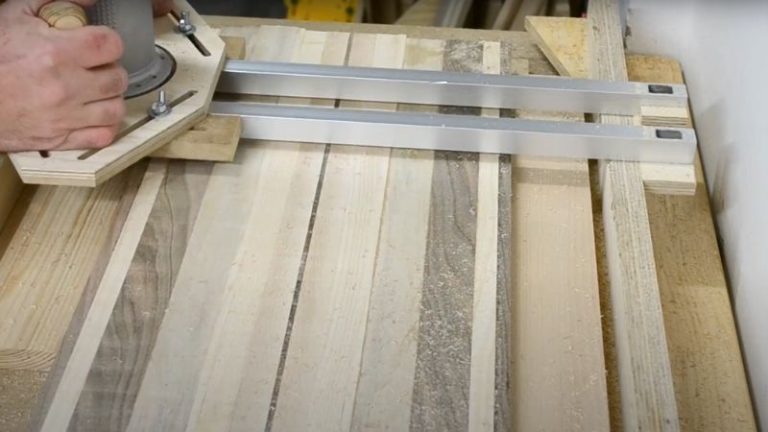
Step 4: Flatten the Board and Square the Ends
Once the glue is fully cured, it’s time to flatten the surface and give the board its final shape. You can use either a planer or a DIY flattening jig, depending on what you have available. I’m using the flattening jig here — it’s a bit slower, but it gives you precise, even results without the risk of tear-out or snipe at the ends.
If there’s any dried glue left on the board, be careful — it can be tough on planer blades. That’s another reason why the flattening jig is a good choice. Using a router with a flattening bit, I surface both sides of the board until they’re perfectly smooth and parallel.
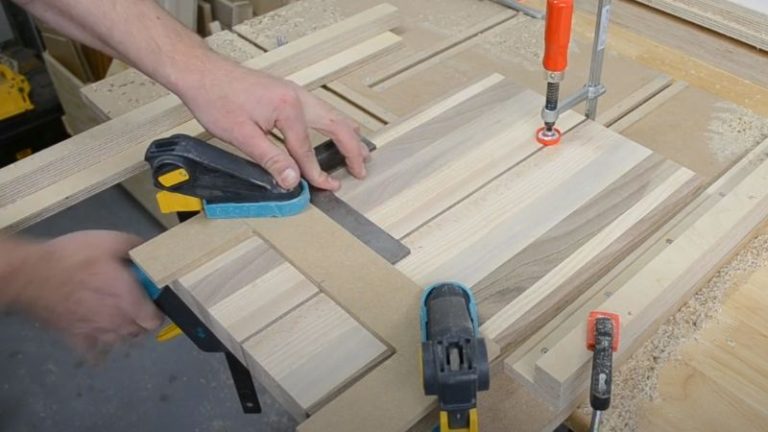
Once flattened, I move to the table saw sled to trim both ends square. This cleans up the slight unevenness from clamping and defines the final length of the board.
💡 NOTE: A Router Flattening jig is one of the most useful jigs to have in any workshop — it works on boards, slabs, and larger projects where a planer won’t fit.
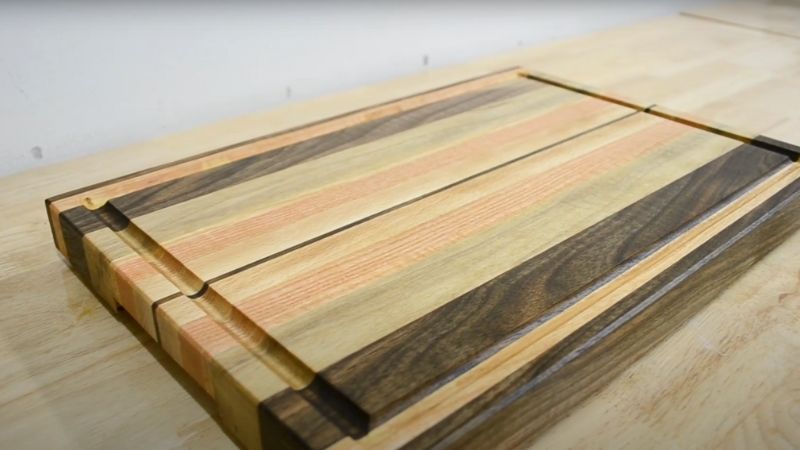
Step 5: Cut the Juice Groove (Optional but Handy)
Place the board in your juice groove jig and secure it firmly. I use a trim router with a juice groove bit. This step looks simple, but after all the work you’ve put in, it’s the one where slips can ruin a good board—so take your time.
For cutting inside a cutting board, route clockwise. Start at one corner/edge and follow the perimeter all the way around. Use lower RPM and take multiple shallow passes to avoid tear-out and burn marks. Keep the router base flat on the jig, steady your hands at the corners, and pause briefly before moving into the next straight to keep the line clean.
👉 Full setup and tips here: DIY Juice Groove Jig

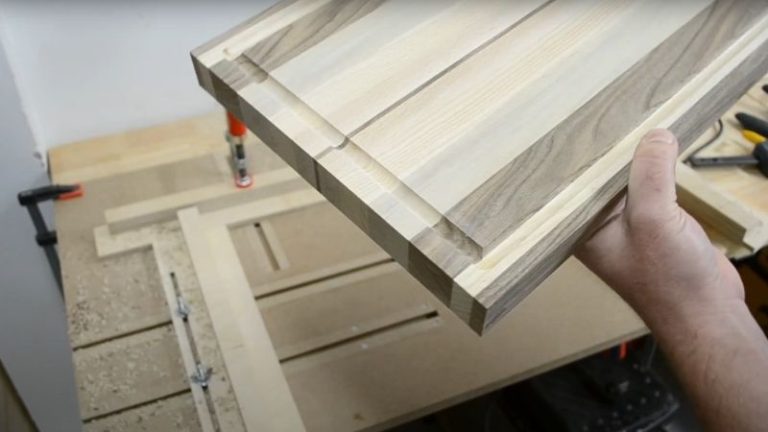
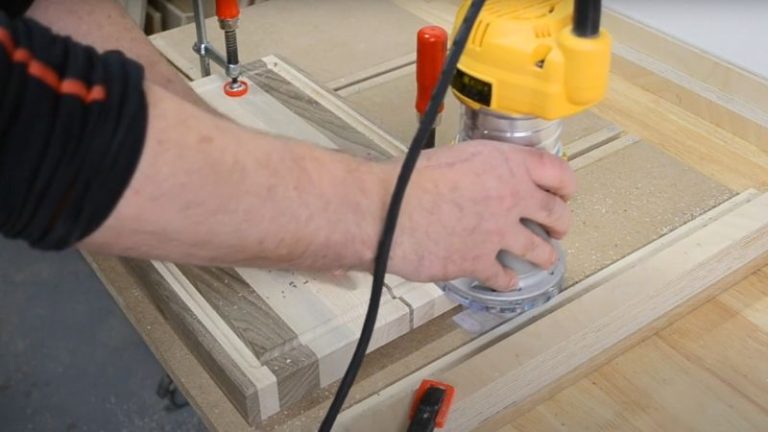
Step 6: Route the Handles and Bevel the Board Edges
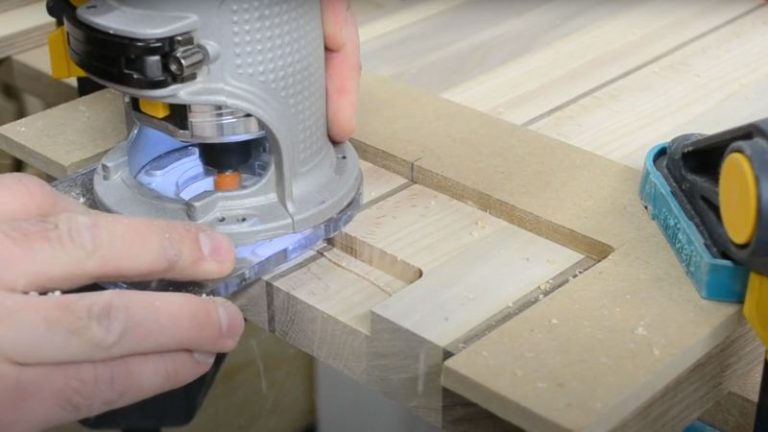
Flip the board bottom-side up and position your router handle jig. Center it, align it with the board’s edges, and clamp it securely. Use a straight router bit and make multiple shallow passes until the handle recess is just deep enough (mine is 7,5mm) for a comfortable grip (remember the board will sit a bit higher once the rubber feet are on). Repeat on the opposite side for the second handle.
Next, switch to a 45° bevel (chamfer) bit to break the sharp edges around the board. Because you’re cutting on the outside edge, route counter-clockwise. Take light passes to avoid tear-out and keep the profile clean.
💡 Tip: Do a quick test cut on scrap to confirm the handle depth and bevel profile before routing the board.
Step 7: Sand, Oil, and Add Rubber Feet
Now it’s time for the finishing touches — sanding, oiling, and adding the rubber feet.
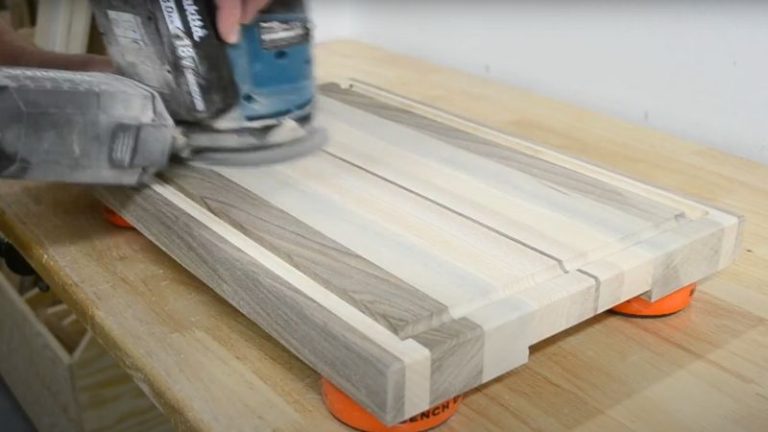
Start by sanding the entire board using an orbital sander. If your sander has variable speeds, that’s even better — start slower on coarser grits and speed up as you go finer. Begin with 80 grit and work your way up to 240 grit. Don’t forget to sand inside the juice grooves and along the beveled edges for a smooth finish.
Once everything feels even, lightly spray the surface with water to raise the wood fibers. When dry, sand the board again with fine-grit paper — this gives it that perfectly smooth feel.
💡 Tip: Use bench cookies while sanding. They lift the board off the surface, keeping it stable and accessible from all sides.
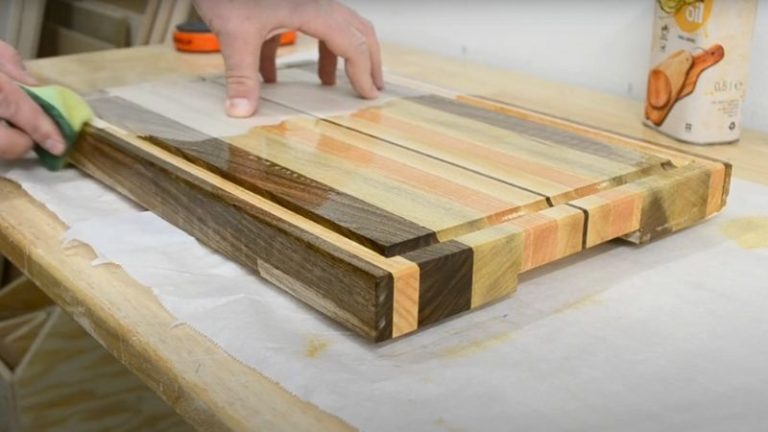
When the surface feels silky, it’s time to apply oil. I’m using Belinka oil or Clarks Cutting Board Oil — both are food-safe and bring out the beautiful grain contrast between walnut, ash, and beech. Apply the oil evenly with a cloth or paper towel, let it soak in, and wipe off any excess after a few minutes.
Finally, mark the positions for the rubber feet using a ruler or marking gauge. Pre-drill the holes, then screw in the feet. This slightly raises the board, makes it easier to grab, and helps with airflow underneath.
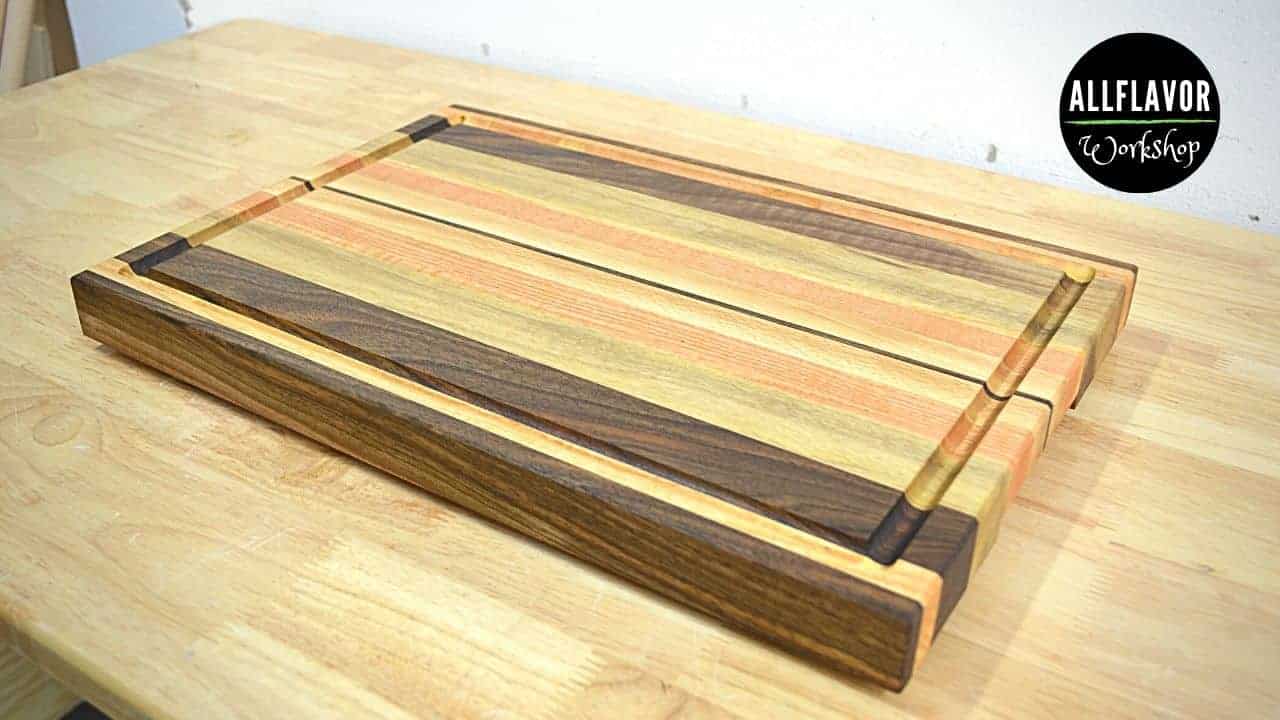
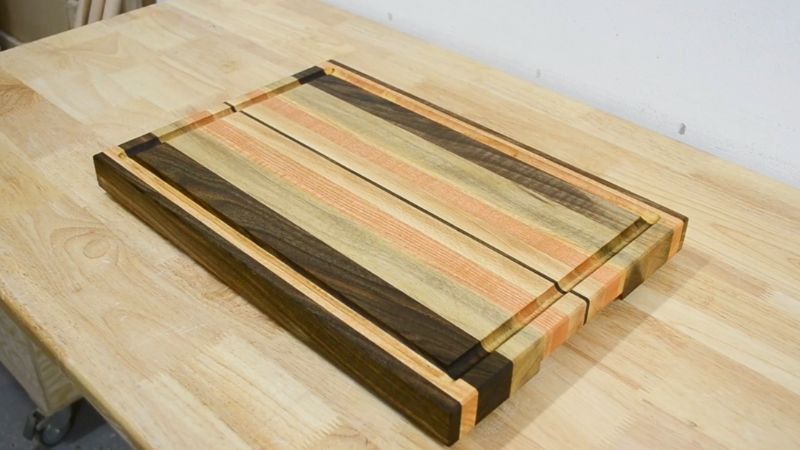
And that’s it — your edge grain cutting board is finished, smooth, and ready to use!

And this is what the finished end-grain cutting board looks like.
Care Tips for Your Cutting Board
To keep your cutting board looking great and performing well for years, a little regular care goes a long way.
Clean by hand only. After each use, wipe the board with warm water and mild soap. Avoid soaking it or putting it in the dishwasher — heat and moisture can warp the wood.
Dry it immediately. Stand the board upright or on its side to let air circulate and prevent moisture buildup.
Re-oil regularly. When the surface looks dry or dull, apply a fresh coat of food-safe oil (like Belinka or Clarks) and let it soak overnight.
Avoid extreme heat or direct sunlight. Sudden changes in temperature can cause cracks or separation at the glue joints.
Use both sides. Even though this board has rubber feet, you can still flip and use it occasionally to distribute wear evenly.
With proper care, your edge grain cutting board will develop a beautiful patina and last for decades — the kind of tool you’ll be proud to keep on display in your kitchen.
Wrap-Up
Making an edge grain cutting board isn’t difficult, but it’s definitely a step up from a simple face grain board. It takes a bit more time, precision, and a few reliable jigs — but they make all the difference. Once you have them, you can reuse them for any project, whether it’s face, edge, or end grain.
The nice thing about edge grain boards is how much freedom you have to design. By mixing different types of wood, playing with color contrast, and changing strip widths, every board comes out unique. It’s a perfect mix of practicality and creativity.
If you haven’t yet, check out Best Jigs for Making Cutting Boards (And How to Use Them) — it covers all the essential jigs I used in this project.
And if you’re ready for the next challenge, the end grain cutting board is the natural next step. It’s a bit more demanding, but it builds on everything you’ve learned here — and the results are absolutely worth it.
👉 Download the free plans for the jigs featured in this build — they’ll make your next project faster and easier.
FAQs
What is an edge grain cutting board?
It’s made by gluing wood strips with their edges facing up. This exposes long wood fibers, making the board durable and more resistant to warping than face grain.
Which woods work best for edge grain cutting boards?
Walnut, maple, and cherry are reliable, food-safe choices. Avoid very soft, oily, or highly open-pored woods.
How thick should an edge grain board be?
About 3.2–3.8 cm (1¼”–1½”). In this build I target ~3.4 cm (final thickness after surfacing).
Do I need special tools or jigs?
Parallel clamps and a planer help a lot. A router flattening jig, juice groove jig, and handle jig make the build faster and more precise.
Which direction should I route the juice groove?
For inside cuts, go clockwise. Take multiple shallow passes at lower RPM to avoid tear-out and burn marks.
What finish should I use?
Use a food-safe oil (e.g., Belinka or Clarks). Re-oil whenever the surface looks dry.
