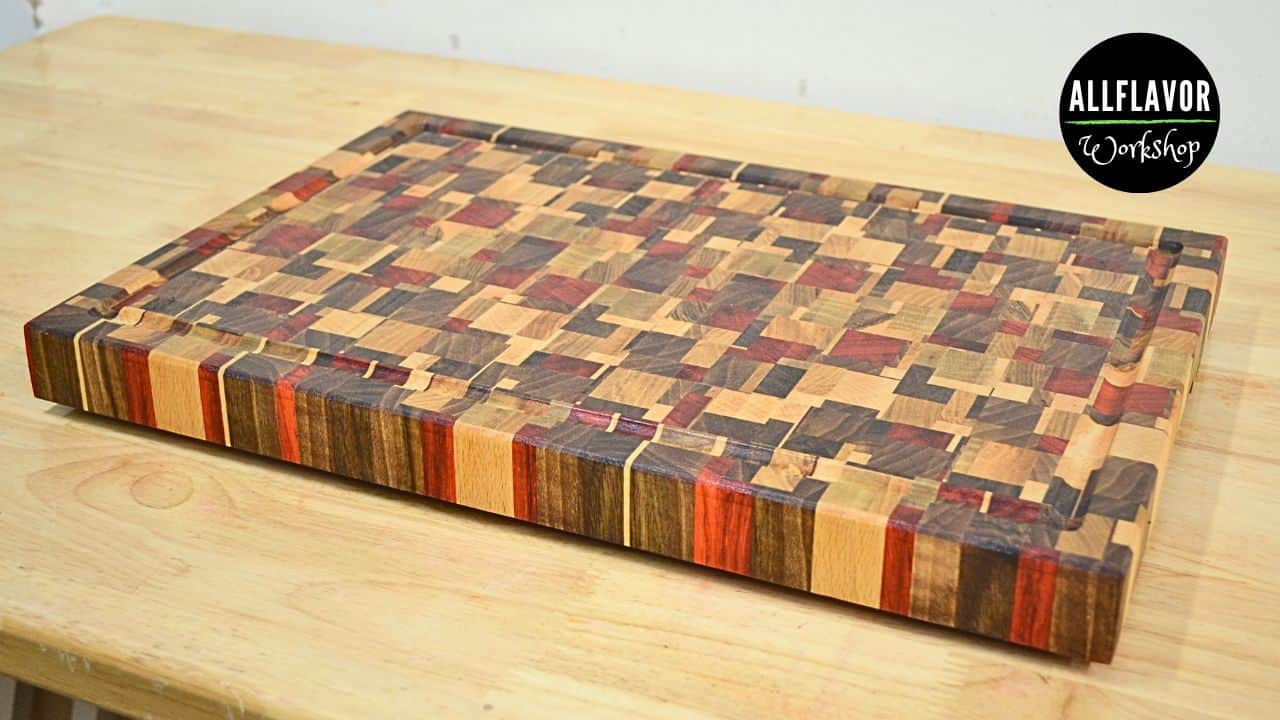
Making a chaotic end grain cutting board is one of those projects that really shows what woodworking is about — mixing creativity with precision. For this board, I used padauk, walnut, ash, and beech, and the result is a colorful mix of warm reds, dark browns, and light tones that really stand out once oiled.
This board is a bit more advanced than the ombré one we built before. There are more cuts, more glue-ups, and a bit more thinking about how to arrange the strips to get that random, “chaotic” pattern. The nice thing is — there’s no single right way to do it. Every board turns out different.
In this build, I’ll walk you through the full process step by step — from preparing and planing the wood, cutting and gluing the panels, flattening, to routing the juice grooves and handles, and finishing with oil and wax.
I’ll also be using a few DIY jigs I made myself: a router flattening jig, a juice groove jig, a handle jig, and a few others that make the process easier and more precise. If you haven’t built them yet, check out my post on the best jigs for making cutting boards.
Video: How to Make a Chaotic End Grain Cutting Board
If you want to see how the whole build comes together, check out the video below. I go step by step through the full process — from cutting the strips to the final oiling and finish.
🎬 Watch the video and don’t forget to subscribe to my YouTube channel for more woodworking builds and jig projects.
Table of Contents
- Video: Watch the Build
- Tools and Materials
- Why Build a Chaotic End Grain Cutting Board?
- Let’s Start Building!
Step 1: Preparing and Cleaning the Boards
Step 2: Gluing Up the Edge Grain Panels
Step 3: Crosscutting the Panels and Preparing the End Grain Layout
Step 4: Flattening and Trimming the Cutting Board
Step 5: Cutting the Juice Groove, Handles, and Beveling the Edges
Step 6: Sanding, Oiling, and Adding Rubber Feet - Care Tips
- Wrap-Up: Why I Love This Chaotic End Grain Cutting Board
- Common Questions About Chaotic End Grain Cutting Boards
Materials and Tools
Here’s everything I used to build the chaotic end grain cutting board. Some tools are optional, but they definitely make the job easier.
Materials:
- Walnut
- Padauk
- Ash
- Beech
- Wood Glue – Wood Glue
- Cutting Board Oil – Cutting Board Oil
- Cutting Board Rubber Feet – Rubber Feet
- Sandpaper Sheets – Sandpaper Sheets
- Sanding Discs – Sanding Discs
Tools:
- Table Saw – Table Saw
- Planer – Planer
- Router – Router
- Orbit Sander – Orbit Sander
- Hand Drill – Hand Drill
- Glue Gun – Glue Gun
- Bessey Parallel Clamps – Parallel Clamps
- F-Clamps – F-Clamps
- Piher One Hand Clamps – Piher One Hand Clamps
- Wolfcraft One Hand Clamps – Wolfcraft One Hand Clamps
- T-Track Clamps – T-Track Clamps
- Dovetail Clamps – Dovetail Clamps
- Dovetail Hardware (Bolts) – Dovetail Hardware
- Table Saw Blade – Table Saw Blade
- Grr-Ripper Push Block – Grr-Ripper Push Block
- Router Flattening Bit – Router Flattening Bit
- Router Juice Groove Bit – Juice Groove Bit
- Router Straight Bit – Straight Bit
- Chamfer Router Bit – Chamfer Bit
- Bench Cookies – Bench Cookies
- Machinist Square – Machinist Square
- Double-Sided Woodworking Tape – Woodworking Tape
- Wood Scraper – Wood Scraper
- Silicon Glue Brush – Silicon Glue Brush
- Painters Tape – Painters Tape
- Dust Respirator – Dust Respirator
- Respirator Cartridge – Respirator Cartridge
- Eye Protection – Eye Protection
This post contains affiliate links. If you buy through them, I may earn a small commission at no extra cost to you. Thanks for supporting AllFlavor Workshop!
📌 Want to build this board?
Save THIS PIN to your Board on Pinterest!

Why Build a Chaotic End Grain Cutting Board?
A chaotic end grain cutting board is all about variety and character. Every strip, every joint, and every color adds something unique — no two boards will ever look the same. It’s a great way to use offcuts or mix different wood species and create something truly original. The end grain surface also makes it extremely durable and gentle on knives, so it’s not just beautiful but practical too.
Let’s Start Building!
We’re starting this build from rough slabs — padauk, walnut, ash, and beech. None of them are perfectly straight or clean yet, so the first job will be preparing the boards and getting them ready for glue-up. The final cutting board will measure roughly 45 cm long and 3.2 cm thick, but there’s plenty of flexibility here depending on what stock you have on hand.
The process is similar to the other cutting boards we’ve built, but this one has a twist — we’ll first prepare and glue up several smaller edge-grain panels, then crosscut them into strips and rearrange them in different ways to create that chaotic, random pattern.
The idea behind a chaotic board is simple: the more panels and the more variety you create, the richer and more dynamic the final pattern will be. You can mix strip widths, flip or rotate pieces, and play with color contrast — padauk adds a warm red tone, walnut brings depth, and ash and beech balance it with lighter shades.
How to Make a Chaotic End Grain Cutting Board
Step 1: Preparing and Cleaning the Boards
For this project, I’m starting with rough slabs of walnut, padauk, ash, and beech. None of them are straight or flat yet, so the first step is to get them ready for cutting. I’m showing the process mainly on the walnut slab — the others follow the same idea.
1️⃣ Removing the Bark and Cleaning the Edges
I start by removing the bark using a sharp chisel and cleaning up the live edges. This makes it easier to see the true surface of the wood and prevents small pieces of bark or dirt from damaging the planer knives.
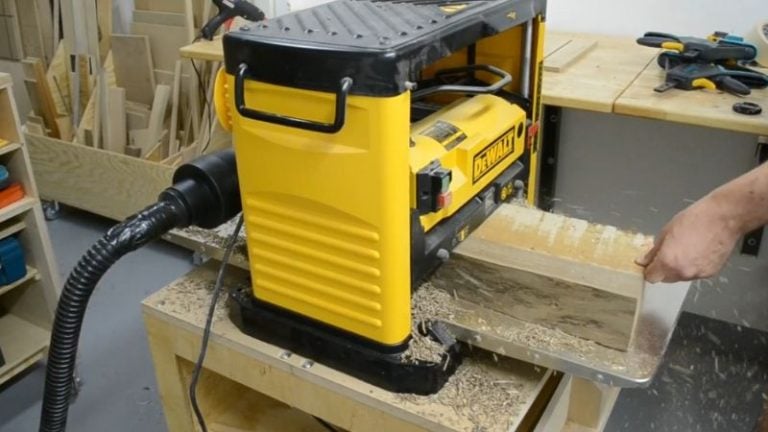
2️⃣ Flattening the Boards
The walnut board I’m using is a bit twisted, so I secure it to a thick plywood base with a hot glue gun. This keeps it from moving or rocking while passing through the planer. Once one side is flat, I remove the glue, flip the board over, and plane the other side until it’s perfectly flat.
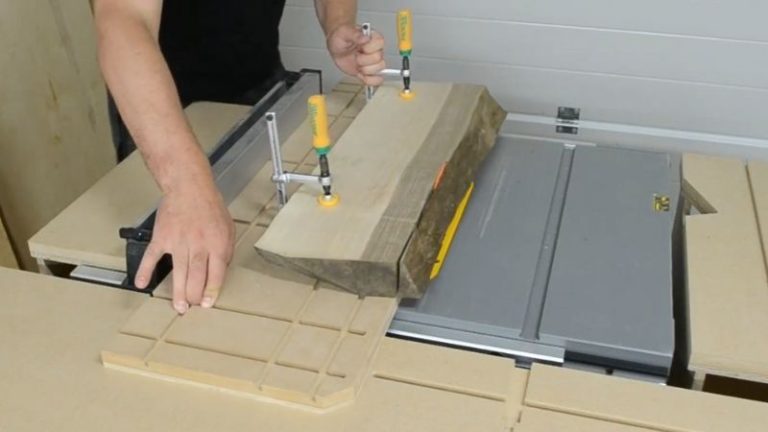
3️⃣ Straightening the Edges
Next, I use my DIY Jointer Sled to straighten both live edges. This step makes sure the boards are perfectly straight and ready for glue-up.
🔗 You can build your own jointer sled using my DIY Jointer Sled guide.
4️⃣ Final Prep
I repeat the same process for all the other slabs. Once finished, I have a set of clean, flat, and straight boards — all ready for the next step: cutting them into strips.
At this stage, it doesn’t really matter if the boards have slightly different thicknesses — we’ll take care of that later once all the strips are cut and planed.


Step 2: Gluing Up the Edge Grain Panels
The main idea behind a chaotic end grain cutting board is to cut your boards into strips of different widths, mix and rearrange them, glue them into panels, and then repeat that process a few times. Each cycle adds more variation — more cuts, more glue-ups, and more randomness in the final design.
In total, I repeat the process four times and end up with two edge grain panels with slightly different patterns, ready to be turned into the final chaotic end grain board.
Let’s go through one full cycle — the other ones follow the exact same process.
🔹 First Cycle – Cutting and Gluing the Strips
Start by cutting all boards into 2.5 cm (1”) wide strips.
💡 Tip: Don’t throw away the offcuts — they often come in handy later for filling gaps or adjusting panel width.
Since the boards were already planed flat in the previous step, we can now rotate the strips, reorder them, and mix different species before gluing. This randomizes the grain and color pattern, which is what gives the board its chaotic look later on.

Once you’re happy with the layout, glue the strips together. Apply glue evenly, spread it with a silicone brush, and clamp firmly — but not excessively.
💡 I like to add masking tape on the clamp bars so the excess glue doesn’t stick to them and can be easily removed later.
Wait until the glue fully dries, then remove the panel from the clamps, clean the surface with a scraper, and run it through the planer again. At this point, you’ll have four smaller edge grain boards, each with a slightly different pattern.

🔹 Cutting Strips for the Next Cycles
Each new cycle repeats the same process — cut, mix, glue, plane — but change the strip width to create new pattern combinations.
| Cycle | Strip Width | Result After Glue-Up |
|---|---|---|
| 1️⃣ First | 2.5 cm | 4 edge grain boards |
| 2️⃣ Second | Same as board thickness (square strips) | 4 edge grain boards |
| 3️⃣ Third | 3.2 cm | 2 edge grain boards |
| 4️⃣ Fourth | Square strips again | 2 final panels ready for final glue-up |
💡 Note: For the final glue-up, aim to end up with panels of similar width. Rearrange strips as needed and reuse offcuts from earlier cycles to fill gaps and balance the layout.

🔗 You can build your own parallel clamping setup like this using my DIY Router Flattening Jig guide — it’s perfect for keeping panels flat and even during glue-ups.
Step 3: Crosscutting the Panels and Preparing the End Grain Layout
Now it’s time to crosscut the edge grain panels and prepare the final end grain layout. This is where the chaotic pattern really starts to take shape.
1️⃣ Squaring the Panels
I start by trimming both ends of each edge grain panel using my table saw sled. This ensures every panel is perfectly square before cutting the strips.💡 Squared ends make alignment much easier during the final glue-up and help reduce waste later on.
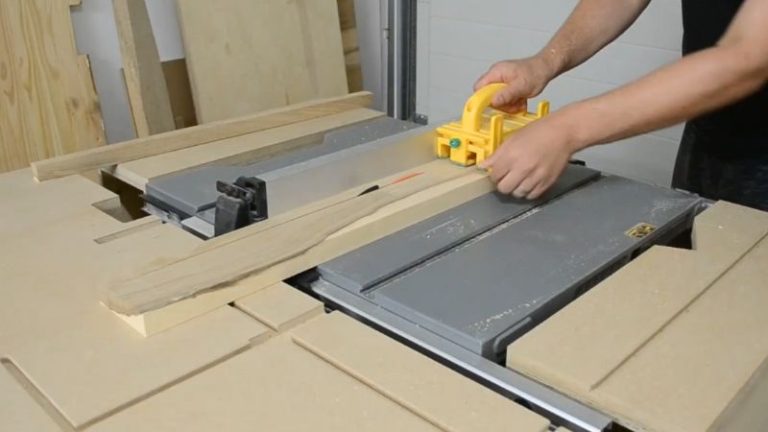
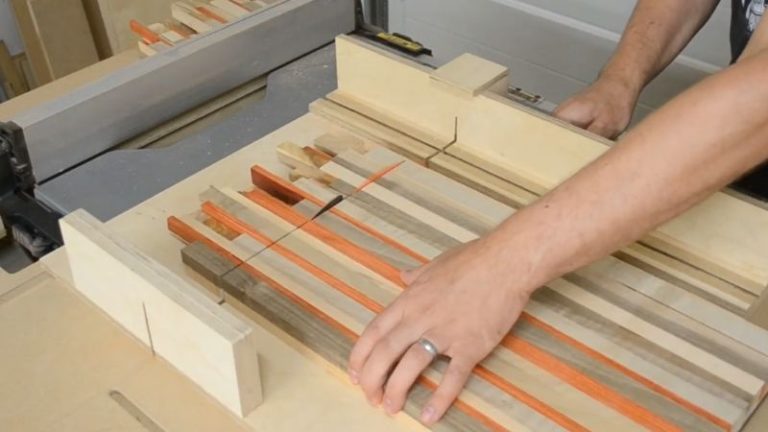
2️⃣ Cutting the Strips
Next, I set the table saw fence to 3.2 cm — that will be the final thickness of the board, slightly reduced later during flattening. I cut all the panels into strips, keeping the cuts clean and consistent.
3️⃣ Arranging the Layout
Now comes the fun part — arranging the final layout. Each strip can be flipped and rotated in four different orientations. By mixing these orientations, you can create an endless number of combinations and avoid any repeating pattern. That’s what gives the chaotic board its character — every build looks different.
4️⃣ Final Glue-Up
Once you’re happy with the layout, glue the final panel together. Apply glue evenly, spread it well, and clamp the panel firmly but evenly from both sides. Try to align the strips as accurately as possible — it’ll save you time flattening and sanding later.
🔗 For clean and accurate crosscuts, I’m using my DIY Table Saw Sled.


Step 4: Flattening and Trimming the Cutting Board
Once the final glue-up is fully cured, it’s time to flatten the board and bring it to its final size. This step turns the rough chaotic panel into a clean, squared cutting board ready for sanding and finishing.
I place the board in my router flattening jig — the safest way to flatten end grain. Running an end grain board through a planer can cause tear-out or serious damage, so the router is the way to go.
I take shallow passes with a router flattening bit, slowly working across the surface. Once one side is flat, I flip the board and repeat the process until both sides are even and smooth.
Then I trim the edges — first using my DIY jointer sled for a straight reference cut, and then my table saw sled to square the board. That way, all corners are clean and the board is perfectly shaped for the final steps.
🔗 Want the exact setup I use? Build my DIY Router Flattening Jig, and DIY Jointer Sled.


Step 5: Cutting the Juice Groove, Handles, and Beveling the Edges
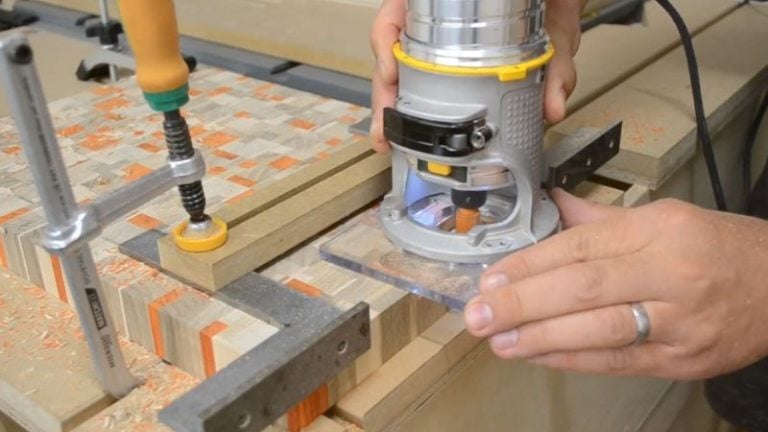
Clamp the board securely in your juice groove jig. I use a trim router with a juice groove bit for precise and even cuts. Move slowly and stay in control — a small slip can ruin hours of work.
When routing inside the board, always move clockwise around the edge to keep the router steady.
💡 Tip: End grain burns easily, so use low RPMs and make shallow passes for a clean finish.
Next, I cut the handles using my router handle jig. Center it on the bottom, align with the edges, and make the cuts about 0.8 cm deep — just enough for your fingers. Repeat for the second handle.
To finish the shape, I use a 45° bevel bit and route against the clock around the outer edge. A few shallow passes help avoid tear-out and leave a smooth finish. If you prefer, you can round the edges by hand with a sanding block. It takes longer but gives the board a softer, handmade feel.
🔗 Check out my DIY Juice Groove Jig, Router Handle Jig, and DIY Sanding Block — they make these steps simple and precise.


Step 6: Sanding, Oiling, and Adding Rubber Feet
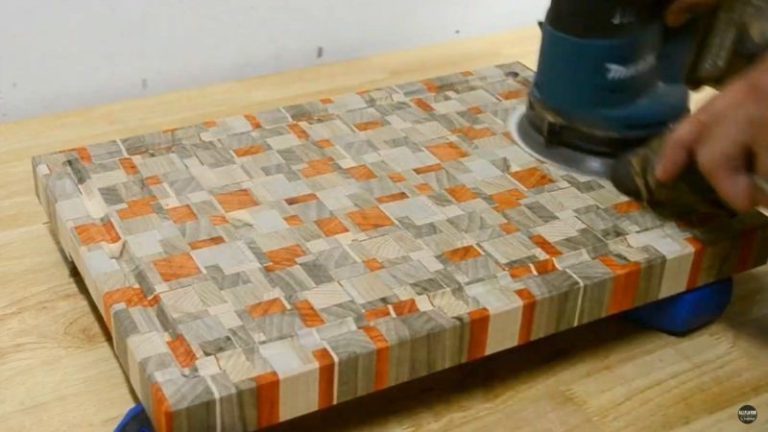
Now it’s time for the finishing touches. I start by sanding the entire board using an orbital sander — from 80 up to 300 grit. A sander with multiple speed settings works best here. Start slow and increase speed gradually as you go to finer grits.
When sanding, pay attention to padauk dust — it’s strong and can stain lighter woods like beech or ash. Use a vacuum or dust extractor after each grit to keep the surface clean and prevent color transfer.
After sanding, spray a light mist of water over the board to raise the grain, then let it dry and sand once more. This helps get the surface silky smooth.
💡 Using bench cookies really helps here — they keep the board stable and raised so you can sand all sides easily.
Once the surface feels perfect, move to finishing. I’m using Clark’s food-safe oil and wax. First apply a generous coat of oil and let it soak in — end grain will absorb a lot more than face or edge grain. After it’s fully absorbed, buff in a layer of wax for extra protection and shine.
Finally, add the rubber feet. Mark their positions using a ruler marking gauge, predrill shallow holes, and screw the feet in. They lift the board slightly, making it easier to handle and preventing moisture from reaching the bottom.


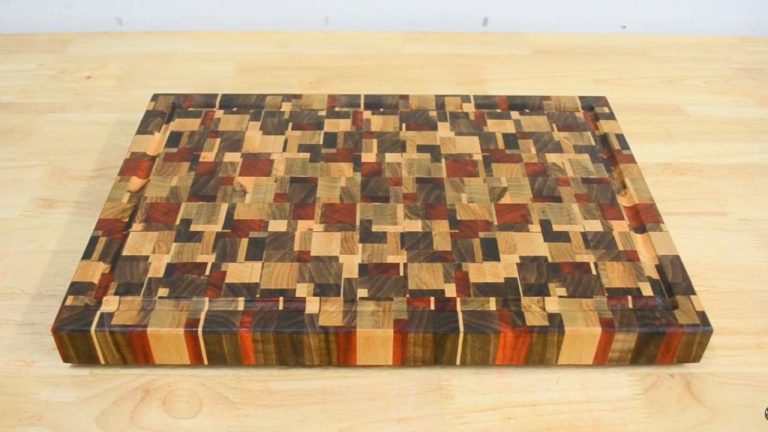
And that’s it — the chaotic end grain cutting board is finished! Once oiled, the colors really pop — the contrast between padauk’s deep red, walnut’s dark brown, and the lighter ash and beech looks incredible.


Care Tips
End grain cutting boards need a bit more attention, but they’ll last for years if cared for properly. Clean the board with mild soap and warm water, then dry it immediately — never soak it in water or put it in the dishwasher. Reapply cutting board oil regularly to keep the fibers sealed and vibrant. For boards with padauk or other exotic woods, oiling also helps preserve the rich color and prevents fading over time.
Wrap-Up: Why I Love This Chaotic End Grain Cutting Board
End grain cutting boards are definitely a step up from face grain or edge grain — even from the ombre version — but once you get the hang of it, it’s quite straightforward and repeatable. There are countless ways to design them, and this chaotic pattern is one of my favorites. You can combine different wood types, mix widths, and end up with a completely unique result every time.
The best moment? When you pour on the oil and watch the colors and pattern come to life — the deep padauk reds, the warm walnut tones, and the light ash and beech contrast beautifully.
If you’re just starting out, I’d recommend beginning with a face grain or edge grain cutting board first. Build a few basic jigs along the way — you’ll need them anyway, and they’ll make every future project much easier. Once you have some experience, this chaotic end grain is a fantastic next step. It’s durable, looks amazing, and will easily last for years.
💡 If you want to make your own setup, check out my post on Best Jigs for Making Cutting Boards — you’ll find all the essential jigs I used in this project and how they’ll help you with your next board build.
Common Questions About Chaotic End Grain Cutting Boards
1. What makes a chaotic end grain cutting board different from other types?
A chaotic end grain cutting board is made from multiple wood types and cut in varying widths, then re-glued several times to create a random, “chaotic” pattern. It’s stronger than a face or edge grain board and looks completely unique — no two boards ever turn out the same.
2. What woods are best for a chaotic cutting board?
Hardwoods like walnut, padauk, beech, and ash work great. They’re durable, food-safe, and provide a beautiful mix of colors and contrast. Avoid softwoods or oily tropical woods that can dull your knives or make gluing difficult.
3. How do you flatten an end grain cutting board safely?
Use a router flattening jig with a flattening bit instead of a planer. Planers can cause tear-out or even damage an end grain surface. Shallow, controlled passes with a router give you a smooth, even surface every time.
4. How should I care for an end grain cutting board?
Clean it with mild soap and water and dry it immediately — never put it in a dishwasher. Reapply food-safe oil regularly, and occasionally add a coat of wax to protect the surface and bring back the shine.
5. Can I use epoxy or inlays in an end grain board?
You can, but it’s generally not necessary. End grain boards already have a strong and decorative surface on their own. If you want to add design elements, epoxy inlays can work, but be sure they’re food-safe and properly sealed.
