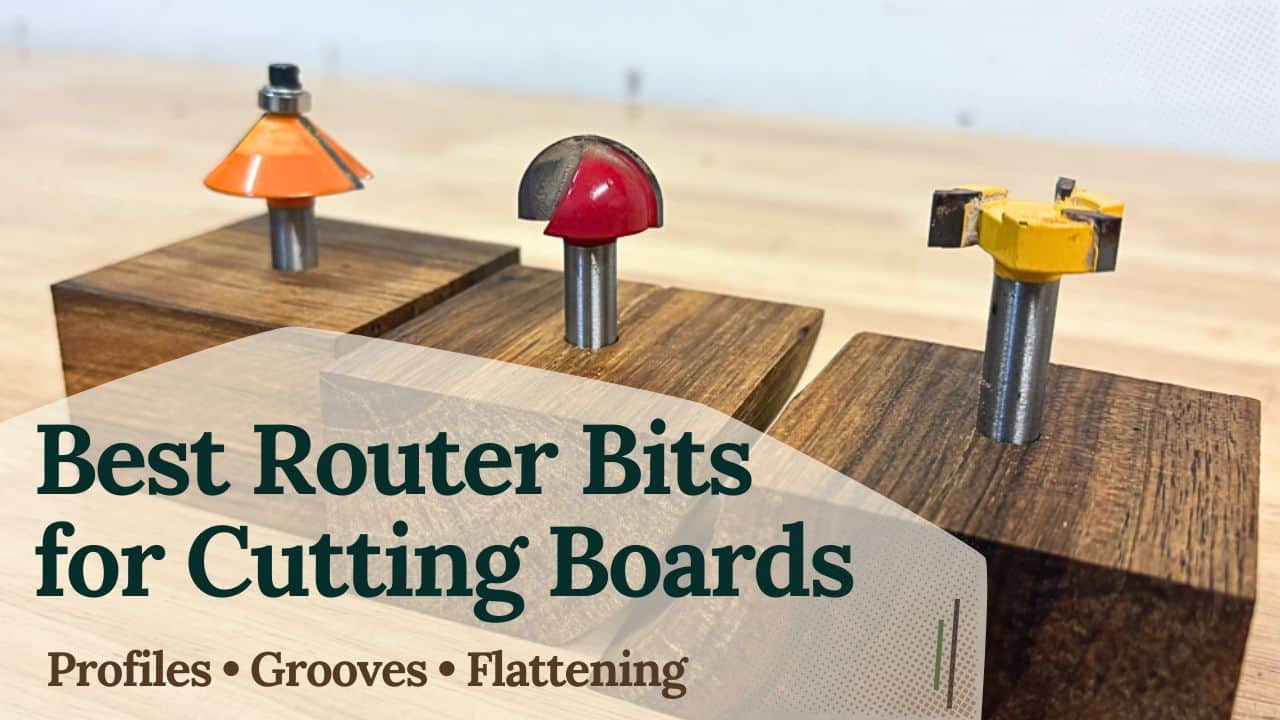
If you make cutting boards, a router is one of those tools that can take your project from “nice homemade” to “this looks like it came from a shop.” It’s not just about looks either — the right bit makes your board more comfortable to hold, easier to clean, and much more repeatable when you build more than one.
And if you’re also building (or planning to build) a few jigs for cutting boards, start here first:
👉 Best Jigs for Making Cutting Boards (And How to Use Them). That post ties everything together — flattening, juice grooves, templates, and the jigs that make routing safer and more accurate.
If you only buy 3 router bits for cutting boards, get these:
✅ 1) Surfacing / Spoilboard Bit (Flattening bit)
This is the bit that makes a flattening jig/router sled actually worth using. It removes material fast and leaves a clean, even surface — perfect for leveling glue-ups, wide boards, or anything that doesn’t fit through a planer.
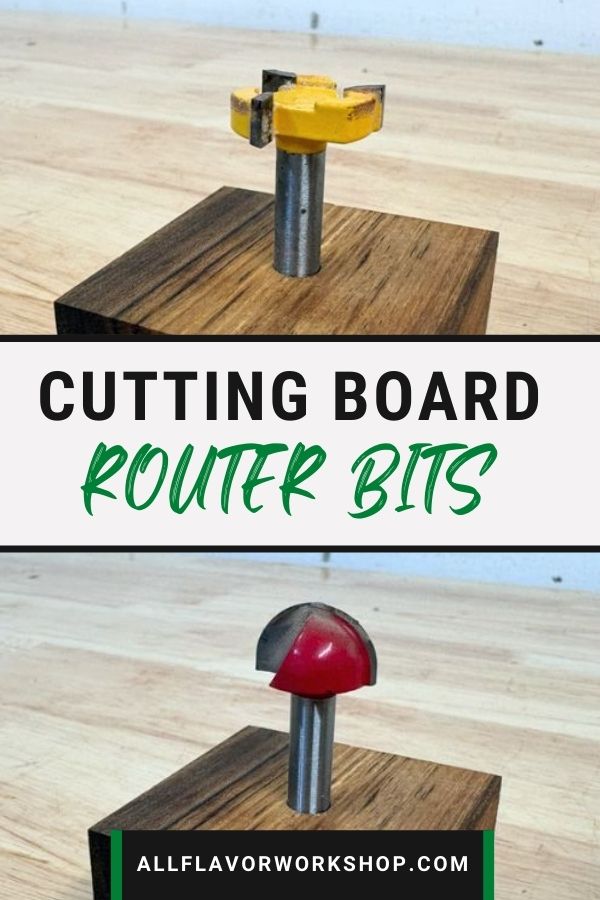
✅ 2) Core Box / Round Nose Bit (best “juice groove” bit)
If you want clean juice grooves that look professional, this is the easiest path. It’s stable, predictable, and leaves a groove that feels intentional (not like a random trench).
✅ 3) Roundover Bit (the must-have edge profile)
This is the “comfort bit.” It softens edges, improves grip, and instantly makes a board feel finished. I use it on almost every board unless I’m going for a sharp, modern chamfer.
And yes — there are more router bits that are super useful for cutting boards (flush trim bits for templates, chamfers, coves, straight bits, etc.). I’ll break those down below by phase of the build, so you can see exactly when each one is used and why it matters.
Why router bits matter on cutting boards
Cleaner results: crisp edges, smooth grooves, fewer burn marks and “oops” moments
More consistency: once you dial in a setup, every board comes out the same
Better feel in the hand: eased edges and smart profiles make a board feel premium
Real function: juice grooves, finger holds, handle cutouts — not just decoration
What to look for in a cutting board router bit
For cutting boards, I mainly care about stability and clean cuts. If a bit is available in 1/2″ shank, I’ll pick that — it runs smoother and chats less, especially on bigger bits like surfacing and roundovers. I also stick to sharp carbide (hardwoods will burn and tear out fast with cheap dull bits). And for anything template-based (handles, shapes), a good bearing matters more than you’d think — a rough bearing can leave a wavy edge even if the cutter is fine.
And honestly, whatever you have to start with is usually good enough — you can always upgrade later once you know which bits you’re reaching for the most.
Quick note: Some links in this article may be affiliate links — it doesn’t cost you extra, and it helps support the builds and free plans on AllFlavor Workshop.
📌 Save THIS PIN to your Board on Pinterest!
Cutting Board Workflow: Where Each Router Bit Fits
Most cutting boards go through the same basic phases — face grain, edge grain, end grain… the order is usually similar. The router steps are the ones that give the board that clean, “finished” look, and they also help you solve a few problems along the way (flattening, grooves, comfort edges, handles).
Here’s when you actually use the bits during a real cutting board build:
1) Flattening + Surfacing (flattening the board, start to finish)
This isn’t only for fixing a bad glue-up. Flattening and surfacing can happen during stock prep, between glue-ups, or at the very end when you want the board perfectly flat and clean. It’s also the go-to method if you don’t have a planer, and it’s often the safer option for end grain boards (many people avoid planing end grain altogether).
You’ll use:
✅ Surfacing / Spoilboard bit → flatten faces in a router sled / flattening jig, clean up glue-ups, level the whole board
✅ Straight bit (optional) → small cleanup passes, trimming ridges, working tight spots where a big surfacing bit won’t fit
Typical moment in the build: during prep (optional), after glue-ups, and/or as a final flattening step before juice grooves and edge profiles.
2) Juice Grooves (routing a clean groove in a finished board)
This is usually done once the board is flat, sized, and sanded to a decent level, because you want the groove to look clean and even. A router + guide jig makes this super repeatable.
You’ll use:
✅ Core box bit / round nose bit (my preferred) → simple, clean groove with a rounded bottom
✅ Bowl & tray bit (also a great option) → wider “tray style” groove that looks very intentional and professional
Typical moment in the build: after flattening and most sanding, before final touch-up sanding and edge breaking.
3) Edge Profiles (small effort, big upgrade)
This is the fastest “pro upgrade” you can do. Even a small profile makes the board feel better in the hand, looks cleaner, and helps prevent splintery edges over time.
You’ll use:
✅ Chamfer bit (my preferred) → crisp, modern, looks professional with almost no effort
✅ Roundover bit (standard option) → softer feel, classic look, easy to control
Typical moment in the build: after the juice groove and sanding (so the profile stays clean and you don’t have to re-sand as much).
4) Handles + Cutouts (comfort + style at the end)
Handles make boards easier to pick up, easier to move, and they add a nice “designed” look. There are a few ways to route them, but these two bits cover the most common handle styles.
You’ll use:
✅ Straight bit → handle cutouts, pockets, and clean rectangular openings (especially with a simple template or fence setup)
✅ Core box bit → rounded finger grooves and comfortable hand holds with a smooth bottom
Typical moment in the build: typically near the end, once the board is flat, shaped, and you know exactly where you want the handle.
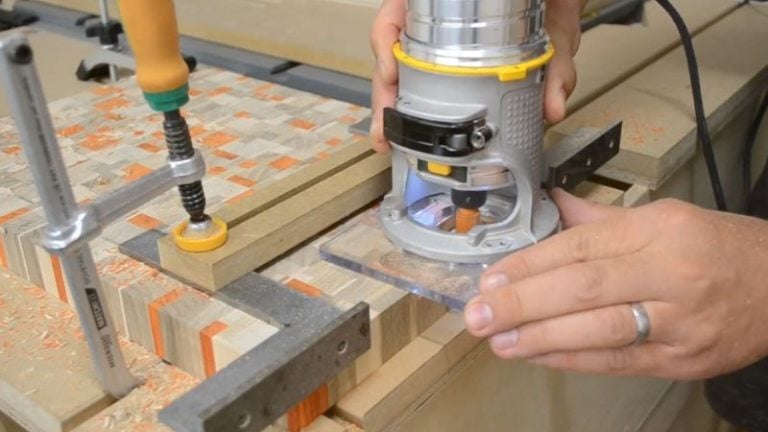
Router Bits for Flattening Cutting Boards (Surfacing + Straight Bit)
If I had to pick one routing setup that really changes the game for cutting boards, it’s a router flattening jig (router sled) paired with a surfacing / spoilboard bit. This combo lets you flatten boards that don’t fit your planer, level glue-ups, and get end grain boards dead flat without stressing a planer.
If you want to build the same setup I’m using, here’s my full guide: Router Flattening Jig
1) Surfacing / Spoilboard Bit (the main flattening bit)
Affiliate link (my go-to surfacing bit): SURFACING / SPOILBOARD BIT

This is the bit that does the heavy lifting. A larger diameter surfacing bit removes material evenly and keeps the surface consistent, which is exactly what you want when flattening a whole cutting board.
Practical tips:
Take shallow passes and let the bit do the work (cleaner surface, less chatter).
A bigger diameter is faster, but stability matters more than speed — keep the router base supported (that’s why the flattening jig helps so much).
Expect light sanding afterwards — the goal is flat, not “finish-ready straight off the router.”

2) Straight Bit (optional, but handy)
I treat the straight bit as the “helper” bit. It’s not the main flattening tool, but it’s great for small cleanup passes (tiny ridges, corners), and for tight spots where a surfacing bit won’t reach cleanly.
Practical uses:
Cleaning up small ridges left after surfacing
Flattening narrow areas where your big bit can’t fit
Light trimming or squaring small sections if your build needs it

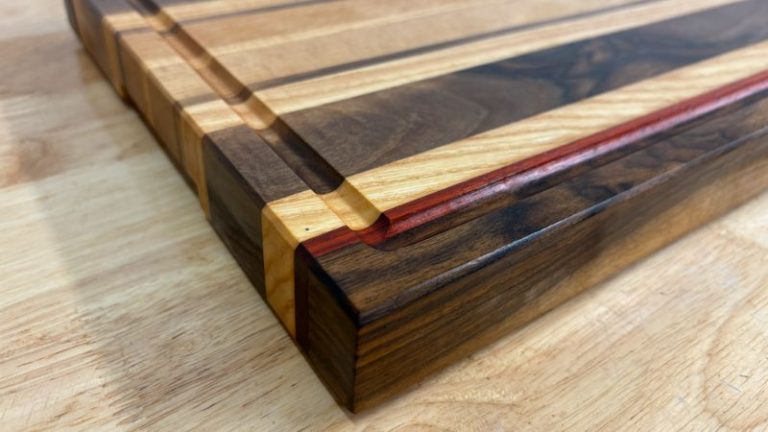
Router Bits for Juice Grooves (Core Box + Bowl & Tray Bit)
Juice grooves are usually one of the last “feature” steps on a cutting board — and they’re also one of the easiest ways to make a board look clean and professional. The key is doing it on a board that’s already flat and sanded, and then using a simple guide setup so the groove stays perfectly consistent.
If you want to build the same setup I’m using, here’s my full guide: Juice Groove Jig
1) Core Box / Round Nose Bit (my preferred juice groove bit)
Affiliate link (my go-to core box / round nose bit): CORE BOX / ROUND NOSE BIT

This is the simplest and most reliable juice groove bit. You get a smooth rounded bottom, the groove is easy to clean, and it doesn’t scream “over-designed.” If you want that classic groove that works on almost any board, this is it.
Practical tips:
Make the groove in 2–3 shallow passes instead of one deep cut.
Do a light final pass to clean up the bottom and walls.
Sanding afterwards is minimal if the bit is sharp and you don’t push too fast.

2) Bowl & Tray Bit (also a great option)
A bowl & tray bit is a great option if you want a slightly wider groove with a more “designed” profile. It’s especially nice on bigger boards where a thin groove can look a little lost.
Practical tips:
Go shallow and steady — wider cutters show mistakes more easily.
Keep the board supported and stable so the groove depth stays consistent.
Router Bits for Edge Profiles (Chamfer + Roundover Bit)
This is the fastest “pro upgrade” you can do to any cutting board. Even a small profile makes it feel better in the hand, looks cleaner, and gives the board that finished, intentional look — with very little effort.
You can cut the profiles freehand, or you can use a router table for that:
1) Chamfer Bit (my preferred profile)
Affiliate link (my go-to chamfer bit): CHAMFER BIT

Chamfers are quick, clean, and forgiving. You can keep them tiny (just breaking the edge) or make a slightly stronger bevel for a more modern style.
Practical tips:
Start with a small chamfer and increase only if it looks right.
Do the profile after the groove, then do a quick touch-up sanding pass.
2) Roundover Bit (classic option)
Affiliate link: ROUNDOVER BIT
Roundovers are the standard for a reason — they’re comfortable, safe, and very forgiving. If you like softer edges or you want a more traditional look, roundover is hard to beat.
Practical tips:
Do a light pass first, then a second pass if needed for a smoother cut.
Watch end grain corners — that’s where tear-out likes to happen.

Router Bits for Handles + Cutouts (Straight + Core Box Bit)
Handles are one of those features that make a board feel “designed.” They’re comfortable, practical, and they add style without needing fancy joinery. I usually do handles near the end, once the board is flat, shaped, and I know exactly where I want the grip to be.
If you want the jigs I am using for cutting handles, here they are:
1) Straight Bit (for handle cutouts and pockets)
Affiliate link (my go-to straight bit): STRAIGHT BIT
Straight bits are great for routing rectangular or rounded-rectangle cutouts, and they’re also useful for shallow handle pockets if you like that style.
Practical tips:
Drill out most of the waste first if you can (less stress on the router).
Take multiple shallow passes — handles are usually deeper than they look.
2) Core Box Bit (for rounded finger grooves)
Affiliate link: CORE BOX BIT
If you want a comfortable finger groove style handle, a core box bit is the easiest way to get that smooth rounded shape without overthinking it.
Practical tips:
Make a test cut first — finger grooves are all about feel.
Keep the groove shallow and comfortable rather than deep and aggressive.

1/4" vs 1/2" Shank Router Bits for Cutting Boards (And Where 8mm Fits In)
If you’re choosing between 1/4″ and 1/2″ shank router bits, the real difference is simple: stability. A thicker shank flexes less, runs smoother, and is easier to control — especially in hardwood and with larger bits.
When 1/4″ (6.35mm) is enough – go with 1/4″ when the bit is smaller and the cut is lighter:
Core box / round nose bits for juice grooves
Straight bits for small cleanup work and light handle routing
Small roundovers/chamfers when you’re just breaking the edge
With sharp carbide and shallow passes, 1/4″ works totally fine for a lot of cutting board work.
When 1/2″ (12.7mm) is worth it – choose 1/2″ when you want the smoothest cut and the least chatter:
Surfacing/spoilboard bits (flattening in a router sled)
Larger edge profile bits
Anything that removes a lot of material quickly
If you’re flattening boards often, 1/2″ is the size that feels the most “locked in.”
Where 8mm fits in (my personal go-to)
In many European shops (including mine), 8mm is the default, and honestly it works perfectly fine for cutting boards. I use 8mm for basically all operations — flattening (where applicable), juice grooves, edge profiles, and handle routing — and I don’t feel limited.
Bottom line: start with what fits your router. If you’re on 8mm, you’re in a great middle ground. If you’re choosing between 1/4″ and 1/2″, use 1/4″ for smaller bits and lighter cuts, and step up to 1/2″ for flattening and bigger cutters where stability matters most.
Wrap-Up: Start Simple, Upgrade as You Go
You really don’t need a huge router bit collection to make great cutting boards. In fact, a decent basic router bit set will cover most of the “everyday” work — edge profiles, grooves, and general routing — and it’s a perfectly fine way to start. I’d only avoid the absolute cheapest sets, because you’ll usually see it in burn marks, tear-out, and a rougher cut. That said, you don’t need to go premium from day one either. Try what you have, see what works, and upgrade only the bits you actually reach for the most.
The one bit that’s usually not included in sets (and makes the biggest difference on cutting boards) is the surfacing / spoilboard bit. Yes, you can flatten with a straight bit and get it done — but a surfacing bit is faster, more stable, and gives you a much more even surface. If you want to invest in one separate bit, this is the one that will pay off quickly, especially when paired with a router flattening jig/router sled.
One thing people forget: a sharp bit and a stable setup beat an expensive bit used poorly. Shallow passes, steady feed rate, and solid clamping will improve your results more than any “fancy” profile.
If you want to make the whole cutting board process easier, here’s my full guide to the jigs I use:
👉 Best Jigs for Making Cutting Boards (And How to Use Them)
📌 Save THIS PIN to your Board on Pinterest!
FAQs (Best Router Bits for Cutting Boards)
1) What are the best router bits for cutting boards?
For most cutting boards, you can cover almost everything with a few essentials: a core box (round nose) bit for juice grooves, a chamfer or roundover bit for edge profiles, and a straight bit for handle cutouts and general routing. If you also flatten boards with a router sled, add a surfacing/spoilboard bit — it’s the one bit that makes flattening faster and more predictable.
2) What router bit is best for a juice groove?
My preferred option is a core box / round nose bit because it leaves a clean groove with a rounded bottom that looks good and is easy to wipe out. A bowl & tray bit is also a great option if you want a wider, more “designed” groove.
3) Can I flatten a cutting board with a straight bit?
Yes, you can flatten with a straight bit, especially for smaller boards or light cleanup — but it’s slower and harder to keep perfectly even. A surfacing/spoilboard bit is simply better for flattening full faces, especially when used with a router flattening jig (router sled).
4) Are cheap router bits good enough for cutting boards?
Sometimes — but it depends. Very cheap bits are more likely to burn, tear out, or dull quickly in hardwoods like maple, beech, or walnut. A mid-range carbide set is usually the best “starter” value. Then upgrade the few bits you use the most (typically your edge profile bit and your juice groove bit).
5) Should I use 1/4", 1/2", or 8mm shank bits for cutting boards?
For larger bits and heavier cuts (like flattening), 1/2″ (12.7mm) is the most stable. 1/4″ (6.35mm) is fine for smaller bits like juice grooves and light profiling. In many European setups, 8mm is a great everyday size — I use 8mm for most cutting board routing and it works perfectly fine.
