
Small woodworking projects can sometimes be more demanding than large ones.
There is simply less room to hide a bad cut.
That is one reason I wanted to make these small wooden keepsake boxes. The design itself is simple — four sides, a bottom, and a removable lid — but at this size, the proportions, alignment, wall thickness, and lid fit all become much more noticeable.
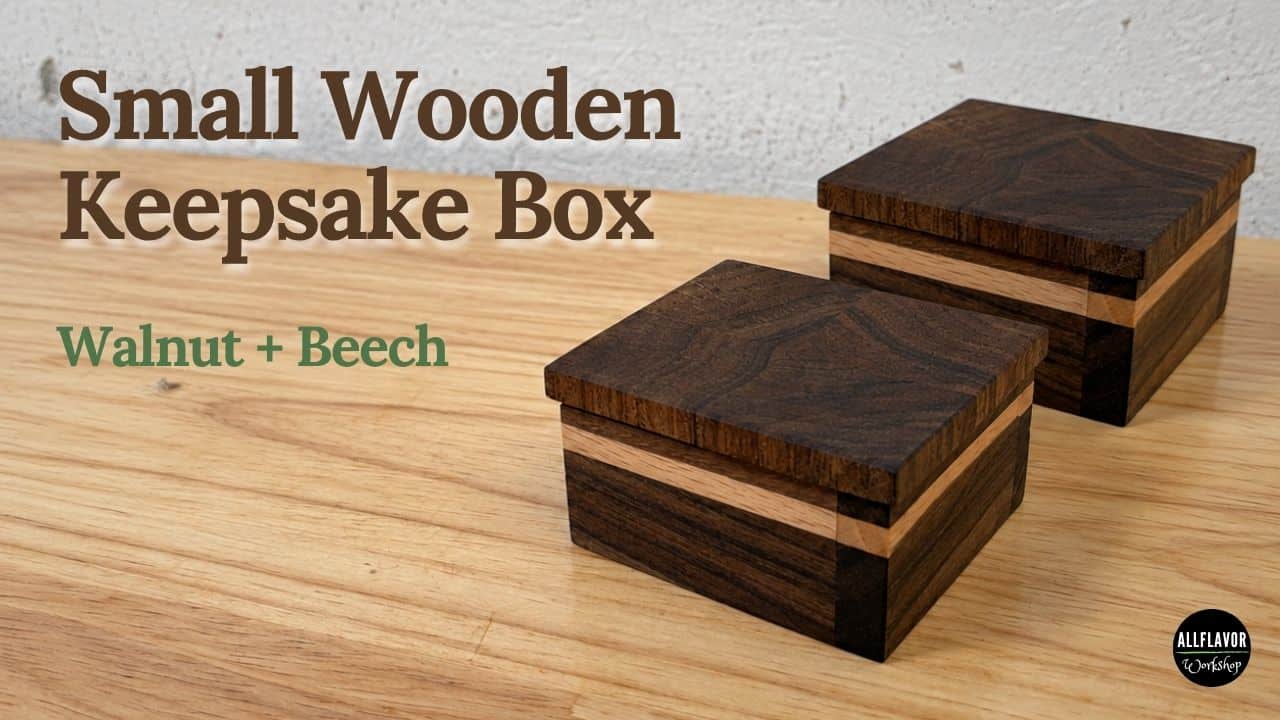
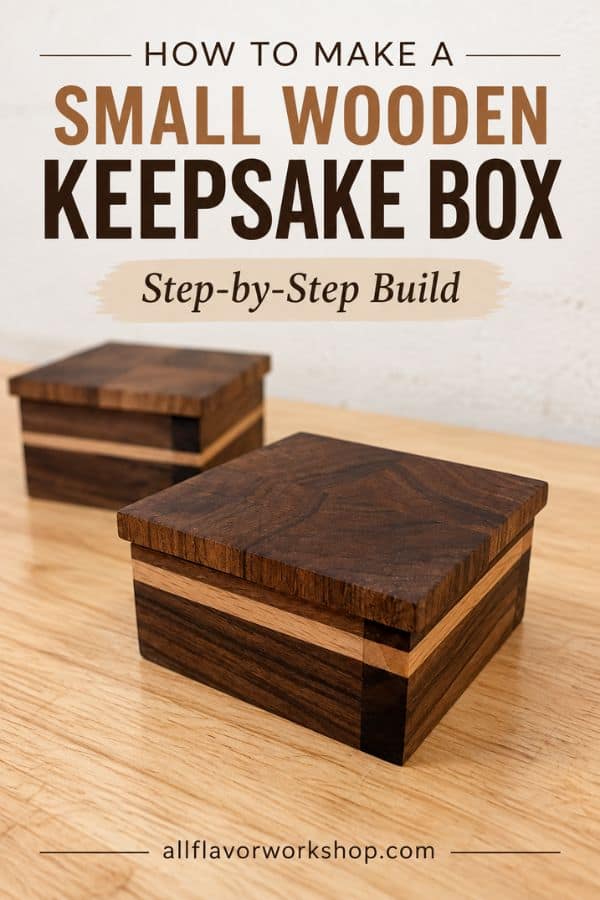
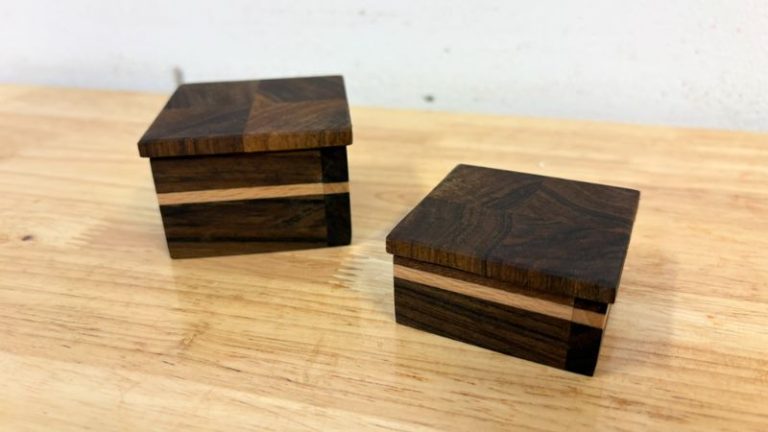
I made two versions using dark walnut for the main body and a narrow beech strip running around the sides for contrast. The boxes are small enough to hold jewelry, coins, small keepsakes, or other little items, but the same construction can easily be scaled up.
The smaller box measures approximately 45 × 45 × 30 mm (1.77 × 1.77 × 1.18 in), while the larger one is 55 × 55 × 35 mm (2.17 × 2.17 × 1.38 in). Both use thin 8 mm (5/16 in) walls and a 7 mm (about 9/32 in) thick lid.
What makes these boxes a little different from a basic wooden box is the construction.
I laminated the walnut with a thin strip of beech, flattened the panels to final thickness with my router jig, used a simple butt-joint assembly, and made the removable lid from end-grain walnut. The underside of the lid is routed so it fits slightly inside the box and holds itself in place without hinges or hardware.
If you are looking for an easier first box project, you can also see my How to Make a Wooden Box guide. That one uses a much simpler pine construction.
This project is a nice step up when you want to work with hardwood, thinner pieces, and tighter tolerances.
Table of Contents
- Small Wooden Keepsake Box Dimensions
- Materials and Tools
- Why I Used Walnut and Beech
- Let’s Start Building!
- Step 1: Make the Laminated Side Panels
- Step 2: Cut the Box Sides and Bottom
- Step 3: Glue the Box Together
- Step 4: Make the End-Grain Walnut Lid
- Step 5: Fit the Lid to the Box
- Step 6: Final Sanding and Finish
- What Can You Use a Small Keepsake Box For?
- Wrap-Up
- Frequently Asked Questions
*Safety is your responsibility. Make sure you know what you’re doing and take all necessary safety precautions while working with power tools. Safety comes first!
Small Wooden Keepsake Box Dimensions
I made two boxes using the same construction but slightly different dimensions.
| Part | Small Box | Larger Box |
|---|---|---|
| Finished outside size | 45 × 45 × 30 mm 1.77 × 1.77 × 1.18 in | 55 × 55 × 35 mm 2.17 × 2.17 × 1.38 in |
| Wall thickness | 8 mm 5/16 in | 8 mm 5/16 in |
| Lid size | 47 × 47 mm 1.85 × 1.85 in | 59 × 59 mm 2.32 × 2.32 in |
| Lid overlap | 1 mm per side about 1/32 in | 2 mm per side about 5/64 in |
| Lid thickness | 7 mm about 9/32 in | 7 mm about 9/32 in |
The dimensions are not critical.
What matters more is keeping the sides equal, the box square, and leaving enough material in the lid to create the fitted section underneath.
💡TIP: If this is your first small box, I would start with the larger version. A few extra millimeters make the pieces easier to hold, clamp, and fit accurately.
Materials and Tools
Wood
- Walnut
- Beech
- Wood glue
The walnut forms almost the entire box, while the beech becomes the thin contrasting strip around the sides.
I started with planed stock rather than rough lumber. Because these parts end up only 8 mm thick, having flat, straight material at the beginning makes the rest of the build much easier.
Finish
- Cutting board oil or mineral oil
I used Clark’s cutting board oil because I already use it for many of my cutting-board projects. For a keepsake box that will not be used around food, you could choose a different woodworking oil or finish depending on the look and protection you want.
Tools
- Table saw – Link
- Router – Link
- Chamfer router bit – Link
- Router flattening bit – Link
- Table saw blade – Link
- Push block – Link
- Parallel clamps – Link
- F-clamps – Link
- One-hand clamps – Link
- Double-sided woodworking tape – Link
✅ Check all the tools I use here
Jigs I Used
I already use these jigs throughout my workshop. On this project, each one solves a different accuracy problem: repeatable side lengths, flattening thin laminated panels, and fitting the lid.
As an Amazon Associate, I may earn from qualifying purchases at no extra cost to you.
Why I Used Walnut and Beech
A box this small does not need a complicated pattern to stand out.
I wanted the walnut to remain the main material, so I used only a thin beech strip as an accent.
The strip is also not centered vertically in the side panel. I positioned it closer to the upper part of the box, which gives the sides a little more character without making the design too busy.
Walnut and beech work well together because the contrast is very clear once the oil goes on.
Before finishing, the difference can look fairly subtle.
After oiling, the walnut becomes much darker and richer while the beech stays light, which makes that small strip much more noticeable.
This same approach can work with plenty of other hardwood combinations. The important part is choosing woods that give you enough contrast and machine cleanly at such small dimensions.
📌 Save THIS PIN to your Board on Pinterest!
Let’s Start Building!
These boxes are small, but the process uses quite a few techniques I also use on larger woodworking projects.
The build starts with laminated side panels rather than individual solid walnut walls. I intentionally make those panels slightly thicker than needed, flatten them after glue-up, and only then cut the final box pieces.
That gives me much more control over the finished wall thickness and keeps the decorative strip aligned across all four sides.
The lid is made separately from four walnut pieces and is fitted only after the box itself is complete.
How to Make a Small Wooden Keepsake Box
Step 1: Make the Laminated Side Panels
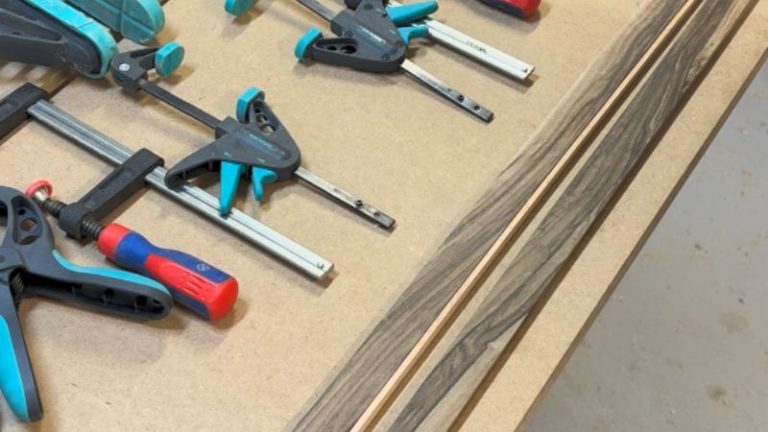
I started by ripping walnut and beech into strips for the box sides.
My target finished wall thickness was 8 mm, but I initially made the laminated panels approximately 10 mm thick. That gives me a little extra material to remove after glue-up and lets me flatten both faces properly.
For the decorative layout, I used:
walnut → beech → walnut
The beech strip itself is also cut from approximately 10 mm thick material during the glue-up, but only around 3–4 mm of it remains visually exposed on the side of the finished box.
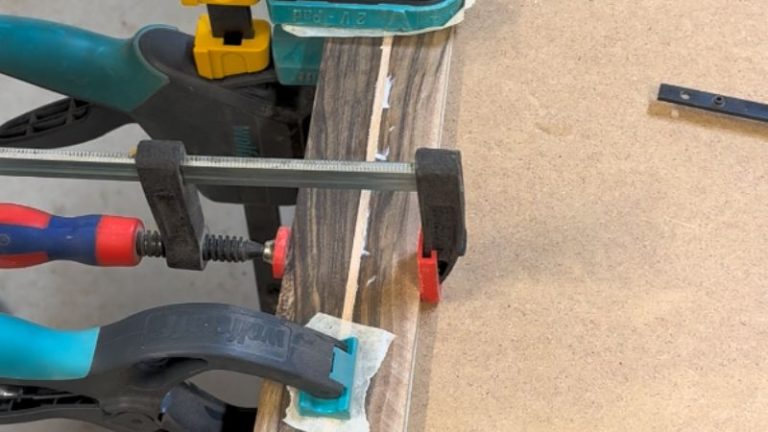
I did not position the strip directly in the center. I moved it closer to the upper third of the side panel. Once I was happy with the layout, I applied glue to the mating edges and clamped the strips together.
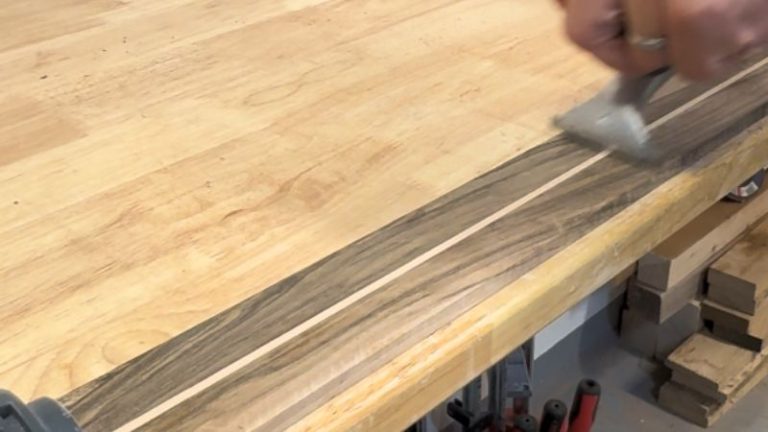
Let the panels dry completely before flattening. After the glue cured, I used a hand scraper to remove the larger glue squeeze-out.
Then I flattened both sides using my Multi-Purpose Router Jig with a flattening bit until the panel reached approximately 8 mm final thickness.
I preferred this over running such thin laminated panels through my planer. At this size and thickness, I did not want to risk breaking or damaging them.
Finish this stage with light sanding to clean up the router marks and leave both faces smooth.
💡TIP: Make the laminated panel slightly oversized in both thickness and length. Flattening and final trimming become much easier when you are not trying to hit the finished dimensions during the initial glue-up.
NOTE: Remove as much dried glue as possible before routing. Hard glue spots can make the flattening pass rougher and unnecessarily stress the router bit.
Step 2: Cut the Box Sides and Bottom
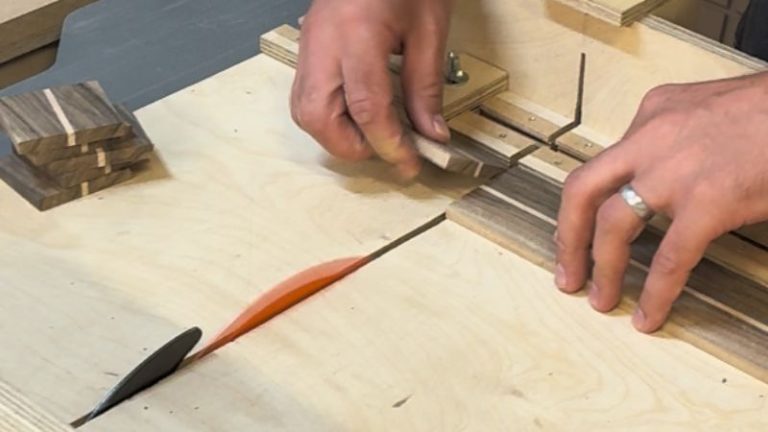
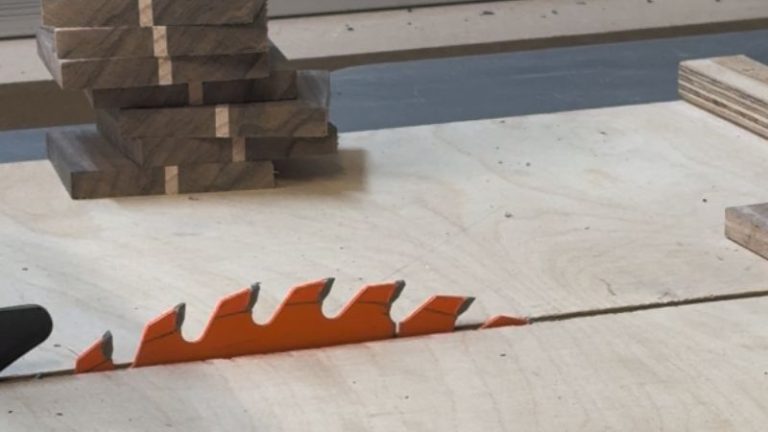
Once the laminated panels were flat and sanded, I cut the four sides to final length. Because these are square boxes, all four side pieces need to be exactly the same length.
I used my Table Saw Sled with a stop block so I could make the same cut repeatedly without measuring every piece.
At this stage, I dry assembled the four sides using the butt-joint layout. This gives me the actual inside opening rather than relying only on calculations.
From there, I cut the walnut bottom piece. The bottom is also approximately 8 mm thick and fits directly inside the four box sides. I usually cut the bottom slightly oversized first and then sneak up on the final dimensions with very small cuts. I want the piece to fit neatly without forcing the sides outward.
Remember that there also needs to be a very small amount of room for the glue during final assembly.
💡TIP: When fitting a small square bottom, trim opposite sides evenly. That helps keep the bottom centered and square rather than slowly shifting it to one side.
NOTE: Do not force an overly tight bottom into place. On a small box with thin walls, even a tiny amount of extra pressure can push the sides out of square.
Step 3: Glue the Box Together
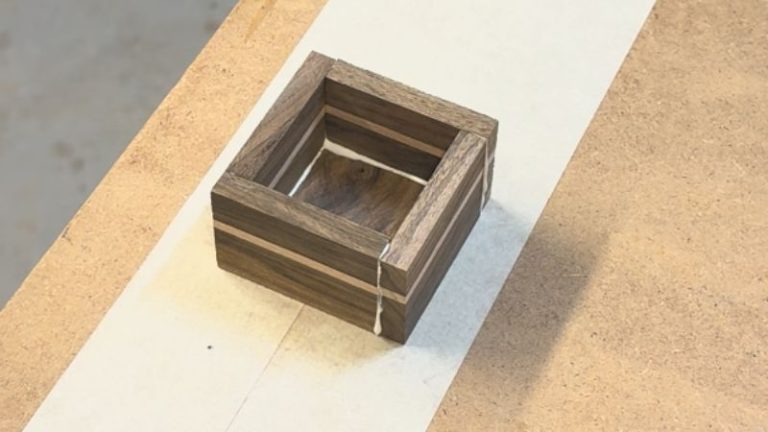
The boxes use simple butt joints.
I intentionally kept the joinery straightforward because at this size I wanted the contrasting strips and lid to provide most of the visual detail. Before adding glue, dry assemble everything once more.
Check that:
- all four walls sit square
- the bottom fits properly
- the beech strips line up at the corners
- there are no obvious gaps
Then apply glue to the edges of the bottom and to the mating ends of the side pieces. Assemble everything together and check the box with a small square.
I used small clamps to hold the assembly while the glue cured. You can also use painter’s tape for a project this small.
The biggest thing I would avoid is too much clamping pressure. These walls are thin, and heavy pressure can easily move the pieces out of alignment. You only need enough pressure to close the joints and hold the box together.
Remove glue squeeze-out while it is still manageable. Once it dries inside a tiny box, getting a scraper or sandpaper into the corners becomes much more annoying.
After the glue has cured, remove the clamps and sand the outside and inside until the surfaces and joints feel smooth.
💡TIP: Spend an extra minute aligning the beech strip at every corner before tightening the clamps. That thin line runs around the whole box, so even a small vertical offset becomes very visible.
Step 4: Make the End-Grain Walnut Lid
The lids are made entirely from walnut.
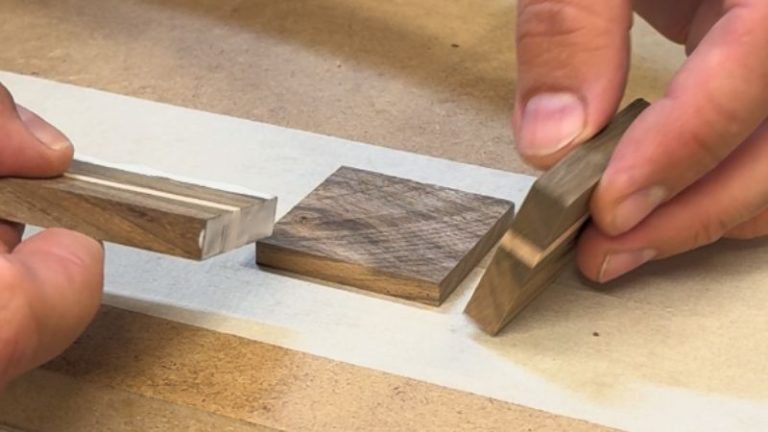
Instead of cutting a simple face-grain square, I glued four walnut pieces together so the finished lid shows end grain on the top. I like this because it adds a subtle pattern without adding another wood species.
Arrange the four pieces so the grain looks balanced and glue them into one square blank. After the glue dries, flatten and sand the blank.
Now find the exact center. I want the pattern centered on the box rather than simply cutting the lid from one edge of the glued panel.
Measure equally from the center in all directions and trim the lid to final dimensions.
- For the smallest box, the lid is 47 × 47 mm, giving roughly a 1 mm overlap on each side.
- For the larger box, it is 59 × 59 mm, giving approximately a 2 mm overlap per side.
The overlap creates a small visual shadow line and makes the lid easier to lift.
Step 5: Fit the Lid to the Box
This is probably the step where I spend the most time sneaking up on the final fit.
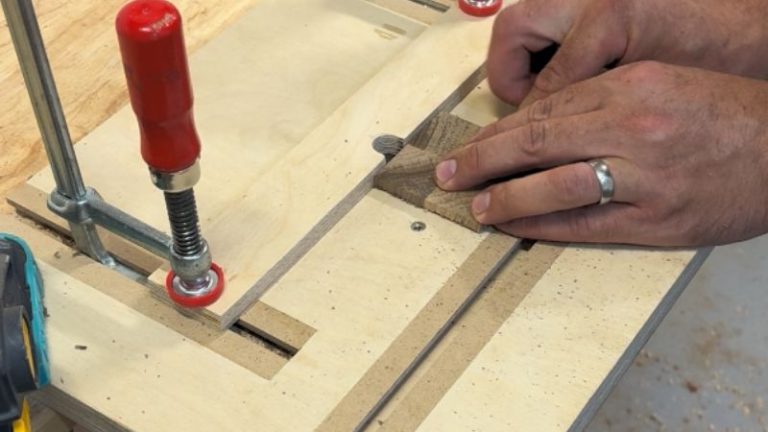
The lid does not use hinges, magnets, or a latch. Instead, I route a shallow step around the underside so approximately 2 mm of the lid fits down inside the box.
I made this cut on my Benchtop Router Table. Do not try to cut directly to the final size in one pass. Take a light pass from each side, test the lid, adjust, and repeat.
The target is a snug fit. For me, a good fitted lid should:
- slide into the box without being forced
- have very little side-to-side movement
- stay in place when I turn the box upside down
- still be easy to remove by hand
That balance is much easier to reach by taking several small cuts than by trying to calculate the exact final dimension. Once the fit is right, I lightly chamfer the top edges of the lid.
The chamfer is small, but it makes the lid feel much more finished and gives you a nicer edge to grab.
💡TIP: Stop routing sooner than you think. Test the lid frequently. You can always remove another fraction of a millimeter, but you cannot put the material back once the lid becomes loose.
NOTE: Fit the lid only after the box itself has been glued and sanded. The actual finished opening is the best reference — not your original drawing or calculated dimension.
Step 6: Final Sanding and Finish
With the box and lid complete, I prepare everything for the final finish.
Before the last sanding, I lightly spray the wood with water. This raises the grain. Let the wood dry completely, then sand it smooth again. It is a simple step, but it helps prevent the surface from feeling rough later if it ever sees moisture.
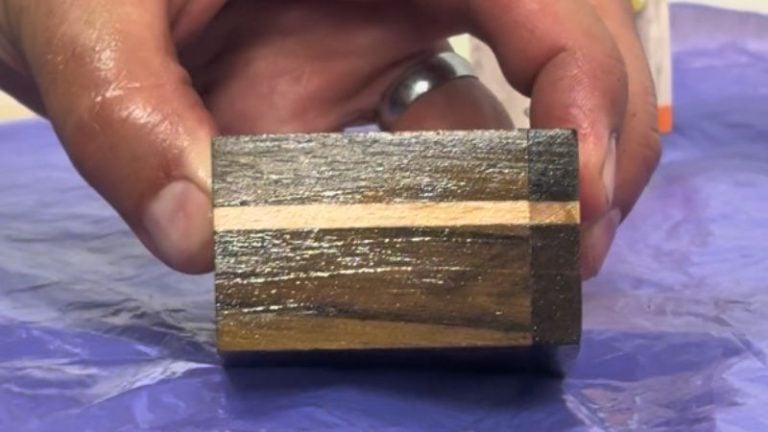
After the final sanding, I apply oil to the box and lid. I used Clark’s cutting board oil, although regular mineral oil or another appropriate woodworking finish can also be used depending on what the box will store.
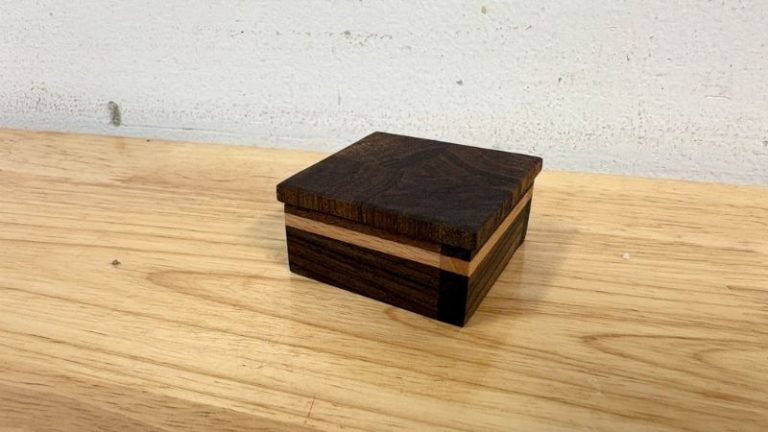
This is probably my favorite part of the project. Before the finish, walnut and beech already contrast nicely. Once the oil goes on, the walnut darkens considerably and the thin beech stripe suddenly stands out.
Apply the oil evenly, let the wood absorb it, remove any excess according to the product directions, and leave the box to dry. Then the build is done.
💡TIP: Finish the lid and box separately so oil does not collect between the fitted surfaces. Let both pieces dry before putting the lid back on.
What Can You Use a Small Keepsake Box For?
These boxes are tiny, so they are not designed as general storage boxes. That is part of what I like about them. They work well for things such as:
- rings
- earrings
- small jewelry
- coins
- small collections
- tiny workshop items
- sentimental keepsakes
- handmade gifts
You could also scale exactly the same construction up if you need more space. I would just increase the wall thickness slightly as the box becomes larger.
For me, these are also great scrap-wood projects.
You do not need much material, and even a small piece of nice walnut that might be too short for furniture can be enough to make several boxes.
Wrap Up
This is a small project, but it includes a surprising amount of woodworking.
You are laminating different hardwoods, flattening thin panels, making repeatable cuts, fitting a bottom, assembling a square box, building an end-grain lid, and then sneaking up on a precise router-table fit.
That is exactly what I enjoy about projects like this.
The final box looks simple, but most of the work is hidden in the small details.
I also like how little material it takes.
A few walnut and beech offcuts can become something useful, and the contrast between the woods gives the box enough character without needing hinges, handles, hardware, or complicated joinery.
If I made another one, I would probably keep the basic construction exactly the same and simply experiment with different wood combinations, stripe positions, and lid patterns.
That is also where the larger decorative box I built takes this idea next.
For an easier starting point, you can see my simple wooden box build.
And if you want to build the jigs I used during this project, these are the three that did most of the work:
Frequently Asked Questions
What is the best wood for a small keepsake box?
Walnut, maple, cherry, beech, and similar stable hardwoods all work well. For this build, I used walnut as the main wood and beech as a contrasting accent strip because the difference between the dark and light wood becomes especially clear after finishing.
How thick should the walls of a small wooden box be?
The walls on these boxes are approximately 8 mm / 5/16 in thick. That feels substantial enough for a small hardwood box without making the proportions look too heavy. For a larger box, I would normally increase the thickness.
What type of joint did you use for the box corners?
I used simple butt joints. The box is very small, and the bottom is glued into the assembly as well, so I did not feel the need to add more complicated joinery to this particular design.
How do you make a wooden box lid fit tightly?
I route a shallow step around the underside of the lid so it fits slightly inside the box. I remove material gradually and test the fit repeatedly until the lid slides in without force but still stays in position when the box is turned upside down.
Can I make this keepsake box without a planer?
Yes. I actually avoided using the planer on these thin laminated panels. Instead, I flattened them using my multi-purpose router jig and a flattening bit, then sanded them to the final surface.
