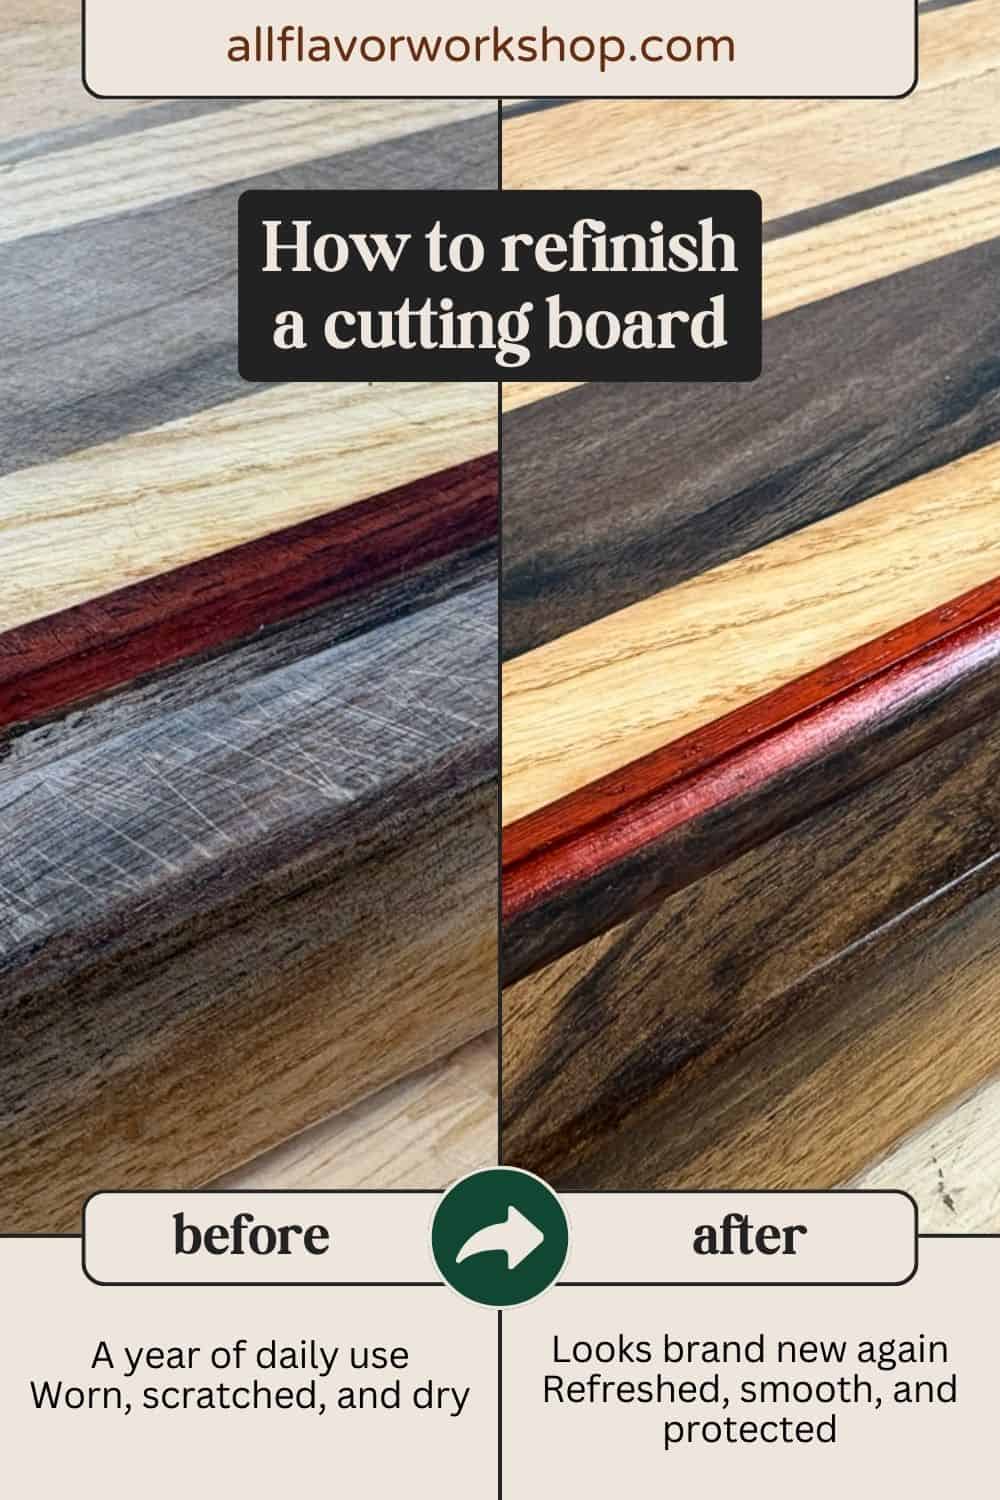
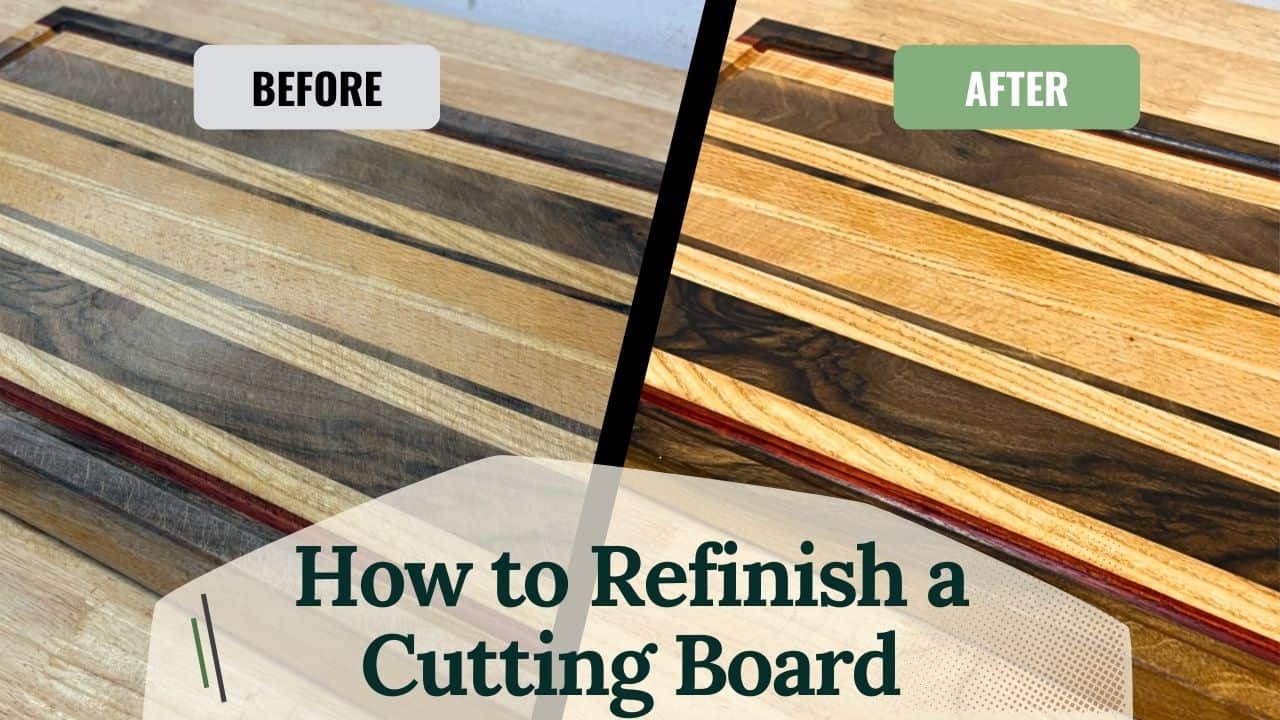
How to Refinish a Cutting Board (Make It Look Brand New Again)
Here’s how I refinished a heavily used cutting board and brought it back to a like-new finish—flattening the surface, reshaping the juice groove, sanding smooth, then re-oiling and waxing (with clear before-and-after results).
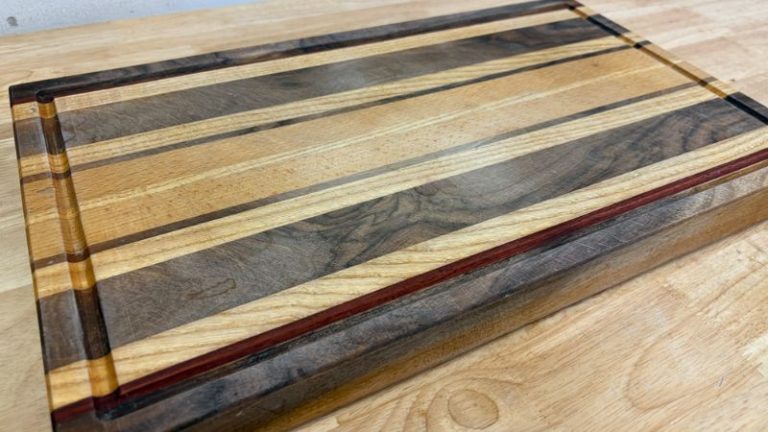
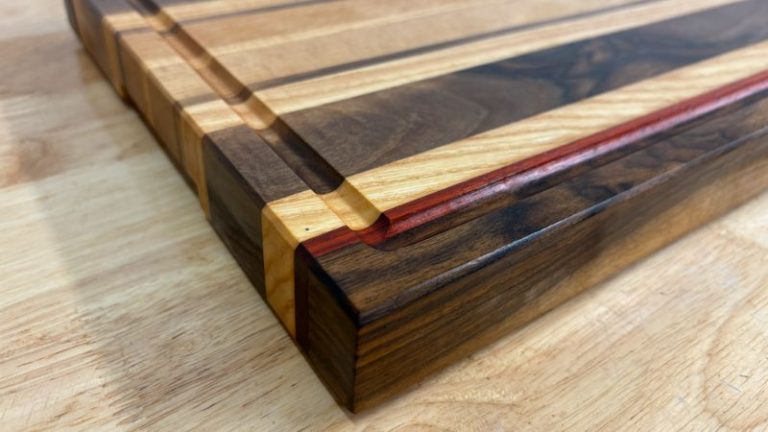
I made this edge grain cutting board a little over a year ago (walnut, padauk, ash, and beech), and I’ve been using it daily — and pretty heavily. Nothing “failed” on it. It still worked perfectly fine and could easily go for a few more years. But that’s exactly the point: a good cutting board doesn’t break… it just slowly shows wear.
The main things I noticed were small tear-outs around the juice groove, a lot of visible knife marks across the surface and edges, and even a few tiny pits/dimples from daily chopping. And honestly, it also simply needed a fresh round of oil and wax (which is something I consider normal monthly-ish maintenance). This time, I decided to go a step further and do a full refresh: I flattened the board again, cleaned up the juice groove, sanded everything smooth, then finished with oil and wax.
Once it was done, it looked like I had just built it.
Step-by-Step: How to Refinish a Cutting Board Step 1: Remove the Rubber Feet Step 2: Flatten the Cutting Board Surface (Remove Knife Marks + Pits) Step 3: Re-Cut the Juice Groove (Clean It Up and Make It Look New) Step 4: Sand the Board Smooth (Remove Router Marks + Prep for Finish) Step 5: Oil and Wax (Bring the Color Back) Step 6: Reinstall the Rubber Feet (Final Stability Check)
These are the main tools I used to refinish this cutting board — you don’t need every single one, but this is what made the process quick, clean, and repeatable.
Affiliate note: Some of the links below are affiliate links, which means I may earn a small commission (at no extra cost to you) if you buy through them.
How to Refinish a Cutting Board — flatten, sand, oil & wax (before/after refresh).
Before You Start: Quick Damage Check (What Needs Fixing?)
Before you jump into sanding, take two minutes to “read” your board. A cutting board can look rough, but the fix depends on what kind of wear you’re dealing with — and whether you want a quick refresh or a full refinish.
Here’s what I check first:
Knife marks + scratches: normal after daily use. Light marks can be sanded out; deep ones usually need flattening first.
Small pits/dimples: these happen over time (especially on softer species). You can usually sand them out, but deeper pits may need a bit more material removed.
Juice groove tear-out: common if the groove gets scraped, washed hard, or just takes a beating. Re-routing the groove makes it look brand new again.
Dry, dull color: if the board looks “thirsty,” oil and wax will bring it back fast — but if you’re sanding anyway, do the finish last.
Bonus check (even if yours is fine): rocking/twist: put it on a flat counter and press on the corners. If it rocks, a quick flattening pass will save you a lot of frustration in the kitchen.
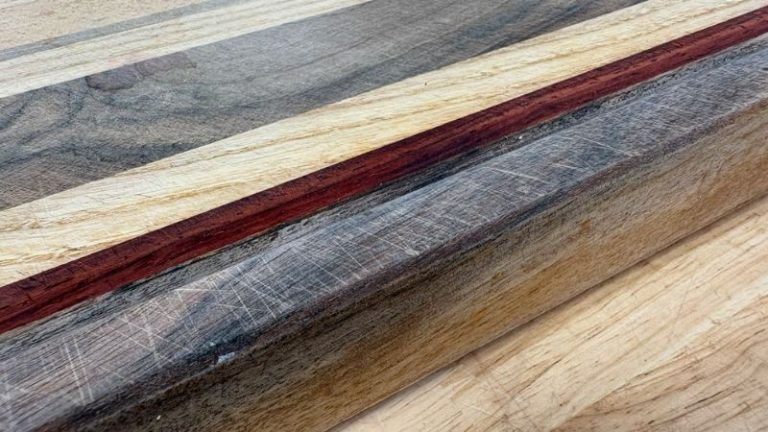
On my board, the structure was still perfect — no rocking and no twist — but the surface and groove clearly showed a year of heavy use. That’s why I went for a full refinish: flatten, clean up the groove, sand, then oil and wax.
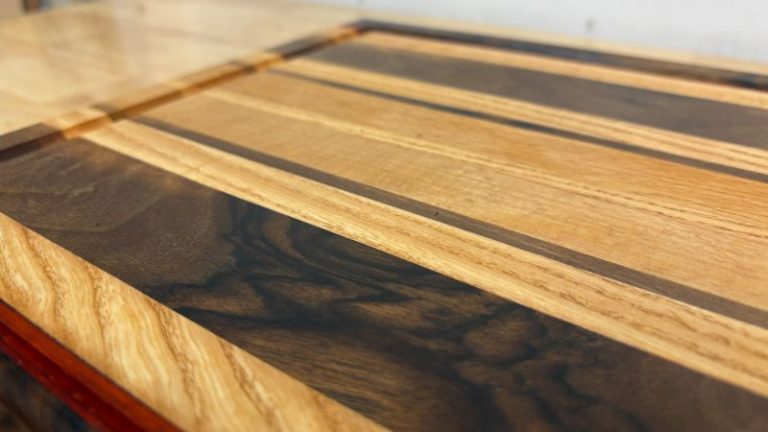
After a year of daily use, the surface had lots of visible knife marks — totally normal.
The juice groove showed small tear-outs — rerouting it is an easy way to refresh the look.
When the wood looks dry and faded, a fresh oil + wax finish makes a huge difference.
This is the “before” state — still solid, just worn from real kitchen use.
Let’s Begin (What We’re Doing in This Refinish)
Once you know what needs fixing, the process is simple — here’s the exact order I follow to bring a board back to like-new.
Flatten the surface again (remove knife marks and bring the board back to level)
Clean up / reroute the juice groove (fix tear-out and refresh the edges)
Sand the entire board (surface + edges, remove router marks and scratches)
Oil and wax (bring the color back and protect the wood)
If your board only looks dry and dull, you can stop at oiling/waxing. But if you’ve got knife marks, rough spots, or a messy juice groove, this full refinish brings it back to that “new board” feel.
How to Refinish a Cutting Board
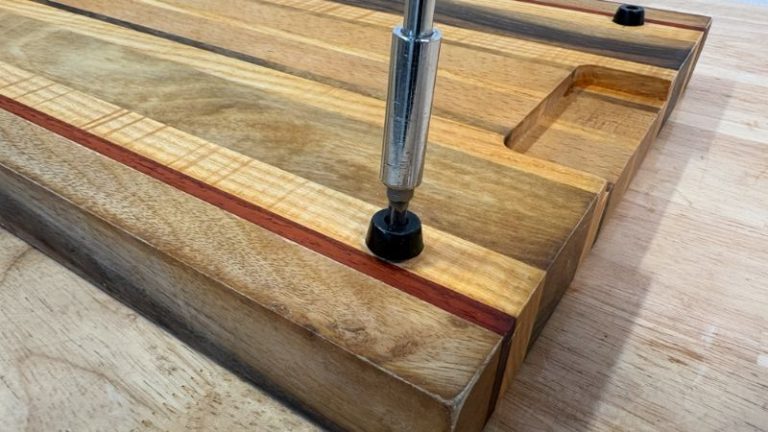
Step 1: Remove the Rubber Feet
If your board has rubber feet, take them off first. You’ll need a clean, flat underside for the next steps — especially if you’re flattening the surface and re-routing the juice groove. Feet can also get in the way when you clamp the board or run it through a jig, so it’s simply easier to work with the board “bare” during the refinish.
I just unscrew the feet, set the hardware aside, and keep track of which screws belong to which feet. Once the board is finished and re-oiled, the feet go back on at the very end.
Step 2: Flatten the Cutting Board Surface (Remove Knife Marks + Pits)
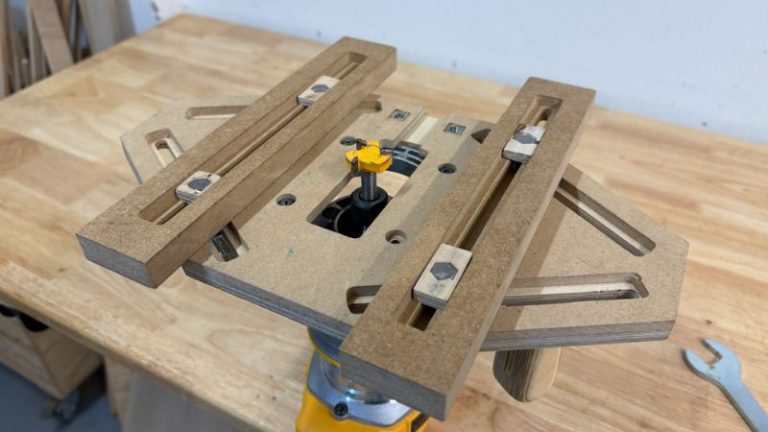
This is the step that brings the board back to “new.” After a year of heavy use, the surface usually has a mix of knife marks, small pits, and rough spots — and sanding alone can take forever if you’re trying to remove deeper wear. So I flatten the surface first, then do the final smoothing with sanding.
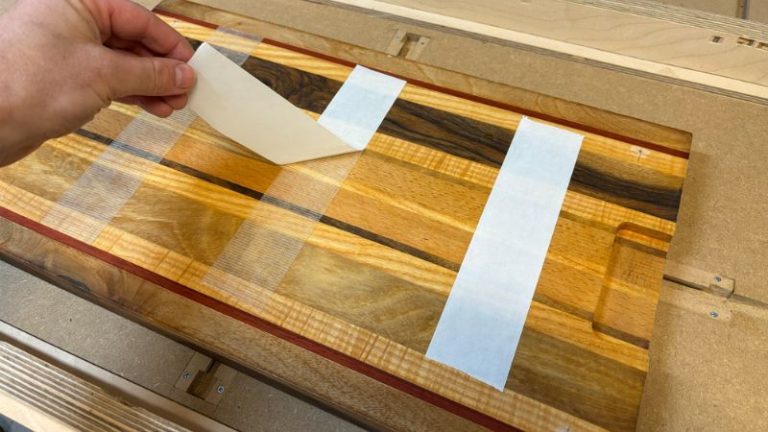
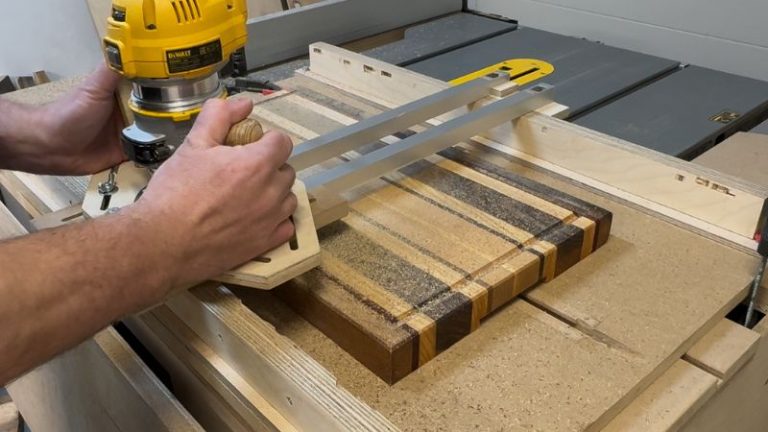
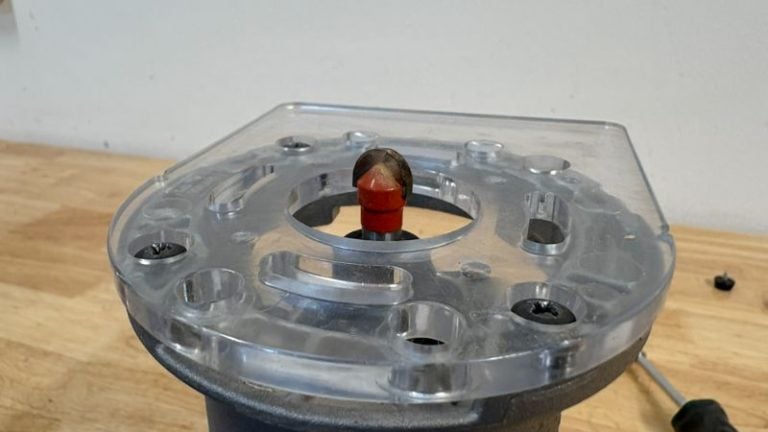
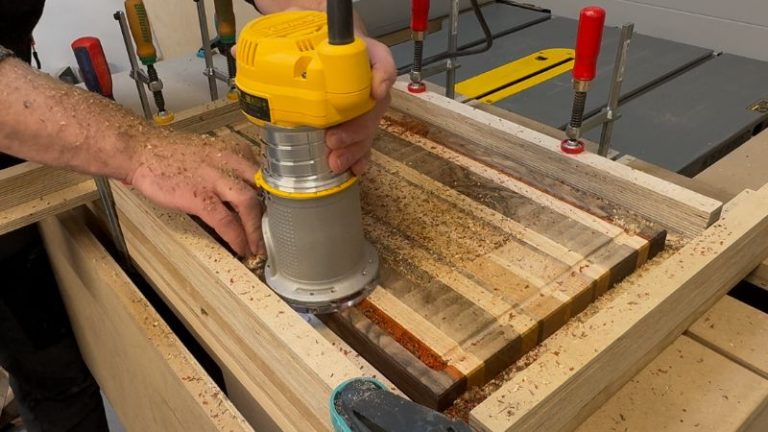
For this refinish, I used a router flattening jig together with my multi-purpose router jig and a flattening/surfacing bit. I set the depth so the bit cuts just a hair below the current surface — enough to remove the top wear layer, but not so deep that I’m wasting thickness. A lot of the fine cleanup happens in sanding anyway, so my goal here is simply: remove the damage while keeping the board as thick as possible.
💡 Tip: To prevent any movement, you can use double-sided tape to secure the board inside the jig (especially helpful if the board is heavy but you still want it locked in place).
A flattening/surfacing bit makes quick work of knife marks and small pits.
Double-sided tape is an easy way to stop the board from shifting during surfacing passes.
Slow, shallow passes remove the worn top layer and bring the board back to flat.
Router tracks are normal — sanding later will remove them completely.
Step 3: Re-Cut the Juice Groove (Clean It Up and Make It Look New)
This isn’t about adding a juice groove — it’s about refreshing the one that’s already there.
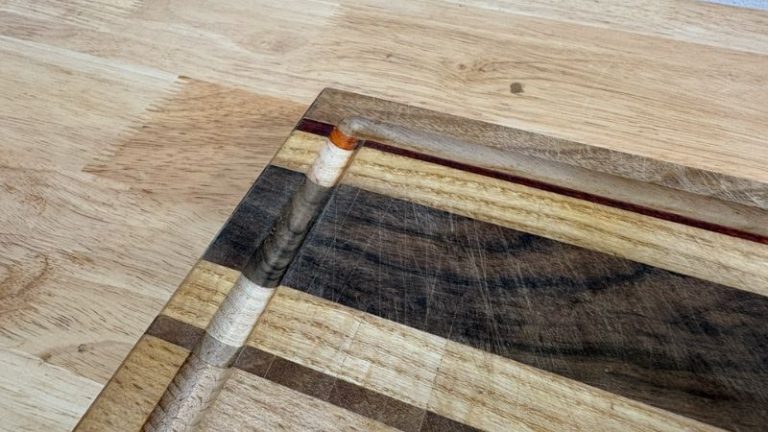
After a year of heavy use, the groove edges can get slightly worn, and small tear-out spots can show up (especially near the corners). Re-cutting the groove is one of the fastest ways to make an older board look brand new again.
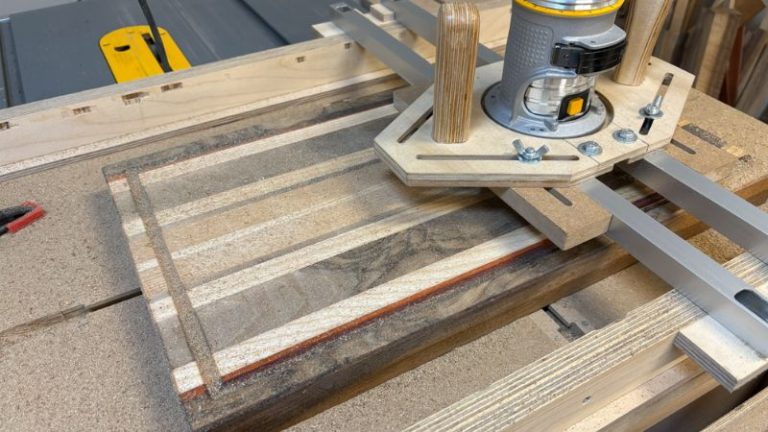
I use my juice groove jig with a juice groove router bit. First I lock the board securely in the jig, then I set the depth to match the current groove depth — I’m not trying to make it deeper, just clean and level. A few steady passes is usually enough to straighten the edges and remove worn spots.
Important: When routing inside the board, go clockwise around the groove. And try to keep your movement steady — especially in the corners — to avoid burn marks and uneven “stop marks.”
I lock the board in the jig so it can’t move — this step rewards patience.
A dedicated juice groove bit gives clean edges and a consistent profile.
Always move clockwise inside the groove — it keeps the router under control.
A quick groove refresh makes an old board look new again.
Step 4: Sand the Board Smooth (Remove Router Marks + Prep for Finish)
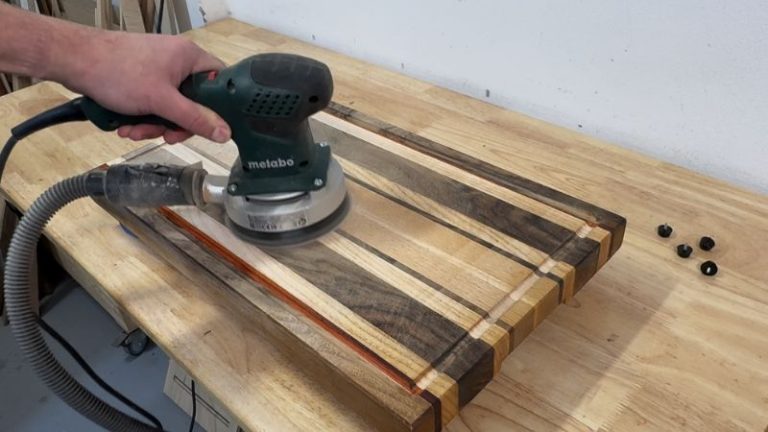
After flattening with a surfacing bit, you’ll usually see light router tracks. You might not feel them much with your hands, but they’re visible — and sanding is what makes the board look truly “new” again.
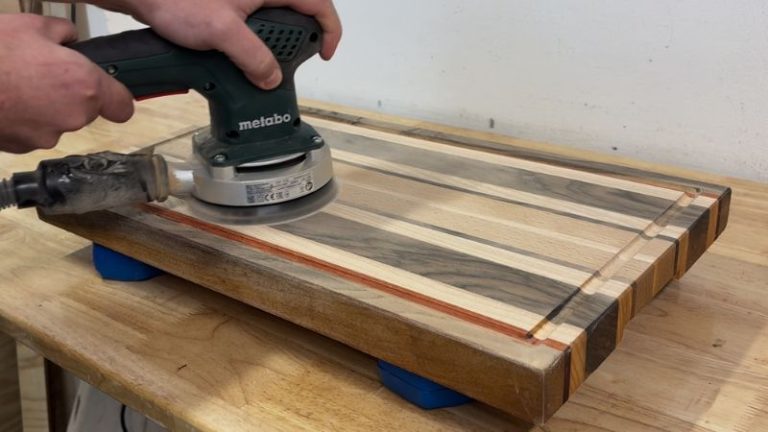
I start with an orbital sander (variable speed helps) and sand the surface from 80 grit up to 200 grit to remove the flattening-bit marks and even everything out. Once the surface looks clean, I mist the board with a little water to raise the grain, let it dry, and then sand again for the final smoothness — this time from 120 grit up to 300 grit.
I also don’t skip the details:
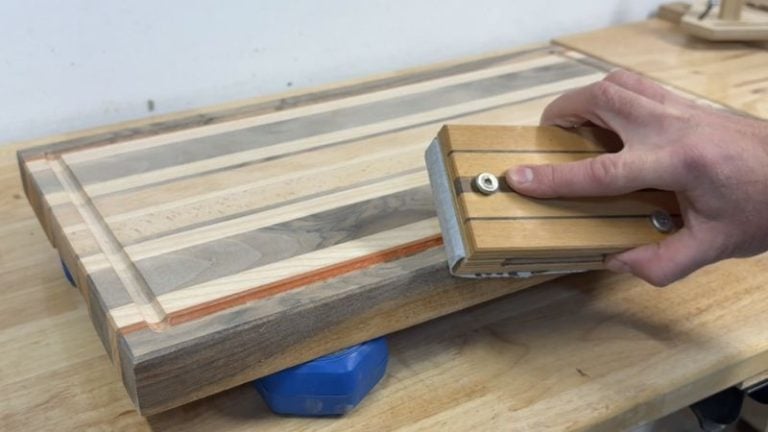
I sand the juice groove by hand (so it feels clean and consistent)
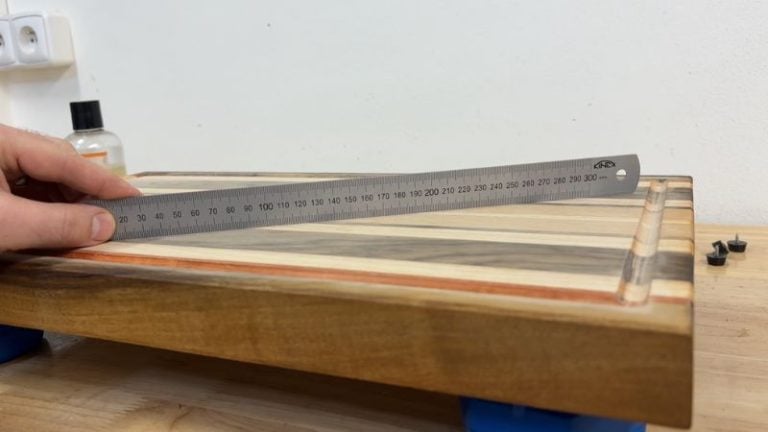
As a final check, I use a straight ruler/straightedge across the board and look for any gaps (light) underneath. If you don’t see gaps and the board feels smooth, you’re ready for oil and wax.
First pass sanding removes the router tracks and levels the surface visually.
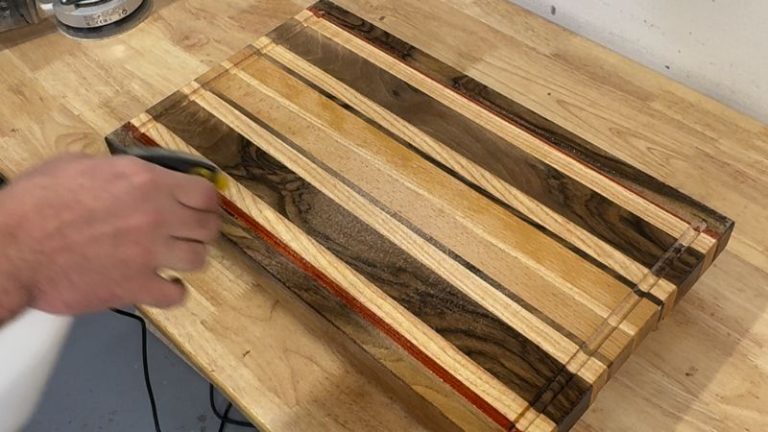
A quick water mist raises the grain so the final sanding feels silky smooth.
The groove gets a quick hand sanding so it feels clean and consistent.
Sanding the edges of a cutting board after with a sanding block.
After the grain raise, I sand again from 120 up to 300 for the finished feel.
Quick flatness check: I use a straightedge and look for any light showing underneath.
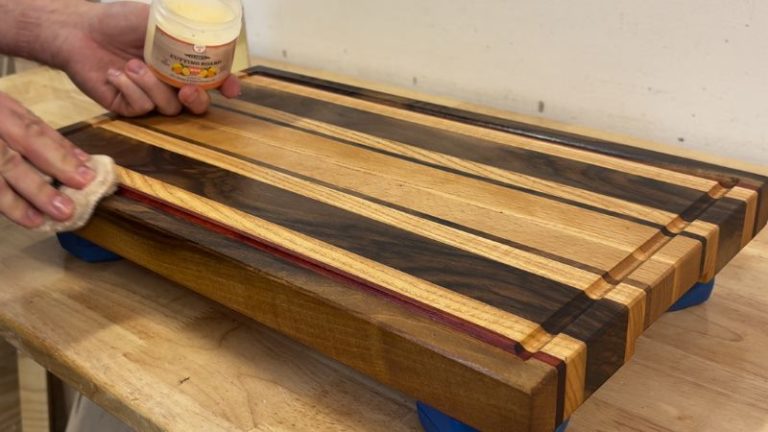
Step 5: Oil and Wax (Bring the Color Back)
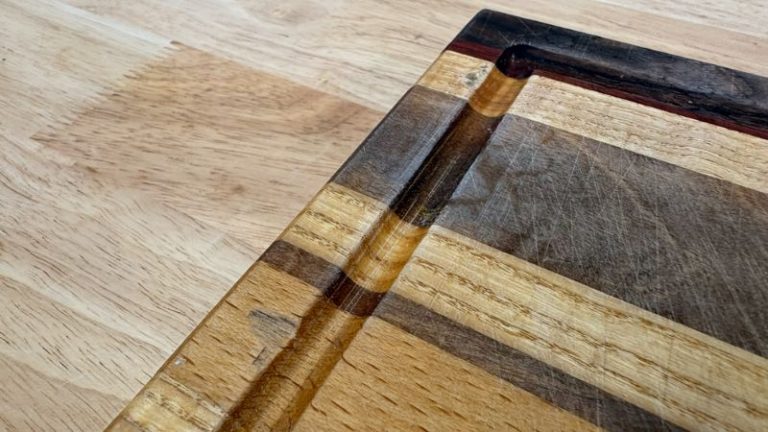
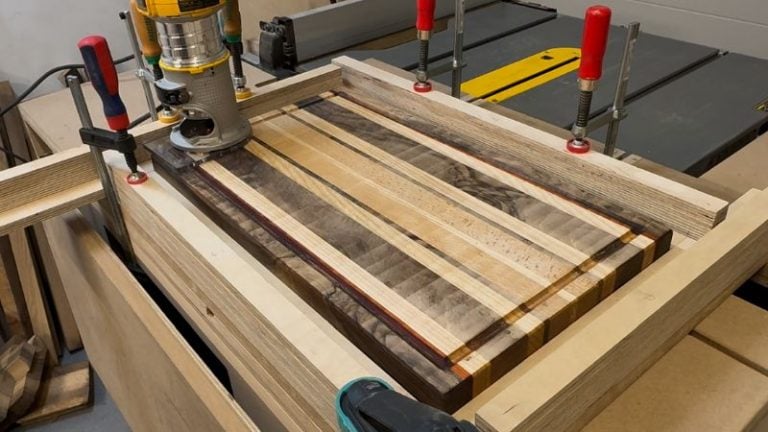
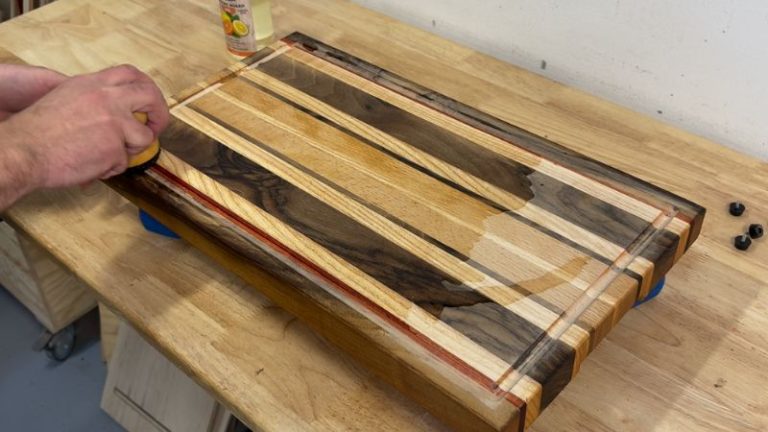
This is the most satisfying part of the whole refinish — it’s where the board instantly comes back to life. After sanding, the surface looks clean but a bit “dry” and pale. As soon as oil hits it, the colors deepen and the grain pops again. On my board you can really see the walnut darken and create that nice contrast against the lighter woods.
For finishing, I use Clark’s cutting board oil and wax. I apply several coats of oil, letting each one soak in before adding the next. Once the board stops drinking the oil, I switch to wax and rub it over the entire surface (top, bottom, and edges). Then I let it sit for a bit so the board can absorb it, and buff off the excess for a smooth, clean finish.
The first coat is the “wow moment” — the wood instantly darkens and the grain pops.
After oiling, a layer of wax adds protection and a really nice feel.
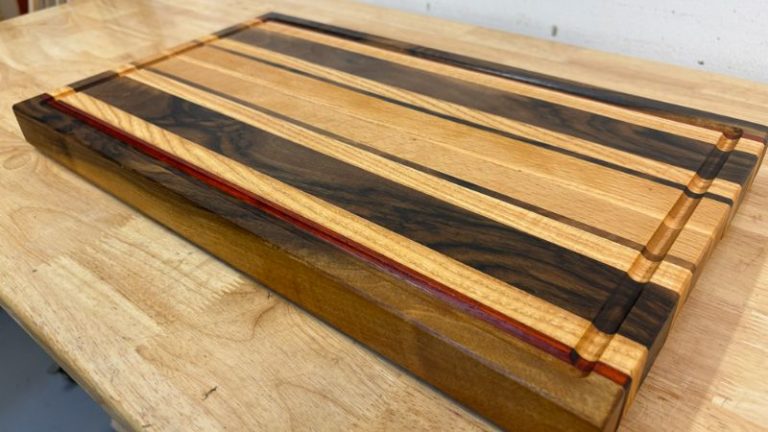
Oil brings back the contrast — walnut goes deep and rich next to the lighter strips.
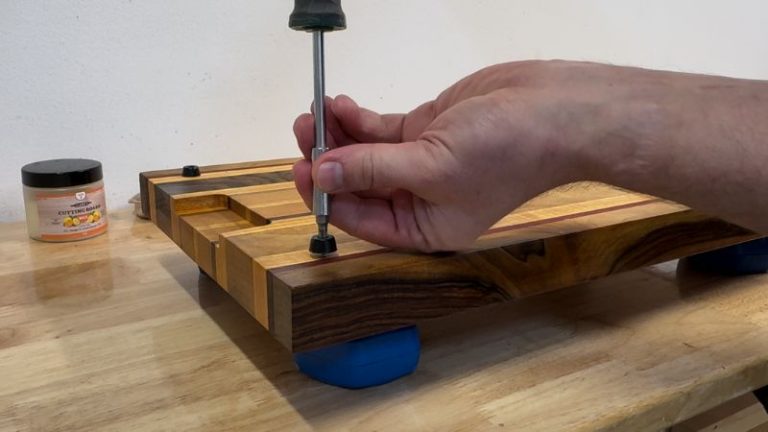
Step 6: Reinstall the Rubber Feet (Final Stability Check)
Once the finish is done and the board looks brand new again, the last step is putting the rubber feet back on. I screw them in, set the board on a flat surface, and check that it sits solid with no wobble.
💡 Tip: Even if your board is perfectly flat, your kitchen countertop might not be. If you feel a tiny rock, you can level it easily by adding a thin washer between the board and one foot — just enough to make it sit perfectly stable on the surface where you actually use it.
Last step: the feet go back on once the board is finished and fully oiled/waxed.
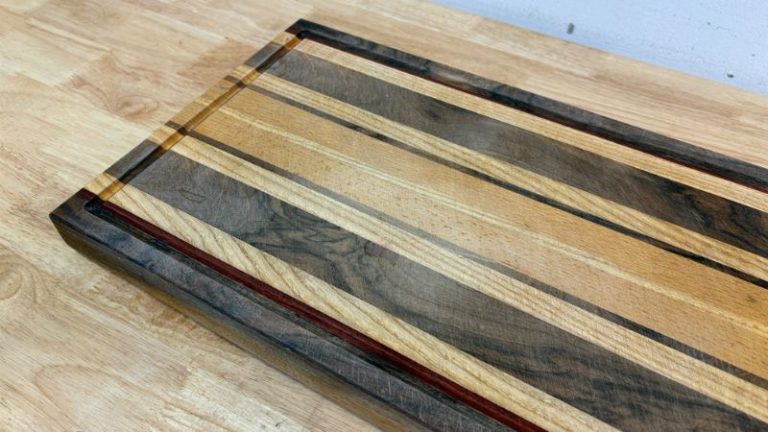
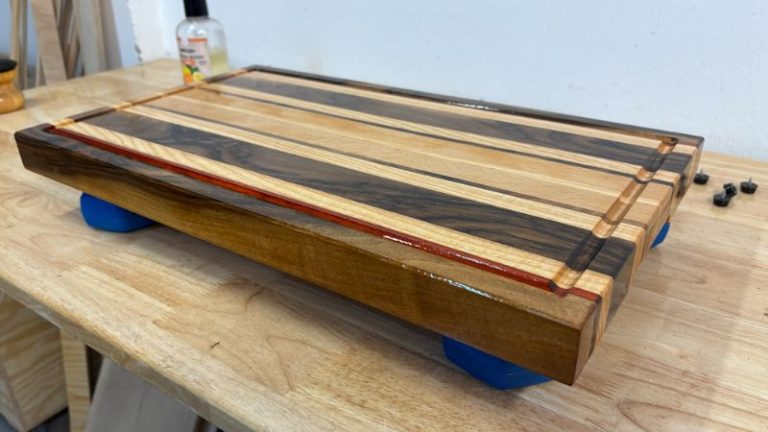
After all the flattening, sanding, and fresh finish, this board looks almost exactly like it did when I first made it. The juice groove is clean again, the surface is smooth, and the oil and wax bring the colors back to life.
Oil and wax bring the grain back to life — walnut darkens and the contrast really pops.
Final result: stable on the counter, smooth to the touch, and ready for daily use again.
After refinishing — the surface is flat again, the groove is clean, and the colors look brand new.
Wrap-Up
Refinishing a cutting board isn’t complicated — it’s basically the same workflow you’d use when making one, just applied to a board that has seen real kitchen life. If your board still feels solid but looks tired, a refinish can bring it back to “like new” without building a new one from scratch.
The biggest takeaways:
Start with a quick damage check. If it’s only dry and dull, oil + wax might be enough. If you’ve got deep knife marks, pits, or a rough juice groove, a full refinish makes sense.
Remove as little material as possible. When flattening, take just the top layer — sanding will handle the rest, and you’ll keep your board thick.
Clean up the juice groove carefully. Match the existing depth, go clockwise, and keep your movement steady (especially in the corners).
Sanding is where the magic happens. Sand out router marks, raise the grain with water, then finish-sand up to a smooth grit before oiling.
Finish properly. Multiple coats of oil, then wax, makes the grain pop and protects the board for everyday use.
Feet are your last “stability check.” Put them back on, test for wobble, and don’t be afraid to level with a thin washer — sometimes the countertop is the problem, not the board.
💡 If you want to see the exact jigs I use when building (and refinishing) cutting boards, here’s my full roundup: Best Jigs for Making Cutting Boards.
FAQ
1) How often should I refinish a cutting board?
It depends on how heavily you use it. Light maintenance (oil/wax) can be done regularly when the board looks dry. A full refinish (flattening + sanding + groove cleanup) is usually only needed once the surface gets heavily scarred, the groove looks rough, or the board just feels “tired.”
2) Can I refinish a cutting board without a router flattening jig?
Yes. If the wear is light, sanding alone can work. But if you have deeper knife marks, pits, or you want to bring the board truly flat again, a flattening jig makes the job much faster and more consistent.
3) How do I fix tear-out or rough edges in a juice groove?
The easiest fix is to re-route the groove using a juice groove jig and the same style bit. Match the existing groove depth and take a few steady passes to clean up the edges. Moving clockwise helps keep the cut controlled and clean.
4) What grit should I sand to when refinishing a cutting board?
A good approach is starting coarse enough to remove marks (often around 80) and working up through the grits. After raising the grain with a light water mist, sanding up to around 300 leaves a smooth finish that feels great in use.
5) What’s the best finish after refinishing a cutting board?
A food-safe cutting board oil followed by wax works really well. Oil restores color and protection, and wax adds a nicer feel and extra water resistance. Apply multiple oil coats until the board stops absorbing quickly, then wax and buff.
📌 Found this post useful? Save THIS PIN to your Board on Pinterest!
Restore a Wooden Cutting Board — resurface + refresh the juice groove (step-by-step).
Meet the creator of AllFlavor Workshop! As a passionate DIYer and woodworking enthusiast, Lukas is always looking for ways to make things himself rather than buying them off the shelf. With a keen eye for design and a knack for working with wood, Lukas enjoys sharing his craft with others and helping them discover the joy of building. Whether you're an experienced woodworker or a novice looking to try your hand at a new hobby, you're sure to find plenty of inspiration and tips on AllFlavor Workshop.