
Cutting a circle in wood can be done in several ways. You can use a trim router, a bandsaw, a jigsaw, or even a table saw. There are a few disadvantages to cutting a circle on a table saw and it is understandable one can be nervous about it, but when using a table saw circle jig and following all safety precautions, it is quite easy to cut a perfect circle in wood.
The great thing is that this table saw circle jig can be used in combination with circle-cutting jigs designed for other power tools. The diameter of the pivoting pin is the same for all the circle jigs which makes it easy to switch from one to another. You can cut a rough circle shape on a table saw and then switch to a router circle cutting jig and finish the edges.

A table saw is a powerful tool. When cutting a circle on it follow all safety precautions and use additional safety devices like push pads, push blocks, magswitches, t-track stoppers, and others, which will facilitate the work and ensure greater safety when working with a table saw.

It may take some time to find the correct position between the table saw circle jig and the blade, but once you’ve set it up properly, you’ll be able to easily and accurately cut perfect circles.
You can easily build the circle jig in a few hours. The material does not cost much and is easily available in local stores. This method may seem cumbersome at first, but cutting a circle on a table saw is quick and the result is very good.
RELATED: There are a few ways to cut a circle in wood. Choose the best approach depending on the tools you have on hand.
Adjustable Table Saw Circle Cutting Jig Video
If you want to see how it is done, watch the video below for a step-by-step guide on how to make an adjustable table saw circle cutting jig.
I appreciate every YouTube subscriber. It’s free and easy to subscribe to — just Click Here To Subscribe. Thank you!
Table of Contents
- Table Saw Circle Jig Video
- Download Table Saw Circle Jig Plans
- The Material you will need
- FAQ – General Questions
- Is it safe to cut circles on a table saw?
- Is it possible to cut a perfect circle with a table saw?
- What are the drawbacks of cutting a circle on a table saw?
- How to Make a Table Saw Circle Jig
- Step 1: Build the Circle Jig Base
- Step 2: Cut a T-track Slot in the Base
- Step 3: Make a T-track Bolt
- Step 4: Attach a Table saw Slot Runner
- How to Use a Table Saw Circle Jig
- Woodworking jigs used for the project
*Safety is your responsibility. Make sure you know what you’re doing and take all necessary safety precautions while working with a table saw. Safety comes first!
What you'll need to make a Circle Jig for a Table Saw
Material – Birch Plywood, Oak
Circle jig
Plywood – 350 mm x 235 mm x 12 mm
T-track bolt
Plywood – 50 mm x 20 mm x 5 mm
Runner – Oak
Strip – 300 mm – fits the table slot
Check all the Tools I Use
Tools:
Table Saw – https://amzn.to/47mWiGf
Hand Drill – https://amzn.to/3HqLEnH
Trim Router – https://amzn.to/3HbQcOg
Chisel Set – https://amzn.to/3tHNJrT
One Hand Clamps – https://amzn.to/48jGxkZ
Spring Clamps – https://amzn.to/41Nuh9D
F-Clamps – https://amzn.to/48ArzY1
Machinist Square / Speed Square
Micro Jig Grr-Ripper Push Block – https://amzn.to/3vjQSP7
Other:
Wood Glue – https://amzn.to/48ltKhJ
Epoxy – https://amzn.to/3tJ5R4L
Drill Bits – 6mm, 4mm – https://amzn.to/48Kaaf7
Sandpaper Sheets – https://amzn.to/41OMx2p
M6 Bolt, M6 Washer, M6 Nut, Wood screws – https://amzn.to/41PodgQ
Brass rod – 4mm – https://amzn.to/3SahtHw
T-track nut/stopper – https://amzn.to/3HaJHeP
We may earn an affiliate commission when you buy something through our retail links. As an Amazon Associate AllFlavor Workshop earns from qualifying purchases.

Is it safe to cut circles on a table saw?
Cutting a circle on a table saw is safe. However, to achieve the best results, it is necessary to use a table saw circle cutting jig and follow all safety precautions.
Keep your hands as far away from the blade as possible and use protective equipment such as push pads and push blocks to cut a rough circle. To fine-tune the circle, lock the circle jig in position by using a track nut (track stopper) or a magswitch. Then, slowly rotate the workpiece against the blade until you get a perfect circle.
It is not recommended to use a table saw circle jig for cutting small circles. For this, it is advisable to use a trim router in combination with a router circle cutting jig.
Can you cut a circle with a table saw?
Yes, cutting circles on a table saw is possible and quite straightforward with a dedicated table saw jig.
If you need to cut circles on a table saw, a table saw circle jig is a great tool to have. The jig is usually adjustable, so you can cut circles of different sizes by moving the pivoting pin and locking it in place with a locking screw.
- To use the jig, first drill a hole in your workpiece and mount it onto the pivot pin.
- Then, use the circle jig as a sled to make a few passes and create a rough circle shape.
- Once you’ve got a rough circle, lock the circle jig in place using a magswitch or t-track stopper, and slowly rotate the workpiece against the saw blade until you get a smooth, even circle.
It may take some time to get the positioning and rotation just right, but with patience and practice, you’ll be able to cut perfect circles every time.
What are the drawbacks of cutting a circle on a table saw?
Cutting circles on a table saw can be efficient, but it comes with its own set of challenges. It’s not the safest way to go; using a router or a jigsaw is often a better choice. Also, setting up the circle jig just right with the saw blade can take a bit of effort.
Here are some situations where you might want to consider another tool:
- For small circles: A router a bandsaw or a jigsaw is more handy and safe.
- For thick pieces: A router or a bandsaw gets the job done more effectively.
- If you get burnt edges: This can happen if the jig isn’t set up right or if you’re using the wrong blade. This means extra work sanding or cutting, and your circle might end up smaller than planned.
Let's start building!
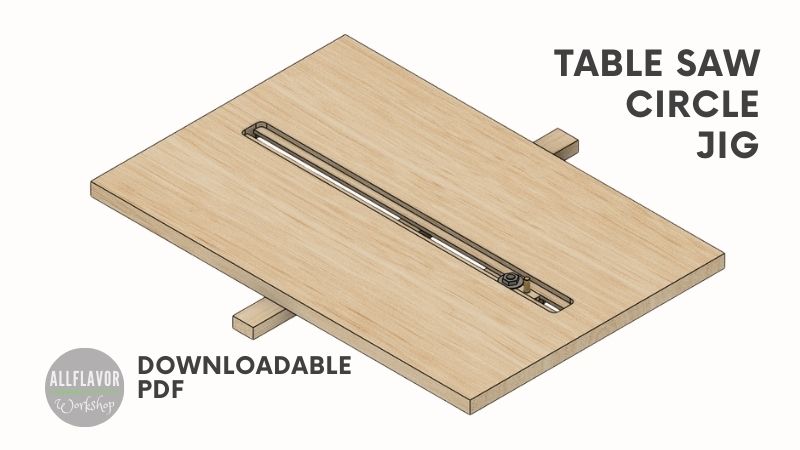
The table saw circle jig base is made of birch plywood and the t-track runner is from oak. Oakwood does not change much due to ambient temperatures and keeps its shape well (other hardwoods can also be used as a suitable material for t-track runners).
The circle jig allows you to cut circles with a diameter from 8 cm to 56 cm. The cut wooden piece rotates on a pivoting pin which is attached to a t-track runner and adjusted with a tightening nut.
Building the circle jig is easy. The material is readily available and for tools, you will need a trim router and a hand drill.
How to Make a Table Saw Circle Jig
Step 1: Build the Circle Jig Base
Cut the plywood piece for the circle base (350 mm x 235 mm x 12 mm).
I am using a 12 mm thick plywood sheet. It is enough to accommodate 2 slots on each side of the desk with a t-track bolt that is completely flush with the surface.

NOTE: I wouldn’t use a desk that would be less than 12 mm thick. The thickness is just enough to fit 2 slots, a running t-track bolt, and still have enough wood between slots to fix the t-track bolt with the pivoting pin in place tightly. I wouldn’t recommend using an MDF desk.
Step 2: Cut a T-track Slot in the Base
Mark the center line on the plywood desk. Cut a 6mm wide slot through the desk along the center line. Leave 30 mm on each side.

Cut a 2cm wide slot along the center line on both sides of the desk.
- The depth of the cut on the upper side is 4mm (enough for a tightening nut)
- The depth of the cut on the bottom side is 5mm (enough for a t-track bolt)
That leaves 3mm for attaching the slider in the slot. Just enough for a tight fix.

NOTE: Use an adjustable router dado cutter or a multi-purpose router jig if you want to get a perfect slot.
Find This Blog Post Useful?
Join my newsletter to receive the latest news, tutorials, and project plans sent directly to your inbox!
Step 3: Make a T-track Bolt
Cut a plywood strip (50 mm x 2 mm x 5 mm) and sand the edges and the corners. Make sure the runner nicely fits the slot and is flush with the surface of the circle jig base.

1. Add a Screw Bolt
Drill a 6mm hole in the center of the strip and carve a hexagon around the drilled hole. The depth of the cut should be around 3mm. (Use a drill press with drill bits for metal to drill a precise hole)
Cut the bolt to size and grind the bolt’s head so it is flush with the strip.


2. Add a Pivoting Pin
Glue a small plywood strip on the t-track runner. It serves as a guide in the track and at the same time, the greater thickness provides more space for the epoxy.
Drill a 4mm hole along the centerline. Apply epoxy in the holes and glue both the pivoting pin as well as the bolt.


NOTE: The pivoting pin needs to be longer than the length of the bolt. The length of the pin is around 17 mm and the length of the bolt is 11 mm.
This is what the finished t-track bolt with a pivoting pin and a screwing bolt included looks like. When inserted in the slot, the bolt does not protrude above the circle jig base plate.


Step 4: Attach a Table Saw Slot Runner
Cut a wooden strip that nicely fits the table saw slot (300 mm in length). It is better to start wider and slowly sneak up on the cut until the width of the strip is perfect.
Glue the runner to the circle jig base and leave overlaps on both sides. Additionally, secure the runner with screws. It is good to use the table saw fence as a reference.
NOTE: find the right position for the runner. When inserted in the slot the circle jig base should be overlapping the table saw blade


Mount the circle jig on the table saw and trim the edge to cut the wood excess. After that, your base is perpendicular to the blade.

The picture below shows what the finished table saw circle cutting jig looks like. It is an easy jig for a table saw and definitely pays off to have one in the workshop.


Possible Enhancements to this Table Saw Circle Jig
By making a few small adjustments, this table saw circle jig can also be used as a tapering jig/ straight edge guide or a jointer jig.
- Add 2 extra t-track slots with t-track bolts and hold-down clamps that can easily hold a small workpiece in position while making a cut.
How to Cut a Circle with a Table Saw
The steps below describe how to set up and how to use a Table Saw Circle Jig to cut perfect circles. Take all safety precautions while working with a table saw.
How to Cut a Circle Using a Table Saw Circle Cutting Jig
- Begin by setting the desired diameter on the circle jig; this is done by adjusting both the t-track bolt and the pivoting pin. This adjustment ensures you get the right circle size.
- Once you have the diameter set, secure the t-track bolt firmly with a locking screw.
- Before placing the workpiece on the jig, drill a small hole in its center. This hole will align with the pivoting pin to keep the workpiece steady.
- Use the circle jig to make several passes on the workpiece, gradually cutting out a rough circle shape.
- Depending on the thickness of your workpiece, shift the jig’s centerline slightly behind the blade’s teeth.
- To ensure the jig doesn’t move during the cutting process, lock it securely in place, either with a magswitch or by using a t-track nut, also known as a t-track stopper.
- Gently rotate your workpiece against the blade. Continue this until you achieve a smooth and perfect circle.
Adjust the position of the circle jig against the blade as necessary. You might need to repeat that a few times until you get the right setting.
NOTE: When cutting circles on a table saw make sure to use a push pad or push block.


How to Fix the Table Saw Circle Jig in Position
After you’ve used the table saw circle jig as a sled to cut the rough shape of your circle, the next step is to fix the jig in place relative to the saw blade. This can be done using either a magswitch or a t-track nut. These tools allow you to secure the jig in the desired position, ensuring that your circle is cut accurately and precisely. With the jig securely locked in place, you can rotate the workpiece against the blade to finish cutting the circle with confidence.
- Magswitch: A magswitch is a magnet with a switch that can be turned on or off. It is typically placed on the table saw surface, where it can be used to lock the table saw circle jig in place and keep it from moving while you make your cuts. Once you’re finished cutting, you can simply turn the switch off and remove the jig from the table.
- T-Track Nut: A T-track nut is a small piece of hardware that can be inserted into a slot on the table saw table, providing a secure anchor point for the circle jig. By tightening the nut in the slot, you can hold the circle jig firmly in place while cutting your circle. Once you’re finished cutting, you can easily remove the jig by loosening the nut.
NOTE: Take your time and find the right position of the circle relative to the saw blade. The cut circle must be perpendicular to the blade.
📌 Found this post useful and inspiring?
Ready to build it? Save THIS PIN to your Board on Pinterest!

I hope the information shared in this blog post inspired and now you are adding this table saw jig to your next builds. 😉
