
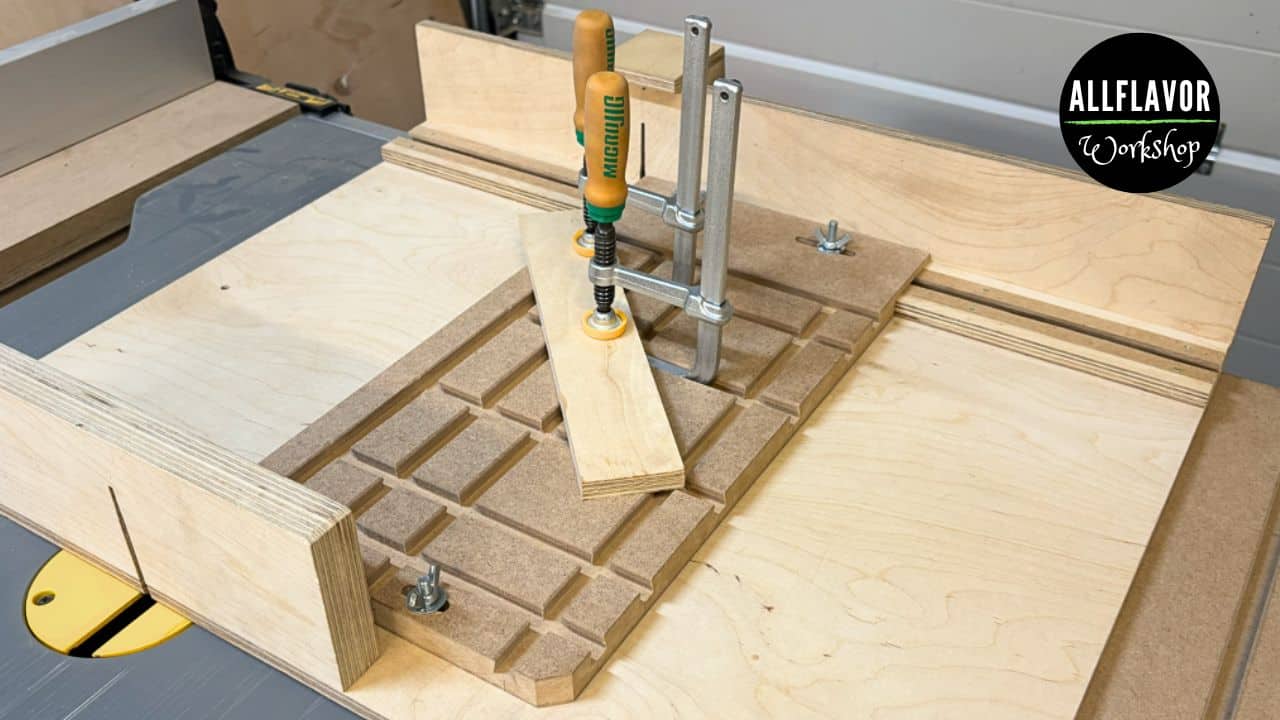
I use my table saw sled for much more than basic crosscuts. One of the reasons I built it with a T-track was so I could keep adding different attachments depending on the project.
This table saw angle jig is one of the most flexible add-ons I have made for it.
I call it my Any-Angle Sled Add-On because instead of using a fixed fence, the jig has a matrix of routed dovetail slots running in both directions. I can place a workpiece on the jig, rotate it to almost any angle I need, clamp it securely, and make the cut.
That opens up a lot of possibilities:
- angled crosscuts
- miter cuts
- irregular workpieces
- custom-angle cuts
- repeatable angled parts
- pieces that are difficult to hold against a regular sled fence
The jig is made from 18 mm (about 3/4 in) HDF and measures approximately 215 × 420 mm (8-7/16 × 16-1/2 in).
It attaches directly to the T-track on my existing Table Saw Sled using bolts and wing nuts, with an additional mounting point on the opposite side for stability.
The attachment slots are adjustable as well, so I can move the whole jig closer to or farther away from the blade depending on the workpiece. That combination of an adjustable mounting system and a flexible clamping matrix is what makes this jig useful.
Table of Contents
- What Is a Table Saw Angle Jig?
- Downloadable Table Saw Angle Jig Plans
- Materials and Tools
- Why I Built This Jig
- Table Saw Angle Jig Size and Design
- How the Clamping Matrix Works
- Let’s Start Building!
- Step 1: Cut the HDF Base
- Step 2: Mark the Clamping Matrix
- Step 3: Route the Vertical Dovetail Slots
- Step 4: Route the Horizontal Dovetail Slots
- Step 5: Cut the T-Track Mounting Slots
- Step 6: Route the T-Track Rabbet
- Step 7: Add the Upper Mounting Point
- How to Attach the Jig to the Table Saw Sled
- How to Use the Table Saw Angle Jig
- What Cuts Can You Make?
- Compatible Clamps and Hardware
- Why the Slots are Open from Two Sides
- How This Fits Into My Modular Table Saw Sled
- Wrap-Up
- Frequently Asked Questions
*Safety is your responsibility. Make sure you know what you’re doing and take all necessary safety precautions while working with power tools. Safety comes first!
What Is a Table Saw Angle Jig?
A table saw angle jig is a guide or clamping setup that helps position a workpiece at a chosen angle before making the cut. My version is a removable add-on for my existing table saw sled. Instead of using a fixed-angle fence, it has a matrix of dovetail slots routed into the HDF base.
My jig has:
- 6 horizontal slots
- 4 vertical slots
Together they create many possible clamping positions across the surface. I can rotate the workpiece to the angle I need, choose the closest slots, and secure it with clamps or bolts.
Downloadable Table Saw Angle Jig Plans
Detailed plans for this jig will include the full dimensions, slot layout, mounting locations, and attachment details in both metric and imperial measurements.
You can find my available downloads on the Woodworking Plans page.
Materials and Tools
Wood
- 18 mm (about 3/4 in) HDF
Hardware
- T-track bolts
- 6 mm bolts
- wing nuts
- compatible clamps
- optional MICROJIG MATCHFIT hardware
- optional track clamps
- optional hold-down clamps
- optional DIY T-track bolts
Router Bits
- MICROJIG MATCHFIT Dovetail Router Bit
- 6 mm (about 1/4 in) straight router bit
- Suitable router bit for the upper mounting slot
Tools
- Table saw – Link
- Router – Link
- MicroJig Matchfit – Link
- MicroJig Matchfit – Link
- Dovetail Clamps – Link
- Dovetail Clamp Bit – Link
- Guide Rail Clamps – Link
- Table saw blade – Link
- Push block – Link
- Parallel clamps – Link
- F-clamps – Link
- One-hand clamps – Link
- Drill bit set – Link
- Double-sided woodworking tape – Link
✅ Check all the tools I use here
NOTE: Some tool links on this site may be affiliate links. This does not change the price you pay.
📌 Save THIS PIN to your Board on Pinterest!
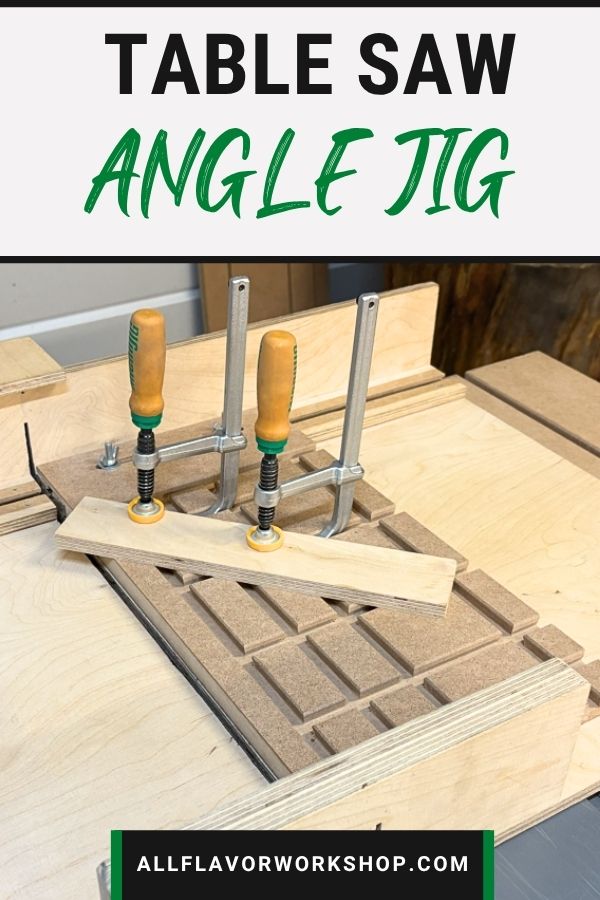
Why I Built This Jig
A standard table saw sled is great for 90° crosscuts. You can also build a dedicated miter sled for 45° cuts or make another fixed jig for a specific angle.
But sometimes I need something much more flexible. I might want to cut:
- 15°, 27°, 38°
- a matching angle from an existing piece
- an angle that is easier to mark directly than calculate
I did not want to build another dedicated fence every time. With this jig, I simply draw the cut line, position the workpiece at the angle I need, clamp it through the matrix, and make the cut.
The same jig can handle many different setups. It also works well with irregular workpieces that do not sit nicely against the normal table saw sled fence.
And because it is an add-on, I can remove it when I am finished and continue using the sled normally. That modular approach is something I use a lot in my workshop. You can see the same idea in my article on Modular Woodworking Jigs.
Table Saw Angle Jig Size and Design
The finished jig measures approximately: 215 × 420 × 18 mm (8-7/16 × 16-1/2 × about 3/4 in).
I made the base from HDF. HDF works well for this type of jig because it is flat, stable, smooth, easy to machine, and suitable for routing clean dovetail slots.
The matrix on my jig has: 6 horizontal slots and 4 vertical slots. The spacing is intentionally not perfectly even. I placed some of the slots closer together near the blade side because that is where I wanted more clamping options.
- The closest vertical slot to the blade is approximately 25 mm (about 1 in) from the edge.
- The lowest horizontal slot, closest to the table saw sled T-track, is approximately 80 mm (about 3-1/8 in) from the lower edge.
You can change the exact matrix layout depending on your sled, your clamps, and the type of workpieces you normally cut.
How the Clamping Matrix Works
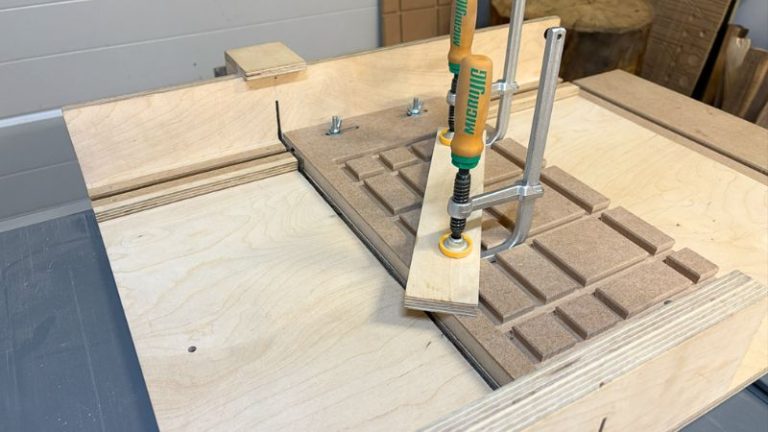
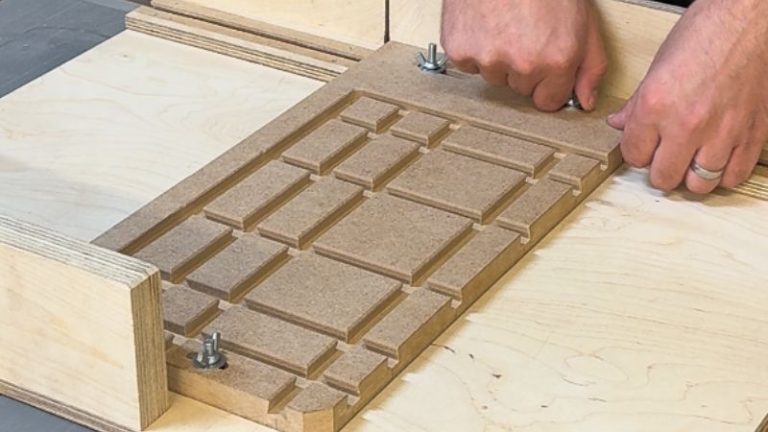
The routed matrix is the main feature of the jig. Because the slots run in both directions, I can normally find a clamping point close to the workpiece regardless of how it is positioned.
The slots are accessible from the:
- left side
- upper side
That means I can slide clamps, bolts, or other hardware directly into the matrix without removing the jig from the table saw sled. This makes setup much quicker.
Another important detail is the blade-side edge. The slots do not continue all the way through that side of the jig. That helps keep clamping hardware away from the blade area.
NOTE: This is an additional safety feature, but it does not replace checking the blade path before every cut. Always make sure the blade cannot contact the jig, clamps, bolts, or other hardware.
The matrix also gives me freedom to use different types of clamping hardware. I am not limited to one single clamp position or one specific workpiece size.
Let’s Start Building!
The jig looks quite complex when the complete slot matrix is finished, but the actual construction is straightforward. Most of the build is careful router work. The process can be divided into three main parts:
- prepare the HDF base
- create the dovetail matrix
- build the mounting system for the table saw sled
How to Make an Any-angle Table Saw Sled
Step 1: Cut the HDF Base
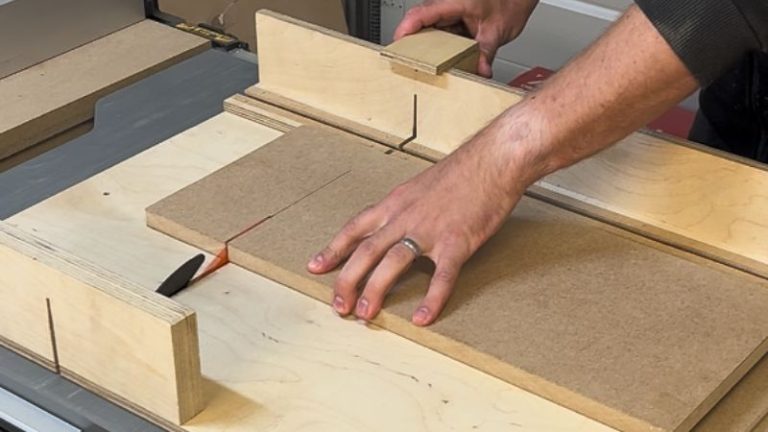
I start with an 18 mm (about 3/4 in) HDF panel. I cut it to the final size on the table saw: 215 × 420 mm (8-7/16 × 16-1/2 in)
Make sure the panel is square and the edges are straight. A clean base makes the remaining layout and router work much easier.
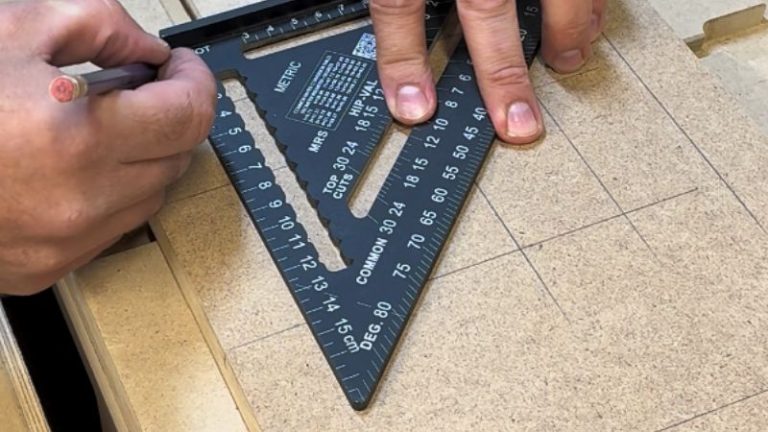
Step 2: Mark the Clamping Matrix
Next, I mark all the dovetail slots with a pencil. My jig has:
- 6 horizontal lines
- 4 vertical lines
The spacing does not need to be perfectly even. In fact, mine intentionally is not. I placed some slots closer together near the blade because I wanted more clamping options there.
Before routing anything, think about:
- where your saw blade will be
- the size of your sled
- typical workpiece sizes
- where clamps will be most useful
- how much material you want to leave between slots
I first mark the vertical slot closest to the blade. That also becomes the stopping point for the horizontal slots later.
💡TIP: Draw the entire matrix first. It is much easier to change pencil lines than a routed dovetail slot.
Step 3: Route the Vertical Dovetail Slots
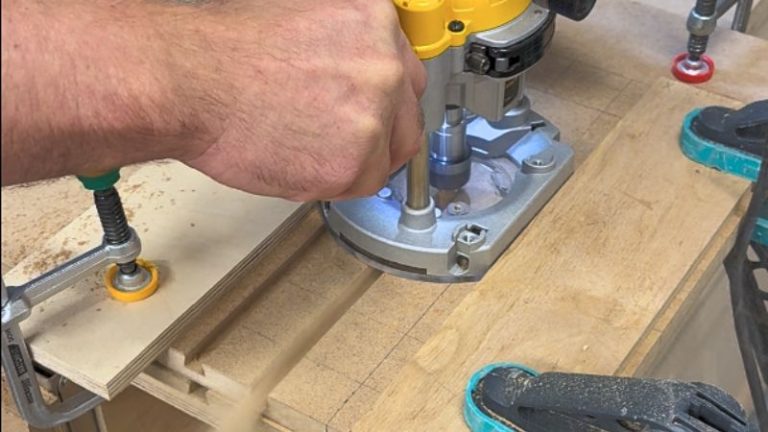
For the clamping matrix I use a MICROJIG MATCHFIT Dovetail Router Bit. First I set the bit to the correct depth. Then I start with the vertical slot closest to the blade. I like routing this one first because it defines the outer limit of the matrix.
After that, I route the remaining three vertical slots. I use a guide on both sides of the router. This is important. The router needs to stay rigid during the cut. If it twists or moves sideways, the dovetail slot can become wider, uneven, or crooked.
Two guides keep the router moving straight and prevent unnecessary wobble.
💡TIP: Spend a little extra time positioning the router guides. Straight slots are important if you want clamps and bolts to slide smoothly through the matrix.
Step 4: Route the Horizontal Dovetail Slots
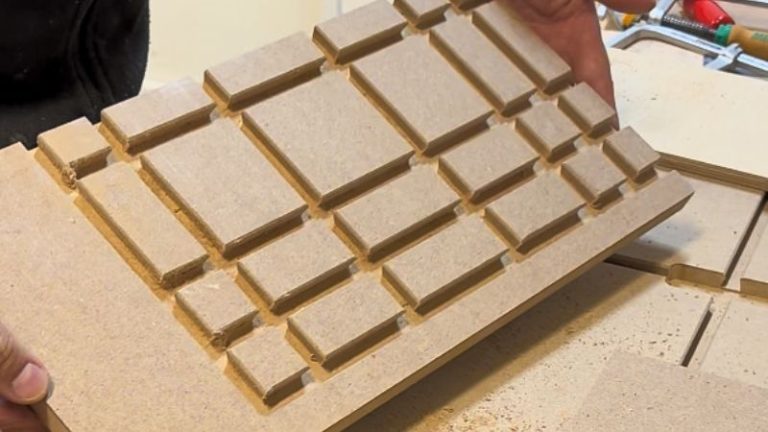
Once all four vertical slots are finished, I move on to the horizontal ones. My jig has six.
I start with the top slot and work my way down toward the table saw sled T-track. I use the same router setup. The horizontal slots intersect the vertical ones and gradually create the full matrix.
Do not rush this part. The cleaner and straighter the slots are, the easier the jig will be to use later.
Step 5: Cut the T-Track Mounting Slots
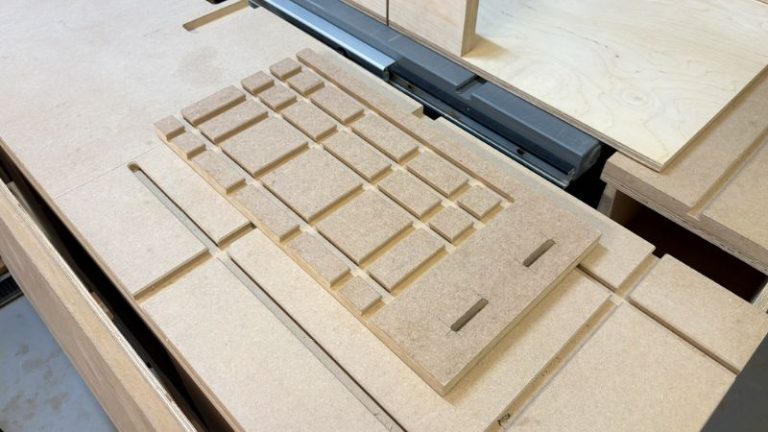
Now I need to connect the jig to the T-track on my existing table saw sled. First, I measure the position of the sled’s T-track and transfer those measurements onto the bottom area of the new jig.
Then I cut two mounting slots. For these, I use:
- handheld router
- 6 mm (about 1/4 in) straight router bit
- my Router Dado Jig
The dado jig works very well here because I need two clean, straight router slots. These are slots rather than simple round holes for a reason.
They let me move the complete table saw angle jig closer to or farther away from the blade before tightening the wing nuts. That gives me additional adjustment depending on the size and angle of the workpiece.
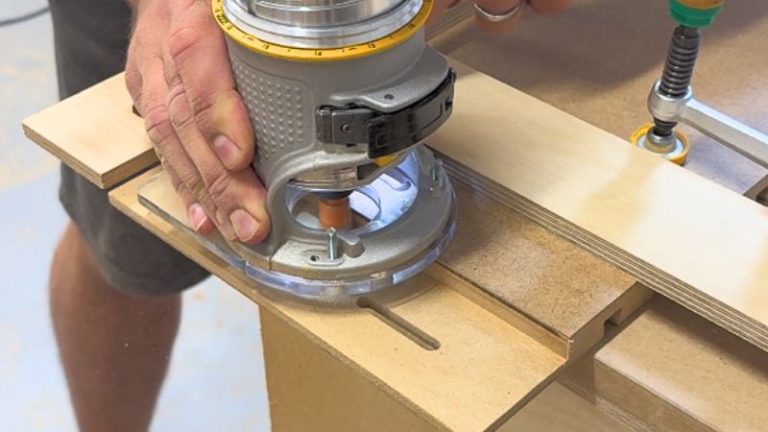
Step 6: Route the T-Track Rabbet
There is another part of the mounting system that needs to be addressed. My jig is 18 mm (about 3/4 in) thick, while the T-track area it overlaps is approximately 12 mm (about 1/2 in) high. I therefore need to remove material from the underside of the angle jig.
In practice, I am creating a deep rabbet. For this I use my Router Rabbet Jig. I position the jig, set the router depth, and remove the HDF gradually in several passes. I continue until the new jig fits over the T-track area properly.
The two mounting slots then line up with the T-track hardware and allow the jig to slide sideways for adjustment.
NOTE: The rabbet is cut from the bottom of the angle jig. The upper working surface stays flat.
💡TIP: Remove the material gradually. Several router passes are easier to control and usually leave a cleaner result.
Step 7: Add the Upper Mounting Point
The T-track secures the lower side of the jig. I also want an attachment point on the opposite side. This prevents the jig from rotating or moving while the workpiece is being clamped or cut.
I route an 8 mm (about 5/16 in) slot through the upper section of the jig. Directly below that position, I drill a 6 mm (about 1/4 in) hole through the table saw sled. A 6 mm bolt connects the two.
From the underside of the sled, I create a hexagonal recess for the bolt head. This does two things:
- locks the bolt so it cannot rotate
- keeps the bolt head completely flush with the bottom of the sled
That second point is very important. Nothing should protrude from underneath the table saw sled. The bottom needs to remain completely flat so the sled can move freely across the table saw.
From the top, I secure the jig with a wing nut. Now the table saw angle jig is held firmly at both ends.
How to Attach the Jig to the Table Saw Sled
Mounting the jig only takes a short time.
The lower side attaches to the existing T-track with bolts and wing nuts. Because the holes in the angle jig are elongated slots, I can move the jig sideways before tightening it. This lets me adjust its distance from the blade.
The opposite side uses the additional bolt and wing nut. Once both sides are tightened, the jig should feel like part of the table saw sled itself. There should be no noticeable movement or rotation.
NOTE: Always check the attachment before placing a workpiece on the jig. The entire platform needs to be secure before you start adjusting the workpiece angle.
How to Use the Table Saw Angle Jig
This is the easy part. Place the workpiece on the matrix. Mark your cutting line. Then rotate the workpiece until the cut line is aligned with the blade path. Once the position is correct, choose suitable dovetail slots around the workpiece and clamp it down.
Depending on the shape and angle, I may use:
- one clamp
- several clamps
- bolts
- a small stop block
- a scrap piece as additional support
- a combination of several clamping methods
The important thing is that the workpiece cannot move or rotate during the cut. Once everything is secured, I use the table saw sled normally and push it through the blade.
💡TIP: A pencil cut line directly on the workpiece makes unusual angles much easier to set than trying to calculate every setup mathematically.
NOTE: Before starting the saw, check the complete blade path manually. Make sure the blade cannot contact the jig, clamps, bolts, or other hardware.
What Cuts Can You Make?
The main advantage of this jig is that it is not designed around a single angle.
Angled Crosscuts
This is the most obvious use.
Position the board at the required angle, secure it, and make the crosscut.
Miter Cuts
The jig can also handle miter cuts.
If I need a large number of identical 45° cuts, a dedicated miter sled may still be faster.
But for changing or unusual angles, this jig gives me much more freedom.
Standard Crosscuts
It can also hold pieces for ordinary crosscuts, especially when the shape of the workpiece makes the standard sled fence inconvenient.
Irregular Workpieces
This is another useful application.
Not every piece has a long straight edge that sits nicely against a fence.
With the matrix I can clamp around the actual shape instead.
Repeatable Custom Angles
Once I find the correct angle, I can use additional stops or blocks to reproduce the same setup for multiple workpieces.
That makes the jig useful not only for one-off cuts but also for small repetitive jobs.
Compatible Clamps and Hardware
I designed the dovetail matrix around the MICROJIG MATCHFIT system. That means I can use compatible:
- dovetail clamps
- bolts
- stops
But the matrix is not limited to only one type of hardware. Depending on the size and shape of the hardware, you may also be able to use:
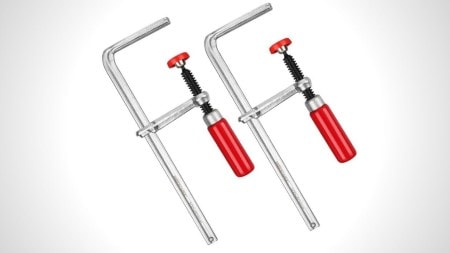
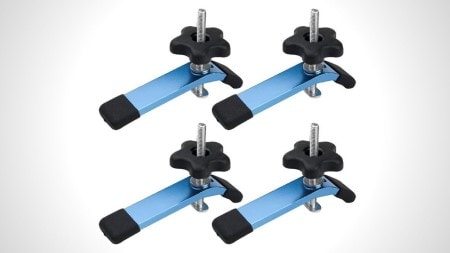
- track clamps
- hold-down clamps
- custom bolts
- homemade T-track-style bolts
- DIY stops and fixtures
That is another benefit of having a large matrix rather than just one or two fixed clamping points.
Why the Slots Are Open From Two Sides
This is a small design detail that makes the jig much easier to use. The matrix can be accessed from:
- the left side
- the upper side
So I can slide clamps or bolts directly into the dovetail slots while the jig stays mounted on the sled. I do not need to remove the entire attachment every time I want to change the clamping setup.
The slots also stop before the blade-side edge. This helps prevent clamps and bolts from being inserted directly from the side closest to the blade.
It is a simple design choice, but it makes the whole setup easier and safer to use.
How This Fits Into My Modular Table Saw Sled
I built this jig specifically as an add-on, not as another completely separate table saw sled.
That is one of the biggest advantages of my current setup. The T-track on the sled gives me a base platform. I can then attach different jigs depending on the operation.
When I need flexible angle cutting, I install this jig. When I am finished, I remove it and go back to normal sled use. It saves both workshop space and build time.
If you like this approach, also have a look at How to Build Modular Woodworking Jigs for Versatility.
Wrap-Up
I originally built this table saw angle jig because I wanted more freedom from my existing table saw sled without building another dedicated sled for every type of angled cut.
The routed matrix turned out to be a simple solution.
Instead of the jig deciding the angle, I position the workpiece exactly where I need it and then use the surrounding dovetail slots to lock it in place.
That makes it useful for miters, angled crosscuts, irregular workpieces, and plenty of custom setups where a standard sled fence is not ideal.
I also like that it remains completely modular. I can install the Any-Angle Sled Add-On when I need it, move it closer to or farther from the blade, and remove it again when the job is finished. It is a relatively simple build, but it adds a lot of flexibility to an already useful table saw sled.
If you want to build the same version, you can find the detailed dimensions and layout on my Woodworking Plans page.
Frequently Asked Questions
What is a table saw angle jig?
A table saw angle jig helps hold a workpiece at a chosen angle while making a cut. My version attaches to an existing table saw sled and uses a matrix of dovetail slots so the workpiece can be rotated and clamped in many different positions.
Can I use this table saw angle jig for miter cuts?
Yes. The jig can be used for miter cuts as well as other custom angles. For repeated standard angles such as 45°, a dedicated miter sled may be quicker, but the angle jig is more flexible when the required angle changes.
Why use dovetail slots instead of T-tracks?
Dovetail slots can be routed directly into the HDF base. This gives me many clamping positions without installing multiple metal T-tracks across the jig.
What clamps can I use with the jig?
I designed the matrix for the MICROJIG MATCHFIT system, but compatible dovetail clamps, bolts, hold-down clamps, track clamps, and other suitable hardware can also be used depending on their dimensions.
Can I change the dovetail slot layout?
Yes. My jig uses six horizontal and four vertical slots, but you can change the number and spacing to suit your sled, workpieces, and clamping hardware.
