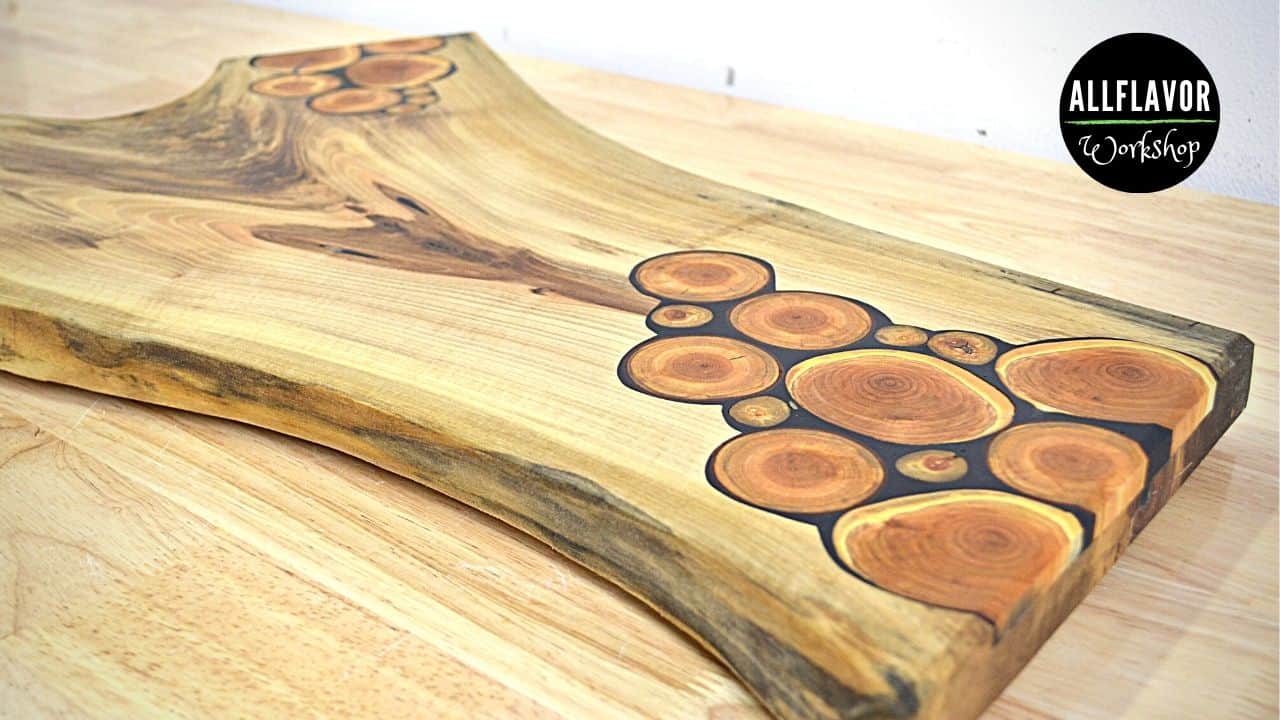
I wanted to make something simple, beautiful, and practical — a cutting board that’s easy to build but still has a bit of personality. So I took a walnut slab, added cherry branch inlays, and finished it off with a little epoxy for that extra charm.
This is one of the simplest cutting boards you can make — no planer or jointer needed. A router flattening jig, a sander, and a bit of patience are all you need to get started. The live edges give it a natural feel, and you can easily skip the inlays or epoxy if you want to keep it straightforward.
If you’re starting with cutting boards, this is a great first project to build confidence. You’ll also see how using a few basic jigs makes the process faster and more accurate.
👉 Check out Best Jigs for Making Cutting Boards (And How to Use Them) — it’s a good place to start before you dive into the build.
Video: How to Make a DIY Face Grain Cutting Board
Watch the full build below — from flattening the slab to applying the final oil finish. The video covers every step and gives you a clear idea of what to expect.
If you enjoy it, don’t forget to subscribe to my YouTube channel for more woodworking jigs, cutting board builds, and DIY workshop projects.
Table of Contents
- Video: How to Make a DIY Face Grain Cutting Board
- Materials and Tools
- Why Choose a Face Grain Cutting Board?
- Let’s Start Building!
Step 1: Prepare and Flatten the Walnut Slab
Step 2: Prepare the Cherry Branch Inlays (Optional)
Step 3: Cut the Recesses and Glue the Inlays
Step 4: Pour the Epoxy and Reflatten the Board
Step 5: Sand, Oil, and Finish the Board - Care Tips for Your Cutting Board
- Wrap-Up
- FAQs
Materials and Tools
Before starting, prepare all the materials and tools you’ll need for this project.
Wood
- Walnut slab (face grain board base, live edge left natural)
- Cherry branches (for inlay cookies)
Hardware / Other
- Epoxy resin – Epoxy Resin
- Epoxy pigment (optional) – Epoxy Resin Pigment
- Cutting board rubber feet – Cutting Board Feet
- Wood oil (food-safe finish) – Wood Oil
- Duck tape – Duck Tape
- Gloves – Protective Gloves
Tools
- Router flattening jig (no planer needed for this build)
- Trim router – Trim Router
- Surfacing bit – Surfacing Bit
- Straight router bit – Straight Bit
- Orbit sander – Orbit Sander
- Sanding discs – Sanding Discs
- Table saw – Table Saw
- Japanese Ryoba saw – Ryoba Saw
- Hand drill – Hand Drill
- Forstner bits – Forstner Bits
- Narex chisels – Narex Chisels
- One-hand clamps – One Hand Clamps
- F-clamps – F-Clamps
- T-track clamps – T-Track Clamps
- Bench cookies – Bench Cookies
- Heat gun – Heat Gun
💡 You can find all the tools I use in my workshop on my Tools Page (link to your tools post).
Disclosure: Some of the links above are affiliate links. If you purchase through them, I may earn a small commission at no extra cost to you. Thanks for supporting AllFlavor Workshop.
📌 Found this post useful and inspiring?
Ready to build it? Save THIS PIN to your Board on Pinterest!

Why Choose a Face Grain Cutting Board?
If you’re new to woodworking, a face grain cutting board is the perfect place to start. It’s simple to make, requires only a few tools, and gives you great results even without a planer or jointer. The wood grain shows beautifully, and when finished with oil, it really pops. You can use it as a regular cutting board, a serving board, or even a decorative piece — it’s that versatile.
Let’s Start Building!
Now that you have everything ready, it’s time to start the build.
This project begins with flattening the walnut slab using a router flattening jig — an easy and accurate way to get a flat surface without a planer. Then we’ll prepare the inlays, pour the epoxy, and finish the board with sanding and oiling.
The same process works great with other food-safe hardwoods like maple or cherry. Ready? Let’s make your first face grain cutting board!
How to Make a Face Grain Cutting Board
Step 1: Prepare and Flatten the Walnut Slab
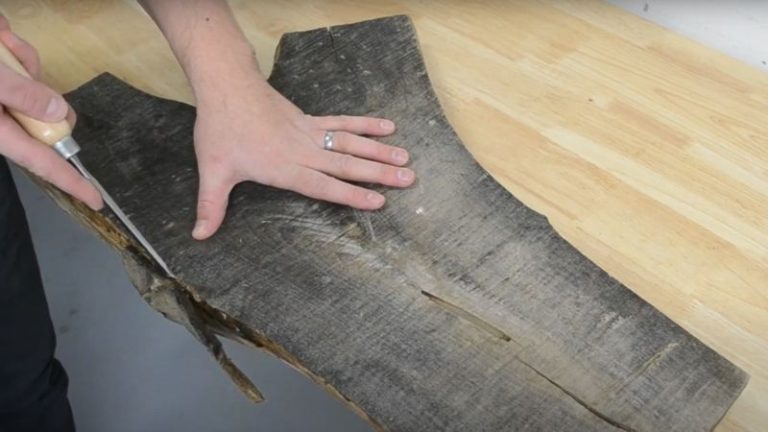
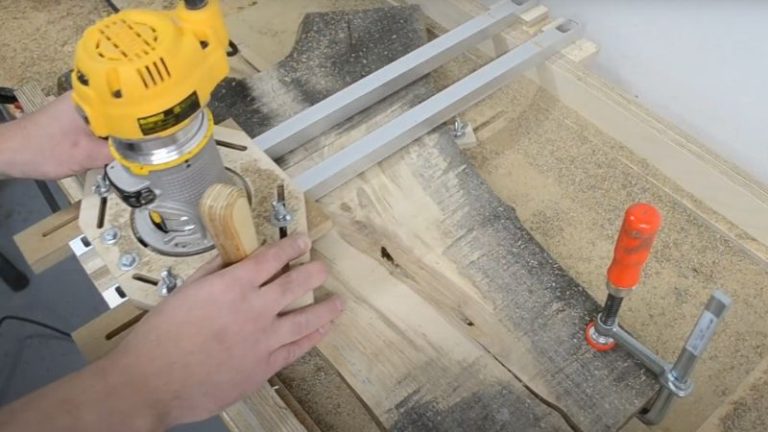
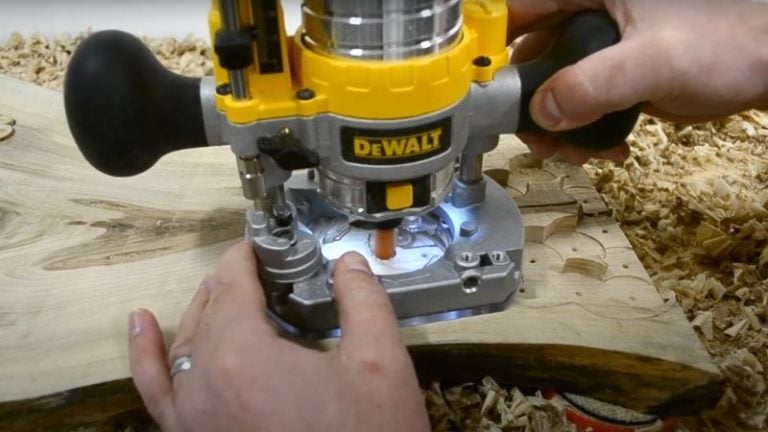
Start by preparing the slab for flattening. I first remove all the bark and clean the live edges using a sander or a wire brush — this keeps the edges natural but smooth to the touch. Then I mount the slab onto my router flattening jig, secure it firmly, and begin surfacing.
Using a router fitted with a flattening bit, I make several passes across the board, slowly removing material until the surface is perfectly flat. Once one side is done, I flip the slab and flatten the other side to ensure both faces are even.
After flattening, I trim the ends of the board using my table saw sled to get clean, straight edges and use a chisel to tidy up any small imperfections or voids. The surface will still show faint lines from the router bit — those will disappear later during sanding.
👉 If you don’t have a planer, a Router Flattening Jig is a simple and versatile alternative for flattening slabs or larger boards.

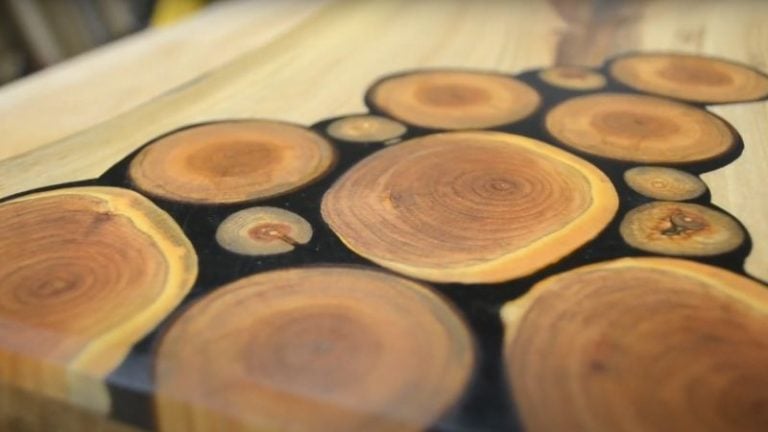
Step 2: Prepare the Cherry Branch Inlays (Optional)
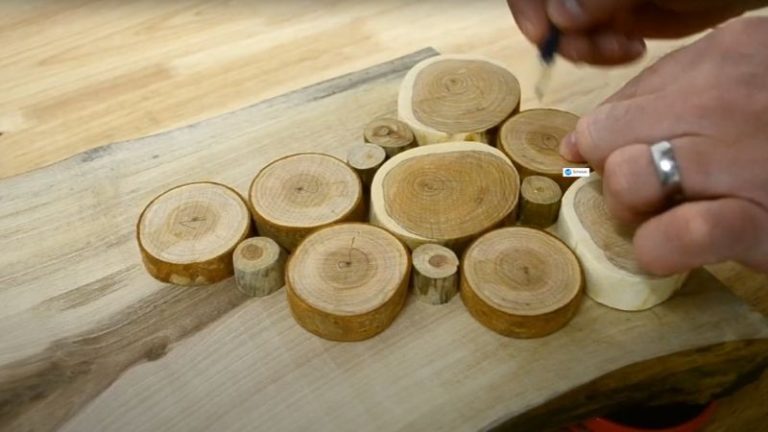
If you want to add a little charm to your board, you can include a few cherry branch inlays. I cut several branches into small cookies about 1.5 cm thick, with diameters between 1 cm and 7 cm to get a bit of variation. After cutting, I remove the bark and lightly sand the edges.
Once the cookies are ready, I arrange them on the board to see how the design will look and outline their positions with a pencil. This helps later when routing the recesses for the inlays.
There are two things to keep in mind:
Remember the placement – label or number the cookies so you can return them to the same position later. It’s surprisingly easy to mix them up once the outlines are routed.
Use dry wood – the cherry cookies should be completely dry. If they aren’t, they’ll shrink over time and create small gaps between the epoxy and the wood.


Step 3: Cut the Recesses and Glue the Inlays
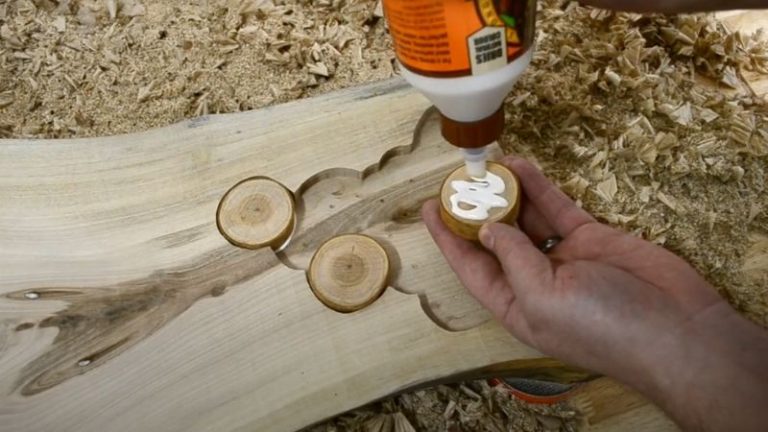
With the outlines marked, it’s time to cut the recesses for the cherry cookies. I start by drilling out the centers with a Forstner bit, going just deep enough so the cookies will sit snugly but still stick out slightly above the board’s surface. Then, using a trim router with a straight bit, I clean up the edges and refine the shape of each recess.
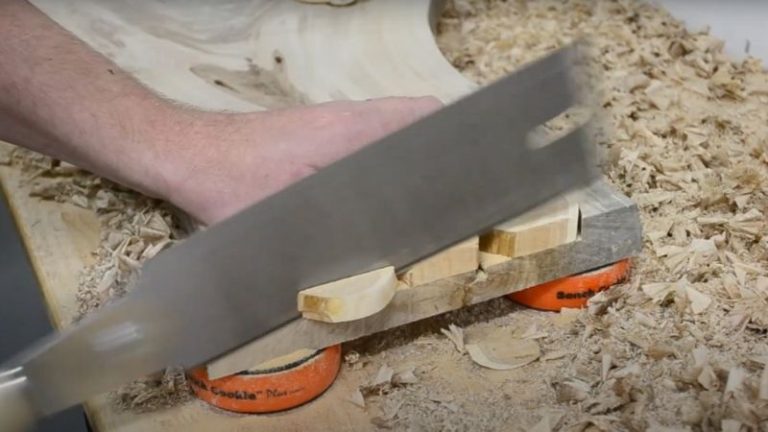
Once all the holes are ready, I add a small amount of wood glue to the bottom of each cavity and place the cookies in their positions following the design layout. After the glue dries, I trim off the overhanging edges of the cookies using a hand saw so they align perfectly with the board edges.
💡 Tip: Make sure the cookies are glued firmly and remain slightly proud of the surface — we’ll flatten them perfectly flush later when we resurface the board.
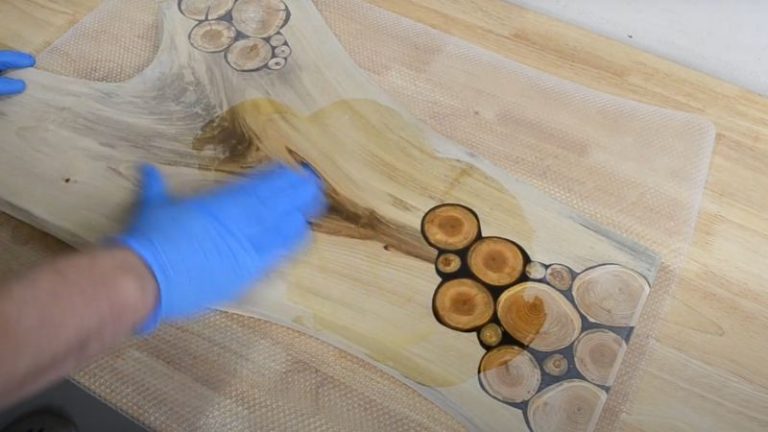
Step 4: Pour the Epoxy and Reflatten the Board
Before mixing the epoxy, make sure to seal all the areas where it could leak. I tape around the sides of the board, fill any cracks or small voids, and cover every spot where resin could escape. A strong silver tape works great — it holds the epoxy in place until it cures completely.
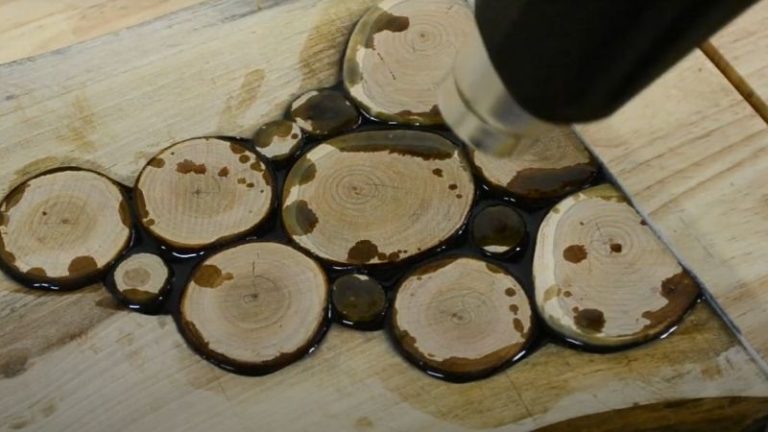
Next, mix the epoxy following the manufacturer’s instructions. I like to add a bit of black pigment to create contrast, but you can experiment with any color you want. Slowly pour the epoxy into the gaps between the cookies, the cracks, and any voids in the board. Don’t rush — after a few minutes the epoxy will settle, and you’ll notice shallow spots. Just top them up with another pour.
💡 Even if the gaps look small, they can take a surprising amount of epoxy — always mix a bit more than you think you’ll need.
For smaller cracks, use a syringe to fill them precisely. Once done, use a heat gun to remove air bubbles from the surface. Let the epoxy cure fully according to the manufacturer’s recommendations.
When it’s ready, return to your router flattening jig and resurface the board. This will level out the cookies, remove excess epoxy, and leave you with a smooth, even surface ready for final sanding.


Step 5: Sand, Oil, and Finish the Board
Now it’s time to give the board its final touch. Start sanding to smooth the surface and remove the faint cut lines left from flattening. I use an orbital palm sander — a variable-speed one works best here. Begin with 60–80 grit sandpaper, then move gradually up to 300 grit for a smooth, even finish. Don’t forget to sand the sides as well.
You can use the sander or a sanding block to slightly bevel the edges, or do it with a trim router if you want a cleaner, more uniform look. Once everything feels smooth, lightly sprinkle water over the board — this raises the wood fibers. Let it dry and sand it again with fine-grit paper for that silky surface.
Now apply your preferred food-safe oil to both sides of the board. I used Belinka oil for this one, and the walnut grain really came to life once it soaked in. The last touch is adding rubber feet — they lift the board slightly, making it easier to grab and handle.
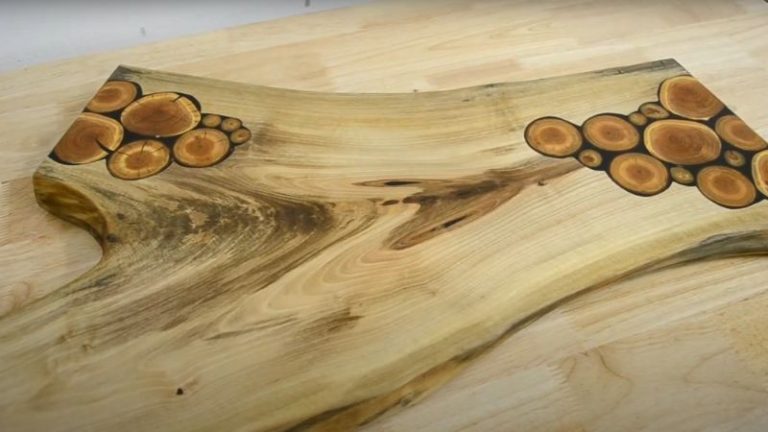
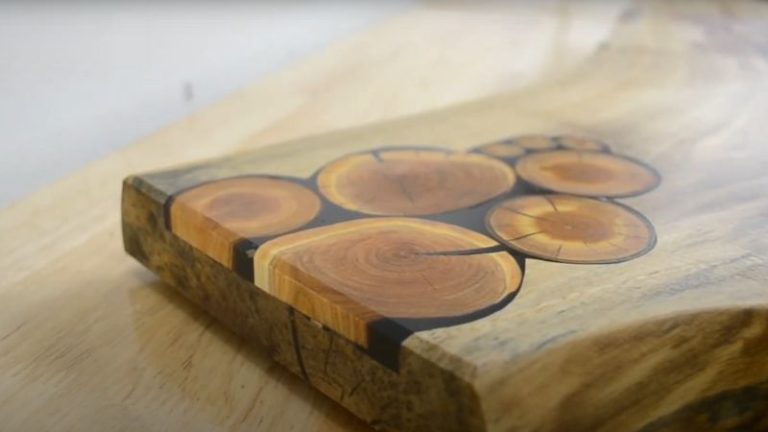
And that’s it — your face grain cutting board is finished and ready to use!


This is what the finished board looks like.
Care Tips for Your Cutting Board
To keep your cutting board in great shape, make sure to care for it regularly.
Clean it by hand only. Wipe it with warm water and mild soap after each use — never put it in the dishwasher.
Dry it right away. Stand it upright or on its side so air can circulate and moisture doesn’t get trapped.
Re-oil the surface. Every few weeks, or when the board starts to look dry, apply a thin layer of food-safe oil and let it soak in overnight.
Avoid extreme heat or humidity. Sudden changes in temperature can warp the wood or affect the epoxy.
With a bit of regular care, your face grain cutting board will last for years and only get better with time.
Wrap-Up
If you’ve made it this far, congrats — you’ve just built one of the easiest cutting boards you can make yourself. It’s a simple project, and if you skip the epoxy and inlays, it’s also a great way to start working with wood without needing a full shop of tools.
I really like projects like this — they’re quick to make, satisfying, and you can actually use them every day. Just remember, not every type of wood is right for cutting boards, so it’s worth taking a bit of time to check which ones are food-safe and durable before you start your next one.
If you’re just getting into woodworking or want to try your first cutting board, this is the perfect place to begin. Once you get comfortable with face grain boards, you can move on to edge grain or end grain versions — those are a bit more advanced and will need a few extra jigs and tools. But that’s the fun part — every project builds on the last.
And the best thing is, if you decide to build a router flattening jig or a sanding block for this one, you’ll be using them again and again for other cutting board projects. They really stack up and make each new build easier and more enjoyable.
👉 If you want to see which jigs I use and how, check out Best Jigs for Making Cutting Boards (And How to Use Them). You’ll find plenty of ideas and free plans to download there.
FAQs
Is a face grain cutting board good for everyday use?
Yes. It’s the simplest style to make and perfectly fine for light to moderate kitchen use (great as a serving/charcuterie board too). For heavy chopping, end grain is gentler on knives.
What wood is best for a face grain cutting board?
Walnut, maple, and cherry are reliable, food-safe choices. Avoid very open-pored, oily, or soft woods.
Can I keep the live edge?
Yes—just remove bark and clean the edge well. Sealing any cracks/voids with epoxy helps long-term durability.
Is epoxy food-safe?
Most quality epoxies are food-safe after full cure (follow the manufacturer’s cure time). Sand smooth and finish the whole board properly.
What finish should I use?
Use a food-safe oil or oil/wax blend. Re-oil when the surface looks dry.
Can I put a wooden cutting board in the dishwasher?
No. Hand-wash with mild soap, rinse, and dry immediately. Standing it on edge helps it dry evenly.
