
When it comes to upgrading a cutting board, adding routed handles makes it not only easier to lift but also much nicer to use. There are different ways to cut handles, but one of the simplest methods (that doesn’t require a router table) is to use a palm router with a cutting board handle jig.
This jig is quick to make, works with any board size, and gives you clean, consistent results every time. All you need is a single board (MDF or Plywood) and you are good to go. You can use the jig for cutting boards, butcher blocks, or even wooden serving trays.
In this post, I’ll walk you through how I made mine, step by step, with pictures along the way. It’s a simple jig, but one I keep reaching for whenever I want professional-looking handles.
👉 Also see my Best Jigs for Making Cutting Boards for more ideas to level up your cutting board projects.
DIY Cutting Board Handle Jig – Video Tutorial
Want to see the jig in action? In this video, I show the full process of making a cutting board, including how I use the handle jig with a palm router to cut clean, consistent handles.
I appreciate every YouTube subscriber. It’s free and easy to subscribe to — just Click Here To Subscribe. Thank you!
Table of Contents
- Cutting Board Handle Jig – Video
- Cutting Board Handle Jig Plans
- The Material you will need to build it
- General Questions
- Benefits of a Cutting Board Handle Jig
- How to Make a Cutting Board Handle Jig (Step-by-Step)
- Step 1: Cut the Template
- Step 2: Draw the Design on the Template
- Step 3: Cut out the Inner Rectangle
- Step 4: Mark the Center of the Template
- How to Route Cutting Board Handles
- Final Thoughts
- FAQ
- Woodworking Jigs Used
Materials and Tools for the Cutting Board Handle Jig
Handle Jig:
- Router Template – MDF, HDF, or plywood board (at least 8 mm / 5/16″ thick) for the jig template
- Straight Router Bit (no bearing) – https://amzn.to/3RJvjiE
📌 Tip: A flat, stable sheet like MDF is easiest to work with for templates. Plywood works too, but avoid boards thinner than 8 mm (5/16″) for stability.
Tools:
- Dewalt Trim Router – https://amzn.to/3HbQcOg
- One Hand Clamps – https://amzn.to/48jGxkZ
- F-Clamps – https://amzn.to/48ArzY1
Check all the Tools I Use
We may earn an affiliate commission when you buy something through our retail links. As an Amazon Associate AllFlavor Workshop earns from qualifying purchases.
Benefits of a Cutting Board Handle Jig
Using a cutting board handle jig makes routing handles faster, safer, and more accurate. Instead of measuring and guessing each time, you get consistent, repeatable results that look clean and professional.
- Consistent results: The jig guides your router so every handle is the same size and position.
- Time-saving: Once made, you can reuse the jig for any cutting board, butcher block, or tray. Just clamp it in place and route.
- Better grip: The routed slots give your fingers a natural place to hold, making boards easier to lift and carry.
💡 Tip: This jig is especially handy if you plan to make multiple cutting boards — it ensures every handle lines up perfectly without extra measuring.
Let’s Start Building!
This cutting board handle jig is simple to make and only requires one sheet of MDF, HDF, or plywood. I used an MDF board because it’s flat, stable, and easy to work with — but any sheet material at least 8 mm (5/16″) thick will do.
💡 Tip: Don’t worry if you don’t have fancy tools. I used an adjustable router template guide and a table saw sled to cut mine, but you can just as easily make it with a jigsaw or even a handsaw.
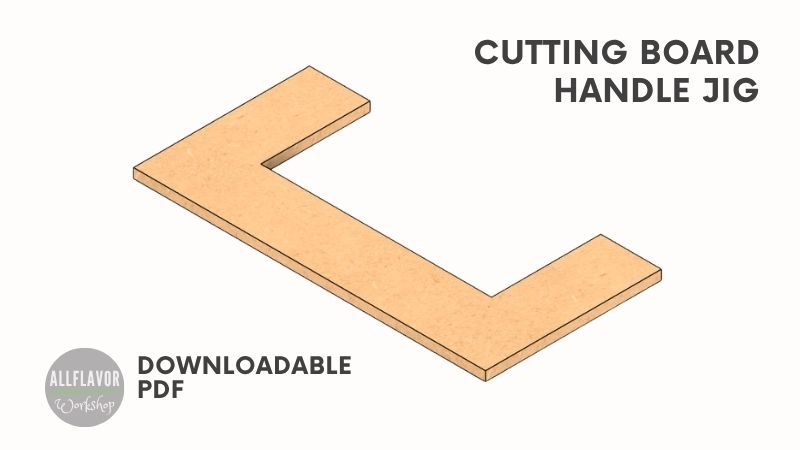
Jig Properties
- Dimensions: 290 × 145 × 8 mm (11 ½″ × 5 ¾″ × 5/16″)
- Inner cut-out: 190 × 90 mm (7 ½″ × 3 ½″) → results in a routed handle size of 100 × 50 mm (4″ × 2″)
- Built for: Dewalt palm router base plate — if you’re using a different router, adjust the template size to fit your base plate.
How to Make a Cutting Board Handle Jig (Step-by-Step)
Step 1: Cut the Template
Cut a board to 290 × 145 × 8 mm (11 ½″ × 5 ¾″ × 5/16″). I used MDF, but HDF or plywood works just as well. Use a table saw, sled, or jigsaw to make the cut.
💡 Tip: Avoid boards thinner than 8 mm (5/16″). The jig needs enough thickness to guide the router base without flexing.

Step 2: Mark the Handle Opening
Draw the rectangle for the inner cut-out (190 × 90 mm / 7 ½″ × 3 ½″). Keep your lines parallel and centered on the board so the jig routes evenly on both sides.
💡 Tip: Use a ruler or marking gauge to keep everything square and symmetrical.


Step 3: Cut Out the Inner Rectangle
Cut the rectangle opening 190 × 90 mm (7 ½″ × 3 ½″). This gives you a routed handle size of 100 × 50 mm (4″ × 2″).
There are several ways to do this:
- Adjustable router template guide (cleanest cut).
- Drill starter holes at the corners + cut with a jigsaw or handsaw.
💡 Tip: Take your time — the accuracy of this cut determines how clean your routed handles will look. Check this article for different ways to cut a square hole in wood – How to cut a square hole in wood


Step 4: Mark the Center Lines
Use a pencil to mark the center lines on the template (both width and length).
💡 Tip: When you clamp the jig onto a cutting board, align these center marks with the board’s center. This guarantees the handles are routed evenly on both sides.

How to Route Cutting Board Handles
Once your jig is ready, routing the handles is quick and straightforward. First, make sure your board is already flat and smooth — a Router Sled for Flattening Boards is a great way to get it prepped before adding handles.
Now here’s how to route the handles:
- Mark the centers → Draw center points on both long edges of the cutting board.
- Clamp the jig → Align the jig’s center marks with the board’s center marks. Clamp it firmly in place so it doesn’t shift.
- Route the outline → Start with a shallow pass around the perimeter of the rectangle in a clockwise direction.
- Remove the middle → Make multiple shallow passes until the entire center is cleared. Shallow cuts help avoid burn marks.
- Repeat on the other side → Move the jig, clamp it again, and repeat the process for the second handle.
💡 Tip: Always route the outline first and leave the center for last. This way, the router base has full support until the very end, giving you a cleaner, even cut.


Final Thoughts on the Cutting Board Handle Jig
This jig is as simple as it gets — you can build it in about 30 minutes from one sheet of MDF, HDF, or plywood. Yet it makes a huge difference when adding handles to cutting boards, butcher blocks, or even wooden trays.
I personally prefer cutout handles on the bottom of a board rather than side handles — they’re easier to grab, and I like the clean look. That’s a personal choice, but this jig makes either option possible.
Over time, I’d probably upgrade this jig by adding stoppers to the front edges. That way, once the centers are aligned, the stoppers would automatically square the jig with the board, giving a quick and precise 90° setup.
There are also a few small tweaks you can try:
- Round or sand the routed edges for a softer, more stylish grip.
- If you plan to add rubber feet to the board, you can make the handles shallower. The extra height from the feet will give enough clearance for your fingers.
👉 If you’d like to try this yourself, grab my free woodworking jig plans — they include the jigs I use for making cutting boards and butcher blocks. You can also check out my Best Jigs for Cutting Boards for more inspiration.
This jig is quick to make, easy to set up, and one I use regularly. For such a small project, it has a big impact on the look and feel of your cutting boards.
📌 Save THIS PIN to your Board on Pinterest!

Frequently Asked Questions
What is a cutting board handle used for?
A routed handle makes a board easier to lift, carry, and maneuver. It adds comfort without changing the board’s footprint.
How deep should a cutting board handle be?
Typically 12–19 mm (½–¾″) deep. Go shallower if you’ll add rubber feet (the extra height gives finger clearance).
How do I ensure the handles are routed to the exact same depth?
Set the depth stop on a plunge router or use a test piece to dial in the depth on a palm router, then don’t change the setting between sides.
What router bit should I use for cutting board handles?
A straight bit without a bearing (e.g., ⅜″–½″ / 10–12 mm) guided by the template. Use a sharp bit for clean walls and less burning.
What’s the best way to sand the handles after routing?
Break the edges with a small chamfer/round-over (router or block), then hand-sand the recess through the grits until smooth.
How do I avoid burn marks when routing handles?
Use a sharp bit, multiple shallow passes, steady feed rate, and keep the router moving. If needed, lower RPM slightly for hardwoods.
