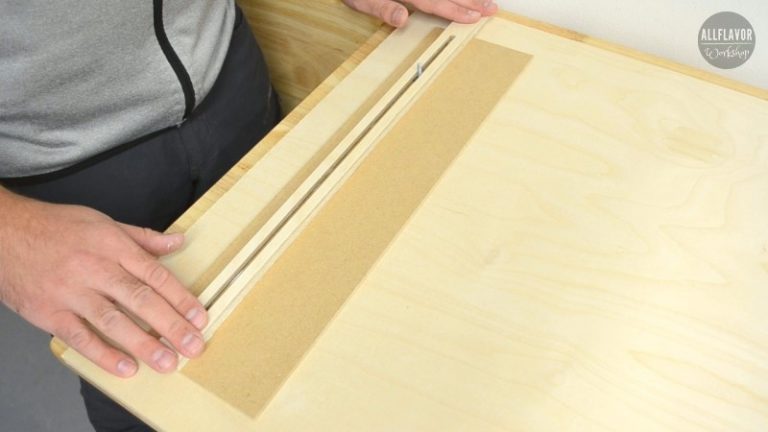
An adjustable router template guide is used to accurately and precisely cut specific shapes in the stock. A router template guide can be used to cut squares and rectangles in wood of different sizes, cut mortises and slots, or dados and rabbets depending on the shape and the setup of the template.
Some time ago I made an adjustable router guide for dados and grooves. It can be easily and quickly set up and serves well to accurately cut slots in the stock. It’s a great router jig for the workshop I have been using very often. Nevertheless, this guide is limited to cutting dados and grooves to a width of 60 mm only.
This DIY router template guide we will be building today not only allows us to cut dados, grooves, and rabbets but also allows us to make all the above-mentioned cuts. It is most suitable for routing squares and rectangles in wood of different sizes but also serves well for cutting exact-width dados and slots.

You can find several router templates on the market, some universal, and some router-specific. The majority of them are made of aluminum. They work well, although are quite expensive and their price can be as high as several hundred dollars per model. You can easily make your own template and save some money. Plus, it can be conveniently disassembled and stored when not in use.
In this blog post, I will guide you step by step on how to make a router template and how to use it to cut a square hole in wood.
DIY Adjustable Router Template Jig Video
If you want to see how it is done, watch the video below for a step-by-step guide on how to make an adjustable router template jig.
I appreciate every YouTube subscriber. It’s free and easy to subscribe to — just Click Here To Subscribe. Thank you!
Table of Contents
- Adjustable Router Template Video
- Adjustable Router Template Plans
- The Material you will need
- General Questions
- What is the best material for a router template?
- How thick should a router template be?
- What router bit to use with a router template?
- Can you plunge with a straight router bit?
- How to Make an Adjustable Router Template Jig
- Step 1: Cut the template base plates
- Step 2: Make the template guide T-slots
- Step 3: Attach the guides to the template base plates
- Step 4: Make a router base plate
- Step 5: Connect all base plates together
- How to Use an Adjustable Router Template Guide for Squares and Rectangles
- Woodworking jigs used for the project
*Safety is your responsibility. Make sure you know what you’re doing and take all necessary safety precautions while working with power tools. Safety comes first!
Always be cautious and careful when using any power tool.
What you'll need to make an Adjustable Router Template
Adjustable Router Template Jig:
Template base – MDF 4mm; 1/8 Inch (95 mm x 460 mm x 4 mm)
Template Guides – Birch Plywood 12 mm; 1/2 Inch (25 mm x 500 mm x 12 mm) – https://amzn.to/48pjjK0
Template Connectors – HDF 5mm; 3/16 Inch (25 mm x 110 mm x 50 mm)
Router Base – HDF 6mm, outer ø105 mm, inner ø39 mm
Check all the Tools I Use
Tools:
Trim Router – https://amzn.to/3HbQcOg
Circular Saw – https://amzn.to/4aMD0xg
Hand Drill – https://amzn.to/3HqLEnH
Machinist Square / Speed Square
F-Clamps – https://amzn.to/48ArzY1
Spring Clamps – https://amzn.to/41Nuh9D
Marking Gauge – https://amzn.to/3vibdnR
Other:
Wood Glue – https://amzn.to/48ltKhJ
Epoxy – https://amzn.to/3tJ5R4L
Router Bits – https://amzn.to/3NQNDVX
Forstner Bits – https://amzn.to/3Hd1aDb
Chisel Set – https://amzn.to/3tHNJrT
Wood Screws – 12 mm
M4 Bolts – 20 mm
Washers, Wingnuts for M4 bolts
Hardware Assortment Kit – https://amzn.to/41PodgQ
We may earn an affiliate commission when you buy something through our retail links. As an Amazon Associate AllFlavor Workshop earns from qualifying purchases.
What is the best material for a router template?
There are many types of material that can be used for a router template. The most recommended type of material is HDF, MDF, Acrylic, or Baltic Birch Plywood. Each has its advantages and can be used for different purposes, but all can be used as a suitable material for a router template.
- MDF – MDF has a perfectly flat surface and is easy to shape. It is relatively cheap and easily available in a store. It is not the best choice for a high-precision template though. It responds to changes in temperature and humidity and will wear out over time.
- HDF – Like MDF, HDF has a flat surface and is easy to shape. It is of better quality than MDF and can be used as a master template to make MDF working templates. It will also wear out over time. MDF and HDF are usually the first choices for a router template.
- Acrylic, Baltic Birch – Acrylic and Baltic Birch are higher quality materials that will last longer. Both materials are good for a high-precision template. Additionally, acrylic reveals more cut material, which makes working with it more comfortable. The material is more costly though.

How thick should a router template be?
The thickness of a material for a router template should be between 6mm (1/4”) and 9,5mm (3/8”), potentially 12mm (1/2”). The material should be thick enough to provide enough bearing surface, but not so thick to unnecessarily shorten the length of the router bit.
The best material for a router template is MDF, HDF, Acrylic, and Baltic Birch Plywood.
What router bit to use with a router template?
The two main types of router bits that can be used with a router template are a flush trim router bit (pattern bit) with a bearing on the top/bottom of the bit or a guide bushing that can accommodate router bits of different sizes.
The position of the bearing on the router bit determines whether the template is placed on top of the workpiece or below the workpiece.
Guide bushings are available in different sizes to accommodate a variety of router bits. The bushing is installed in the baseplate of the router and perfectly copies the shape of a template. When using a guide bushing it is necessary to take into account the gap that arises between the template and the cut piece.
Can you plunge with a straight router bit?
A straight router bit can be used for plunge cuts. However, several factors need to be taken into account when using a straight router bit for router plunge cuts. Most importantly the router bit needs to be long enough to extend sufficiently across the base of the router. Secondly, the blades of the router bit don’t overlap which may result in burning the wood if cut too deep. To prevent wood burning, the material should be cut in shallow passes.
Although a more specialized router cutting bit like an upcut/down-cut spiral bit should be used when plunging with a router. The cuts will be cleaner since the contact between the router bit and the material is more constant as opposed to the straight bit which is hitting the piece but not cutting off the material.

Let's Start Building
The standard 460 mm long sides of the adjustable router template guide allow for about 360 mm of router cutting. The base is made of MDF, the guide rails of birch plywood, and the template connectors of HDF.
The template guide can be used with or without router bushings. Both options are possible. In my case, I am using it without router bushings and using the router base itself as a guide.
- If used without guide bushings then one router bit size is needed for each cutting (the same router bit used for the template creation). The router template then exactly matches the cut shape making it easy to set up.
- If used with guide bushings then the offset of the bushing and the diameter of the router bit needs to be taken into account, which makes setting up the template more complex.
To make the adjustable template you will need a circular saw, a trim router, and a hand drill. I am also using several other jigs you can find at the end of this blog post.
How to Make an Adjustable Router Template Guide
Step 1: Cut the template base plates
Cut 4 MDF stripes. The final dimensions of the stripes are 95 mm x 460 mm x 4mm, but first cut them a little wider – 105 mm x 460 mm. The excess will be cut off in a later step.
A table saw would be the best tool to make the cuts. If you don’t have one then a circular saw will do just fine. To have an accurate straight cut you can use a circular saw track or a circular saw guide for crosscuts which will result in a more accurate 90-degree angle.
Either way, make sure the cuts are as close to 90 degrees as possible. This is important when connecting the boards to each other. When fully connected together they should create a perfect square.


Step 2: Make the template guide T-slots
Cut 4 plywood strips (25 mm x 500 mm x 12 mm). Each strip is slightly longer than the base plate. They serve both as guides for the trim router as well as T-tracks to connect the base plates together.
The plywood strip is 25 mm wide, which includes a 15 mm wide and 7 mm deep groove. There is a 6mm wide slot in the middle of the groove.
The groove starts 20 mm from the end of one side and ends 60 mm from the end of the other side. To cut the plywood strips to the width I am using a circular saw with a rip fence guide and to cut the slots a trim router with a ø6mm straight bit in combination with a router guide jig.


NOTE: Instead of cutting a slot in a plywood strip to make a T-track you can also make a T- track by gluing wood strips on top of each other. This article provides more information on different ways how to make T-tracks.
Find This Blog Post Useful?
Join my newsletter to receive the latest news, tutorials, and project plans sent directly to your inbox!
Step 3: Attach the guides to the base plates
Apply glue on the bottom of the T-track, insert a T-track bolt (toilet bolt), and glue the track with the base plate. Align the shorter end of the track with the edge of the plate, leaving a 3 mm (what is left) overhang on the other side. Make sure no glue gets in the track. It is better to apply less glue and additionally secure the track with screws.
Leave a 20 mm space from the back of the track for clamping purposes. Glue the track in line with the long side and perpendicular to the sides maintaining all the 90-degree angles.


NOTE: For the T-track bolt I am gluing the bolt with a washer. To make it slide nicely on the track and avoid turning when tightening the bolt, you can grind the sides of the washer to make it fit exactly the dado.
Additionally, you can create a keyhole at the track’s end for inserting the bolt after affixing the track to the base plate. This design provides the flexibility to remove the bolt whenever necessary.
Step 4: Make a router base plate
This step is optional. I am making a new round router base plate with a minimal overlap which allows using the router in any position. Nevertheless, any base plate works fine.
Keep in mind any base chosen is the one to be used with the router template jig.
For the base plate, I am using a 6mm thick HDF with an outer diameter of 105 mm, and an inner diameter of 39 mm. As an alternative, you can also use plastic. To cut the circles I am using a router circle cutting jig.

Mark the position for the bolts, drill the holes, and attach the base plate to the router. To center the base plate around the router, use a router centering cone.


Step 5: Connect all base plates together
Trim the excess wood from the base plate using your router and the router bit of your choice. I’ve opted for a 6mm bit – keep in mind, that once you select a bit size, you need to stay consistent with it.


To connect the base plates together attach a 110 mm long HDF strip on top of the T-track, leaving an overlap of 60 mm. To attach the strip, use wood glue and screws.
Before attaching the strip, route a 45 mm long slot in it to allow for an easy setup and additional adjustments.


And this is what the finished DIY router template guide looks like.


NOTE: When building the jig, try to make all the cuts and glue-ups as perpendicular as possible. If by any chance after assembling all the pieces together, you do not end up with square corners, the routed slots in the connecting strips will allow for additional adjustments, making it still possible to copy the desired shape.
How to Use an Adjustable Router Template Guide for Cutting Square Holes in Wood
An adjustable router template guide can be used to accurately and precisely cut specific shapes in the stock. It can be used to cut squares and rectangles of different sizes, to cut mortises and cavities, or dados and rabbets depending on the shape and the setup of the template.
One of the biggest benefits is that it can be assembled in minutes. Once assembled there is no need to disassemble it again. The four sides of the jig can be easily adjusted to the required dimensions using bolts and wing nuts.
How to Cut a Square Hole in Wood With a Router Template Guide
- Assemble the adjustable router template by connecting all four base pieces using bolts and wing nuts.
- Sketch the square shape onto your workpiece.
- Position the router template over your drawn design. Adjust its size using the wing nuts to match your sketch. Alternatively, if you have an item to replicate, place it inside the template and adjust it until it matches the item’s shape.
- Secure the router template to both the workpiece and the workbench to ensure stability.
- Fix the appropriate base plate to your router. Set the cutting depth, place the router inside the template, and begin your cut.
- Once done, refine the edges using a chisel for a clean finish.
NOTE: If the template is used with guide bushings take into account the offset of the bushing and the diameter of the router bit.


Conclusion
To wrap up, an adjustable router template guide is a cost-effective solution for accurately cutting exact shapes in stock and makes it a valuable addition to any workshop. It is one of the best ways to cut a square hole in wood with a router.
This router jig is versatile. It doesn’t just cut squares or rectangles; you can also use it for mortises, slots, dados, and rabbets. Each arm can work on its own, serving as a guide for straight cuts.
Its design makes it easy to put together and take apart, so it’s handy for any workspace.
📌 Found this post useful and inspiring?
Ready to build it? Save THIS PIN to your Board on Pinterest!

I hope the information shared in this blog post inspired and now you are adding this router jig to your next builds. 😉
Really impressed with your work.
Such precision. Almost surgical. Excellent demonstrations and easy to follow instructions with the tools required as well. I love your work and dedication. Thank you
Thank you, Mark, I appreciate it. 🙂