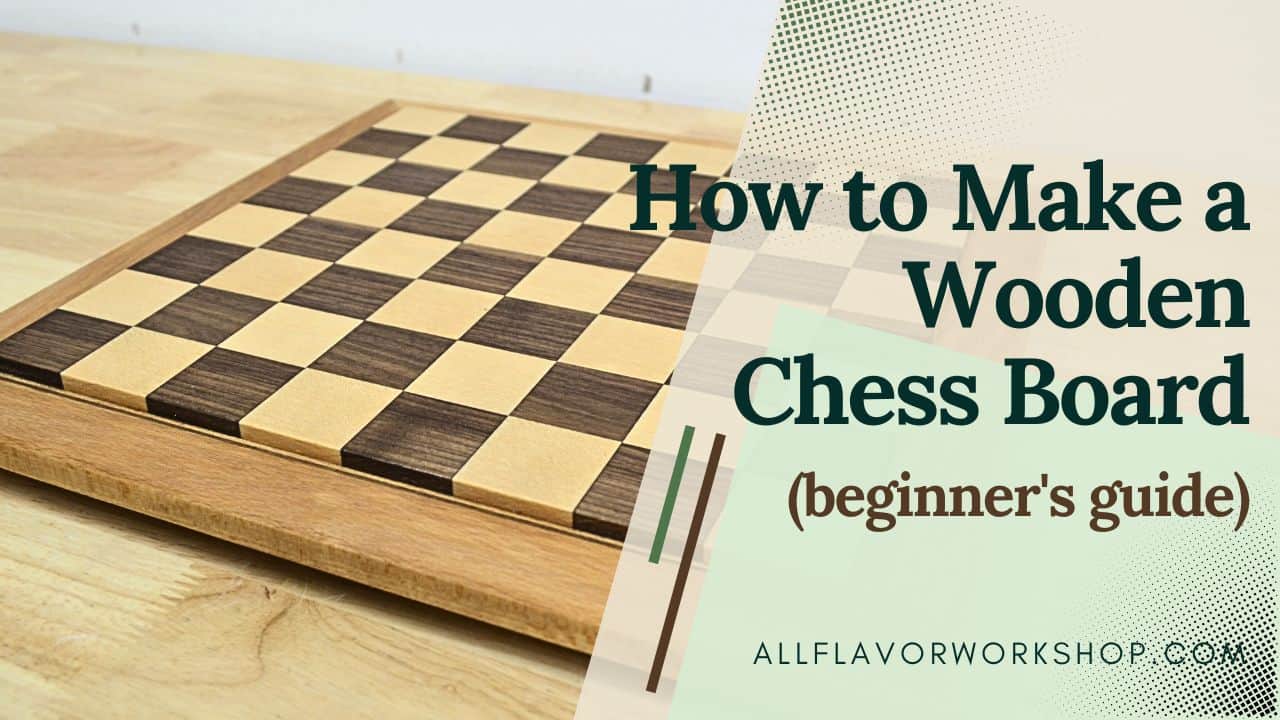
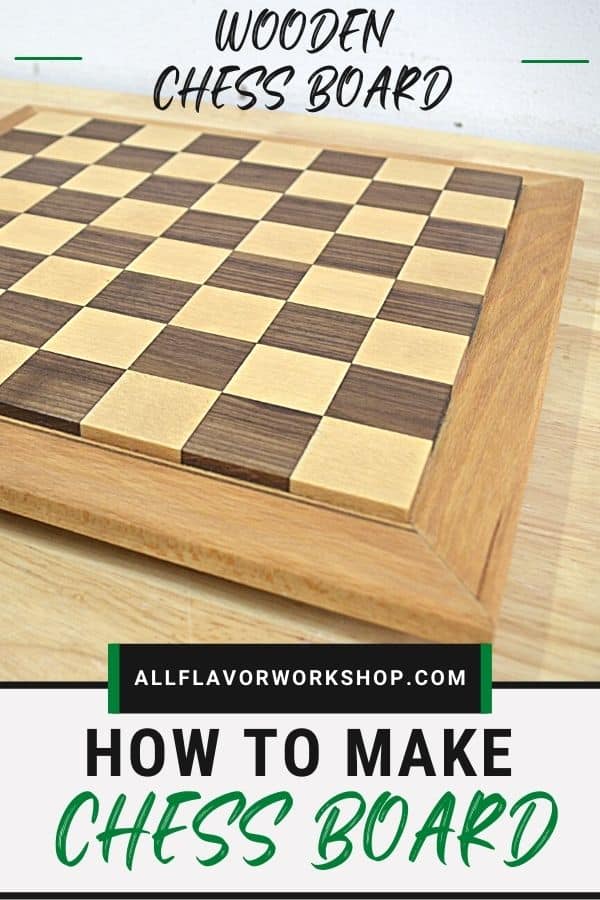
In this post I’m going to show you how I built a wooden chess board from beech and walnut. I love this combo because the contrast is strong even when it’s raw, and once you oil it, the pattern really pops.
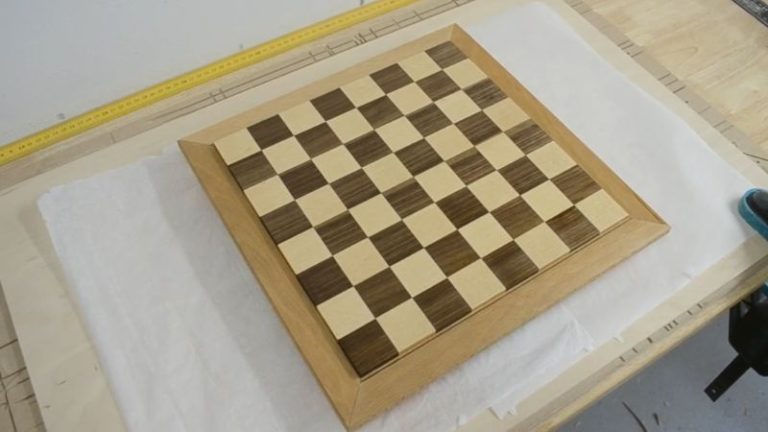
The finished board is 35 × 35 cm (including the frame). The playable area inside is 29 × 29 cm, which gives you squares around 3.6 × 3.6 cm each. That size feels like a nice sweet spot: plenty of room for standard chess pieces, but not so big that the board takes over the whole table. I also added a frame around the outside — partly for style, but mainly because it helps protect the rim from small dents and chipping over time.
If you’ve ever made an edge-grain cutting board, you’ll recognize a lot of the process. This build has the same “rhythm”: cutting strips to size (I’m starting with planed boards), gluing up panels, flattening, trimming to final dimensions, and then finishing. Different end goal, but very similar steps — which is honestly why it’s such a fun project.
And if you want to make the build easier (especially the glue-up/flattening/sizing parts), a lot of the same jigs apply here too.
👉 Best Jigs for Making Cutting Boards (And How to Use Them)
Video: Watch the Build
If you prefer to follow along visually, here’s the full build video — I’ll walk through the main steps and show the key details up close.
Table of Contents
- Video: Watch the Build
- Materials and Tools Used (Beech + Walnut)
- Woodworking Plans (Coming Soon)
- Chess Board Size and Layout (Squares, Play Area, and Frame)
- Let’s Start Building!
- Step 1: Cut the Wooden Strips to Size (Beech + Walnut)
- Step 2: Glue Up the Strips (First Panel)
- Step 3: Crosscut the Panel into Blocks + Second Glue-Up (Make the Chess Pattern)
- Step 4: Flatten the Board (Planer or Router Flattening Jig)
- Step 5: Build and Attach the Frame (Beech Frame + Walnut Inlay)
- Step 6: Sand and Finish the Chess Board (Grain Raise + Oil)
- Wrap-Up: A Chess Board That’s Fun to Build (and Even Better to Use)
- FAQs: How to Make a Wooden Chess Board
Materials Used (Beech + Walnut)
I built this chess board from beech and walnut for a clean contrast that really pops once it’s oiled.
Affiliate disclaimer: Some of the links in this post may be affiliate links — they don’t cost you anything extra, but they help support the builds and free guides on AllFlavor Workshop.
Materials:
- Walnut, Beech
- Wood Glue – Wood Glue
- Cutting Board Oil – Cutting Board Oil
- Sandpaper Sheets – Sandpaper Sheets
- Sanding Discs – Sanding Discs
Tools:
- Table Saw – Table Saw
- Planer – Planer
- Router – Router
- Orbit Sander – Orbit Sander
- Bessey Parallel Clamps – Parallel Clamps
- F-Clamps – F-Clamps
- Wolfcraft One Hand Clamps – Wolfcraft One Hand Clamps
- T-Track Clamps – T-Track Clamps
Tools:
- Table Saw Blade – Table Saw Blade
- Grr-Ripper Push Block – Grr-Ripper Push Block
- Chamfer Router Bit – Chamfer Bit
- Bench Cookies – Bench Cookies
- Wood Scraper – Wood Scraper
- Silicon Glue Brush – Silicon Glue Brush
- Painters Tape – Painters Tape
- Dust Respirator – Dust Respirator
- Respirator Cartridge – Respirator Cartridge
- Eye Protection – Eye Protection
Check All the Tools I Use
Woodworking Plans (Coming Soon)
I’m working on clean, printable plans for this chess board — they’re on the way and I’ll add them here as soon as they’re ready.
📌 Save THIS PIN to your Board on Pinterest!
Chess Board Size and Layout (Squares, Play Area, and Frame)
Before you cut anything, it’s worth deciding on the final size and the square layout. A chess board is always 8×8 squares, and the main thing that matters is that the squares are consistent and sized to match the pieces you want to use.
If you want a reference point, official tournament boards are typically built with 5–6 cm squares. My board is more compact on purpose. The finished size is 35 × 35 cm, with a 29 × 29 cm playable area inside the frame. That gives squares around 3.6 × 3.6 cm, which fits nicely on a normal table and still leaves enough space for most chess sets (especially smaller pieces).
The outer frame isn’t just for looks either — it also helps protect the rim from dents and chipping over time, which is handy if the board is going to be moved around and actually used.
How to Make a Wooden Chess Board (Step-by-Step)
Alright — let’s build it. I’ll walk through the process the same way I build edge-grain cutting boards: prep the strips, create the square pattern panel, add the frame, then flatten, trim, sand, and finish. I’ll include the key measurements I used along the way so you can adjust the size if you want a bigger or smaller board.
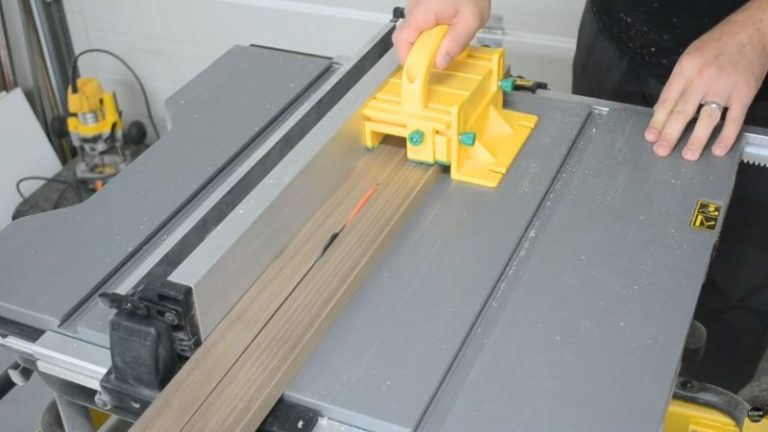
Step 1: Cut the Wooden Strips to Size (Beech + Walnut)
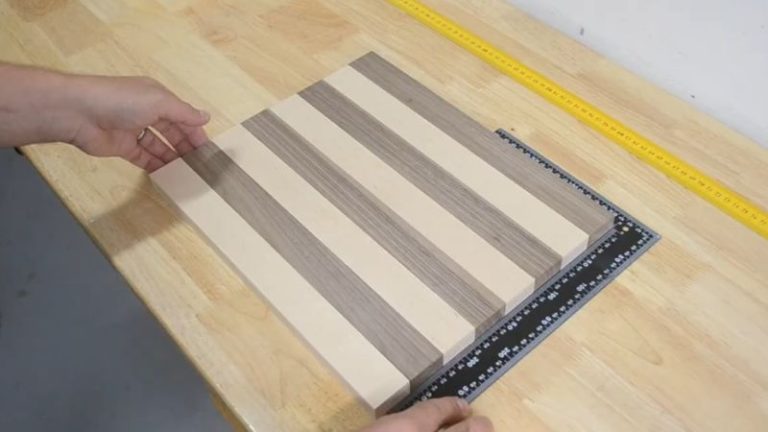
I started with beech and walnut boards that were already planed to 19 mm thickness. First, I ripped both species into strips that are 36 mm wide. Then I used my crosscut sled to cut the strips to 350 mm length.
At the end of this step, I had 4 beech strips and 4 walnut strips, all the same size: 36 × 350 mm (thickness stays 19 mm). Now we’re ready for the first glue-up.
NOTE: I cut them to 350 mm on purpose — that extra length gives me a buffer for clean crosscuts and trimming in the next steps.
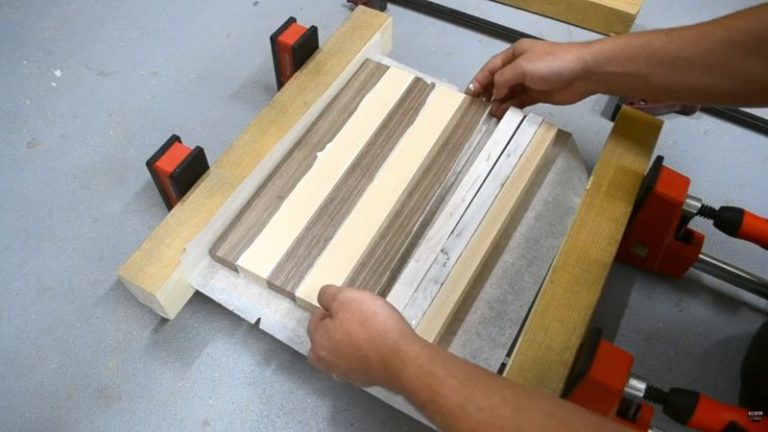
Step 2: Glue Up the Strips (First Panel)
Before gluing, I do a quick dry fit and pay attention to orientation — which face goes “up,” how the grain looks next to each other, and whether I want to alternate growth rings to help keep things flatter. Once I’m happy with the order, I apply glue, bring the strips together, and clamp the panel.
I tighten the clamps gradually and keep an eye on alignment, so the strips stay flush and I don’t create extra work for flattening later. If I have space, I’ll also add a clamp across the top to help keep the panel as flat as possible while it cures.
While the glue is still soft, I wipe or scrape off the squeeze-out. After the panel dries, I use a scraper to remove any remaining dried glue before moving on.
NOTE: Try to keep glue off the surfaces as much as possible — dried glue can mess with sanding and can show up later when you apply finish.
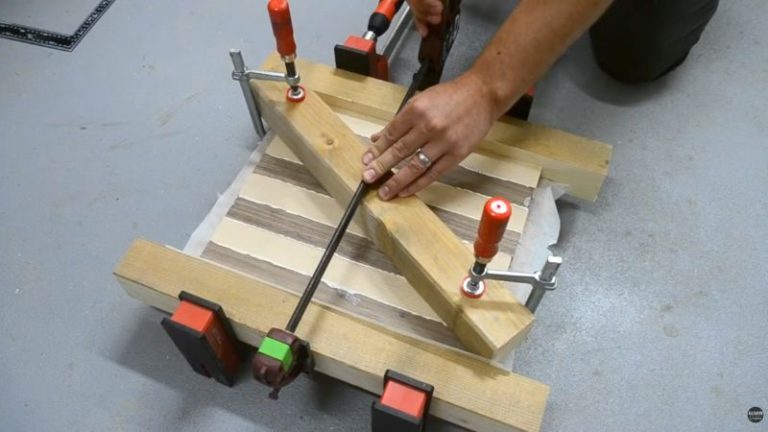

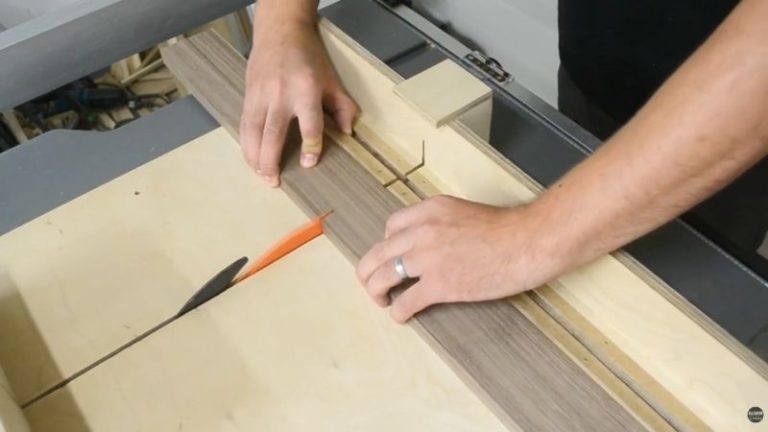
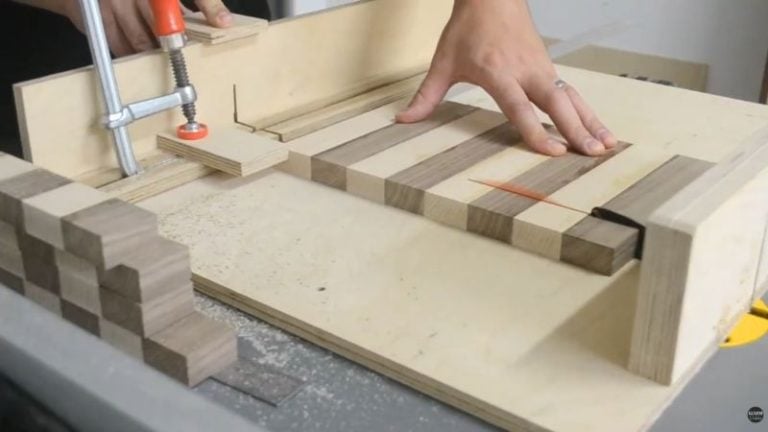
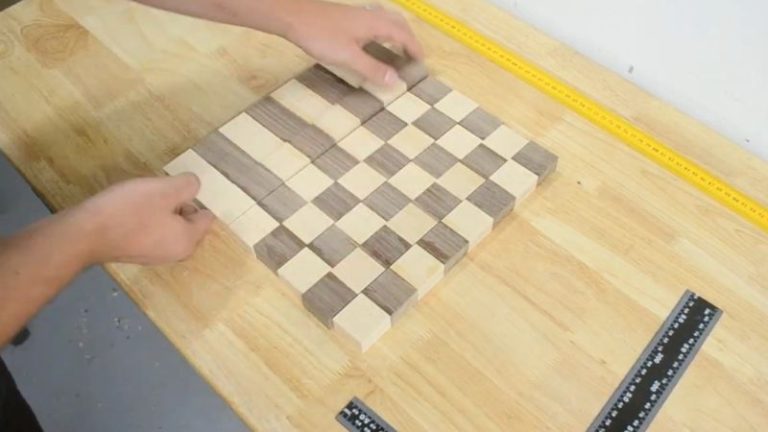
Step 3: Crosscut the Panel into Blocks + Second Glue-Up (Make the Chess Pattern)
Once the first panel is fully dry, I move back to the table saw and start crosscutting it into “blocks” that will become the chessboard pattern. Since my square size is 36 mm, I set the stop/cut length to 36 mm and use the crosscut sled again for repeatable cuts.
Before I cut the whole panel, I always do a couple of test cuts. If you’re even slightly off here, the pattern won’t line up perfectly later — so it’s worth taking a minute to dial it in.
After all the cuts are done, I rotate every other strip to create the classic checkerboard pattern, then I do the second glue-up. This glue-up needs a bit more attention than the first one — I take my time to align the corners so the squares meet cleanly.
Just like before: remove squeeze-out while it’s soft, and scrape off any dried glue once everything cures.
TIP: During the second glue-up, align the corners and square lines first, then tighten clamps. If the corners are clean, the whole pattern usually follows.
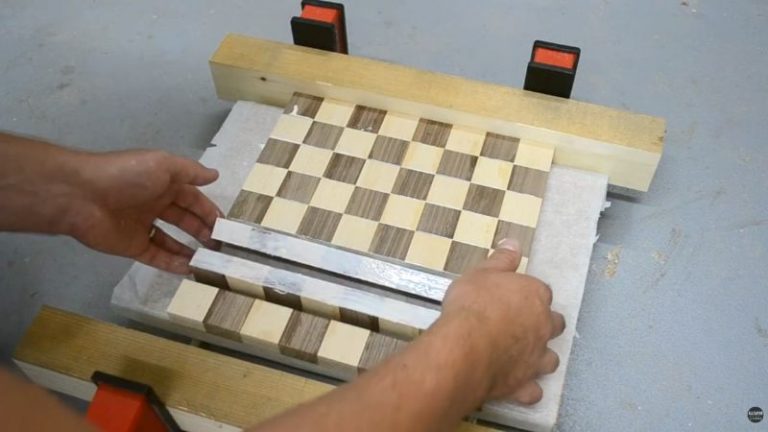
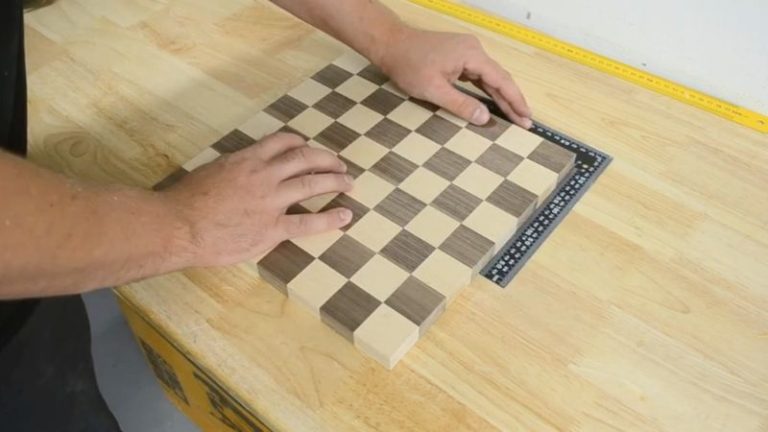
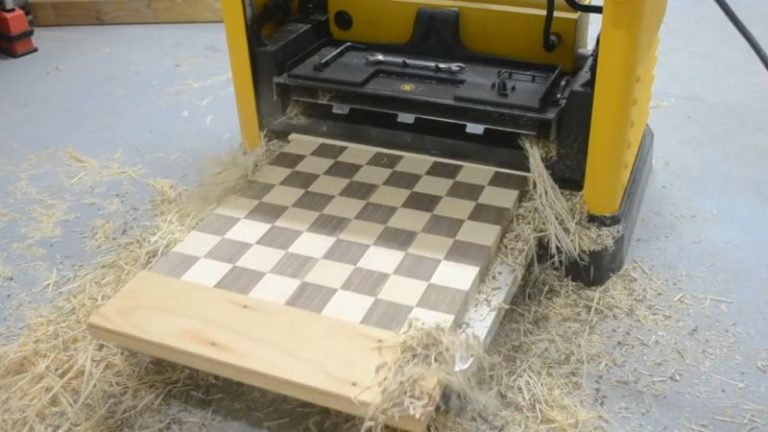
Step 4: Flatten the Board (Planer or Router Flattening Jig)
After the second glue-up, the board is usually close — but not perfectly flat. You have a couple of good options here: you can flatten it with a planer, or you can use a router flattening jig (router sled). Both work, and each has pros and cons depending on your tools and how wide the board is.
If you want the full comparison (and when I’d pick which), here’s my guide:
👉 How to Flatten a Cutting Board: Planer vs Router Flattening Jig
For this chess board, I used the planer. To avoid tear-out on the ends (and reduce the risk of snipe), I glued two sacrificial wood pieces to both sides of the board. These take the damage instead of the chess board itself. Then I ran the board through the planer with very light passes, a few times, until it was flat and level.
NOTE: When you glue the sacrificial pieces on, use only a small amount of glue. You don’t want a super-strong bond — after planing, you want them to pop off easily.
TIP: Take shallow passes and don’t rush. It’s safer for the board (especially the corners) and you’ll get a cleaner surface for sanding later.
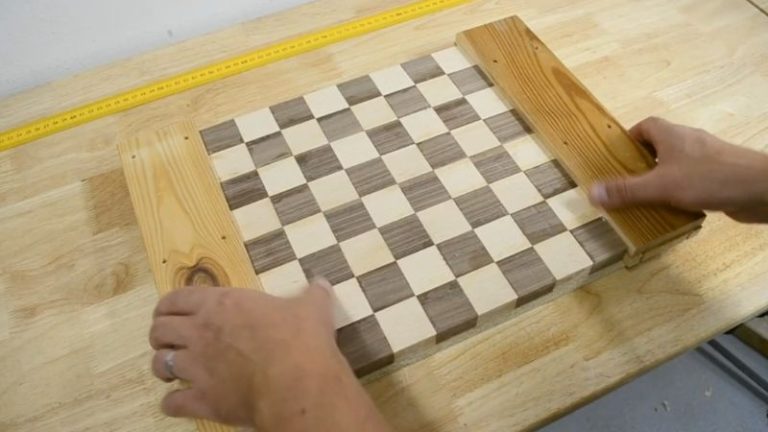
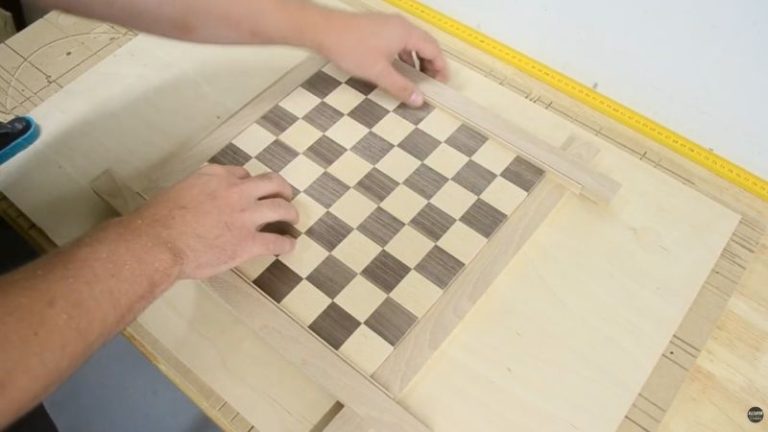
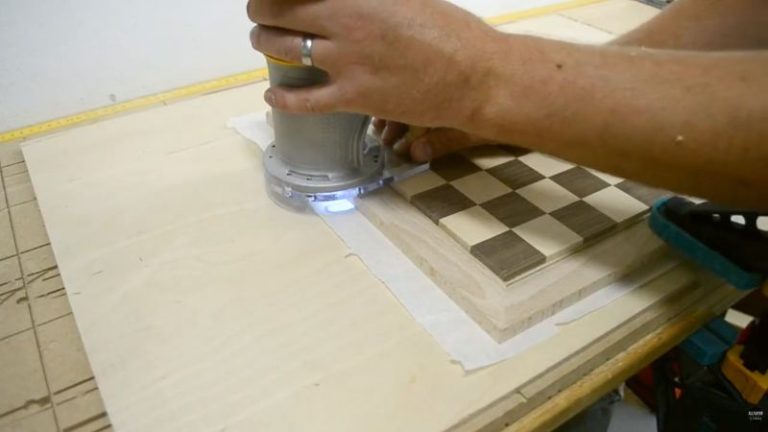
Step 5: Build and Attach the Frame (Beech Frame + Walnut Inlay)
The frame is one of my favorite parts of this build — it makes the board look more finished, and it also protects the outer edges from dents and chipping. I made the frame from beech, 12 mm thick and 30 mm wide, going all the way around the board. For a bit of extra detail, I also added a thin walnut inlay in the frame just for contrast.
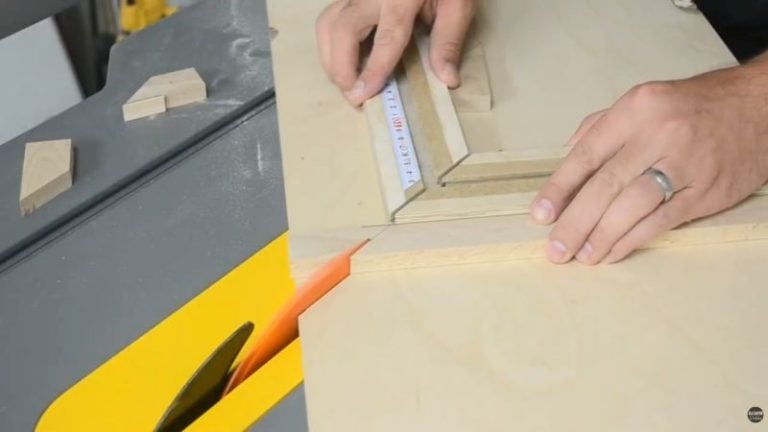
First, I ripped the frame strips to width. Then I placed them around the chess board, marked the exact miter positions, and moved to the table saw. For accurate cuts I used my picture frame jig to cut all the miters. This is a step where it’s worth slowing down — if the cuts are even slightly off, you’ll see gaps in the corners.
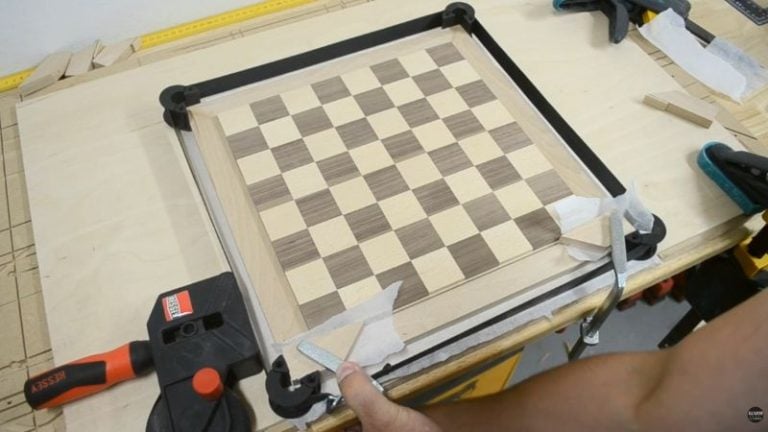
Once the pieces fit nicely, I added glue, placed the frame around the chess board, and used a picture frame strap clamp to pull everything tight and square. While the glue was still wet, I cleaned up squeeze-out. After the glue dried, I used a router jig to add a small bevel around the frame edges to soften it and give it a nicer finished look.
NOTE: Don’t over-tighten the strap clamp — you want the corners to close, but you don’t want the frame to slide out of position.
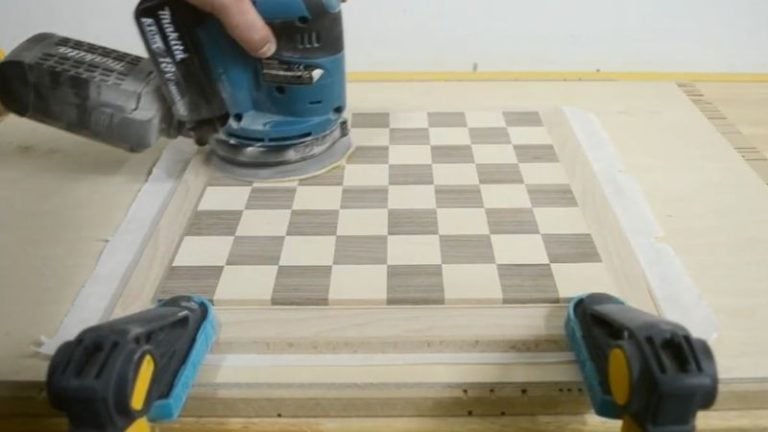
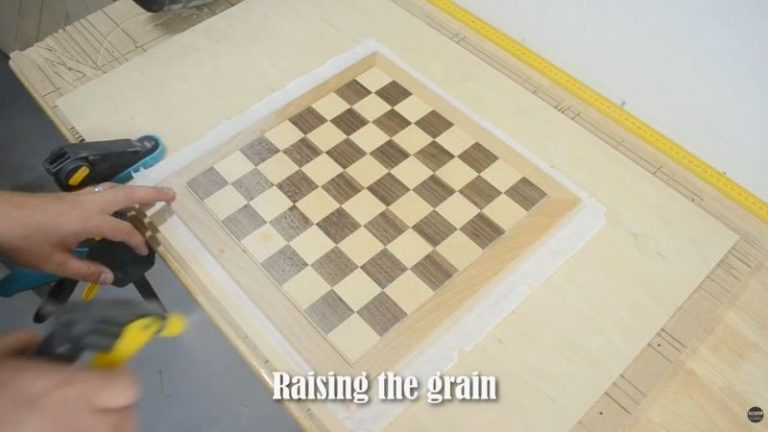
Step 6: Sand and Finish the Chess Board (Grain Raise + Oil)
This is the fun part — the step where everything comes together. I sanded the whole board from 80 grit up to 300 grit, making sure the surface feels even and the edges are clean. Then I lightly sprayed it with water to raise the grain. Once it dried, I sanded again (quick pass) to knock the fuzz down, and after that I moved on to finishing.
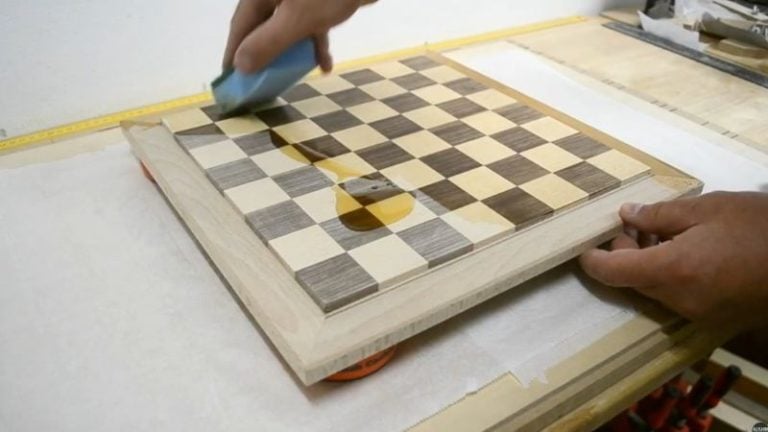
For the finish, I applied a few coats of Belinka oil, letting each coat soak in and then fully dry before adding the next one. This is the moment where the board really transforms — the beech and walnut fields deepen, the contrast becomes sharper, and the whole pattern starts to look “alive.”
TIP: Put wax paper (or a plastic sheet) under the board while oiling. Excess oil will drip or wipe off, and you don’t want it staining your workbench or table.
And that’s it — the board is done. LET’S play Chess! ♟️
NOTE: Don’t rush the drying. If the surface still feels oily, give it more time — the finish will look better and feel better once it’s fully cured.
Wrap-Up: A Chess Board That’s Fun to Build (and Even Better to Use)
This is a really nice weekend project. If you’ve made cutting boards before, a lot of the steps will feel familiar — ripping strips, glue-ups, flattening, sanding, finishing… it’s the same rhythm. And if you haven’t made cutting boards yet, then building this chess board is basically your first cutting board — and not just a simple one, but an edge-grain one. 😉
What I like about this project is that you get a finished piece that’s actually useful, looks great on the table, and teaches you a bunch of “core” woodworking skills in one build: clean glue-ups, keeping panels flat, accurate crosscuts, and a finish that makes the wood pop. Plus, you can easily customize it later — bigger squares, a different frame, or different wood combinations.
If you want to make builds like this easier (chess boards and cutting boards), here’s my full guide to the jigs I use and recommend:
👉 Best Jigs for Making Cutting Boards (And How to Use Them)
FAQs: How to Make a Wooden Chess Board
1) What size should the squares be on a wooden chess board?
It depends on your chess pieces. Tournament boards often use squares around 5–6 cm, but for a compact home board smaller squares can work great. In this build I used squares around 3.6 × 3.6 cm, which fits nicely on a normal table and works well with smaller to mid-sized pieces.
2) What are the standard dimensions of a chess board?
A chess board is always 8×8 squares. The overall size depends on your square size and whether you add a border/frame. For example, an 8×8 playing area made with 5 cm squares is 40×40 cm (plus any frame).
3) What wood is best for a wooden chess board?
The best approach is using one light hardwood and one dark hardwood for contrast. Beech + walnut works great (that’s what I used), but maple/walnut is also a classic combination. Choose stable hardwoods that machine cleanly and finish nicely.
4) How do you keep a wooden chess board from warping?
Use dry, stable wood, keep glue-ups flat during clamping, and flatten the panel after glue-up. A border/frame can also help protect edges, but good prep and even finishing are the big factors. Also try not to soak the board with water — wipe it clean instead.
5) What finish should I use on a wooden chess board?
A penetrating oil finish works really well because it’s easy to apply and makes the grain pop. I used Belinka oil on this board. Whatever you choose, apply it evenly (top and bottom if possible) and let it fully dry/cure before using the board.
