
Cutting a juice groove usually comes right at the end of the build. You’ve already done all the glue-ups, flattened the board, trimmed it to final size, sanded it smooth… and then you pick up a router and start cutting a groove just a few millimeters from the edge. It’s a small detail, but it’s also one of the easiest moments to ruin an otherwise perfect cutting board.
I have been there – I ruined a few boards exactly at this stage—slipping off the path, letting the router grab, or burning the corners so badly that sanding them out destroyed the shape of the groove. After all the work that goes into an end grain or edge grain board, it’s not a fun way to finish. That’s why, over time, I moved to the safest, most repeatable setup I could come up with.
In this guide, I’ll walk you through how I now cut juice grooves so they’re clean, consistent, and low-risk. The key pieces are: using a juice groove jig instead of freehanding, choosing the right router bit, and paying close attention to cutting direction and depth. Let me share what’s worked for me so your groove comes out smooth the first time.
👉 If you want to see the exact setup I use in my own shop, you can check out my DIY Juice Groove Jig—it’s the same jig I rely on for most of my cutting board builds.
Table of Contents
- What Is a Juice Groove (And When Do You Need One?)
- Ideal Juice Groove Dimensions (Depth, Width, and Offset)
- Tools and Jigs You Need to Cut a Juice Groove
- Step-by-Step: How to Cut a Perfect Juice Groove with a Router and Jig
Step 1: Set Up the Juice Groove Jig
Step 2: Install the Router Bit and Set the First Depth
Step 3: Make the First Shallow Clockwise Pass
Step 4: Deepen the Groove in Several Passes
Step 5: Clean Up the Groove and Ease the Edges - How to Avoid Burn Marks and Tear-Out
- Using a Juice Groove Jig vs. Freehand or Fence
- Wrap-Up: Why a Juice Groove Jig Is Worth It
- FAQs: Juice Grooves on Cutting Boards
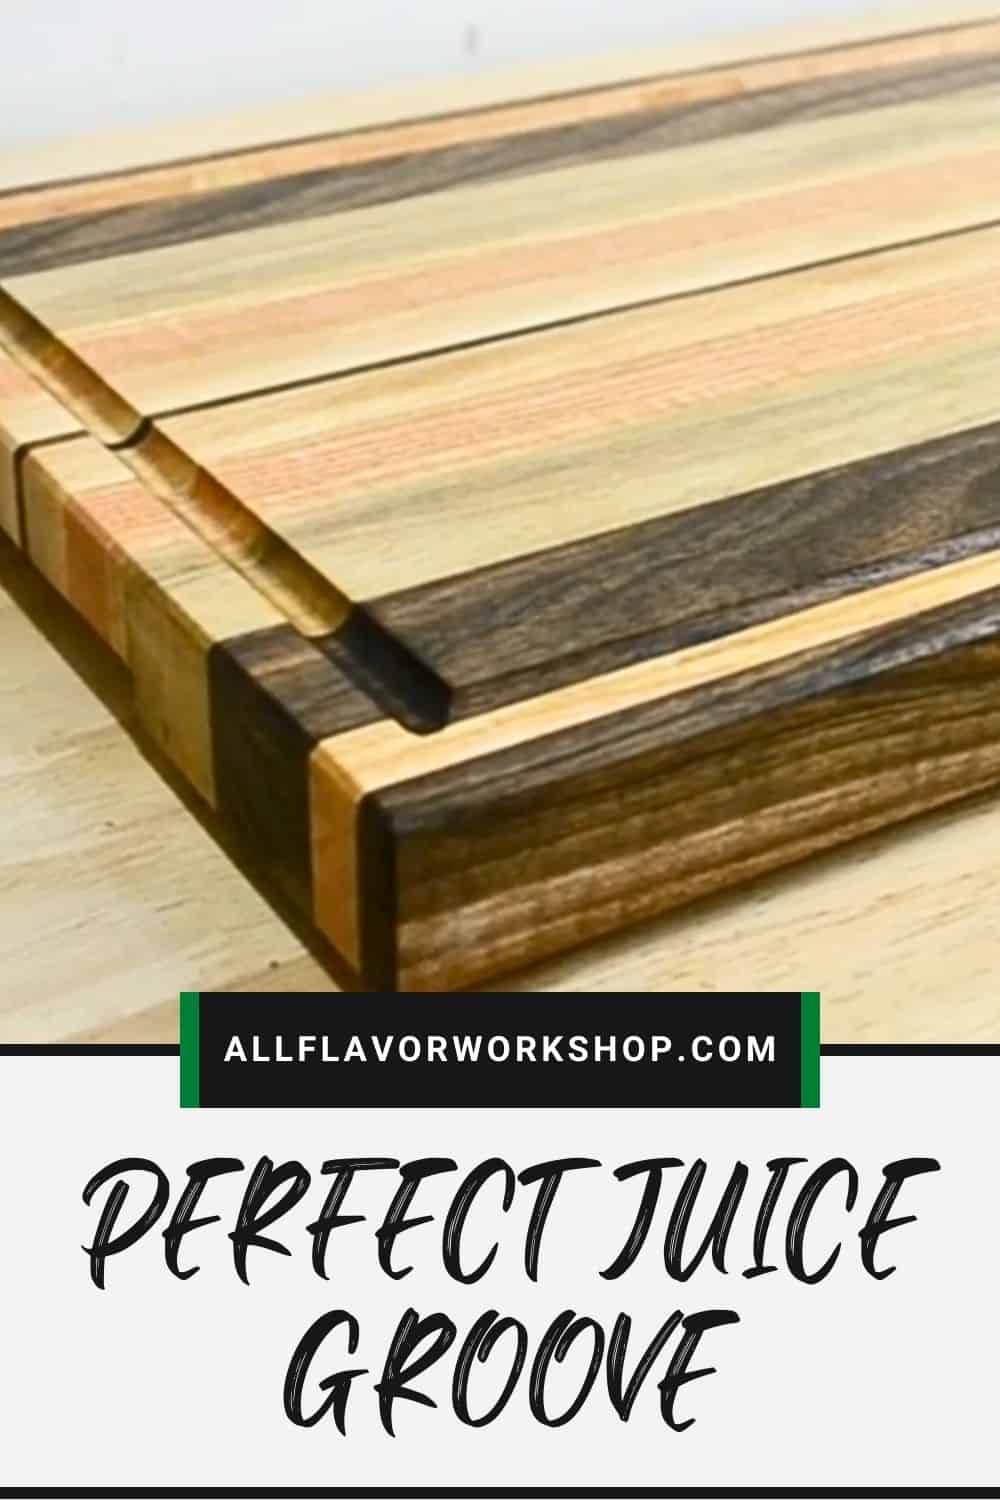
📌 Save THIS PIN to your Board on Pinterest!
What Is a Juice Groove (And When Do You Need One?)
A juice groove is the shallow channel you see running around the edge of some cutting boards. Its main job is simple: catch liquids before they run off the board and onto your counter. When you’re carving a roast, slicing steak, cutting tomatoes, or prepping juicy fruit, the groove gives that extra bit of “overflow space” so everything stays a little cleaner.
You don’t need a juice groove on every board. It makes the most sense on:
Carving boards for meat and BBQ
Larger everyday prep boards that see a lot of veggies and fruit
Any board you know will live on the counter during bigger cooks
On the other hand, I usually skip a groove on small breakfast boards, cheese boards, bread boards, or simple serving boards. In those cases it doesn’t add much function, and a clean, flat surface often just looks better.
So the question isn’t “Should every board get a juice groove?” but rather “What will I actually use this board for?” If it’s going to see a lot of juicy stuff, a well-cut groove is worth the extra effort. If not, you can happily leave it off and keep the build simpler.

Ideal Juice Groove Dimensions (Depth, Width, and Offset)
You don’t need complicated math for a good juice groove, but a few simple rules help a lot. On most of my larger boards (around 500 × 300 mm / 20″ × 12″), I usually go with:
Groove depth: about 5 mm (≈ 3/16″)
Groove width / bit size: 10 mm (≈ 3/8″) core box bit
Offset from edge (to the outside of the groove): about 15 mm (≈ 5/8″)
That puts the center of the groove roughly 20 mm (≈ 3/4″) from the edge, which feels nicely balanced and still leaves plenty of material so the edge stays strong.
I generally avoid going any closer than 15 mm / 5/8″ on bigger boards, because the fibers near the edge can start to tear, chip, or just look too fragile. On smaller boards, I might move the groove in slightly (closer to 10–12 mm / 3/8″–1/2″ from the edge) and also make it a bit shallower—more for looks and light use than for catching a lot of juice. In the end, there’s some personal preference involved, but staying within a sensible range keeps your boards looking clean and solid.
Here’s a simple guide you can use as a starting point:
| Board Size | Typical Use | Groove Width (Bit) | Groove Depth | Offset from Edge (to Groove Edge) |
|---|---|---|---|---|
| Small (~350 × 250 mm / ~14" × 10") | Breakfast, fruit, light prep | 10 mm (≈ 3/8") core box bit | 3–4 mm (≈ 1/8"–5/32") | 10–12 mm (≈ 3/8"–1/2") |
| Medium (~400 × 280 mm / ~16" × 11") | Everyday cutting board | 10 mm (≈ 3/8") core box bit | 4–5 mm (≈ 5/32"–3/16") | 12–15 mm (≈ 1/2"–5/8") |
| Large (~500 × 300 mm / ~20" × 12") | Carving & BBQ board | 10 mm (≈ 3/8") core box bit | 5–6 mm (≈ 3/16"–1/4") | 15–20 mm (≈ 5/8"–3/4") |
Treat these as starting points: go shallower and a bit closer to the edge for small serving boards, and deeper with a larger offset for big carving boards that need to catch a lot of juice.

Tools and Jigs You Need to Cut a Juice Groove
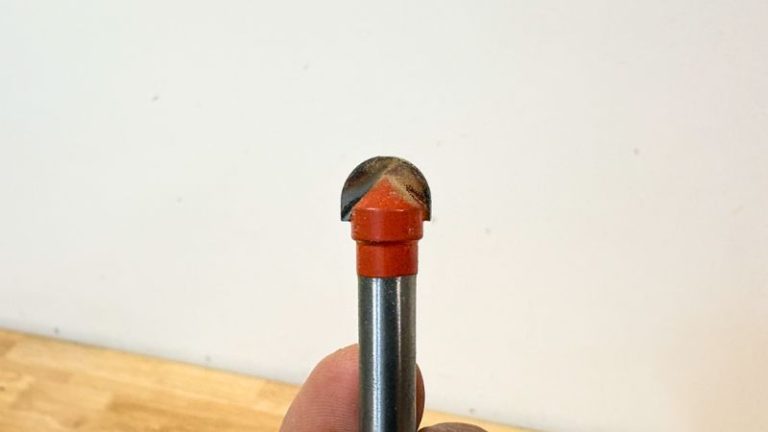
You don’t need a full shop to cut a clean juice groove, but a few right tools make it much safer and more repeatable. The core is a handheld router—a trim router is enough for most boards—as long as you can set depth accurately. For the bit, I like a 10 mm (≈ 3/8″) core box / round nose bit. It leaves a smooth, rounded groove that looks great on both edge and end grain boards.
The big choice is how you guide the router. An edge guide or fence can work if you only cut the occasional groove, but corners are fiddly, and any small slip can send the bit off the path and ruin a finished board. For me, that’s just too much risk.
I strongly prefer a dedicated juice groove jig, especially one that’s adjustable. A good jig should:
Have a flat, hard, straight base for the cutting board to sit on so it stays level
Secure the board in place (with stops, wedges, or double-sided tape) so it can’t shift mid-cut
Let you adjust the offset from the edge for different groove layouts
Accommodate cutting boards of different sizes without rebuilding the setup each time
Work with both thin and thick boards
Once the board is secured in the jig and the offset is set, your main job is to make steady passes with the router and let the jig keep everything on track. On top of that, you’ll want clamps to lock the jig to your bench, plus dust extraction and basic PPE—routing hardwood grooves creates a lot of fine dust in a very small area. Check out all the tools I use in my workshop.
👉 Have a look at my DIY Juice Groove Jig—it’s built to tick all of these boxes.

Step-by-Step: How to Cut a Perfect Juice Groove with a Router and Jig
There are a few different ways to cut a juice groove, but if you want the safest and most repeatable method, an adjustable juice groove jig + router is hard to beat. Here’s exactly how I use mine.
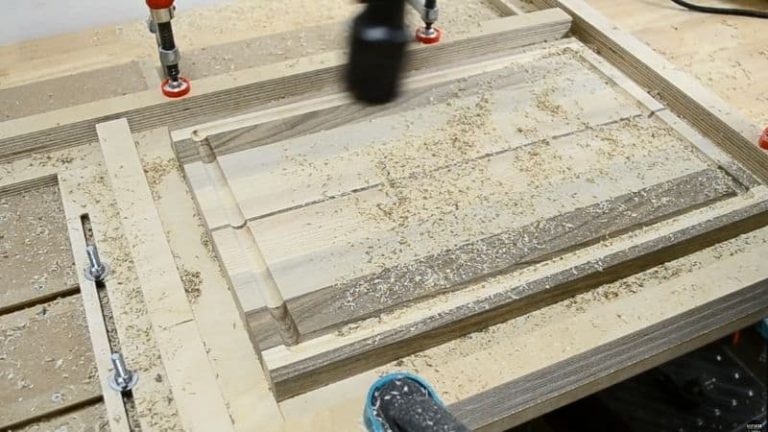
1. Set Up the Juice Groove Jig
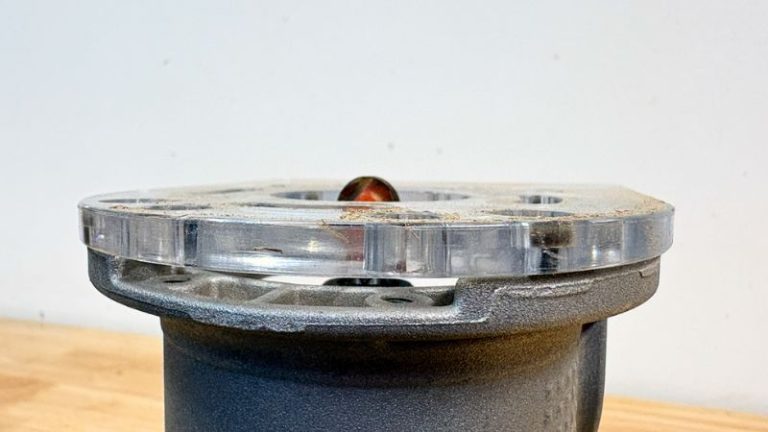
First, I place the juice groove jig on my workbench and secure it with clamps so it can’t move. Then I drop the cutting board into the jig and slide the movable fences in so they sit snugly around the board.
On my jig, there’s already a default offset built in for my DeWalt palm router, but I can easily adjust it by adding an extra layer or spacer between the fences and the board. That way I can set different offsets depending on the board size or the look I’m after. Once I’m happy with the position, I tighten the fence clamps so everything is locked in place and the board can’t shift.

2. Install the Router Bit and Set the First Depth
Next, I set up the router. I install a 10 mm (≈ 3/8″) round juice groove / core box bit and set the depth for a shallow first pass, usually around 2 mm (≈ 1/16″). This first pass is just to establish the groove and check that the offset and depth feel right before going any deeper.
3. Make the First Shallow Pass (Clockwise)
Now it’s time to cut. Because this is an inner cut, I always route clockwise around the board. That gives better control and keeps the router from grabbing and jumping out of the groove.
For the cleanest results, I try not to “stab” the bit straight down. Instead, I start moving in the direction of the cut while lowering the bit into the wood. That little motion helps avoid burn marks and reduces the chance of leaving a visible entry spot. From there, I keep a smooth, steady feed rate and avoid stopping in one place—especially in the corners. The more “fluid” and continuous the cut, the fewer burn marks you’ll have to deal with later.
I complete one full loop around the board at this shallow depth before touching the depth adjustment again.

4. Deepen the Groove in Several Passes
After the first pass, I increase the depth slightly and repeat the cut. I keep doing this in several shallow passes until I reach my target depth from the dimension guidelines (for most of my boards, that’s around 5 mm / 3/16″).
Multiple shallow passes mean:
Cleaner cuts
Less burning, especially in hardwoods
More control if something doesn’t feel right
Between passes, I’ll vacuum or brush out the chips so they don’t pack into the groove and affect the cut quality.
5. Clean Up and Ease the Edges
When I’m happy with the depth and the groove looks even all the way around, I vacuum the groove thoroughly and check for any ridges or small steps. If needed, I do a very light hand-sanding inside the groove using a rolled-up piece of sandpaper, or a Dremel with a light touch just to knock back any rough spots.
Finally, I give the board surface a quick pass with a sanding block or sander to remove any fuzz around the groove. In most cases, you’ll be sanding the whole board again before oiling anyway, so this step just blends everything together.
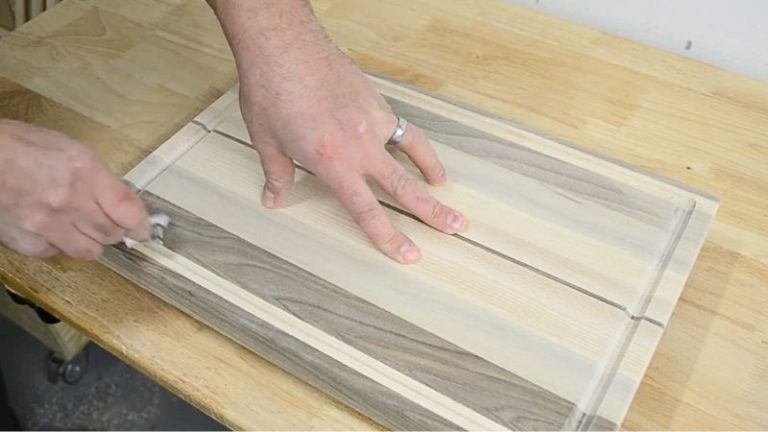
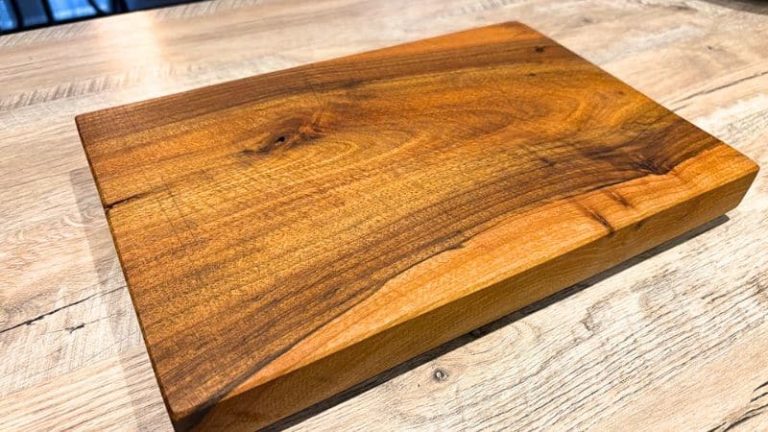
The finished juice groove:
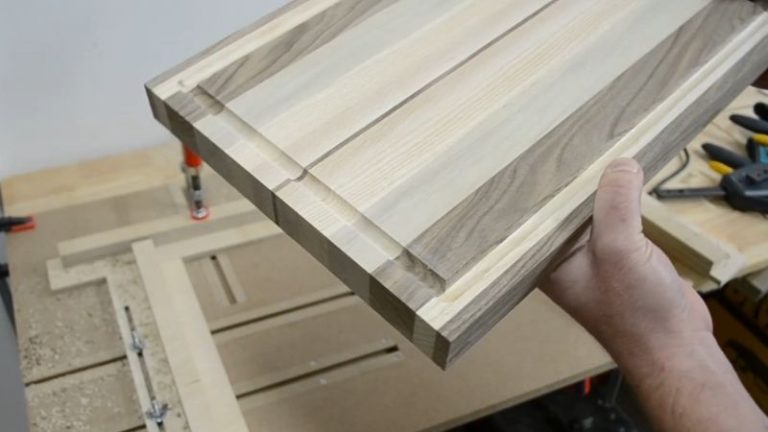
How to Avoid Burn Marks and Tear-Out
Burn marks and tear-out usually come from some mix of too much RPM, too little feed rate, a dull or dirty bit, or an unstable setup. Most of it is easy to control once you know what to watch for.
| Problem | Most Likely Cause | How to Avoid It | How to Fix It Afterwards |
|---|---|---|---|
| Burn marks along straight sections | Router RPM too high and feed rate too slow; bit slightly dull or dirty | - Drop the router speed to a medium setting - Keep a steady, slightly faster feed rate - Make multiple shallow passes instead of one deep cut | - Try one very light final pass with faster feed - If still visible, sand the groove lightly with rolled sandpaper or a Dremel with a fine drum |
| Burn marks in the corners | Pausing in the corner or “pivoting” the router in one spot | - Plan the cut so corners are part of a continuous motion - Don’t stop in the corners—keep the router moving - Take shallow passes so turning the corners feels easier | - Hand-sand just the corners with fine grit wrapped around a dowel - If needed, one last shallow pass focusing on a smooth corner motion |
| Rough surface / chatter in the groove | Feed rate too fast, router unstable, or bit not fully tightened | - Slow down slightly and keep both hands steady on the router - Make sure the base rides flat on the jig rails - Double-check the bit is fully seated and tightened | - Lightly sand the groove with rolled sandpaper or a fine drum - On deep chatter, take one shallow clean-up pass at a slower, steady feed |
| Tear-out on the board edge | Unsupported fibers at the edge, aggressive depth, or wrong cut direction | - Keep a safe offset (don’t run the groove too close to the edge) - Use multiple shallow passes - Ensure the board is well supported and the jig is stable | - Soften the edge with sanding or a light chamfer/roundover - For minor chips, blend them into the profile rather than chasing them out |
| Router “jumps” or wanders in the groove | Board not secured well enough or trying to freehand part of the cut | - Make sure the board is firmly secured in the jig (stops + tape/clamps) - Let the jig guide the router—no freehand corrections mid-cut | - If wander is minor, blend with sanding and a very light clean-up pass - If it’s severe, consider making a slightly wider groove or turning the board into a smaller project |
Most of the time, dialing in speed, depth, and a stable jig will eliminate burn marks and tear-out before they start. And if you do get a few marks, a light clean-up pass and some careful sanding usually save the board.
Using a Juice Groove Jig vs. Freehand or Fence
In the steps above I focused straight on the juice groove jig, because that’s what I actually use in the shop and what I recommend if you want clean, repeatable results. But it’s still useful to see how it compares to the other options you might be considering.
Here’s the short version:
1. Juice Groove Jig
- Fastest and most repeatable option
- Same offset every time, less layout and marking
- Board is secured and supported the whole way
- Ideal if you build multiple boards or want a “pro” setup
2. Router Fence / Straight Edge
- Works for one or two boards
- Requires more marking, measuring, and clamping
- Corners are tricky if fences aren’t connected
- Any slip or shift can send the bit off the path
3. Freehand (no guide)
- Technically possible, but I wouldn’t recommend it
- Very hard to keep a clean offset and straight lines
- One small mistake can ruin a finished board in a second
If you only cut a juice groove occasionally, you can get by with a fence and careful layout. However, if you’re selling boards, gifting boards regularly, or making a small batch for friends and family, a dedicated jig really pays off.

Wrap-Up: Why a Juice Groove Jig Is Worth It
I add a juice groove on almost every cutting board I make, except for small serving boards. A clean groove, together with a good finish, gives the board that “completed” look—it frames the surface, makes it feel more premium, and it’s genuinely useful when you’re carving meat or cutting juicy ingredients. The flip side is that this is also the stage where you can ruin a finished board in a few seconds. After all the milling, glue-ups, flattening, and sanding, cutting the groove is one of the most delicate steps in the whole build.
That’s why I like using a juice groove jig. Yes, you can cut a groove with a simple straight edge, and that might be okay if you only make one or two boards a year, but the setup is fussy and the risk of a slip is high. Freehand, I honestly wouldn’t recommend at all. With a good jig, you can secure the board, set the offset, and “just” focus on making smooth passes. It’s repeatable, it’s safer, and your results stay consistent from board to board. You can also play with different offsets and depths to match different board sizes and styles without redesigning your setup every time.
👉 It’s definitely worth having a juice groove jig. Anyway, also, check out my Best Jigs for Making Cutting Boards guide—it’s not only about the juice groove jig; all of these jigs work together to make the whole cutting board process easier, safer, and more fun.
📌 Found this post useful and inspiring?
Ready to build it? Save THIS PIN to your Board on Pinterest!
FAQs: Juice Grooves on Cutting Boards
1. Do I really need a juice groove on my cutting board?
Not always. Juice grooves are most useful on carving and BBQ boards, or larger everyday boards that see a lot of meat, tomatoes, and fruit. For bread, cheese, or small serving boards, a flat surface is usually enough and often looks cleaner.
2. How deep should a juice groove be?
For most boards, 3–6 mm (≈ 1/8″–1/4″) works well. On smaller boards used for light prep, you can stay on the shallow side. On larger carving boards, going closer to 5–6 mm (≈ 3/16″–1/4″) gives you more capacity without weakening the edge.
3. How far from the edge should the juice groove be?
As a rule of thumb, keep the outer edge of the groove about 10–20 mm (≈ 3/8″–3/4″) from the board edge, depending on the board size. I typically use 15 mm (≈ 5/8″) on larger boards, with the groove center around 20 mm (≈ 3/4″) in from the edge. Going too close risks tear-out and a fragile edge.
4. What router bit is best for cutting a juice groove?
A core box / round nose bit is the classic choice. I usually use a 10 mm (≈ 3/8″) bit, which leaves a smooth, rounded channel that’s easy to clean and looks good on both edge and end grain boards.
5. How do I stop the router from burning the wood?
Use medium RPM and multiple shallow passes, and keep a steady feed rate—don’t pause in one spot, especially in the corners. A clean, sharp bit and a stable jig also help. If you still get burn marks, a very light final pass with a slightly faster feed and some hand sanding usually cleans them up.
6. Can I add a juice groove after the board is already finished and oiled?
You can, but it’s not ideal. It’s always better to cut the groove before final sanding and finish. If you add one later, you’ll need to re-sand around the groove and re-oil/wax the board so everything blends together and the finish looks even.
