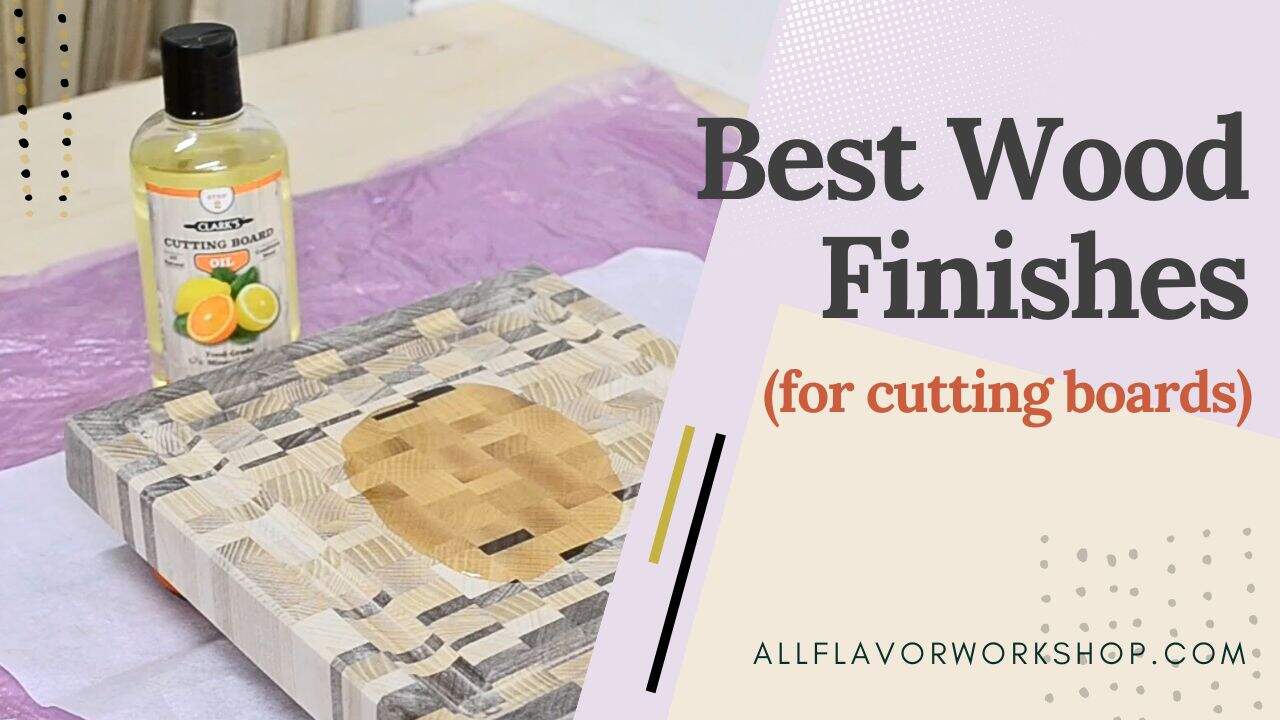
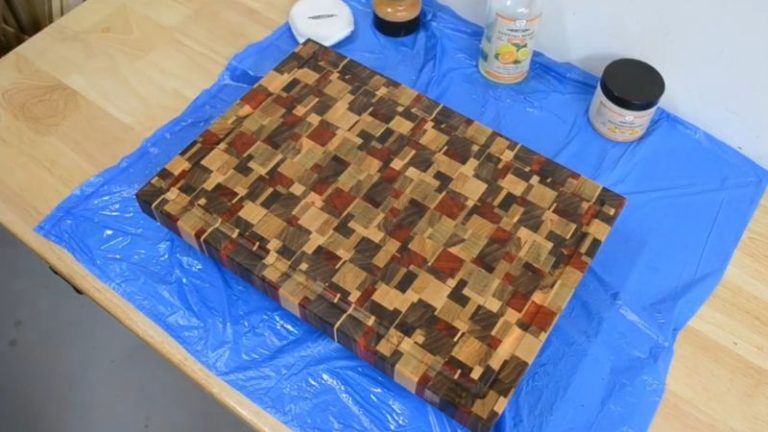
Adding a finish to a cutting board is usually the very last step before you start using it. It’s the end of the whole process — the board is shaped, sanded, cleaned up, and finally ready. And honestly, I love this moment. You wipe on the oil and the board instantly “wakes up” — darker woods get richer, lighter woods get warmer, and the contrast between species pops right away. That’s the point where the board really comes alive.
Finishing isn’t just about looks though. The main job of oil/wax is protection and preservation: it helps slow down water absorption, keeps the wood from drying out, and makes the surface easier to wipe clean after daily use.
There are a lot of options out there, but these are my 3 go-to finishes for cutting boards:
Clark’s Oil + Wax (my favorite overall)
Easy to apply, great feel in the hand, and the wax adds a nice extra layer of water resistance.
Affiliate link: CLARK’S OIL + WAXBelinka (great alternative option)
A solid, food-contact finish that I like when I want something a bit more “set and done” compared to basic oiling.Mineral oil (simple and reliable)
The classic budget-friendly option. Easy maintenance and works on any board — you just reapply more often.
Affiliate link: FOOD GRADE MINERAL OIL
In the rest of this guide I’ll show you how I apply finish in my shop (I’ll do the full step-by-step on Clark’s), how often I refresh it, and what to avoid if you want a finish that’s truly cutting-board friendly.
If you’re building boards and want the full workflow (flattening, juice grooves, handles, edge profiles), start here:
👉 Best Jigs for Making Cutting Boards (And How to Use Them)
Table of Contents
- Why You Should Finish a Cutting Board
- Food Safety Basics for Cutting Board Finishes
- Choosing a Cutting Board Finish: Oil, Oil + Wax, or Food-Contact Oil
- Comparison Table: Best Wood Finishes for Cutting Boards
- Clark’s Oil + Wax (How I Apply It on Cutting Boards)
- How Often Should You Oil a Cutting Board?
- Wrap-Up: The Finish That Makes a Cutting Board Feel “Done”
- FAQs
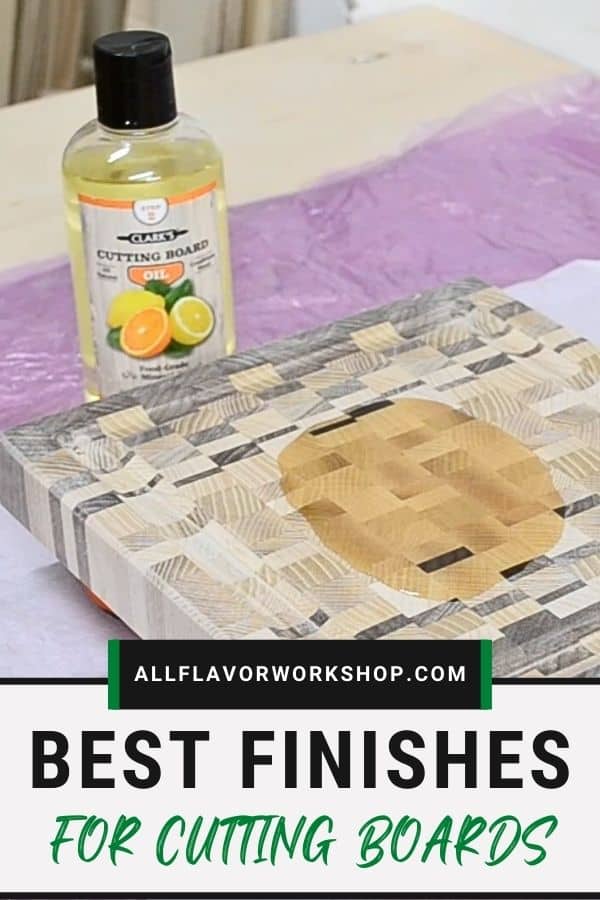
📌 Save THIS PIN to your Board on Pinterest!
Why You Should Finish a Cutting Board
A cutting board finish is partly about looks — but mostly it’s about keeping the board in good shape long-term. Wood is always moving and reacting to moisture, and a board that’s left “raw” will dry out faster, absorb water more easily, and start looking tired much sooner.
Functionally, a good oil/wax finish helps with:
Preservation: slows down moisture exchange so the board doesn’t dry out as quickly
Easier cleaning: water and food juices don’t soak in as fast, so the board wipes cleaner
Less staining and odor: finished boards are less likely to pick up smells and deep stains
Hygiene (realistic expectation): it doesn’t make a board “sterile,” but a well-finished board is easier to clean and less likely to hold onto gunk in dry, fuzzy grain
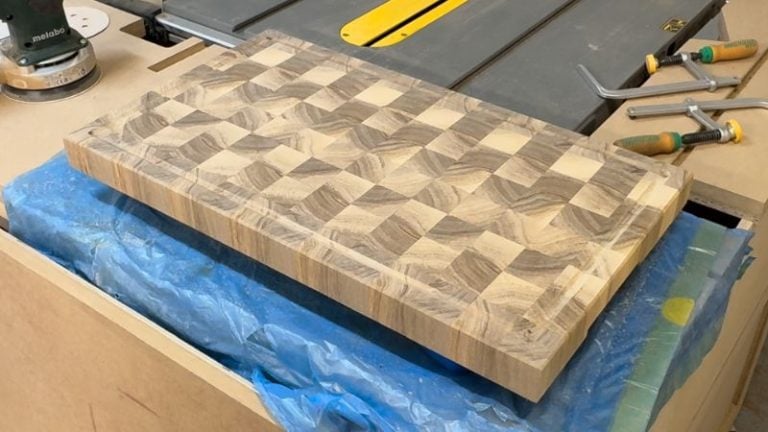
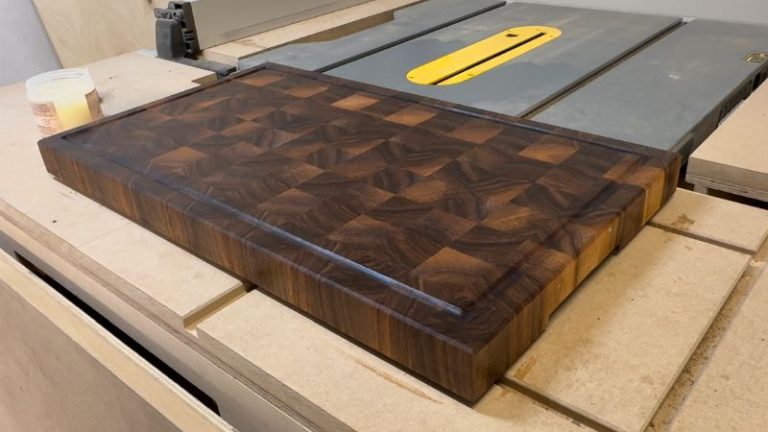
And aesthetically, this is where the magic happens:
Grain and figure pop, contrast between wood species gets stronger
Dark woods get richer, lighter woods warm up
The board instantly looks more “finished” and professional
One important thing to keep in mind: finishing isn’t a one-time operation. Cutting boards need basic maintenance — reapply oil when the surface starts looking dry or “thirsty.” I’ll cover an easy rule of thumb for how often to refresh it later in the post.
Food Safety Basics for Cutting Board Finishes
When we talk about “food safe” cutting boards, it’s really a combo of two things: food-safe wood + the right finish. Most hardwoods we use for boards are naturally non-toxic and safe for food contact — but the finish matters, because it’s what you’re putting on the surface that touches your food every day.
What “food safe” actually means
For cutting boards, “food safe” usually means the finish is either:
non-toxic once cured, or
a non-curing oil/wax that’s commonly used for food-contact surfaces (and safe in normal use)
In practice, the goal is simple: you want something that won’t leave harmful residue, won’t turn sticky, and won’t chip off into your food.
What to avoid on cutting boards
I keep it pretty conservative here. I avoid anything that creates a hard “film” that can crack, chip, or peel over time — because cutting boards get chopped, scraped, and washed constantly.
I’d also avoid:
Cooking oils (olive oil, sunflower, etc.) — they can go rancid and smell over time
Anything that stays tacky/sticky (usually from heavy coats or the wrong product)
Finishes that don’t make sense for daily washing and knife contact
Quick note: End grain boards drink finish
End grain boards soak up finish like crazy — especially on the first few applications. The first time you oil one, you’ll be surprised how much it absorbs, and you’ll usually need to refresh the finish more often compared to face grain or edge grain boards. That’s normal — end grain is basically a bundle of tiny “straws,” and it wants to drink.
Choosing a Cutting Board Finish: Oil, Oil + Wax, or Food-Contact Oil
Most cutting board finishes fall into three simple buckets. They all work — the main difference is how they feel, how much protection they add, and how often you’ll reapply.
1) Oil (simple and reliable)
This is the classic option — mineral oil is the most common example. It’s easy to apply, affordable, and it makes the grain pop right away. The tradeoff is that it doesn’t “build up” much on the surface, so you’ll usually reapply more often, especially on end grain boards.
2) Oil + wax (my favorite feel and day-to-day protection)
This is my go-to for cutting boards. The oil soaks in, and the wax adds a little extra water resistance and a smoother, more finished feel. That’s why I like Clark’s Oil + Wax — it’s easy to apply, it looks great, and the board feels nicer in the hand.
3) Purpose-made food-contact oils (a more “set-and-done” option)
These are still oils, but they’re formulated specifically for wood that touches food. That’s where Belinka Oil Food Contact fits in. I like it as an alternative when I want a dedicated product for this purpose. It’s still a penetrating oil finish (not a hard varnish layer), but it can feel a bit more “finished” than plain mineral oil depending on how you apply and maintain it.
Quick takeaway:
If you want the simplest budget option, go mineral oil. If you want the best overall feel and a little extra protection, go oil + wax. And if you want a dedicated food-contact oil option, Belinka is a solid alternative.
Comparison Table: Best Wood Finishes for Cutting Boards
| Finish | Best for | Look & feel | Water resistance | Application | When you can use it | Maintenance | Notes |
|---|---|---|---|---|---|---|---|
| Clark’s Oil | My main oil step before wax | Pops grain fast, natural feel | Medium | Wipe on, let it soak, wipe off | After it soaks in and feels dry to the touch | Refresh when the board looks dry (end grain more often) | Great “base layer” before wax; easy to reapply |
| Clark’s Wax / Board Butter | Top coat feel + extra water resistance | Smooth, slightly richer, “finished” feel | High (for a cutting board finish) | Rub in thin, let haze, buff | After buffing (once it’s not greasy) | Touch up when water stops beading or surface feels dry | My favorite combo with Clark’s Oil; great for serving boards too |
| Belinka Oil Food Contact | A dedicated food-contact oil option | Natural look, slightly more “set” feel than plain mineral oil | Medium to medium-high | Wipe on, let soak, wipe off (repeat as needed) | Once it’s dry to the touch (follow the label for full cure) | Refresh when the board looks dry or loses water beading | Good alternative if you want a purpose-made product for food contact |
| Food-Grade Mineral Oil | Simple, budget-friendly starting point | Nice grain pop, very neutral feel | Low to medium | Wipe on generously, let soak, wipe off | After excess is wiped off and it doesn’t feel oily | Most frequent reapply (especially end grain boards) | Works on any board; great “baseline” finish, just needs more upkeep |
Tip: End grain boards absorb a lot more finish at first. The first few applications can disappear fast — that’s normal.
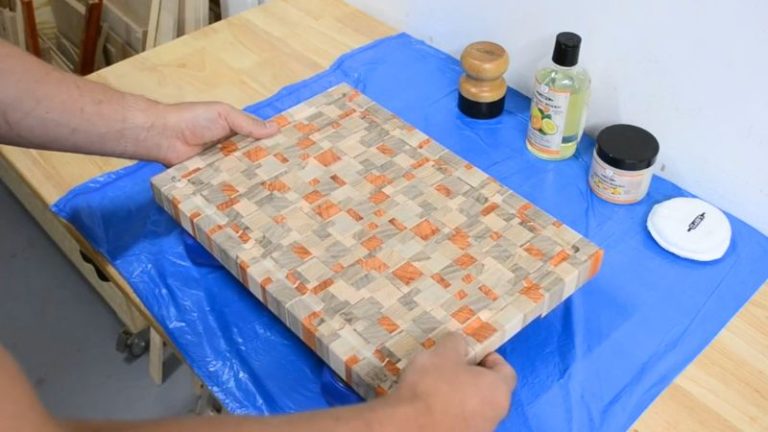
Clark’s Oil + Wax (How I Apply It on Cutting Boards)
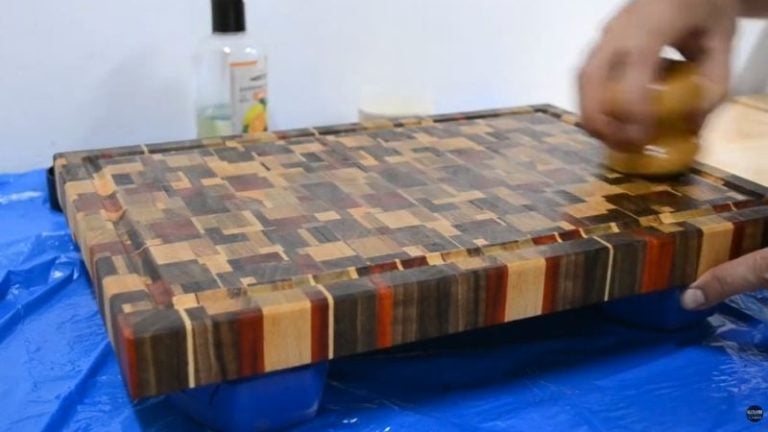
This is the finish I use the most on cutting boards. It’s simple, it looks great, and it gives the board that “finished” feel without turning it into a hard film. It also spreads really nicely, and I genuinely like the smell — the one I use has a light citrus scent (they have other scents as well). The oil pops the grain, and the wax top coat leaves a nice subtle shine, adds a bit more water resistance, and makes the surface feel smoother in the hand.
Affiliate link (what I use): CLARK’S OIL + WAX
When I use it
I apply Clark’s at the very end, once the board is fully built and sanded. It works great on face grain, edge grain, and end grain boards — just keep in mind that end grain will drink a lot more oil at first. I also like it for serving boards, because the wax leaves a really nice feel in the hand.
My application steps (simple shop routine)
Final sanding + dust cleanup
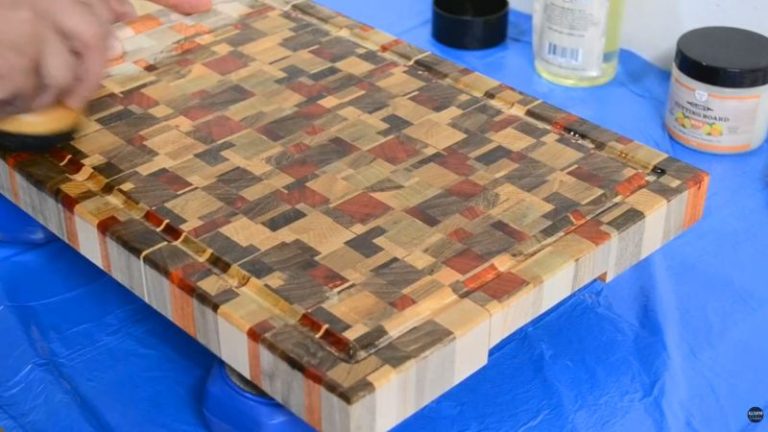
I finish sanding, then wipe the board clean so there’s no dust left in the pores.Oil coat (wipe on, let it soak, wipe off)
I wipe on a generous coat of oil, let it soak in for a bit, then wipe off the excess. If the board looks “thirsty” in spots, I’ll add a little more.Let it rest
I give it some time so the oil settles in and the surface doesn’t feel greasy.Wax coat (thin layer + buff)
I apply a thin wax coat, let it haze slightly, then buff it out. This is the step that makes the board feel smooth and finished.
Maintenance (how often I refresh it)
This isn’t a one-and-done finish. I refresh it whenever the board starts looking dry, feels rough, or water stops beading on the surface. End grain boards usually need more attention at the beginning, but once they’re “loaded up,” maintenance becomes pretty easy.
How Often Should You Oil a Cutting Board?
Oiling a cutting board isn’t a one-time thing. If you want the board to last and keep looking good, a quick refresh is part of normal maintenance — just like sharpening a knife.
1. Quick rule of thumb (new board vs. already finished)
New board: oil it a few times in the beginning until the surface stops “drinking” it instantly. New boards (especially end grain) soak up a lot at first.
Already sealed board: after that, you’re usually just doing quick touch-ups when it starts looking dry again.
2. Visual signs it’s time to re-oil
You don’t need a strict schedule — the board will tell you:
The surface looks dry or pale in spots
The board feels a bit rough instead of smooth
Water stops beading and starts soaking in quickly
End grain areas look especially “thirsty” compared to the rest
3. End grain vs edge grain vs face grain (what to expect)
End grain: needs the most oil at the start and usually the most frequent refresh. It’s basically a bundle of tiny “straws,” so it drinks finish fast.
Edge grain: middle ground — still benefits from regular oiling, but not as thirsty as end grain.
Face grain: usually the least demanding. It still needs maintenance, just not as often.
A simple habit that works well: if the board looks dry after washing and drying, it’s probably time for a quick oil refresh.
Wrap-Up: The Finish That Makes a Cutting Board Feel “Done”
If you ask me, oiling a cutting board isn’t optional — it’s part of what makes the board last. A good finish helps preserve the wood, slows down water absorption, and keeps the surface easier to clean and maintain over time. And just as important, it’s the step that makes the board look and feel “done.” The grain pops, contrast shows up, and the whole board suddenly has that finished, professional look.
My personal go-to is still Clark’s Oil + Wax. It’s easy to apply, it spreads nicely, it smells great (I like the citrus one), and the wax top coat leaves a smooth feel with a bit of extra water resistance. It’s a simple routine that works, and once you’ve done it a few times it becomes a quick habit — especially when you reapply only when the board starts looking dry or thirsty.
If you’re building cutting boards and want the full workflow (flattening, juice grooves, handles, edge profiles — and the jigs that make everything easier and more repeatable), start here:
👉 Best Jigs for Making Cutting Boards (And How to Use Them)
FAQs: Best Wood Finishes for Cutting Boards
1) What is the best wood finish for cutting boards?
For most home shops, a simple food-safe oil finish is the best choice because it’s easy to apply and easy to maintain. My personal favorite is an oil + wax system (like Clark’s Oil + Wax) because it gives the board a smooth “finished” feel and a bit more water resistance than plain oil.
2) Is mineral oil food safe for cutting boards?
Yes — food-grade mineral oil is widely used for cutting boards because it’s stable, odorless, and easy to reapply. The downside is that it doesn’t build much protection, so you’ll usually need to refresh it more often than an oil + wax finish.
3) How often should you oil a cutting board?
It depends on how often you use and wash it, and what type of board it is. As a rule of thumb, new boards need a few coats at the start, then you reapply whenever the board looks dry, feels rough, or water stops beading. End grain boards typically need more frequent oiling than edge grain or face grain boards.
4) What finishes should I avoid on a cutting board?
I avoid finishes that can chip or peel under knife use, and I also avoid cooking oils (like olive or sunflower oil) because they can go rancid and smell over time. Stick to finishes designed for food contact, like mineral oil or a proper oil + wax product.
5) Can I put a wax top coat on a cutting board?
Yes. A wax top coat (often beeswax-based) is a nice upgrade because it adds a smoother feel and improves water resistance. It won’t make the board waterproof, but it helps water bead up and makes cleanup easier. You still maintain it over time as the board dries out.
