
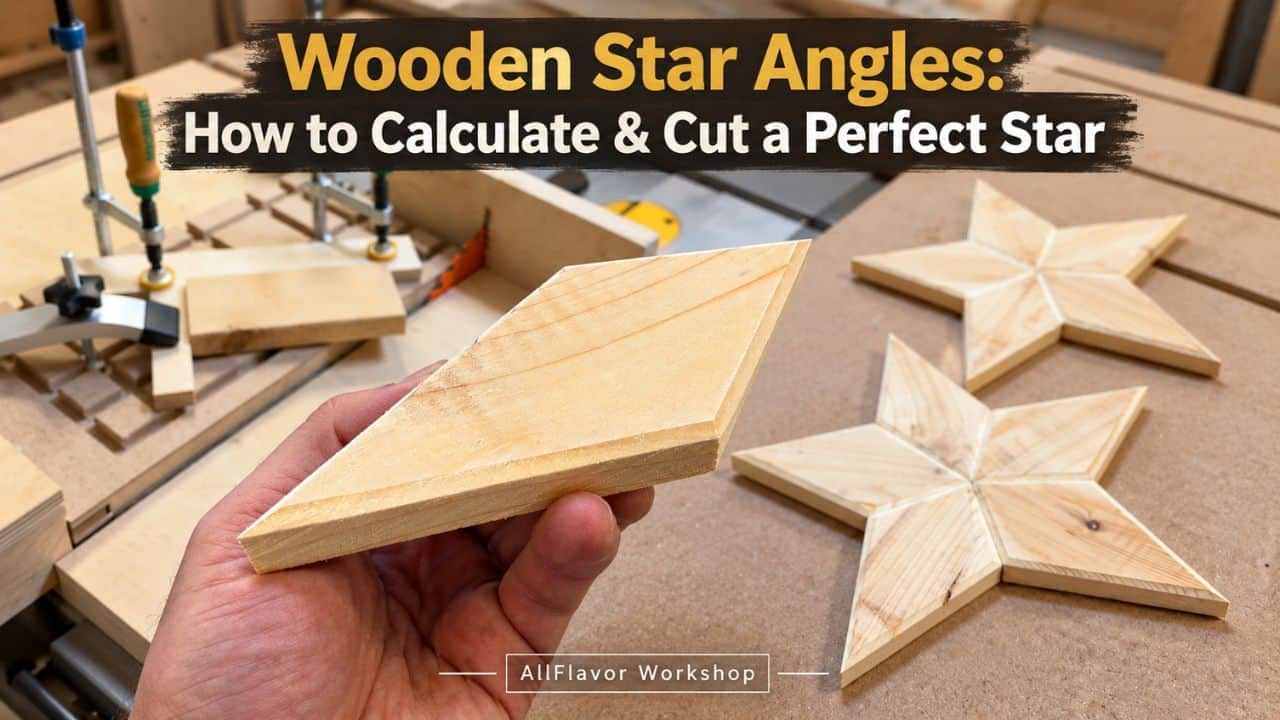
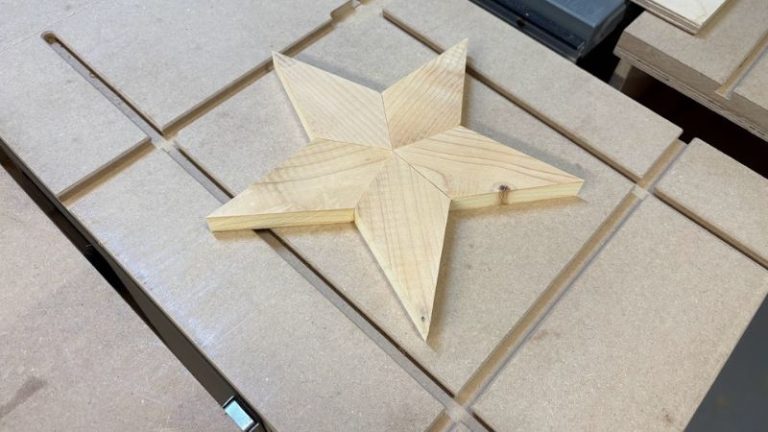
The hardest part about making a wooden star is not cutting the wood — it is getting the wooden star angles right.
When several pieces meet in one center point, even a small error in each cut gets repeated around the whole star. What looks like a tiny difference on one piece can turn into a visible gap by the time the final piece is added.
I ran into exactly this while making my 4-point, 5-point, and 6-point wooden stars.
Once I understood the geometry behind the wooden star angles and set the jig accurately, though, the whole process became much easier and — more importantly — repeatable.
- The basic calculation is surprisingly simple: 360° ÷ number of star points = center angle
- Then, because each star segment is symmetrical: center angle ÷ 2 = cutting angle for each side
For the stars I built, that gives:
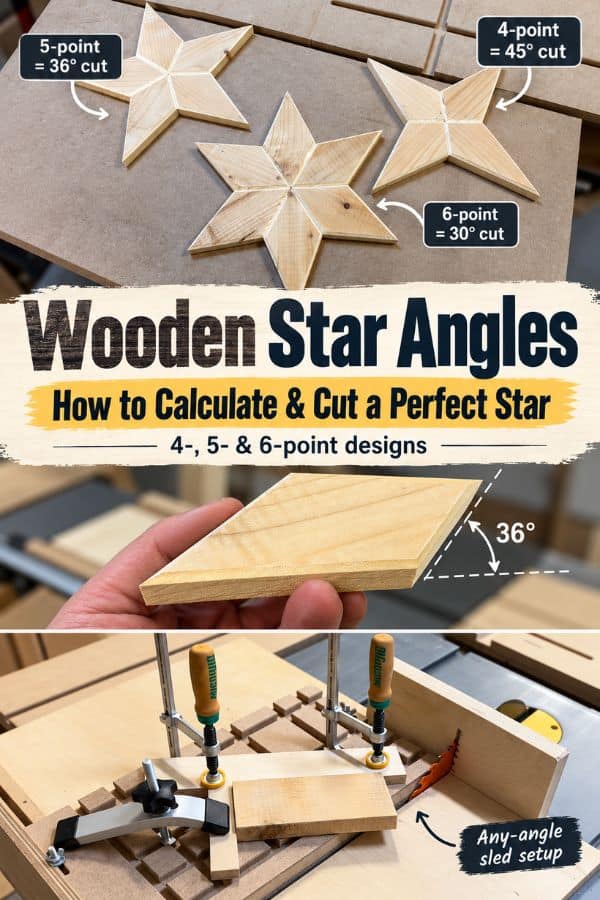
- 4 points → 90° center → 45° cuts
- 5 points → 72° center → 36° cuts
- 6 points → 60° center → 30° cuts
That is the core idea behind this entire article.
If you want to see the complete woodworking process from blank to finished decoration, start with my How to Make a Wooden Star: 4, 5 & 6 Point Designs tutorial.
Here, I am going to focus on the angles, calculations, table saw setup, and accuracy.
Table of Contents
- The Simple Wooden Star Angle Formula
- Wooden Star Angle Chart
- Understanding the Center Angle
- Why You Divide the Angle in Half
- 4-Point Star Angles
- 5-Point Star Angles
- 6-Point Star Angles
- How to Calculate Stars With More Points
- How I Set the Angle on the Table Saw
- Why Accuracy Matters So Much
- How to Check the Fit Before Gluing
- What About the Outer Star Point?
- How to Fix Small Angle Errors
- Table Saw vs Miter Saw for Wooden Stars
- Wooden Star Plans and Templates
- Wrap-Up
- Frequently Asked Questions
*Safety is your responsibility. Make sure you know what you’re doing and take all necessary safety precautions while working with power tools. Safety comes first!
📌 Save THIS PIN to your Board on Pinterest!
The Simple Wooden Star Angle Formula
For this type of segmented wooden star, the center always needs to complete a full circle. A full circle is: 360°
- So the first calculation is: 360° ÷ number of points = center angle of each star segment
- Then divide that result by two: center angle ÷ 2 = cutting angle on each side
You can combine those into one simple formula: Cutting angle = 180° ÷ number of star points
For example, a 5-point star:
- 180° ÷ 5 = 36°
- So each side of the inner point is cut at 36°.
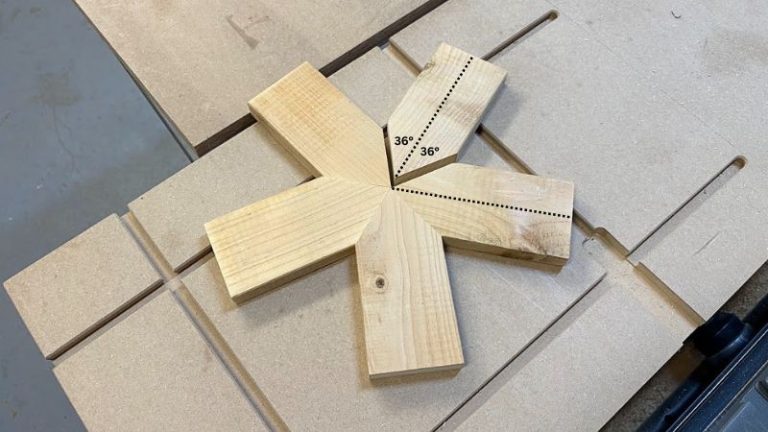
- Two 36° cuts create a 72° point.
- Five 72° points then give: 5 × 72° = 360°
That closes the center.
Wooden Star Angles - Chart
Here are the angles for some common star designs.
| Star Points | Center Angle | Cutting Angle Per Side |
|---|---|---|
| 4 | 90° | 45° |
| 5 | 72° | 36° |
| 6 | 60° | 30° |
| 7 | 51.43° | 25.71° |
| 8 | 45° | 22.5° |
| 9 | 40° | 20° |
| 10 | 36° | 18° |
| 12 | 30° | 15° |
You can use exactly the same formula for other point counts.
The more points you add, the smaller the angle becomes.
Understanding the Center Angle
The most important angle is the inner point that meets at the center of the star. -> That is the angle you need to calculate first.
Imagine placing every finished segment around one center point. Together they need to create exactly 360°.
- If you are making a 6-point star, six identical pieces need to fill that circle: 360° ÷ 6 = 60°. So every piece needs a 60° inner point.
- For five pieces: 360° ÷ 5 = 72°
- For four: 360° ÷ 4 = 90°
This is why the center becomes such a good indicator of whether your setup is accurate.
If the calculation or setup is wrong, the pieces will either:
- leave a gap, or
- start pushing against each other before the star closes.
Why You Divide the Angle in Half
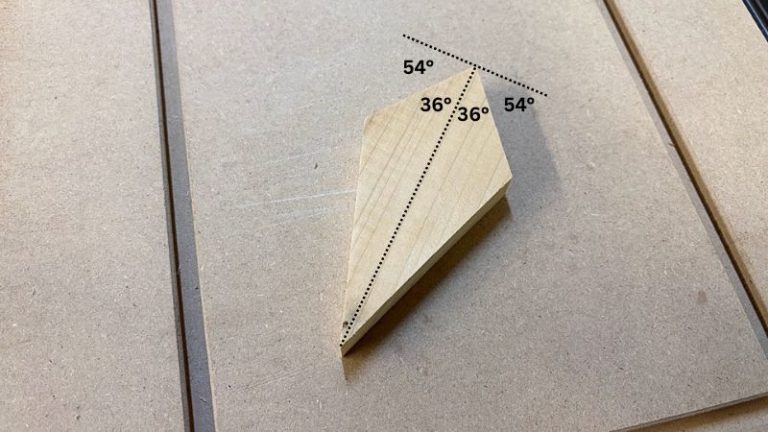
The star segments I made are symmetrical. That means the inner point consists of two identical angled cuts.
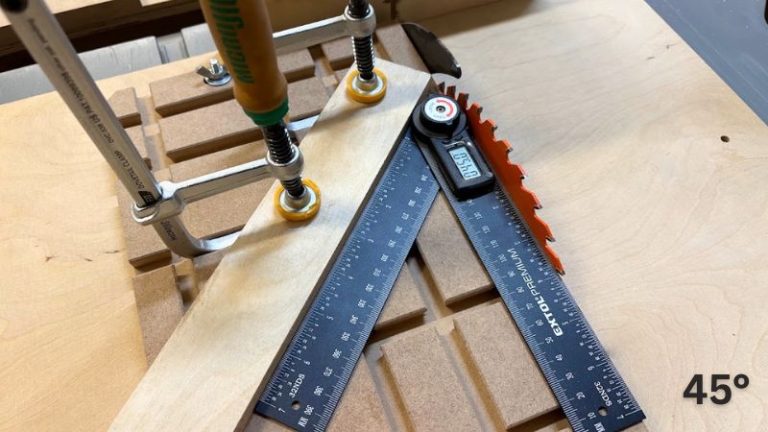
For the 4-point star, the finished center point needs to be 90°. Split evenly: 90° ÷ 2 = 45°. So the left side is 45° and the right side is 45°.
The same applies to every version.
- For a 5-point star: 72° ÷ 2 = 36°
- For a 6-point star: 60° ÷ 2 = 30°
This is also why the formula can be simplified to: 180° ÷ number of points. That gives you the cutting angle directly.
4-Point Star Angles
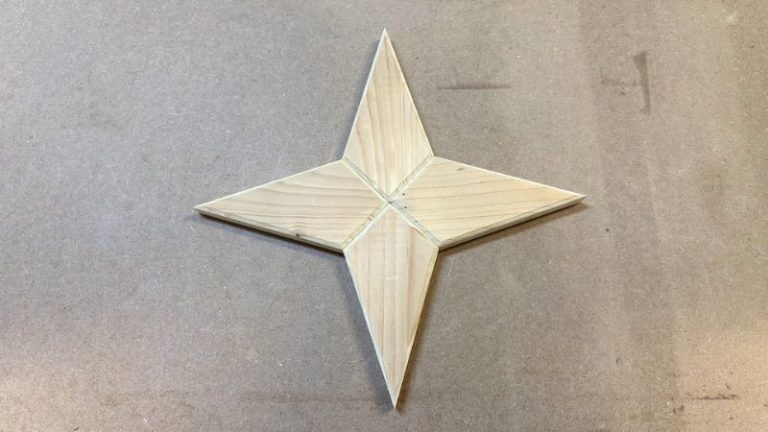
The 4-point star is the easiest one to understand and a good place to start. The calculation is: 360° ÷ 4 = 90°. So every piece needs a 90° inner point.
Each side of that point is: 90° ÷ 2 = 45°. I therefore set my guide at 45° relative to the saw blade. Cut one side. Rotate the workpiece 180°. Cut the other side using the same setup.
You now have a 90° point. Do the same for all four pieces, and the four points should close together into the center.
5-Point Star Angles
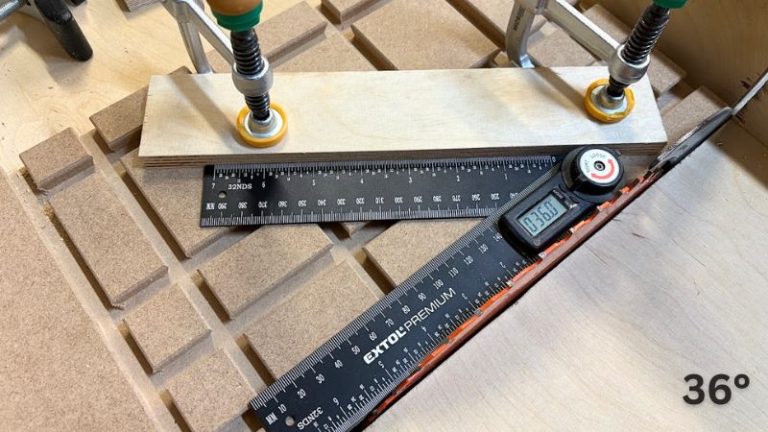
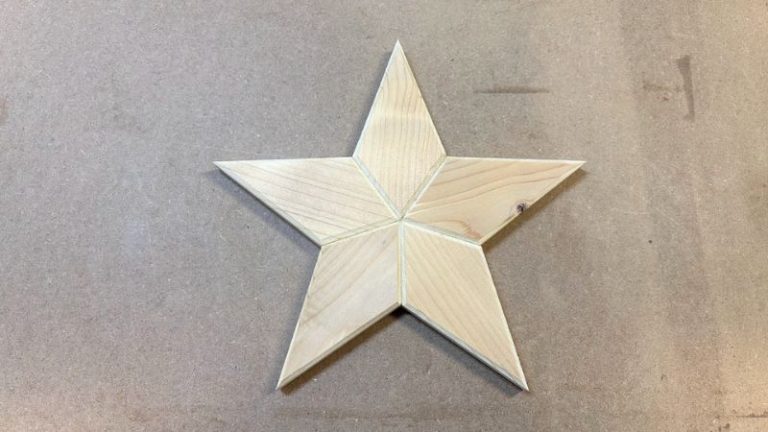
For a 5-point star: 360° ÷ 5 = 72° Each segment therefore needs a: 72° inner point. Split that in half: 72° ÷ 2 = 36°.
So I set the guide to 36° relative to the blade. This is where accurate setup matters most. A 1° error on one component might not look like much. But repeat that error five times and the center may no longer close properly.
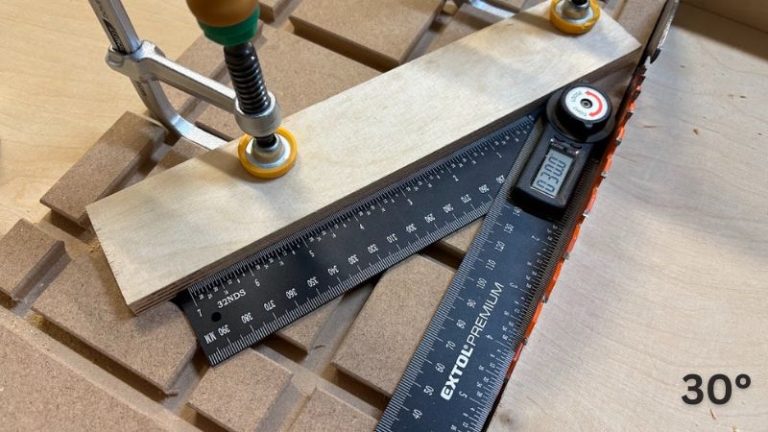
This is one reason I like using a digital angle finder instead of setting the angle visually.
6-Point Star Angles
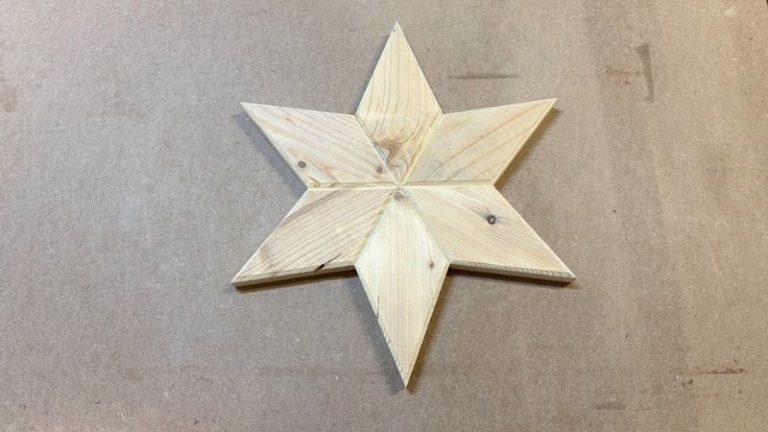
For the 6-point version: 360° ÷ 6 = 60°. Each inner point therefore needs to measure 60°. Each side becomes: 60° ÷ 2 = 30°.
- So the cutting setup is: 30°
- Six pieces then complete the center: 6 × 60° = 360°
This star has more components meeting in the middle, which means small errors can become even more obvious.
How to Calculate Stars With More Points
Once you understand the formula, you can make almost any number of points.
- Center angle = 360° ÷ number of points
- Cutting angle = center angle ÷ 2
Or simply: Cutting angle = 180° ÷ number of points
- For an 8-point star: 180° ÷ 8 = 22.5°
- For a 10-point star: 180° ÷ 10 = 18°
The woodworking process remains essentially the same. What changes is:
- number of pieces
- center angle
- support jig angle
- visual proportions
As the point count increases, accurate setup becomes increasingly important.
How I Set the Angle on the Table Saw
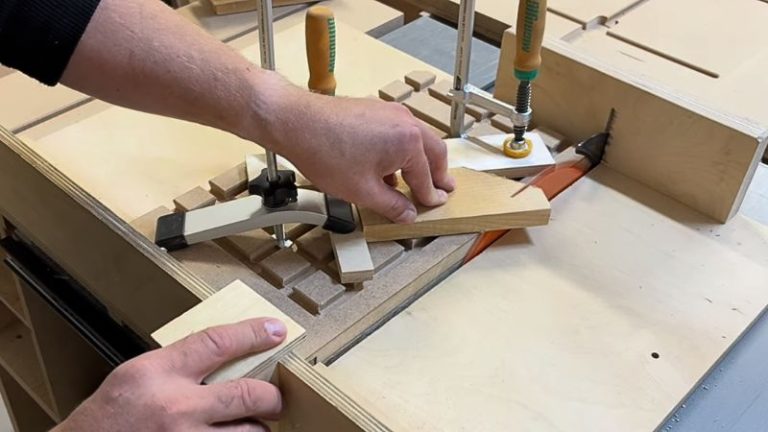
I made these stars using my DIY Table Saw Angle Jig attached to my Table Saw Sled.
The setup consists of:
- the table saw sled
- the Any-Angle attachment
- a straight guide
- clamps
- a stop block
- digital angle finder
I place the straight guide on the clamping matrix and set the required angle relative to the blade. For example: 36° for the 5-point star.
Once the angle is correct, I clamp the guide tightly. Then I add a stop block. The stop is important because it ensures every blank enters the blade by the same amount. This keeps all matching pieces consistent.
Once the setup is correct, do not change it until every piece for that star has been cut. That is what makes the process repeatable.
Why Accuracy Matters So Much
The biggest problem with segmented stars is cumulative error. Imagine your 5-point star should have five 72° center angles. Perfect geometry gives: 72° × 5 = 360°
Now imagine every piece is only 1° too narrow: 71° × 5 = 355°. That leaves 5° missing. The resulting gap in the star can be very obvious.
The same happens in the opposite direction. If every segment is slightly too wide, the pieces start pushing against one another before all of them reach the center.
This is why consistency matters just as much as the actual number on the angle finder. If every workpiece is slightly different, correcting the final star becomes much harder.
How to Check the Fit Before Gluing
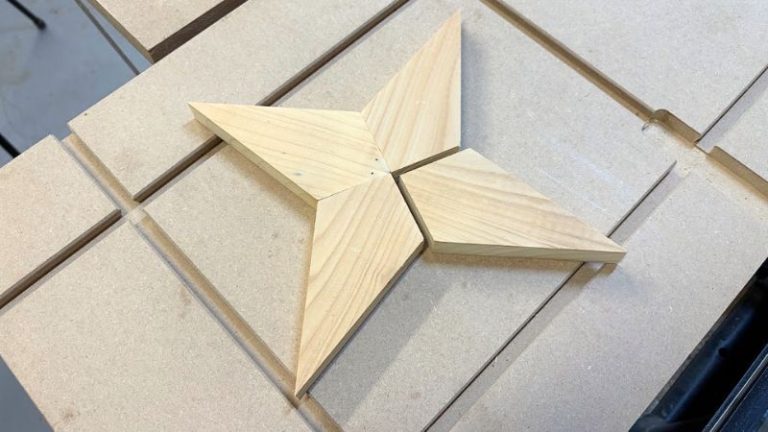
Before applying glue, always make a dry assembly. Place all the segments together on a flat surface.
Check:
- Does the center close?
- Do all the points reach the center?
- Are any pieces rocking?
- Are there visible gaps?
- Is one segment pushing the others out of position?
A dry fit tells you whether the star is ready to glue or whether one or more surfaces need slight adjustment. Do not wait until the glue is already applied. That makes corrections much more difficult.
💡TIP: Take a photo of the dry fit from directly above. Small inconsistencies are often easier to spot in a photo than while leaning over the workbench.
What About the Outer Star Point?
The outer point is different from the center. The center angle is dictated by geometry. The outer point is largely a design choice.
Its position determines things like:
- how long the star points look
- overall star size
- how narrow or wide each point appears
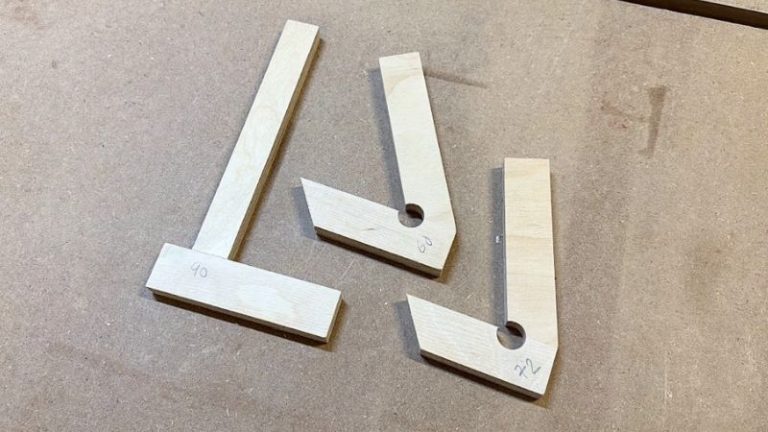
For my stars, I did not calculate an exact outer point length. Instead, after cutting the center point, I placed that point into a matching support jig:
- 90° for the 4-point star
- 72° for the 5-point star
- 60° for the 6-point star
The support locks the inner point in position. Then I visually position the opposite end around the center of the blank and cut the first side. I rotate the workpiece 180° and make the matching cut on the other side. That keeps the outer point symmetrical.
If you need an exact final size, you can calculate and mark the position of the tip beforehand. For decorative stars like mine, I found the visual method perfectly suitable.
How to Fix Small Angle Errors
If the center gap is large, I would recommend correcting the cutting setup and making new pieces. There is no good reason to spend a lot of time trying to hide a major geometry error.
Tiny gaps are different. Those can often be improved.
Sand the Mating Surfaces
Check where the joint is preventing the pieces from closing. Lightly sand that area. Then test again. Remove as little wood as possible.
Chamfer the Edges
I chamfered all the visible edges on my Benchtop Router Table. Apart from looking good, the chamfer creates intentional separation between each segment. That makes tiny inconsistencies much less visible.
Use Sawdust and Glue
For very small gaps, fine sawdust mixed with wood glue can be pressed into the opening. Once dry, sand it smooth.
This works best when the gaps are genuinely small. If the center geometry is obviously wrong, recutting is still the better solution.
Table Saw vs Miter Saw for Wooden Stars
A miter saw is probably the most common tool people use for projects like this.
For my setup, I prefer the table saw. The main reason is not simply the saw itself. It is the combination of the table saw sled + Any-Angle jig + clamping setup.
This gives me:
- precise angle adjustment
- repeatable cuts
- a stable flat surface
- stop-block positioning
- support for smaller components
- the ability to clamp the workpiece securely
- more freedom when working with unusual or very specific angles
A miter saw is limited by the miter range built into the saw, so there are angles you simply cannot set directly on some models. With a table saw sled and an adjustable jig, I can rotate and lock the workpiece at a much wider range of angles instead. This is especially useful for projects like segmented wooden stars, where angles such as 36° or other less common values are required.
Once the angle is dialed in, I can cut all matching components without changing the setup.
If you are deciding between the tools more generally, I also have a full Miter Saw vs Table Saw comparison.
NOTE: Very small or extreme angles on a table saw can still become awkward because the workpiece needs enough support and safe clearance around the blade, but overall I find the table saw setup gives me more flexibility than a standard miter saw.
Wooden Star Plans and Templates
I am also preparing detailed PDF plans and templates for these wooden stars.
The finished plans will make the setup easier by giving you the exact information for each version. I also plan to make these available through my woodworking plans collection and later through Etsy.
Until then, the full step-by-step build process is available in How to Make a Wooden Star: 4, 5 & 6 Point Designs. You can also browse my current Woodworking Plans.
Wrap-Up
The geometry behind wooden stars sounds more complicated than it actually is.For the type of segmented stars I made, there is really one relationship you need to remember:
The center must add up to 360°. From there, divide 360° by the number of points to get the center angle. Then divide that number by two to get the cutting angle for each side.
That gives us:
- 4 points → 45° cuts
- 5 points → 36° cuts
- 6 points → 30° cuts
Once the angle is set accurately, the rest of the process becomes repetitive. That is also why I like using my Table Saw Angle Jig. I can spend the time getting one setup right, lock everything in position, and then make every matching segment without changing the angle.
If you want to build the actual stars from start to finish, continue with my How to Make a Wooden Star guide.
Frequently Asked Questions
What angle do I cut for a 5-point wooden star?
For a symmetrical 5-point segmented star, divide 360° by 5 to get a 72° center angle. Divide that in half, giving a 36° cutting angle for each side.
What angle do I cut for a 6-point wooden star?
A 6-point star needs six 60° center angles. Each side of the point is therefore cut at 30°.
What angle do I cut for a 4-point wooden star?
A 4-point star needs four 90° center angles. Each side is cut at 45°.
How do I calculate the angle for any wooden star?
Divide 180° by the number of points. The result is the cutting angle for each side of a symmetrical star segment. For example: 180° ÷ 8 = 22.5°. So an 8-point star uses 22.5° cuts on each side.
Why does my wooden star have a gap in the center?
A center gap usually means the cutting angles are slightly incorrect or the individual pieces are not identical. Because the error is repeated around the star, even a small difference can become noticeable.
Does the outer point need a specific angle?
Not necessarily. The center angle is fixed by the number of star points, but the outer point can be adjusted to change the proportions and overall size of the star.
