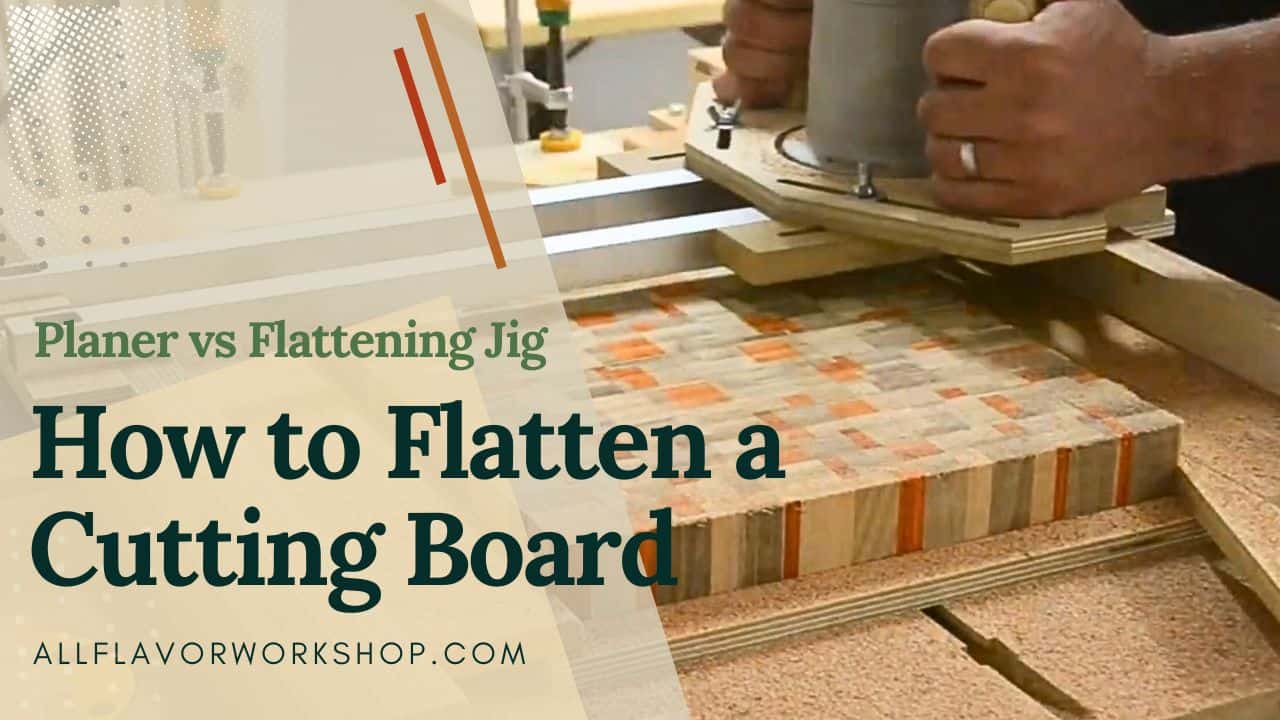
This article starts at the point where most cutting boards actually become a cutting board: right after glue-up, when you’ve got a solid blank… but it’s not perfectly flat yet. Maybe it’s slightly cupped, maybe you’ve got glue lines or ridges, or maybe you’re trying to rescue a board that already looks “finished,” but rocks on the counter.
The good news: you don’t need a huge machine setup to fix it. A planer and a router flattening jig can both get you to a flat board — but each one shines in different situations. And since a planer is expensive (and many woodworkers simply don’t have one), I’ll also show you how to flatten a cutting board without a planer using a router jig, with results that can be just as good (and sometimes even better).
One quick note: even though I’m talking about flattening cutting boards, these exact methods also apply to wood prep before the build — flattening slabs, boards, and glue-ups before you start adding features like grooves and handles.
If you want the safest “works on almost anything” method, check out my DIY Router Flattening Jig build (and plans) — it’s one of the most useful jigs I use for board making.
Quick Answer (Planer vs Router Flattening Jig)
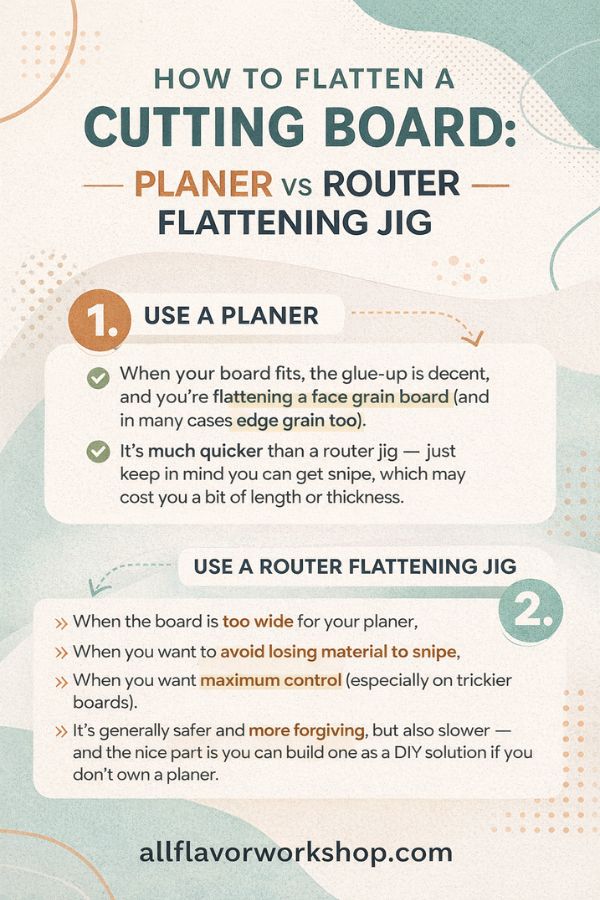
Use a planer when your board fits, the glue-up is decent, and you’re flattening a face grain board (and in many cases edge grain too). It’s much quicker than a router jig — just keep in mind you can get snipe, which may cost you a bit of length or thickness.
Use a router flattening jig when the board is too wide for your planer, when you want to avoid losing material to snipe, or when you want maximum control (especially on trickier boards). It’s generally safer and more forgiving, but also slower — and the nice part is you can build one as a DIY solution if you don’t own a planer.
If you’re not sure which way to go, I usually default to the router jig for safety and control — then only use the planer later if it still makes sense for final thicknessing.
Table of Contents
- Planer vs Router Flattening Jig: Decision Table
- What “Flat” Actually Means (And Why It Matters for Cutting Boards)
- Flattening a Cutting Board With a Planer
- Flattening a Cutting Board With a Router Flattening Jig
- Hybrid Workflows (Best of Both Worlds)
- Surface Quality: Planer vs Router Jig (And How Much Sanding to Expect)
- Troubleshooting Cutting Board Flattening (Quick Fixes)
- Wrap-Up
- FAQs: How to Flatten a Cutting Board
📌 Save THIS PIN to your Board on Pinterest!

Planer vs Router Flattening Jig: Decision Table
If you only read one section, read this one. Here’s the quick “which method should I use?” guide based on board size, board type, and the most common issues after glue-up.
| Situation / Goal | Planer | Router Flattening Jig | My pick |
|---|---|---|---|
| Face grain board (normal size, mild glue lines) | FastGreat finishVery safe when grain is friendly. | WorksSlower, but still a solid option. | Planer (if it fits) |
| Edge grain board (tight glue-up, clean surface) | FastUsually fine, but watch grain direction and take light passes. | SaferMore control if you’re worried about tear-out. | Planer (light passes) |
| End grain board | Not recommendedRisk of tear-out and damaged edges. | Best choiceControlled, predictable, and safer. | Router jig |
| Board is too wide for your planer | Not possible (capacity limit). | PerfectDesigned for wide glue-ups and slabs. | Router jig |
| You want to avoid snipe / save length & thickness | Snipe riskPlan extra length or use sacrificial ends/support. | No snipeMore control over exactly what gets removed. | Router jig |
| Board is cupped / twisted (rocks on the bench) | Possible, but only after you stabilize it (sled/shims), otherwise you “plane it wrong.” | GreatShim the board solid and flatten one face properly. | Router jig |
| You don’t own a planer | CostlyHard to justify for occasional flattening. | DIY friendlyBuild a simple sled and you’re set. | Router jig |
| You want the fastest workflow (multiple boards) | BestQuick passes, repeatable results. | Slower setup + slower flattening passes. | Planer |
| Surface quality right off the tool | Cleaner finishLess sanding (usually). | Router linesExpect light sanding to remove tracks. | Planer |
| Safety & control (beginner-friendly) | Safe when used correctly, but mistakes can happen fast. | More forgivingSlower, controlled material removal. | Router jig |
| My “real-world” approach | Great for final thicknessing after you have one flat face. | Great for getting the first face flat (especially wide or twisted boards). | Hybrid (often) |
What “Flat” Actually Means (And Why It Matters for Cutting Boards)
A cutting board doesn’t need to be “machinist flat” — it just needs to sit stable on the counter and have two faces that are flat enough to stay that way. Most problems come from one of these three shapes:
Cup – the board curves across the width (it rocks on the counter)
Bow – the board curves along the length
Twist – opposite corners are high/low (the annoying one)
The reason this matters is simple: if you try to plane or sand a board that’s rocking, you usually just follow the curve and end up with a board that looks smooth… but still isn’t truly flat.
✅ My rule of thumb:
The board should sit on a flat surface without rocking.
A straightedge should show no obvious gaps across the face (a tiny gap is fine — your finish and sanding won’t fix a big one).
Also, remember the “flattening trap”: every pass removes thickness. So flattening is always a balance between getting it stable and not thinning the board more than you want. If you’re already close to your target thickness, it’s often smarter to stop once the board is stable and do the rest with sanding.
1. Flattening a Cutting Board With a Planer
A planer is the fastest way to flatten a cutting board when the board fits and the stock is reasonably cooperative. For face grain boards it’s usually straightforward, and for many edge grain boards it works great too — you just want to be a bit more careful with light passes and grain direction. The two big things to watch are tear-out (mainly on edge grain) and snipe (on the first/last part of the board).
Use your planer when:
the board fits your planer’s width and height capacity
the glue-up is fairly even (no big ridges)
you want a fast, repeatable workflow (especially if you’re making multiple boards)
Step-by-Step: How I Flatten a Cutting Board With a Planer
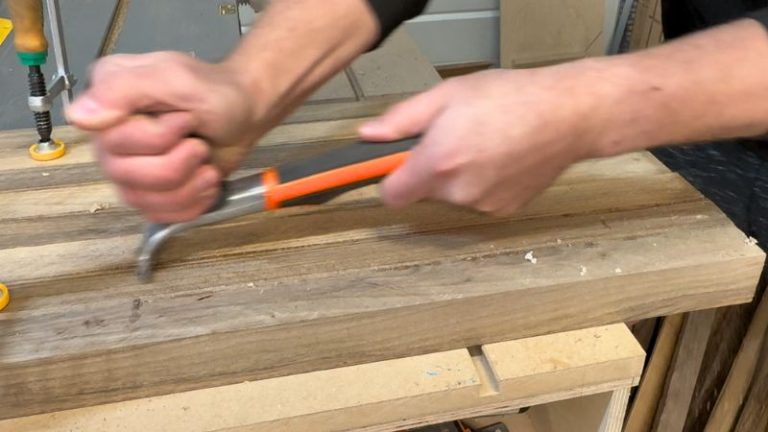
Step 1: Remove glue squeeze-out first
Before the board goes anywhere near the planer, remove all dried glue (especially along glue lines). Glue is harder than wood and can nick your blades — and it can also leave ugly tracks.
Step 2: Take light passes and alternate faces
Start with shallow cuts and don’t rush it. After a few passes, flip the board and plane the other side. Alternating faces keeps things more balanced and helps prevent new warping.

Step 3: If the board rocks, stabilize it with a sled (hot glue works)
If your board is cupped or twisted, don’t send it through the planer as-is. It will rock, and you’ll end up planing the shape into it. Instead, stabilize it first — one easy method is hot-gluing the board to a flat sled/base so it can’t move.


Step 4: Leave sacrificial ends to deal with snipe
Planers often leave a bit of snipe at the beginning and end of a board. The easiest solution is to leave extra length and treat the ends as sacrificial, then trim them off later (especially helpful if your slab ends had cracks anyway).


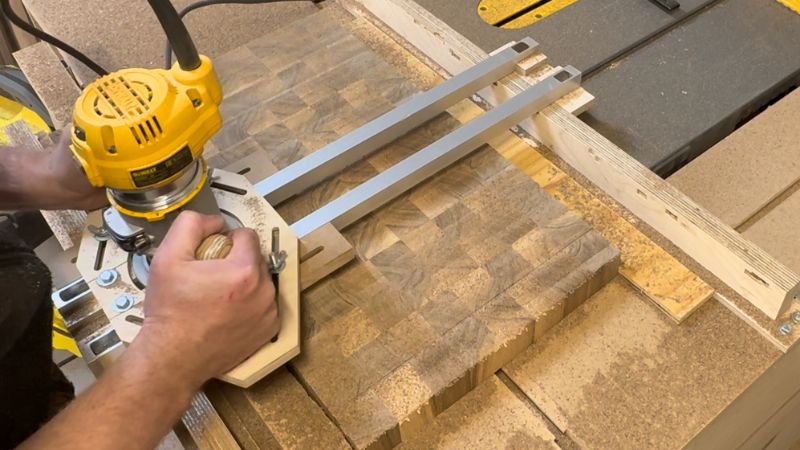
2. Flattening a Cutting Board With a Router Flattening Jig
If you don’t own a planer (or your board is too wide to fit in one), a router flattening jig is the most reliable way to get a cutting board dead flat. It’s generally safer and more forgiving than a planer because you remove material slowly and you’re always in control — the trade-off is that it’s slower and you’ll usually have a bit more sanding afterward.
If you want to build the same setup I use, check out my DIY Router Flattening Jig (build + plans) — it’s the go-to solution for flattening boards without a planer.
Step-by-Step: How I Flatten a Cutting Board With a Router Jig
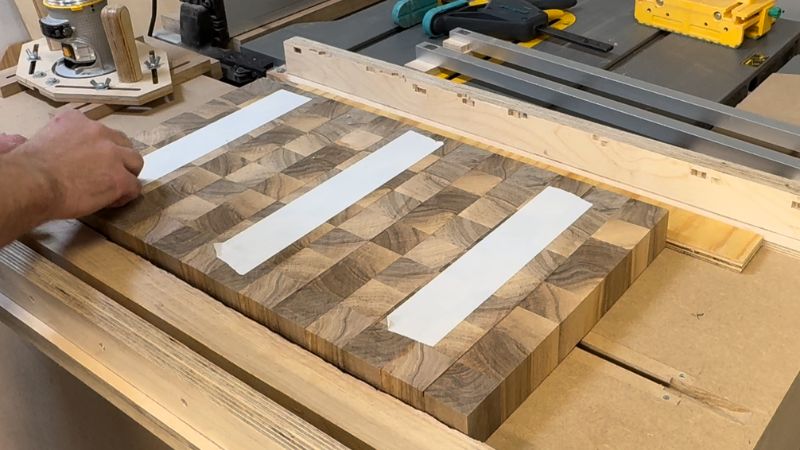
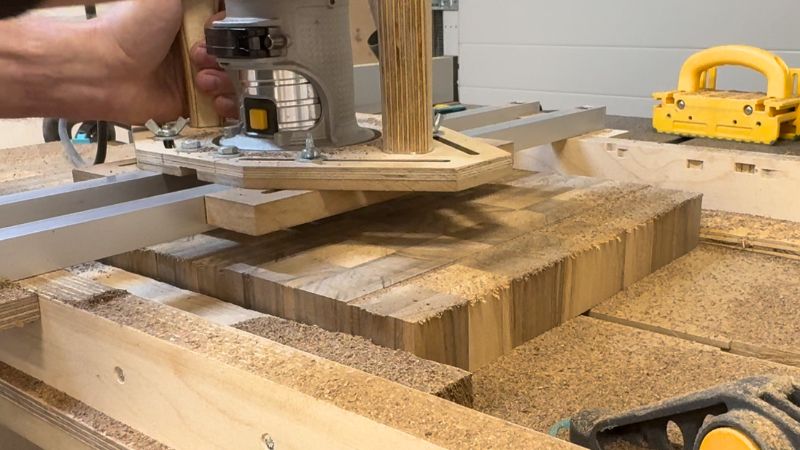
Step 1: Lock the board down so it can’t rock
This is the most important part. If the board moves or rocks, you’ll “chase flat” and never get a true reference face. I support the board with shims (or wedges) and clamp it so it stays perfectly still.
Step 2: Set up the rails and sled (parallel + rigid)
Make sure the rails are solid, parallel, and the sled moves smoothly without slop. Any flex here shows up in your surface.
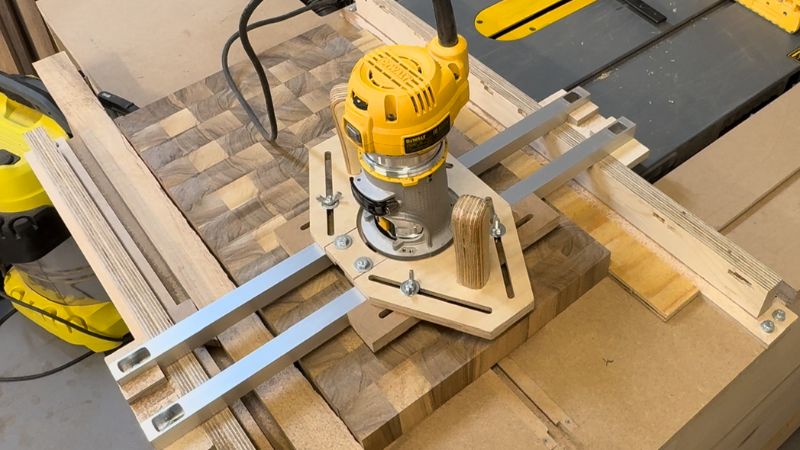
Step 3: Use the right bit and take shallow passes
A large flattening/surfacing bit works best. I set a shallow depth and take multiple passes instead of trying to hog it all at once.
Step 4: Work in a consistent pattern with overlap
I move across the board in rows, overlapping each pass so I don’t leave ridges. Slow and steady wins here.
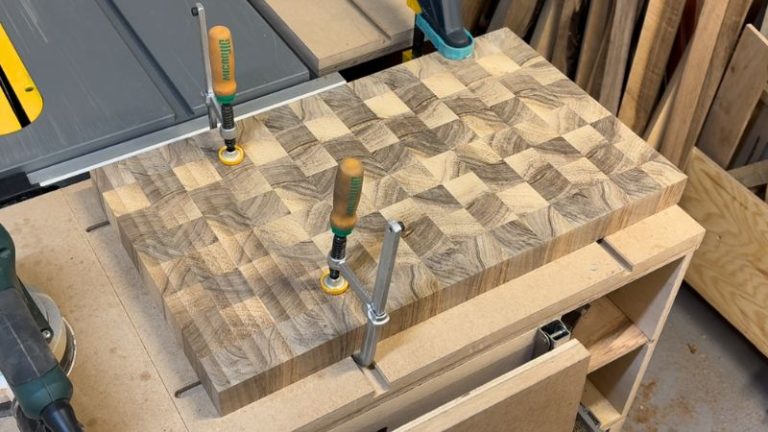
Step 5: Check progress, then flatten the second side
Once the first face is flat, flip the board, support it again if needed, and flatten the second face to thickness.
Step 6: Clean up the router lines
You’ll usually see light “tracks” from the bit. A quick sanding session removes them easily.
Hybrid Workflows (Best of Both Worlds)
In a real shop, it’s rarely “planer or router jig” — it’s often both.
Each method has its strengths, and combining them is usually the most efficient approach. The best workflow mainly depends on board type (face/edge/end grain) and board size, because those two factors decide what’s safe, what fits your tools, and how much material you can afford to remove.
A common pattern is: use the router flattening jig to get one face truly flat (especially on wider or trickier boards), then use the planer for quicker thicknessing — but only when it makes sense for the board you’re working with.
Surface Quality: Planer vs Router Jig (And How Much Sanding to Expect)
If we’re talking purely “out of the box” surface quality, a planer usually wins. The surface typically feels cleaner right away — especially on face grain boards — and it often needs less work before finishing.
That said, both methods still require sanding. How much sanding you’ll do depends more on the type of cutting board than on the tool:
Face grain boards: usually quick sanding. They plane nicely, and the grain sands fast.
Edge grain boards: a bit more sanding time, and you’ll notice it more if the grain is mixed or hard.
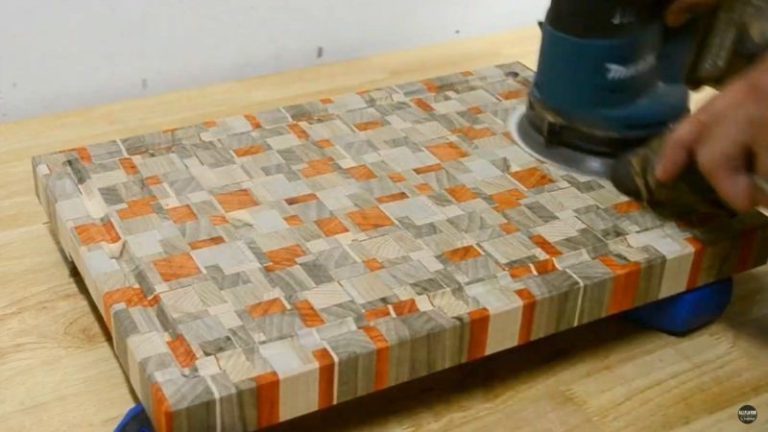
End grain boards: the most sanding, almost always. End grain just takes longer to smooth out.
A router flattening jig adds one extra factor: it leaves faint router tracks from the surfacing bit. You usually won’t feel them with your hand, but they are visible — and on an end grain board, that means you’re doing the “slow sanding” plus removing routing marks.
For sanding, I treat it as a simple progression: start around 80 grit (to remove tool marks), then work up through the grits until the surface looks and feels right — often up to around 300 grit before oil.
If you’re not sure which board type you’re working with (or why sanding feels so different), check out my guide on cutting board types: face grain vs edge grain vs end grain — it’ll make the rest of this process click fast.
Troubleshooting Cutting Board Flattening (Quick Fixes)
If something feels “off” while flattening (rocking, snipe, tracks, tear-out), use this table to diagnose the cause and fix it fast.
| Problem | Likely Cause | Fix | Prevent Next Time |
|---|---|---|---|
| Board still rocks after “flattening” | Board wasn’t supported (router jig) or it rocked in the planer; you flattened the curve, not the board. | Find the high corners, shim properly, and re-flatten one face as a true reference. | Always stabilize the board first (shims/sled). Don’t plane a rocking board freehand. |
| Planer snipe dents on the ends | Normal planer behavior; infeed/outfeed support not ideal; board too short. | Trim off the snipe, or re-plane with better support and lighter passes. | Leave sacrificial ends, support in/outfeed, use light cuts, keep board longer during flattening. |
| Tear-out / chipped edges | Wrong grain direction, heavy pass, dull knives; risky on edge grain and especially end grain. | Take lighter passes, slow feed, switch direction, sharpen/replace knives; switch to router jig if needed. | Light passes only, keep knives sharp, avoid planing end grain boards. |
| Deep planer lines / ridges | Glue squeeze-out hit the knives, nicked blade, or uneven feed pressure. | Remove all glue, replace/rotate knives, then take a very light finish pass. | Scrape glue before planing; don’t send glue ridges through the planer. |
| Router tracks are visible after flattening | Normal surfacing marks from the bit and pass overlap. | Sand starting around 80 grit until tracks disappear, then work up to ~300. | Use shallow passes, overlap consistently, keep rails rigid and sled tight. |
| Chatter / washboard surface from the router | Too deep of a cut, moving too fast, loose sled/rails, or bit not ideal. | Reduce depth, slow down, tighten the sled/rails, and take a cleanup pass. | Shallow passes, rigid rails, sharp surfacing bit, steady feed. |
| Burn marks | Too slow feed, too high RPM, dull bit, or too much material removed per pass. | Lower RPM, speed up feed slightly, take shallower passes, clean/replace bit. | Shallow passes, correct RPM, keep bits clean and sharp. |
| Low spots won’t disappear (you keep chasing them) | Board wasn’t supported flat, or you’re removing too much from the wrong area. | Stop, re-check with a straightedge, re-shim the board, then flatten again properly. | Shim before the first pass; lock the board so it can’t move at all. |
| Board got too thin | Flattened past what was necessary; started too thin; tried to remove twist by over-flattening. | Accept “flat enough” and finish by sanding; for severe twist, rebuild or use thicker stock next time. | Start thicker, flatten only until stable, then sand; don’t try to fix major twist by thinning. |
| Board warped again after flattening | Uneven moisture, uneven sanding/finishing, or stored wet/flat on a counter. | Re-flatten if needed, then oil all sides evenly and dry/store upright. | Finish both sides, avoid soaking, dry upright, don’t store flat while wet. |
Wrap-Up
Both methods work — the key is using the right one for the situation.
For face grain (and often edge grain too), a planer is usually the fastest option. It’s quick, repeatable, and the surface often comes out cleaner right away — you just need to plan for snipe and take lighter passes when the grain gets tricky.
For wide boards, twist/cup, or when you want maximum control, a router flattening jig is the safer choice. It’s slower, but it’s predictable and works even if you don’t own a planer.
My biggest rule is this: I’ll use a planer on face or edge grain, but I’m very cautious with end grain. After days of glue-ups and work on an end grain board, I want the flattening step to be as smooth and safe as possible — and that’s where a router jig shines.
If you want the method I trust most for wide boards and end grain, check out my DIY Router Flattening Jig (build + plans). And if you’re building more boards this year, my roundup Best Jigs for Making Cutting Boards will show you the essential jigs I use to make the whole process easier, safer, and repeatable.
📌 Save THIS PIN to your Board on Pinterest!
FAQ
1) Can I flatten a cutting board without a planer?
Yes. A router flattening jig is the most reliable way to flatten a cutting board without a planer, especially if the board is wide, cupped, or twisted. It’s slower than a planer, but it’s controlled and beginner-friendly.
2) Is it safe to run an end grain cutting board through a planer?
I don’t recommend it. End grain boards can chip and tear out more easily, and after all the work that goes into an end grain board, it’s not worth the risk. A router flattening jig is the safer choice.
3) What router bit is best for flattening a cutting board?
A surfacing/flattening bit (wide cutter) is the best option because it removes material evenly and leaves fewer ridges. Sharp bits and shallow passes make a big difference in surface quality.
4) How do I avoid planer snipe when flattening a cutting board?
The easiest fix is to leave extra length and trim the ends after planing. You can also support the board at the infeed/outfeed, take lighter passes, and avoid planing very short pieces.
5) How smooth should the board be after flattening?
Flattening is about getting it flat — sanding is what makes it finish-ready. I usually sand from about 80 grit up to 300 grit, and end grain boards will take the most time (especially if you’re removing router tracks).
