
If you’ve been around woodworking for even a short time, you’ve probably come across the term “jig” more than once. Maybe in a YouTube tutorial, maybe in a tool catalog—or maybe even in one of my own videos.
So what exactly is a woodworking jig—and do you really need one?
The short answer is yes. Whether you’re just getting started or already building regularly, jigs can seriously improve your accuracy, safety, and speed in the shop. They help you get repeatable results, cut down on mistakes, and give you way more control over your tools.
In this guide, I’ll break down what woodworking jigs are, how they work, and why they’re one of the smartest additions to any workshop. I’ll also show you real examples of the ones I use and build—many of which I’ve shared step-by-step on my YouTube channel.
Table of Contents
- What Is a Woodworking Jig?
- Why Use a Jig in Woodworking?
- How Do Woodworking Jigs Work?
- Common Types of Woodworking Jigs
- Woodworking Jigs vs Fixtures: What’s the Difference?
- Examples of Woodworking Jigs You Can Build
- Buying vs Making a Jig: Which One Is Right for You?
- Best Materials to Use for DIY Jigs
- Tips for Getting Started With Your First Jig
- Frequently Asked Questions
- Conclusion
1. What Is a Woodworking Jig?
A woodworking jig is a simple tool that helps you guide your saw, router, drill, or other equipment to make clean, repeatable, accurate cuts—safely and consistently.
It holds your workpiece steady and controls movement, so you don’t have to measure and mark every time. Whether you’re cutting straight lines, drilling evenly spaced holes, or routing precise dados, a jig keeps things lined up and repeatable.
I use jigs with almost every tool in my workshop:
- Table saw
- Circular saw
- Trim router
- Drill
- Jigsaw
Some jigs are incredibly simple (like a straight-edge guide for your circular saw), while others are more complex (like a router flattening sled with built-in stops). But in all cases, they make the process smoother and more predictable.
🎥 Want to see how I build and use many of these jigs? Check out my YouTube channel here.

2. Why Use a Jig in Woodworking?
There’s a reason you’ll find jigs in almost every workshop—whether it’s a pro setup or a DIY corner in someone’s garage. They just make things easier, faster, and more accurate.
Here’s what woodworking jigs help with:
1. Precision
Jigs guide your tools and keep your cuts consistent. No more guessing or remeasuring every time—just set it up once and go.
2. Repeatability
If you’re making multiple parts (like a set of shelves, picture frames, or a cabinet), a jig lets you create identical pieces quickly and with confidence.
3. Safety
Many jigs are designed to keep your hands away from the blade or bit. A good jig not only improves your cut—it lowers your risk of injury too.
4. Speed
Once you have a jig set up, it often saves time on layout, measuring, and setup. Especially when you’re doing similar cuts across multiple projects.
5. Cleaner Results
Jigs help reduce tear-out, misalignment, and angled cuts that shouldn’t be angled. If you’ve ever ruined a board on the final pass, you know the value of doing it right the first time.
Whether you’re using a circular saw, router, or drill, a jig helps you get professional-looking results without needing expensive machinery. And if you’re working in a small shop, that’s a big win.
🧠 Bonus: Building your own jigs also helps you become a better woodworker. You’ll learn how tools behave, how to solve problems, and how to work more efficiently in your space.
3. How Do Woodworking Jigs Work?
At their core, jigs are all about control. They help you guide a tool (or hold a workpiece) in a way that reduces human error and increases repeatability.
Instead of freehanding a cut or guessing your drill placement, the jig either:
Holds the workpiece steady
Guides the tool in a fixed path
Limits movement so every cut is consistent
Here are a few quick examples to show how that works in practice:
A crosscut sled rides in the grooves of your table saw and keeps your board perfectly square while pushing it through the blade.
A router dado jig lets you drop the router in and slide it along a straight path—perfect for making grooves the exact width you need.
A jigsaw guide rail helps you cut long, straight lines without veering off.
Once you set up the jig correctly, it removes the guesswork. You don’t have to re-measure, realign, or redo. And that’s what makes it so useful—not just for pros, but for beginners too.
🔧 The best part? You only need to build it once. A good jig can serve you for years across multiple projects.
4. Common Types of Woodworking Jigs
There are dozens of jigs out there, but they generally fall into a few categories depending on what tool they’re used with and what they help you do.
Here’s a quick overview of the most common types:
| Jig Type | Tool It Pairs With | What It Helps You Do |
|---|---|---|
| Crosscut Sled | Table Saw | Make straight, safe 90° crosscuts |
| Miter Sled | Table Saw | Cut perfect angles (e.g. for frames or boxes) |
| Dado Jig | Router | Rout consistent dadoes, grooves, or rabbets |
| Circle Cutting Jig | Router | Rout perfect circles of various sizes |
| Flattening Sled | Router | Level large boards, slabs, or tabletops |
| Guide Rail | Circular Saw | Cut long, straight lines on sheet goods |
| Crosscut Jig | Circular Saw | Make square crosscuts with a handheld saw |
| Drill Guide Jig | Hand Drill | Drill straight holes or repeatable patterns |
| Right-Angle Clamp | Assembly Work | Hold pieces at 90° during glue-ups or screwing |
You don’t need all of these to start—but even just one or two can make a huge difference in your workflow. If you’re using basic tools like a circular saw, drill, or router, a few simple jigs can bridge the gap between beginner and pro results.
🎥 Want to see how I build many of these? You can watch the step-by-step process on my YouTube channel.
5. Woodworking Jigs vs Fixtures – What’s the Difference?
The terms jig and fixture often get used interchangeably, but they’re not quite the same thing. Knowing the difference can help you better understand how each one fits into your workflow.
Here’s a simple way to look at it:
| Jig | Fixture | |
|---|---|---|
| Primary Function | Guides a tool during a cut or process | Holds the workpiece in a fixed position |
| Tool Movement | Yes — jig directs the motion | No — tool moves independently |
| Example | Dado jig, circle jig, drill guide | Bench vise, miter box, clamping jig |
A few quick examples:
A router circle jig helps you guide the router in a perfect arc → That’s a jig.
A corner clamp holds two pieces at 90° while glue dries → That’s a fixture.
Many workshop tools combine features of both, especially in DIY builds. The key idea is:
Jigs guide the tool. Fixtures hold the workpiece.
And in both cases, they make your life easier.

This is a jig — it guides the tool
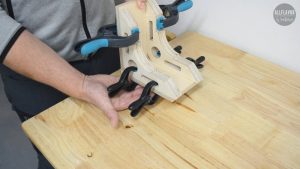
This is a fixture — it holds the wood pieces
6. Examples of Woodworking Jigs You Can Build
You don’t need a huge budget or fancy workshop to start using jigs. Some of the best jigs are simple, made from scrap plywood, and built in under an hour.
Here are a few jigs I’ve built myself—and still use regularly in my workshop. You can find full tutorials, photos, and videos for each one below. (🎥 Watch the builds on YouTube)
1. Circular Saw Straight Edge Guide
Make clean, straight cuts across plywood or MDF sheets. Works like a track saw—but way more affordable.
👉 How to Make a Circular Saw Guide
2. Crosscut Sled for Table Saw
The first jig I recommend building if you own a table saw. It’s perfect for safe, square crosscuts every time.
👉 Build Your Own Crosscut Sled
3. Router Dado Jig
Cut perfect grooves and dados with just a trim router. Adjustable width and super accurate.
👉 Step-by-Step Dado Jig Guide
4. Corner Clamp (Right-Angle Jig)
Hold two boards at 90° while assembling boxes, frames, or cabinets. Quick to build and really satisfying to use.
👉 Make a DIY Corner Clamp
5. Router Circle Jig
Cut perfect circles with a router—great for speaker holes, tabletops, or decorative work.
👉 How to Make a Router Circle Jig
🔧 These are all simple enough for beginners, but useful enough that I still use them regularly in my shop.
You can build most of them with a circular saw, drill, and a router—using materials you probably already have.
7. Buying vs Making a Jig – Quick Recap
At some point, every woodworker asks:
“Should I build this jig myself… or just buy one?”
And the honest answer is: it depends.
Here’s a quick comparison based on my own experience:
| Build It Yourself | Buy It | |
|---|---|---|
| Cost | Usually cheaper—often just scrap wood | More expensive, especially for specialized jigs |
| Customization | Tailored to your needs and tool setup | Fixed design—you work around it |
| Learning Value | High—you’ll get better at woodworking itself | Minimal—you skip the problem-solving process |
| Time Required | Slower up front, especially for complex jigs | Ready to use out of the box |
| Durability | You control the materials and build quality | Can vary—some are plastic or lightweight metals |
| Flexibility | Easy to modify or rebuild as needed | Harder to adjust or repurpose |
Personally, I’ve built almost all of my jigs myself. It saved money, gave me full control, and honestly—it was part of the fun.
But if you’re tight on time or need something really specific (like a dovetail jig or box joint jig), buying can make sense too.
Check out my full post on Buying vs Making Jigs, where I go deeper into when I choose to build and when I don’t.
8. Best Materials to Use for DIY Jigs
You don’t need exotic hardwoods or fancy composites to build solid jigs. In fact, most of the best jigs are made from materials you probably already have in your workshop.
Here are the most common ones I use—and why:
1. Plywood (especially Baltic Birch)
- My go-to for most jigs
- Strong, stable, and holds screws well
- Doesn’t warp easily
- Available in multiple thicknesses—perfect for layered jigs
2. MDF (Medium-Density Fiberboard)
- Great for smooth, clean surfaces
- Cuts cleanly with saws and routers
- Inexpensive and easy to work with
- Downsides: it’s heavy and doesn’t handle moisture well
3. HDF (High-Density Fiberboard)
- More durable and dense than MDF
- Holds up better to wear and pressure
- Ideal for jigs that will see heavy use
4. Hardwood Scraps
- Great for fences, stops, and runners
- Use oak, beech, or maple if you need strength
- I often use scraps from old furniture or cutoffs
Tip: Don’t be afraid to mix materials in one build. Also, use materials that are easily available in your location and do not cost a fortune.
You really don’t need much. In fact, building jigs is a great way to use up leftover materials that would otherwise go to waste.
9. Tips for Getting Started With Your First Jig
If this is your first time building a woodworking jig, don’t overthink it. You don’t need a fancy design or perfect joinery—just something solid that works. Here are a few tips I wish I had when I started:
Start with simple jigs
Don’t jump straight into a complex router sled. Try a straight edge guide or a crosscut sled first. They’re quick to build, super useful, and give you immediate results.
Use scraps
I build most of my jigs from leftover plywood, MDF/HDF, or hardwood offcuts. It’s a great way to reuse materials—and if something doesn’t work out, no big deal.
Test before trusting
Before using a jig on your final piece, test it on scrap. You’ll catch mistakes early and avoid ruining a good board.
Label and store your jigs
You’ll be surprised how often you reuse a jig months later. Add a quick label with its purpose and stash it somewhere accessible. A French cleat wall is perfect for that.
Conclusion
When I started woodworking, I didn’t have a fancy shop, expensive tools, or perfect skills. What I did have was a need to make clean, repeatable cuts—and that’s exactly where jigs came in.
Every jig I built helped me work smarter. Some were simple, some were ugly, and a few didn’t work the first time. But each one taught me something. Over time, they became a core part of how I work—and honestly, they’re one of the reasons I enjoy woodworking so much.
If you’re just starting out, don’t wait. Build your first jig. Make it out of scraps. See how much easier it makes things. Then build another. And another.
That’s how it started for me—and it’s probably how it’ll start for you too.
🛠️ If you’re looking for easy builds, I’ve got step-by-step guides and downloadable plans for all the jigs I use most. You can find them here on the blog or watch them come together on my YouTube channel.
Frequently Asked Questions
What is a woodworking jig?
A woodworking jig is a tool that helps guide your saw, router, or drill for more accurate, repeatable, and safe cuts.
Do I really need jigs to get started in woodworking?
Not at first, but they’ll make your life much easier. A few simple jigs can dramatically improve your results, even with basic tools.
What are the best woodworking jigs for beginners?
Start with a crosscut sled, a straight edge guide for your circular saw, or a router dado jig. These are simple to build and very useful.
Is it cheaper to build or buy jigs?
Building is usually cheaper—especially if you use scrap materials. You also get to customize the jig for your tools and projects.
Can I build jigs without a table saw or router?
Yes! You can make effective jigs using just a circular saw and drill. Many of my early jigs were made this way.
📌 Found this post useful and inspiring?
Ready to build it? Save THIS PIN to your Board on Pinterest!
