
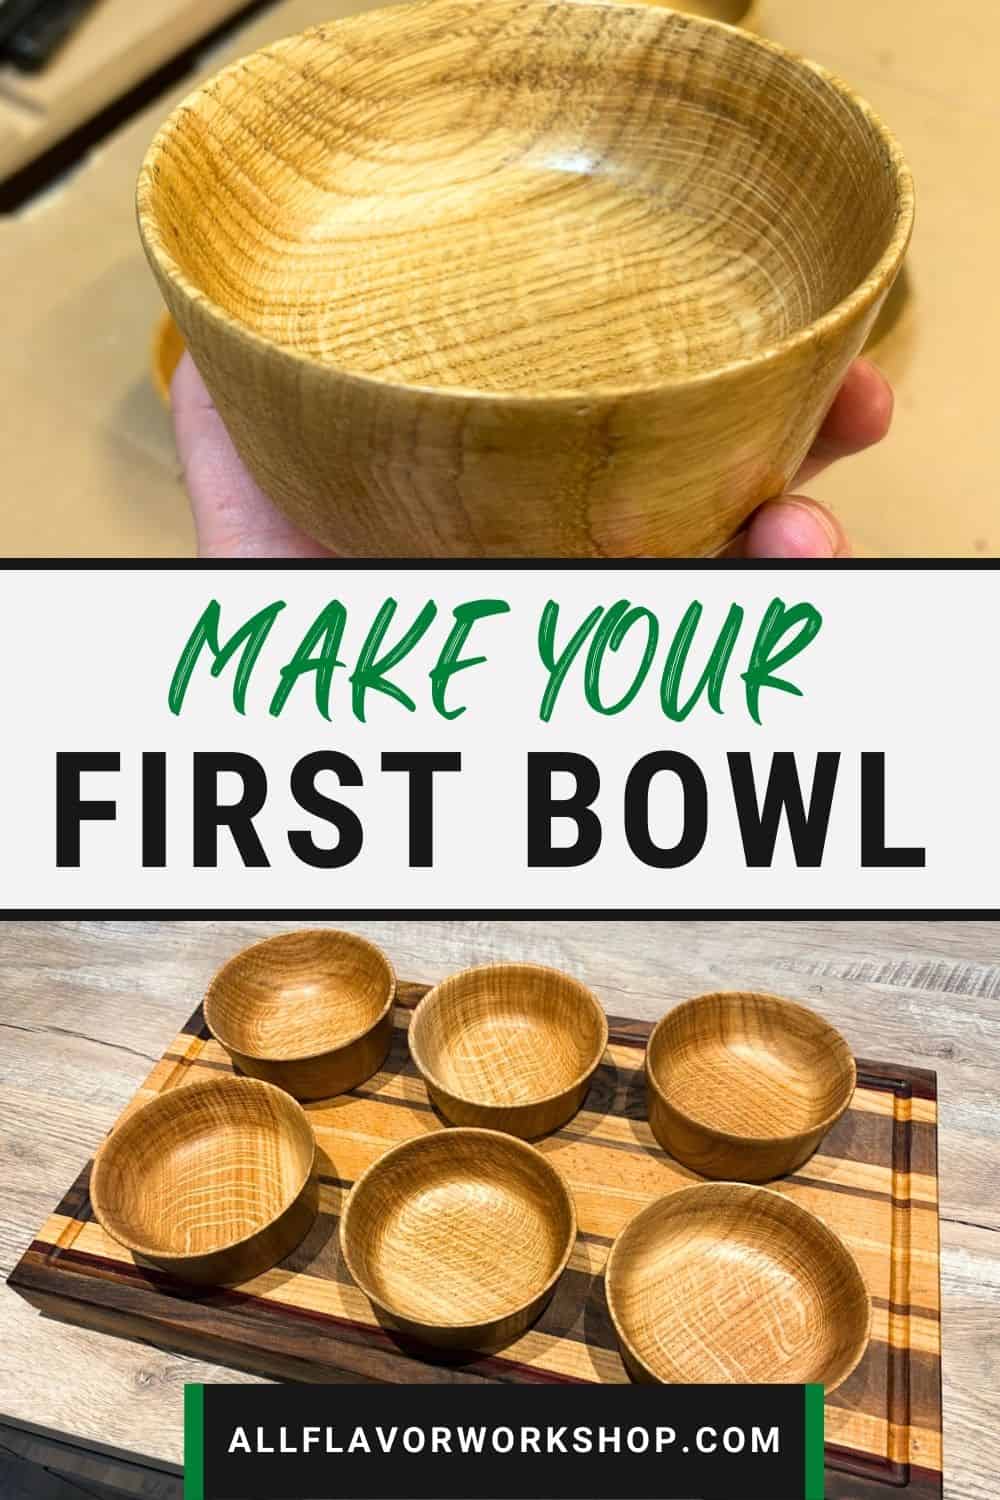
This is one of the simplest bowls you can turn on a lathe—perfect for a first project. I used oak here, but you’ve got options. If the bowl will ever touch food, pick woods you’d trust for cutting boards: maple, beech, cherry, walnut, oak. I started from an oak slab ~10 cm wide, checked it was straight, and rejected any knots, checks, or cracks before doing anything else.
Before we make shavings, a quick word on safety—it matters more than any tool on the bench. A spinning blank can be unbalanced and hard, and mistakes happen fast. Here’s my non-negotiable checklist:
Full face shield (not just glasses) and a dust mask for sanding.
Stand out of the line of fire on startup; let the lathe come up to speed.
Start slow and increase RPM only once the blank runs true.
Tool rest close and set to height, spin the work by hand to confirm clearance.
Solid mounting: faceplate/chuck tight, screws sized right, no loose bark or punky patches.
Sharp tools, light cuts—ride the bevel and don’t force it.
Prep-wise, I rough the blank round with a Table Saw Circle Cutting Jig—not just for a balanced first spin, but also to remove the extra waste upfront. The finishing and wood choices will feel familiar if you’ve built cutting boards—raise the grain, sand in steps, and use a food-safe oil.
I’ll use a few jigs along the way. If you want the exact builds, grab them on my Woodworking Plans page—especially the Circle Cutting Jig I use to prep bowl blanks.
Table of Contents
- Materials & Tools
- Project Specs & Prep
- Let’s Start Building
- How to Turn a Wooden Bowl (Step-by-Step)
- Step 1: Prep the Blank (Slab → Circles)
- Step 2: Mount on Faceplate & Lathe
- Step 3: Shape Outside, Cut Mortise, Finish Bottom
- Step 4: Flip to the Chuck
- Step 5: Hollow the Inside
- Step 6: Sand, Raise the Grain & Oil
- Care Tips
- Wrap-Up
- General Questions (FAQ)
Materials & Tools
Here’s the simple beginner setup I used for this bowl—nothing fancy, just the essentials that make turning safe and predictable.
Materials:
- Ash
- Cutting Board Oil – Cutting Board Oil
- Sandpaper Sheets – Sandpaper Sheets
- Full Face Mask – Face Mask
- Lathe Turning Tools – Lathe Chisel Set
Oils and Finishes:
- Clark’s Oil and Wax – Bowl Oil
- Odie’s Oil – Odies Oil
- Mineral Oil – Mineral Oil
- Oil and Wax Applicator – Oil Applicator
Tools:
- Lathe – Lathe
- Table Saw – Table Saw
- Hand Drill – Hand Drill
- Table Saw Blade – Table Saw Blade
- Dust Respirator – Dust Respirator
- Respirator Cartridge – Respirator Cartridge
- Eye Protection – Eye Protection
Check all the Tools I Use
Affiliate Disclosure: Some of the links above are affiliate links. As an Amazon Associate, I earn from qualifying purchases at no extra cost to you.
📌 Save THIS PIN to your Board on Pinterest!

Project Specs & Prep (At a Glance)
Wood & stock: Oak, cut from the edge of a clean slab (no knots, warps, cracks, or bugs). Fully dried, then acclimated in the shop for a few days.
Blank & size: Starting thickness ~60 mm. Finished bowl: Ø125 mm (rim), Ø105 mm (base), height 50 mm with a slight flare.
Straightening: My slab edge was already straight, so I kept the live edges. If it were wavy, I’d first joint it with my Jointer Sled.
Rough cutting: Table Saw Sled → cut to squares, then Circle Cutting Jig → quick, balanced round ready for mounting.
Mounting sequence: Faceplate for shaping the outside and forming the foot, then flip to a chuck with a mortise (recess) for hollowing.
Safety & feel: Face shield + dust mask, tool rest close/at height, start at low RPM and increase as it runs true. Keep tools sharp—you should be shaving, not forcing.
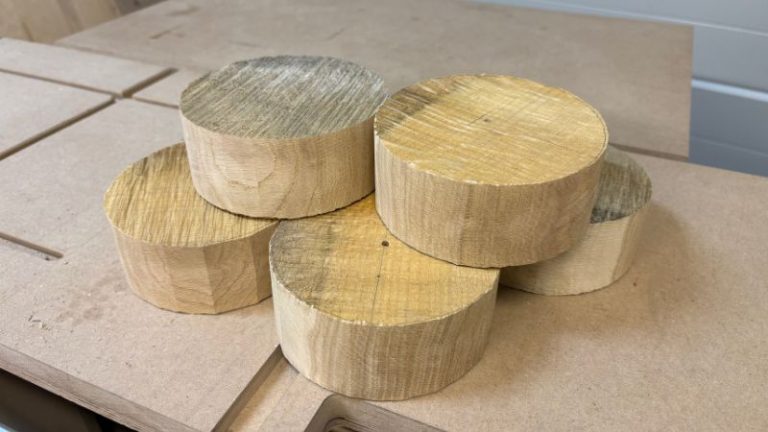
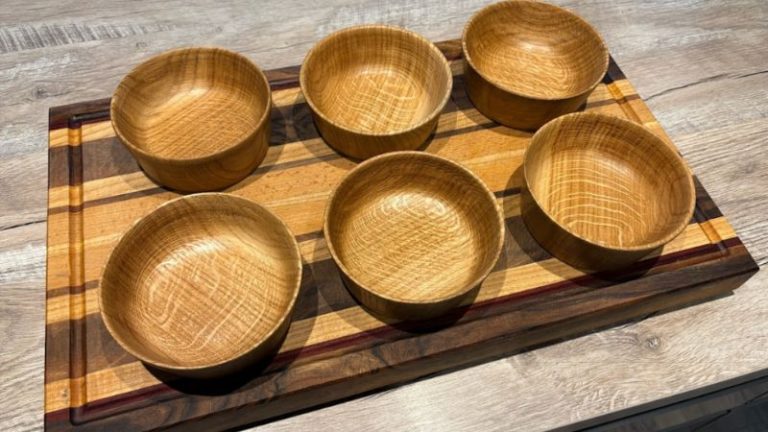
Throughput: I made six bowls from the same slab—once the workflow clicks, it goes fast.
Let’s Start Building
We’ll follow a clean, beginner-friendly flow: prep the blank → mount on a faceplate → shape the outside & form a mortise → flip to the chuck → hollow the inside → sand, raise the grain, and oil. I’ll note where the Circle Cutting Jig, Table Saw Sled, and Jointer Sled help so you can repeat this process for the next five bowls just as easily.
Step 1 comes next—we’ll start with prepping the blank and setting the lathe for a safe startup.
How to Turn a Wooden Bowl for Beginners
Step 1: Prep the Blank - From Slab to Ready-Cut Circles
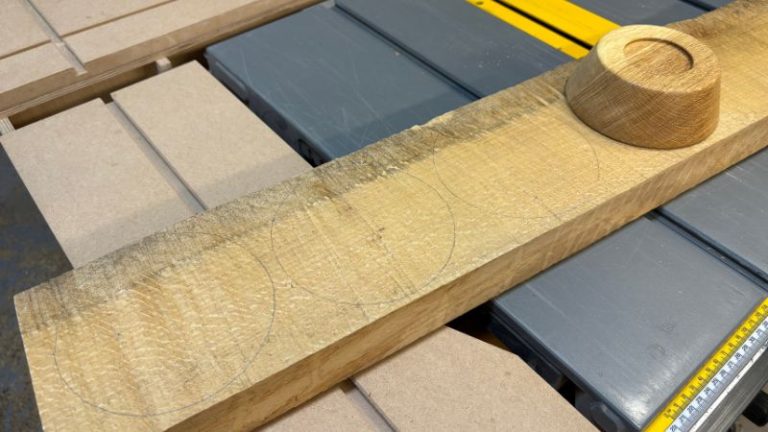
I start by laying out all six bowls on the oak slab so every circle has a clean spot (no knots/cracks). You can use a compass or trace another bowl for the outline. I leave about 10 mm between circles—enough buffer for the crosscuts and the circle jig.
Find true centers.
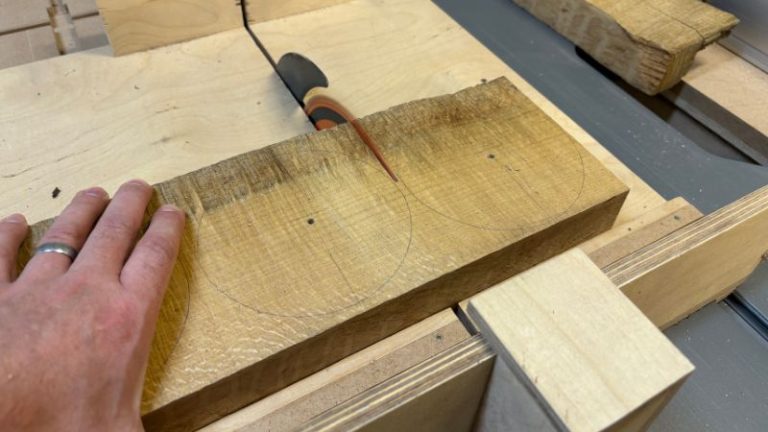
With my DIY Ruler Marking Gauge, I mark the center of each circle. Drill a 4 mm hole ~10 mm deep—this is the pivot point for the circle-cutting jig and the bowl’s true center later.Break the slab into squares.
Using the Table Saw Sled, I crosscut between the drawn circles. Now I’ve got six square blanks, each with a center mark.Cut true circles (save time later).
There’s still a lot of extra wood on those squares, so I switch to the Table Saw Circle Cutting Jig and quickly trim each square into a clean circle. This step does two things: it balances the blank for a safer, smoother first spin on the lathe, and it saves a ton of time you’d otherwise spend shaving waste off at the lathe.
End of Step 1: six round, centered oak blanks—ready for the faceplate.
Tip: If your slab edge is wavy or has live edge in the way, square it first with a Jointer Sled so your circle cuts sit flat and safe on the jig.


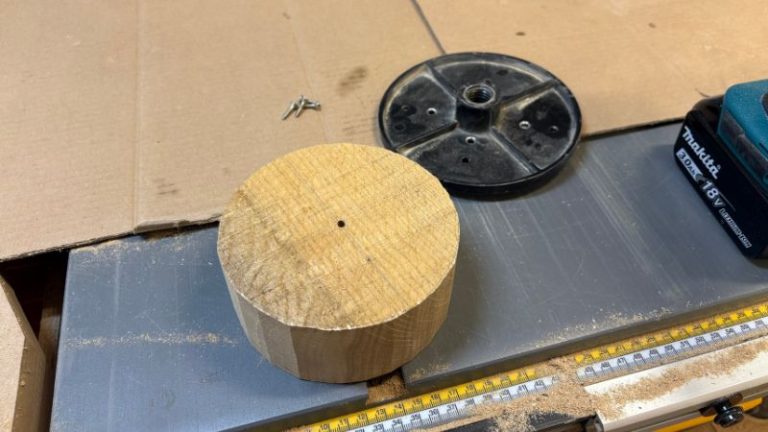
Step 2: Mounting on a Faceplate & Onto the Lathe
With the circles cut, it’s time to mount one blank to a faceplate so we can true the outside and shape the bottom.
Center the faceplate.
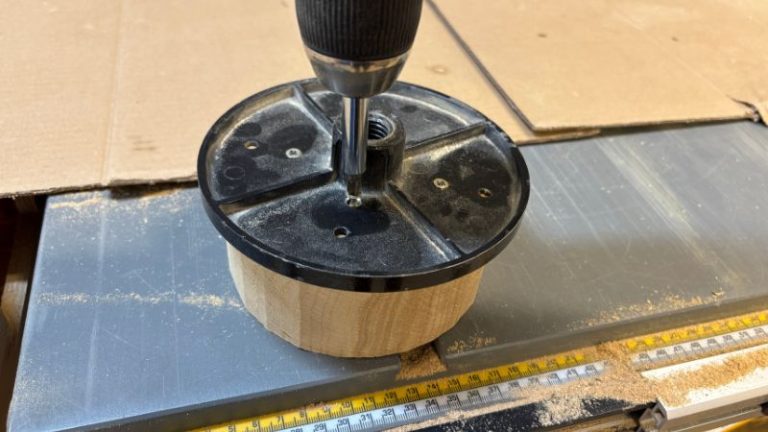
Use the 4 mm pilot hole you drilled as your reference. Align the faceplate over the mark (an awl helps), then pre-drill for screws if needed so they bite cleanly.Screw it down (secure, not excessive).
Use 4 wood screws. On a 60 mm thick blank, ~12 mm screw length is fine. Drive them snug in a cross pattern so the plate seats evenly. Keep screws well outside the area you’ll turn away for the foot/tenon so you never hit metal later.Thread onto the lathe.
Do not thread the faceplate on while the spindle is spinning. With the lathe off, hand-thread the faceplate onto the spindle until seated; engage the spindle lock (if available) to snug it. Bring the tailstock up for extra support during roughing.Safety check before the first spin.
Spin the work by hand to confirm clearance.
Set the tool rest close and at height; re-check clearance by hand.
Start at low RPM (conservative), stand out of the line of fire, and only increase speed once it runs true.
Sharp tools make this fun—light cuts, ride the bevel.
Now you’re ready to true the outside and form the base/mortise in the next step.


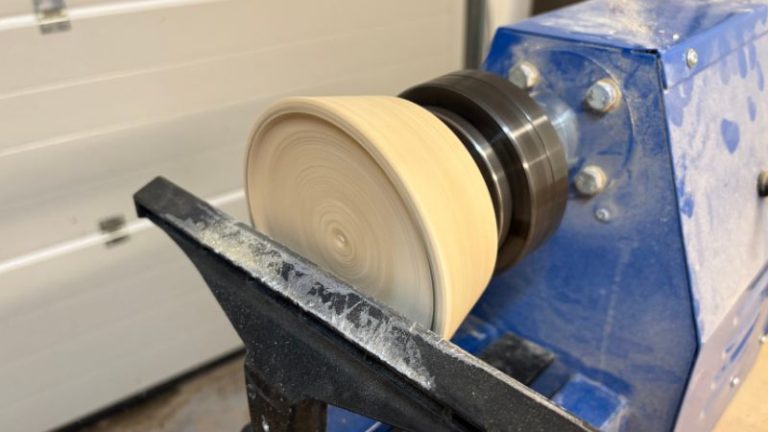
Step 3: Shape the Outside, Cut the Mortise, Finish the Bottom
With the blank secured on the faceplate, we’ll bring the outside into a clean curve, then form a mortise for the chuck. After that, a quick sand so it’s ready to flip.
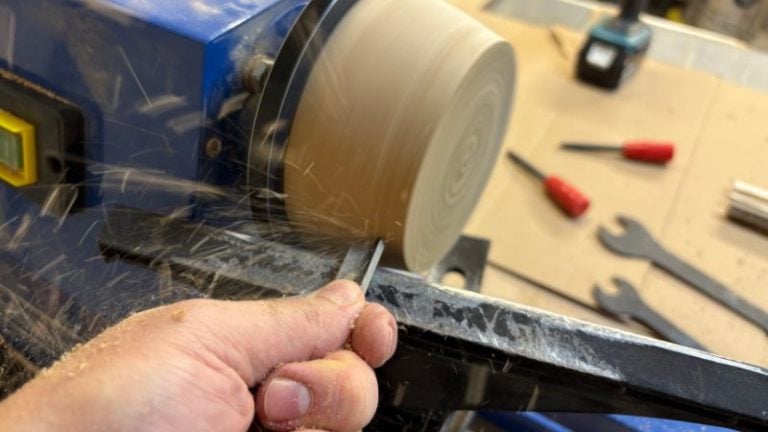
True and shape the sides
Set the tool rest close; adjust height so cuts are comfortable.
With a bowl gouge, make light, controlled passes from bottom toward the rim to true the blank and establish your outside profile.
Focus on sharp tools, bevel riding, steady stance, and a consistent feed—let the tool cut; don’t force it.
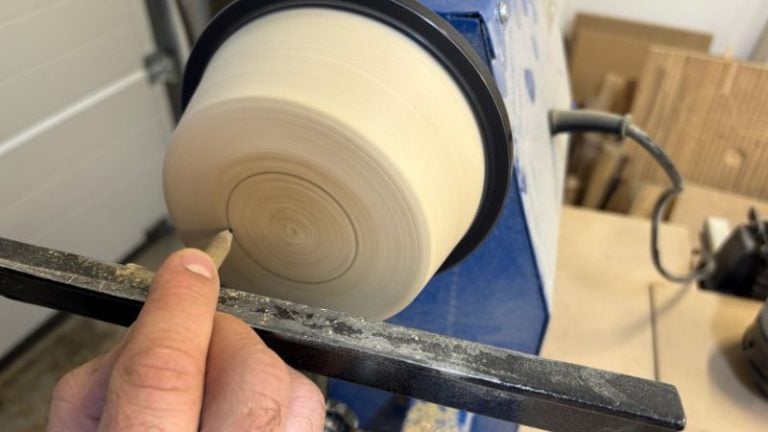
Flatten and clean the bottom
Reposition the tool rest to work the base safely.
Take light passes to create a flat land where the mortise will go. Keep the surrounding area slightly relieved (a tiny hollow) so the bowl sits stable on its final foot.
Lay out and cut the mortise
Use a pencil to mark the mortise diameter to match your chuck jaws in their near-closed (round) position.
Target mortise depth ~5–6 mm.
With a skew chisel, cut down to depth and then shape the mortise wall to the dovetail angle your jaws require.
Leave a shoulder for the jaws to register against. The fit should be snug and clean—no torn fibers.
Sand the outside and bottom land
- Sand from 60 → 120 → 150 → 180 → 220 → 240 (don’t skip more than one grit).
Keep RPM modest, move constantly to avoid heat, and vacuum between grits. You can do a light grain raise later after hollowing.
End of Step 3: now you have a clean exterior profile with a proper mortise and a sanded base—ready to flip onto the chuck for hollowing.

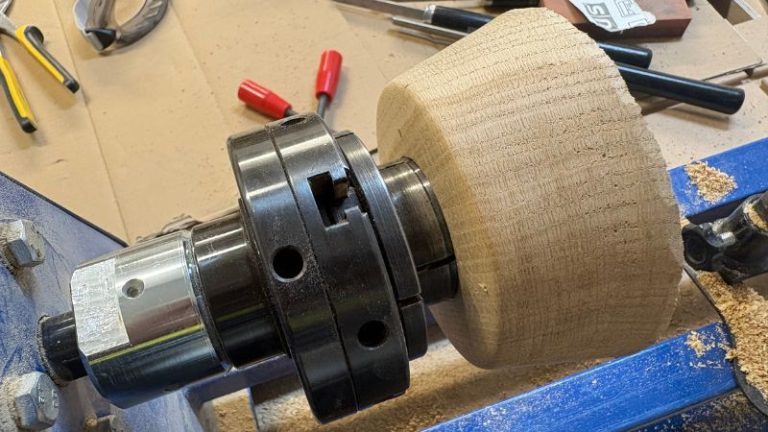
Step 4: Flip to the Chuck (Secure, Ready to Hollow)
Time to switch from the faceplate to the chuck so we can hollow safely.
Remove the faceplate
With the lathe off, unthread the faceplate from the spindle. Back out the four screws and set the plate aside. Keep the bowl bottom clean—no raised fibers inside the mortise.
Mount the chuck
Thread the chuck onto the spindle and snug it (use the spindle lock if you have one). Open the jaws slightly wider than your mortise.
Seat the mortise in the jaws
Offer the bowl up to the chuck and seat the mortise fully so the dovetail wall matches the jaws’ angle.
Tighten evenly with the chuck key. Firm is good; don’t crush the mortise—let the shoulder/jaw contact do the holding.
Centering & safety checks
Hand-spin the bowl to verify clearance and look for wobble. If it wobbles, reseat and retighten.
Set the tool rest close and at the height for inside work. Sharp tools again—this is where they pay off.

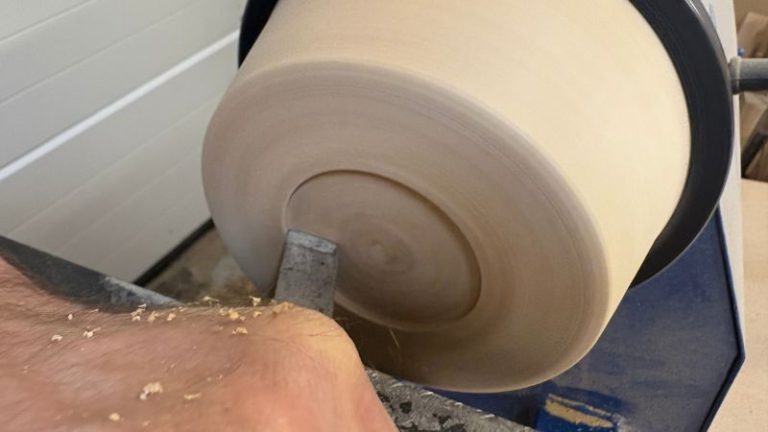
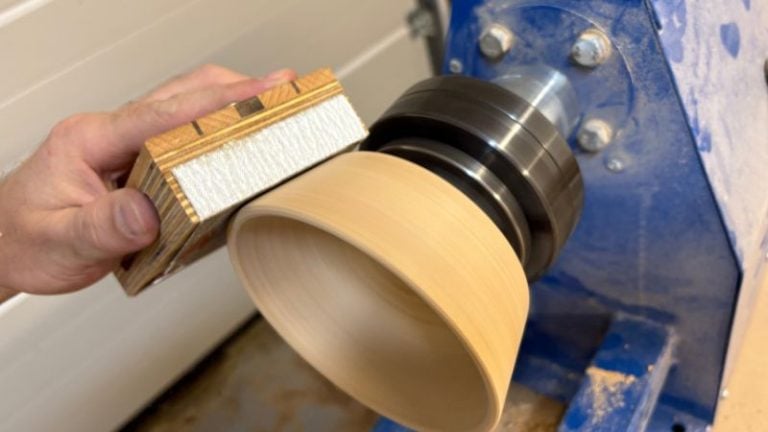
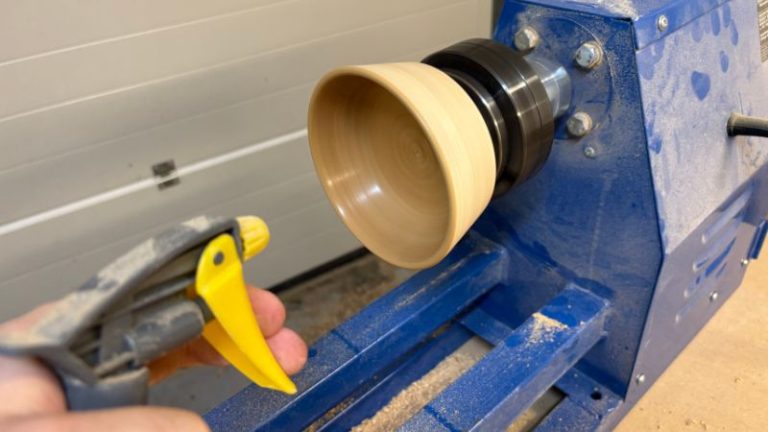
Step 5: Hollow the Inside (Even Walls, Clean Cuts)
With the bowl secure in the chuck, we’ll open the inside and set the wall thickness.
Face the rim flat
Bring the tool rest close and square to the surface.
Take light passes with a bowl gouge to create a flat, clean face—this gives you a true reference for depth and wall thickness.
Mark your wall thickness
Use a pencil to mark the intended wall width at the rim (e.g., ~6–10 mm for a first bowl). (You can use calipers to check thickness as you go)
Hollow in stages
Work in bands: bring the wall from the rim down a few centimeters to near-final thickness, then move one band deeper, and so on—this keeps the rim supported and reduces chatter.
Ride the bevel, present the edge lightly, and keep the tool rest advancing inward as the hollow grows.
Keep the rim at your marked thickness; check with calipers and your fingers.
Refine the inside curve
Blend the bands into a single, smooth curve.
Leave the bottom slightly thick
Stop ~2–3 mm thicker than target at the base for now—this avoids flex while you refine the curve.
Make a final, continuous pass to bring the bottom to thickness and match the inside curve.
Important at this stage: sharp tools, steady feed, and frequent checks. If you feel chatter, shorten the tool overhang.

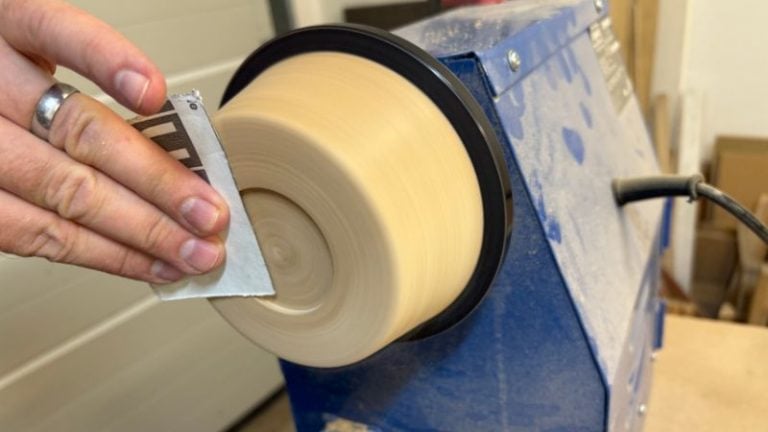
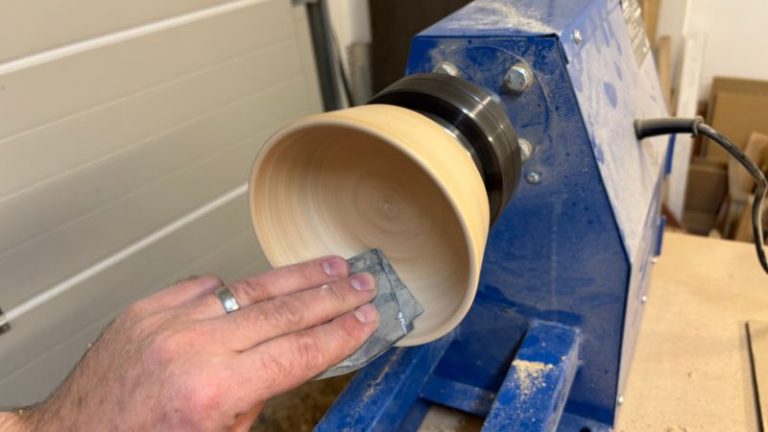
Step 6: Sand, Raise the Grain & Oil
With the inside shaped, I move the tool rest out of the way and keep the bowl in the chuck so I can sand with good support. I work through the grits 60 → 80 → 120 → 150 → 180 → 220 → 320 → 1000. You can sand by hand or use a sanding block.
Sanding on the lathe: run at a modest RPM, keep the pad moving, and don’t push hard—heat = scratches and glazing. Vacuum between grits so coarse dust doesn’t ride along to the next step.
Raise the grain: after ~150–180, spritz water lightly, let it dry, then continue with the next grit. Oak especially benefits here—it knocks down the fuzz and gives a silkier feel.
Mind the rim: slow down and give the top edge extra attention. It’s what hands feel first.
Final touch: if you see a swirl or a spot you missed, stop the lathe and hand-sand with the next grit until it blends.
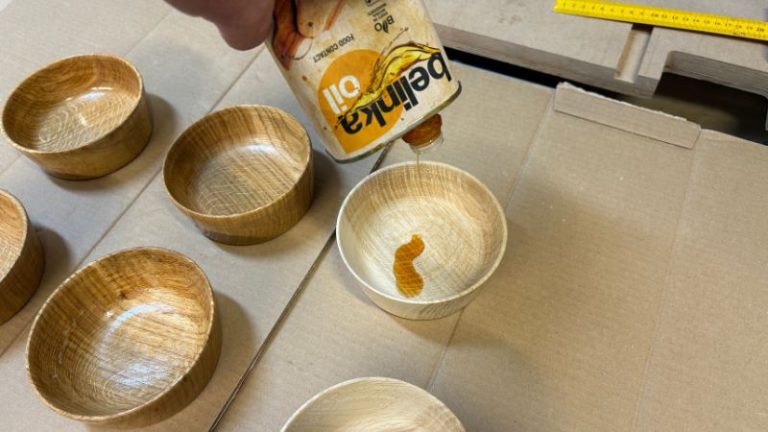
When the surface feels even, wipe the dust and go to finish. If this bowl will see food, stick with food-safe oils—same idea as cutting boards. I like Belinka or Clark’s, but plain mineral oil works too. Flood the surface, let it soak, wipe off, then repeat until the wood stops drinking. Finish with a beeswax + oil paste for a soft sheen.
Curious about linseed oil? I’ve got a full post: Is Linseed Oil Food Safe? (Raw vs Boiled)—read before you choose a finish.
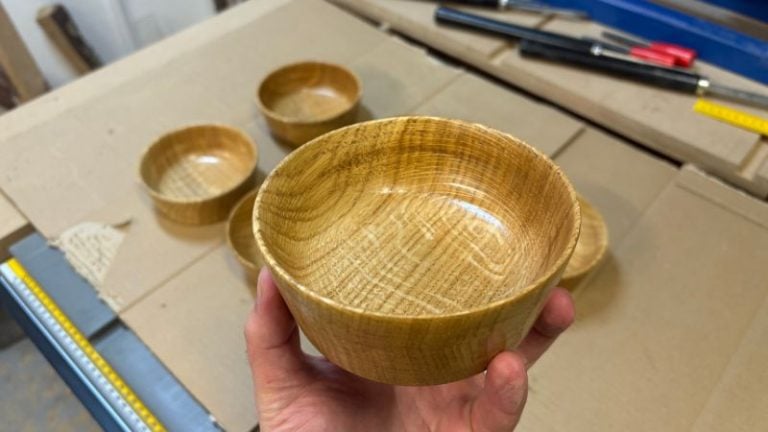
And this is what the finished bowls look like.

Care Tips
Wooden bowls are low-maintenance if you keep the basics simple. Hand-wash with mild soap and warm water, then dry right away—never soak and never use the dishwasher. Re-oil whenever the surface looks dry (a thin coat of food-safe oil, then wipe off); this keeps fibers sealed and the grain looking alive. If the bowl ever feels a bit rough, do a quick hand sand (220–320 grit) and re-oil. For open-pore woods like oak, wipe thoroughly after oily or colored foods and avoid direct heat/sun, which can dry the surface and fade color.
Wrap-Up
This oak bowl is a great first turning project—simple shape, a few essential tools, and a clear, repeatable process. The big non-negotiable is safety: you’re spinning a heavy blank at speed, so wear a full face shield, keep the tool rest close and at height, start slow, and use sharp tools so you’re shaving, not forcing.
Once the workflow clicks—prep a round blank, mount, shape the outside, cut a clean mortise, hollow in stages, then sand/raise the grain and oil—you can turn a second bowl twice as fast. From here, it’s easy to branch into different profiles, thicker/thinner walls, and new woods. The best moment is to watch the grain wake up after oiling.
If you want the jigs I used, grab the plans on my Woodworking Plans page—especially the Circle Cutting Jig, Jointer Sled, and the Sanding Block. Build them once, and you’ll use them on every single bowl.
📌 Save THIS PIN to your Board on Pinterest!
FAQ
1) What wood should I use for my first bowl?
Oak, beech, cherry, or walnut are all beginner-friendly. If the bowl will touch food, stick to these closed-grain hardwoods and use a food-safe finish.
2) Faceplate or chuck—what should I start with?
Start with a faceplate to shape the outside and form a mortise (or tenon). Then flip to a chuck for hollowing. It’s secure, predictable, and beginner-friendly.
3) How thick should the bowl walls be?
For a first bowl, aim for 6–10 mm. Work in bands (rim toward center), check with calipers, and keep thickness even all the way around.
4) What sanding grit sequence works best?
Go 60 → 80 → 120 → 150 → 180 → 220 → 320 → 400 → 600. After 150–180, lightly spritz water to raise the grain, let it dry, then continue.
5) Which finish is food-safe for bowls?
Mineral oil or products like Clark’s/Belinka work well. Flood, soak, wipe, and repeat, then add a beeswax + oil top coat.
