
Choosing between face, edge, and end grain is the big first step. Each one looks and behaves a little differently—build time, tools, durability, and how kind it is to knives. In my small shop, I’ve made all three, and there’s a clear pattern: start simple, keep stock flat, and use the jigs that make each step predictable.
Below, I’ll show what each type is, the pros/cons, what it costs in time/tools, and when I pick it. I’ll also link my step-by-step builds so you can jump straight in once you decide.
| Type | Look & Feel | Difficulty | Time to Build | Tools/Jigs | Knife-Friendliness | Durability | Best Woods | Watch-outs |
|---|---|---|---|---|---|---|---|---|
| Face-Grain | Clean, simple patterns; “board-like” look | Easy | Fast | Planer (optional), Jointer Sled, Sanding Block | Good | Good (can show knife marks sooner) | Maple, Beech, Cherry; Walnut accents | Use closed grain for the working face; keep glue edges straight |
| Edge-Grain | Striped look, very tidy; everyday workhorse | Moderate | Medium | Planer, Jointer Sled, Router Table | Better | Very good (stable, resists warp) | Maple, Beech, Walnut, Cherry; Teak (prep for glue) | Orient grain, light passes; prep oily woods with solvent |
| End-Grain | Checkerboard; premium, “butcher block” feel | Harder | Longest | Router Flattening Sled, Juice Groove Jig, lots of clamps | Best (gentle on knives) | Excellent (with proper care) | Maple, Beech; Walnut/Cherry accents | Never plane end grain; expect more oil; careful flattening |
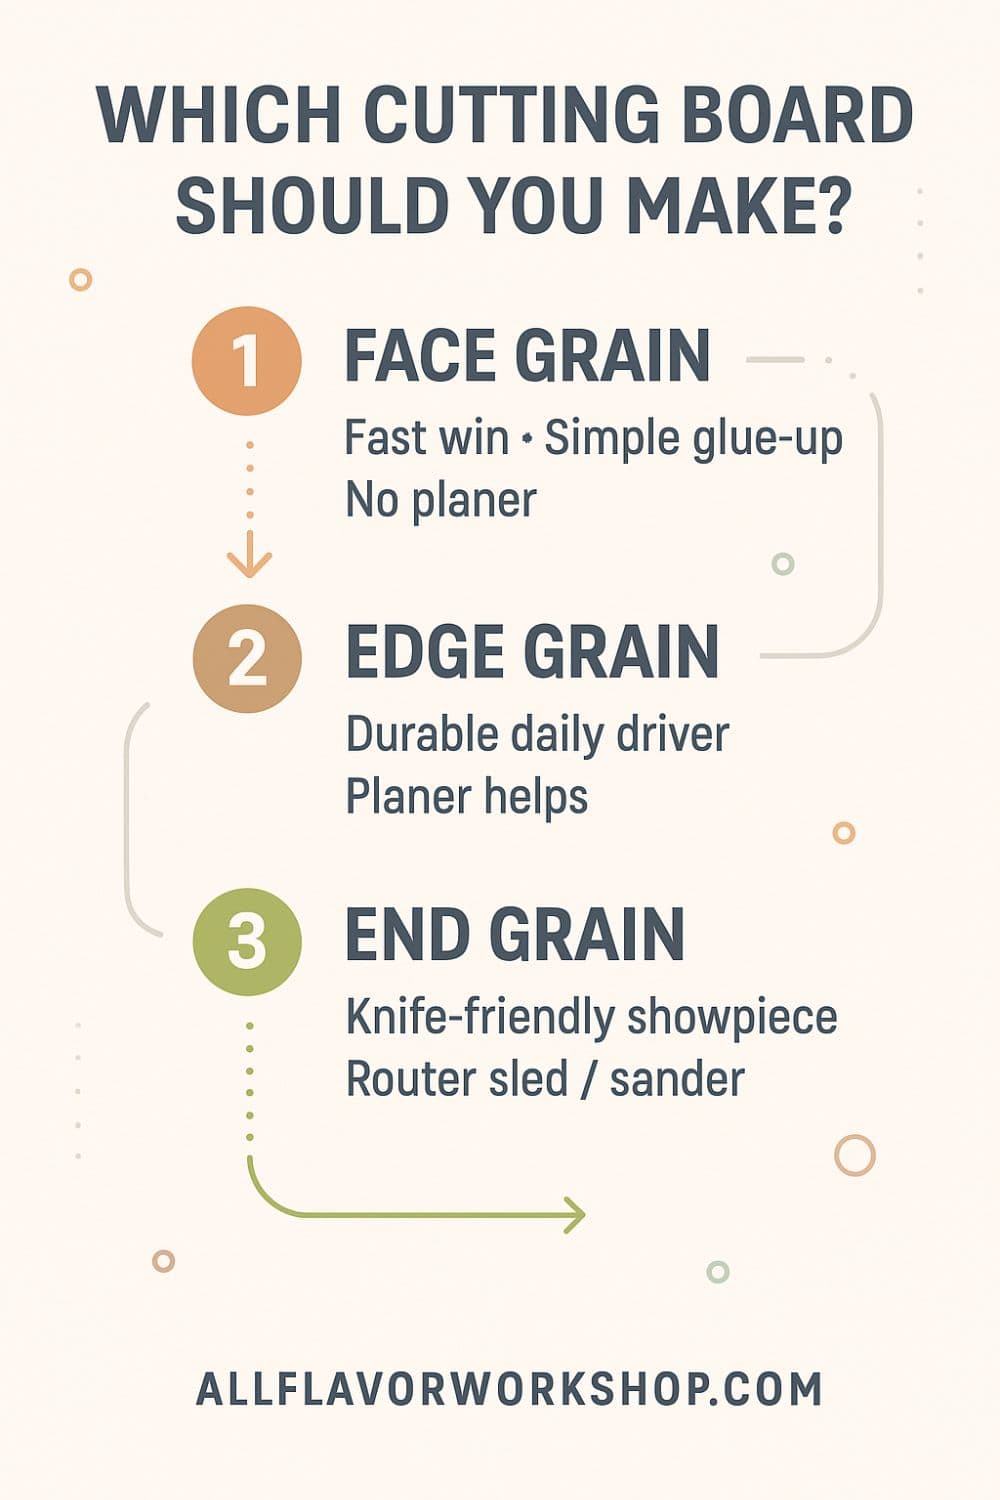
📌 Save THIS PIN to your Board on Pinterest!

What Each Type Means
Here’s the simple, beginner-friendly way to tell them apart. It’s all about which face of the wood becomes the cutting surface.
Face-grain
- What it is: You’re looking at the board’s wide face (growth rings as “lines/figure” across the surface).
- Looks like: Clean, flowing grain; classic “board” look.
- How it behaves: Quick to build, easy to finish, shows knife marks sooner than the others.
Edge-grain
- What it is: You’re looking at the board’s narrow edge (long, straight fibers running the length).
- Looks like: Tidy stripes; very consistent.
- How it behaves: Stable, durable, great daily driver. Glues and planes well if grain is aligned.
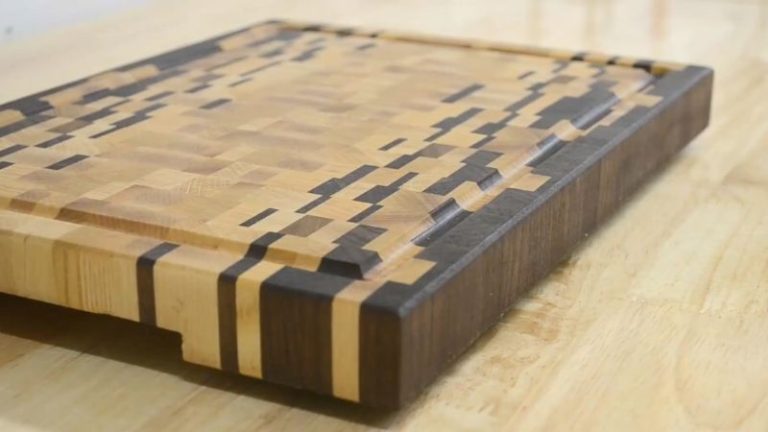
End-grain
- What it is: You’re looking at the ends of the fibers (like a bundle of straws pointing up).
- Looks like: Checkerboard or mosaic.
- How it behaves: Most knife-friendly and long-lasting; takes the most time to build and must be flattened on a router sled (never with a planer).
Quick visual cue:
Face = wide face up.
Edge = narrow edge up.
End = fiber ends up (little dots).
Next, we’ll look at each type—what it’s good for, the tools/jigs that make it easier, the woods I reach for, and a direct link to the step-by-step build for that style.
Face-Grain Boards
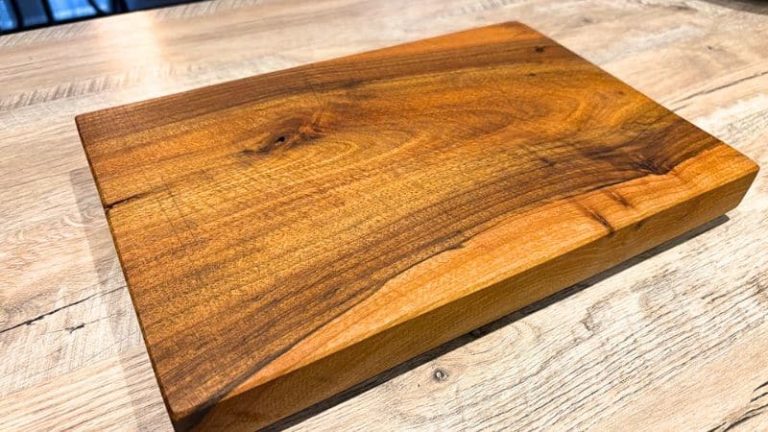
What it is: The board’s wide face is up—classic look with flowing grain.
Why I make them: They’re quick to build, easy to finish, and perfect for gifts or a first project. You’ll see knife marks sooner than with edge/end grain, but maintenance is simple—wash, dry, re-oil.
Looks & feel: Clean, natural grain. If you like quiet patterns (or a single-species board), this is it. Add a walnut stripe for contrast if you want a little pop.
Best woods: Maple, beech, cherry as the main surface (walnut is also a good option). Keep the working face closed-grain for easier cleaning.
Tools/jigs that help:
Jointer Sled for wood prep, or to get one dead-straight edge before glue-up.
Planer (optional) for fast thicknessing.
Router Table for a small round-over or chamfer on edges.
DIY Sanding Block for softening corners and quick touch-ups.
Build time & difficulty: Fastest of the three; beginner-friendly. A good weekend project, including finish time.
Watch-outs:
Joint clean, straight edges so glue lines disappear.
Go for even clamp pressure—not “as tight as possible.”
If the panel needs flattening, light passes in the planer (long grain), or use a router sled for full control.
Ready to make one?
Build it → DIY Face-Grain Cutting Board (step-by-step guide).
Edge-Grain Boards
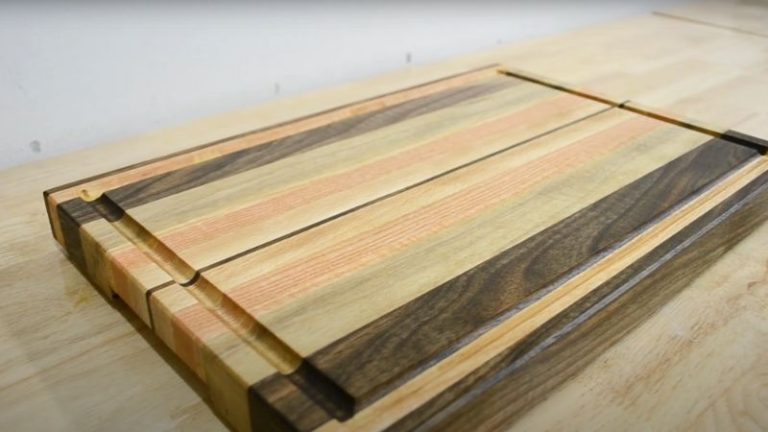
What it is: The narrow edges of the strips face up. Long, straight fibers run the length of the board—clean, striped look.
Why I make them: Rock-solid daily drivers. They stay flatter than face-grain, are faster to build than end-grain, and stand up well to everyday chopping.
Looks & feel: Neat, uniform stripes. Easy to mix light/dark species for contrast without getting busy.
Best woods: Maple, beech, walnut, cherry, padauk, purple heart. Teak works too—just prep oily faces before glue.
Tools/jigs that help:
Jointer Sled for one dead-straight reference edge before ripping strips.
Planer for quick, consistent thickness (light passes with the grain).
Router Table for a small round-over/chamfer; steady feed to avoid burns.
DIY Sanding Block for edge cleanup and softening corners.
Build time & difficulty: Medium. A solid weekend if you include finishing and feet.
Watch-outs:
Grain direction matters—run strips so planing follows the grain to reduce tear-out.
With teak/other oily woods, wipe glue faces with solvent, let flash off, then glue.
Keep clamp pressure even; a flat underlay and taped cauls help.
Ready to make one?
Build it → DIY Edge-Grain Cutting Board (step-by-step guide).
End-Grain Boards

What it is
The ends of the fibers are up (think “bundle of straws” pointing at you). That’s the classic butcher-block look.
Why I make them
They’re the most knife-friendly and hold up incredibly well over time. If I want a showpiece that still gets used hard, this is the one. It takes longer than face/edge grain, but the feel under the knife is worth it.
Looks & feel
Tight checkerboard/mosaic pattern. Beech with walnut or cherry accents is my go-to—clean, warm, and it pops after oil.
Best woods
Maple or beech for the main field; walnut/cherry/padauk for accents. Keep open-pore species (oak/ash) out of the cutting surface.
Tools/jigs that help
Router Flattening Sled — the safe, repeatable way to get dead-flat. (Skip the planer.)
Lots of clamps + taped cauls — even pressure through multiple glue-ups.
Router Table / small round-over — gentle edge break without tear-out.
DIY Sanding Block — crisp, controlled cleanup on edges and corners.
Build time & difficulty
Longest of the three; more steps and glue-ups – heavily depends on the design. Plan on an unhurried weekend (plus finish time).
Watch-outs
Never plane end grain. Flatten on the router sled with shallow passes and a wide base.
End grain drinks oil—flood, soak, wipe, repeat until saturated, then wax.
Color bleed can happen (e.g., padauk into maple). Vacuum between grits and sand light species last.
Mind your layout marks so patterns stay aligned during the second glue-up.
A light grain raise before final sanding helps you nail that silky finish.
Ready to make one?
Build it → DIY End-Grain Cutting Board (step-by-step guide).
Face vs. Edge vs. End Grain — Quick Comparison
This table shows how face, edge, and end grain compare for look, tools, time, and durability.
Pick the row that fits how you cook and build—then use the “Build it” link at the end of each section to jump straight into that project.
| Type | Look & Feel | Difficulty | Time to Build | Tools / Jigs | Knife-Friendliness | Durability | Maintenance | Best Woods | Watch-outs |
|---|---|---|---|---|---|---|---|---|---|
| Face-Grain | Classic, flowing grain; simple, clean look | Easy | Fast | Planer (optional), Jointer Sled, Router Table, Sanding Block | Good | Good (shows marks sooner) | Re-oil monthly; light sanding as needed | Maple, Beech, Cherry; Walnut accents | Use closed grain for the cutting face; joint edges straight for tight glue lines |
| Edge-Grain | Neat stripes; tidy and consistent | Moderate | Medium | Planer, Jointer Sled, Router Table, taped cauls | Better | Very good (stable) | Re-oil monthly; occasional resurfacing | Maple, Beech, Walnut, Cherry; Teak (solvent-prepped) | Follow grain in planer; prep oily woods before glue; even clamp pressure |
| End-Grain | Checkerboard / mosaic; premium “butcher block” feel | Harder | Longest | Router Flattening Sled, many clamps, Juice Groove / Handle Jigs | Best (gentle on knives) | Excellent with care | Re-oil more often; floods & wax top-coat | Maple, Beech; Walnut/Cherry accents | Never plane end grain; expect higher oil use; flatten on sled, shallow passes |
Choosing Guide (Use Cases)
Here’s the simple way I help beginners pick a board style—based on skills, tools, budget, time, and how you cook.
Brand-new to boards, limited tools, weekend build?
→ Face-grain. Fastest start, forgiving, looks great. A jointer sled + sanding block is plenty.You own a planer and a table saw, want a daily driver?
→ Edge-grain. Stable, tidy stripes, great “first serious” board. Planer for thickness, jointer sled for a dead-straight edge.You cook a lot and care about knife edges, don’t mind extra steps/time?
→ End-grain. Most knife-friendly and durable. Needs a router flattening sled (no planer), more glue-ups, and more oil.Tight budget / practicing technique?
→ Start with beech or maple in face/edge-grain. Ruin a cheap board, not a premium walnut block.Minimal shop space (small workshop)?
→ Edge-grain with a jointer sled and taped cauls. Flatten light in the planer; final skim on a router sled if needed.Gift deadline this weekend?
→ Face-grain. One glue-up, quick finish, easy to personalize with a walnut stripe or a small chamfer.Want a showpiece for the counter?
→ End-grain in maple/beech with walnut or cherry accents. Plan for an unhurried weekend + finish time.Nervous about tear-out/burns?
→ Use router table for small round-overs/chamfers, keep passes shallow, and vacuum often. Edge-grain is the friendliest here.Planning a juice groove or handles?
→ Any type works—add a Juice Groove Jig and Handle Jig for clean, repeatable results (especially on dense woods).
Next step: pick your style above and grab the jigs that make it smooth on my Woodworking Plans page (table saw sled, flattening sled, jointer sled, juice groove jig, handle jig, sanding block).
Tools & Jigs You’ll Actually Use
Picking face, edge, or end grain is the first decision. Getting a clean result from that choice comes down to a few simple jigs. They tame tear-out, keep panels flat, and make repeatable cuts—so your maple/beech/walnut looks its best.
What each jig does (and why it matters):
Table Saw Sled — Squares ends and trims panels safely. Tight, square glue lines matter most on face/edge boards where lines are visible.
Router Flattening Sled — Dead-flat panels without a planer. It’s the only safe way to flatten end-grain, and it’s great insurance on wide face/edge panels too.
Jointer Sled — Gives you one dead-straight edge when you don’t have a jointer. Critical for clean glue lines on face/edge; also handy to straighten a finished board.
Juice Groove Jig — Clean, repeatable grooves with consistent depth. Useful on all three types, especially dense woods where hand-routing can burn.
Handle Jig — Centered, identical finger slots every time. Works on all types; avoids chip-out in brittle species.
Router Table — Controlled round-overs/chamfers and tiny underside bevels. Prevents burns/tear-out on edge/end corners, quick softening on face boards.
DIY Sanding Block — Fast edge cleanup and micro-chamfers where a router would be overkill. Great for all types.
Quick “Which Jig for Which Type” matrix
| Jig / Tool | Face-Grain | Edge-Grain | End-Grain | Why it helps |
|---|---|---|---|---|
| Table Saw Sled | ✓✓ | ✓✓ | ✓ | Square ends; safe panel trimming after glue-up; perfect for tight, visible lines. |
| Router Flattening Sled | ✓ | ✓ | ✓✓✓ | Dead-flat surfaces; **mandatory for end-grain** (no planer), fixes twist/warp safely. |
| Jointer Sled | ✓✓✓ | ✓✓✓ | ✓ | One straight reference edge for clean glue lines; remove live edges; true up finished boards. |
| Juice Groove Jig | ✓✓ | ✓✓ | ✓✓ | Accurate, repeatable groove with shallow passes; reduces burn and wavy lines. |
| Handle Jig | ✓✓ | ✓✓ | ✓✓ | Centered, matching handles; no wandering or chip-out on brittle species. |
| Router Table | ✓✓ | ✓✓✓ | ✓✓ | Controlled round-overs/chamfers; tiny underside bevels; steady feed avoids burns. |
| DIY Sanding Block | ✓✓ | ✓✓ | ✓✓ | Quick edge softening and cleanup where a router is too aggressive. |
For the exact builds I use (table saw sled, flattening sled, jointer sled, juice groove jig, handle jig, sanding block), grab them on my Woodworking Plans page—downloadable and ready for your bench.
Common Mistakes & Fixes
Quick reference: spot the issue, fix it fast, and keep it from coming back.
| Mistake | Where | Likely Cause | Quick Fix | Prevent Next Time |
|---|---|---|---|---|
| Planed end-grain (tear-out) | End | End grain through planer | Stop; re-flatten on router sled | Never plane end grain; sled + shallow passes |
| Visible glue lines | Face / Edge | Starved joints; uneven edges; over-clamping | Light re-surface; wick thin glue or re-glue strip | Joint one true edge; even pressure; taped cauls + underlay |
| Snipe on ends | Face / Edge | Planer setup; no in/outfeed support | Trim ends; light resurface | Sacrificial end-caps; lighter passes; proper support |
| Tear-out on corners/routing | All (esp. Edge/End) | Wrong direction; deep pass; dull bit | Light cleanup pass; sand; re-route shallow | Outside CCW / inside CW; shallow passes; sharp bits; corner nibble |
| Burn marks (router/table) | Face / Edge / accents | Dull bit; slow feed; packed chips (maple/purpleheart) | Light cleanup pass or sand out | Vac close to bit; steady feed; sharp bits; tiny depth |
| Board is cupping | Face / Edge | Uneven moisture; rings not alternated | Re-flatten on sled; re-oil both faces; dry with airflow | Alternate growth rings; add feet; store upright |
| Twist / wind after glue-up | All | Stock not flat; rushed milling/acclimation | Skim both faces on sled | Mill in stages; 8–10% MC; let stock acclimate |
| Color bleed (e.g., padauk → maple) | All (mixed species) | Dust transfer; sanding out of sequence | Sand back lightly; clean with alcohol; re-sand fine grit | Vac between grits; sand light species last; separate sessions |
| Wavy juice groove | All | No jig; uneven feed; deep single pass | Re-route with Juice Groove Jig | Always use jig; shallow multiple passes; steady feed |
| Handles off-center | All | Freehand layout; drift during routing | Square ends; re-route with fence/jig | Handle Jig + Ruler Marking Gauge; use stop blocks |
| Rocking board on counter | All | Uneven feet; no underside chamfer | Adjust/replace feet; add small underside chamfer | Test on flat surface; fit feet after finish cures |
| Fuzzy end-grain after oil | End | No grain raise; stopped too low grit | De-oil lightly; sand 220–300; re-oil | Raise grain after 150–180; one more grit before oil |
Getting Started
If you’re new to boards, keep it simple and set yourself up to win. Here’s the beginner-friendly path I wish I had on day one.
1) Pick your board type (start easy)
First board? Go edge-grain — stable, tidy, and beginner-friendly.
Ready for a quick win? Face-grain is the fastest build.
Want the “butcher-block” feel? End-grain is premium, just slower, and needs a flattening sled.
2) Choose the right wood (suitability first)
Grab a closed-grain hardwood: maple, beech, walnut, cherry are safe bets. If you’re practicing, start with beech/maple (budget-friendly), then add walnut for contrast later.
See: Best Wood for Cutting Boards (Face, Edge & End Grain).
3) Gather 2–3 jigs that make life easy
You don’t need a huge shop. A few jigs do the heavy lifting:
Jointer Sled → one dead-straight edge for clean glue lines.
Router Flattening Sled → flat panels and all end-grain (no planer).
Sanding Block → quick edge cleanup and tiny chamfers.
All my builds are on the Woodworking Plans page (download & go).
4) Prep & mill (calm, predictable)
Acclimate your stock (~8–10% MC) before milling.
Joint one clean edge (jointer sled), rip strips, then light passes in the planer for face/edge-grain.
For twist or wide glue-ups, a quick pass on the flattening sled saves sanding later.
5) Glue-up (flat and stress-free)
Taped cauls + flat underlay panel = even pressure and no clamp marks.
Aim for even squeeze-out, not “as tight as possible.”
Catch drips with baking paper; scrape squeeze-out when it goes rubbery.
6) Flatten & sand (make it feel great)
Face/edge-grain: planer or light sled passes, then sand 80→120→150→180→220→300 (don’t skip more than one grit).
Raise the grain after 150–180, let dry, sand one more grit.
Use bench cookies and vacuum between grits, especially with padauk/walnut dust.
7) Edges, handles & grooves (optional)
Small round-over/chamfer on a router table; steady feed to avoid burns.
Handles: Handle Jig for centered, repeatable slots.
Juice groove: Juice Groove Jig, shallow passes, vacuum often. (After all that work, the jig keeps it clean.)
8) Finish & feet
Flood with food-safe oil (Clark’s, Belinka, or mineral oil) until saturated; then beeswax + oil top-coat.
End-grain drinks more—have extra oil ready.
Add rubber feet for airflow and grip, or leave it reversible if you like flipping sides.
9) Care (the one-minute routine)
Hand-wash, dry upright, re-oil when it looks dry (about monthly), and keep it out of the dishwasher/heat.
Wrap-Up
There are a lot of ways to make a cutting board—from a simple, clean slab to complex patterns that just look awesome on the counter.. If you’re just getting started, take the steady path: start with face grain, step up to edge grain, and save end grain for when your process feels smooth. The designs are fun, but two things come first: pick the right wood (food-safe, closed grain) and use the right finish. These live in the kitchen—no one wants moldy pores, stubborn stains, or a finish that won’t cure.
What helped me most (and yes, I ruined a few boards I didn’t have to) are a few reusable jigs. The Jointer Sled and Router Flattening Sled make prep predictable and flat. A Router Table gives repeatable edges. The Juice Groove Jig keeps lines clean on the last step when mistakes hurt most. Build these once and you’ll use them on every board—face, edge, and end grain—with better precision, speed, and repeatability.
Next step—have a look at Best Jigs for Making Cutting Boards (And How to Use Them) or browse all of my builds on the Woodworking Plans page—downloadable plans, ready for your next board.
Ready to build your first board?
📌 Save THIS PIN to your Board on Pinterest!
FAQ
1) What’s the difference between face, edge, and end grain?
Face = the wide face up (classic board look). Edge = the narrow edge up (tidy stripes). End = the fiber ends up (checkerboard/butcher-block).
2) Which type should I make first?
Start with face-grain (fastest), then edge-grain (great daily driver), and move to end-grain once your process feels smooth.
3) Which one is best for knives?
End-grain is the most knife-friendly (fibers part and “self-heal”). Edge-grain is next. Face-grain is fine, just shows marks sooner.
4) Do I need special tools or jigs?
You can start simple, but a Jointer Sled (straight edges), Router Flattening Sled (flat panels; mandatory for end-grain), Router Table (clean edges), and Sanding Block make everything easier and more repeatable.
5) Can I plane an end-grain board?
No—don’t plane end grain. Flatten with a router sled and shallow passes. Face/edge-grain can go through the planer with light, with-the-grain cuts.
6) What wood should I use for each type?
Stick to closed-grain hardwoods. Face/edge: maple, beech, walnut, cherry. End-grain: maple/beech for the field with walnut/cherry accents. (Full guide: Best Wood for Cutting Boards.)
