

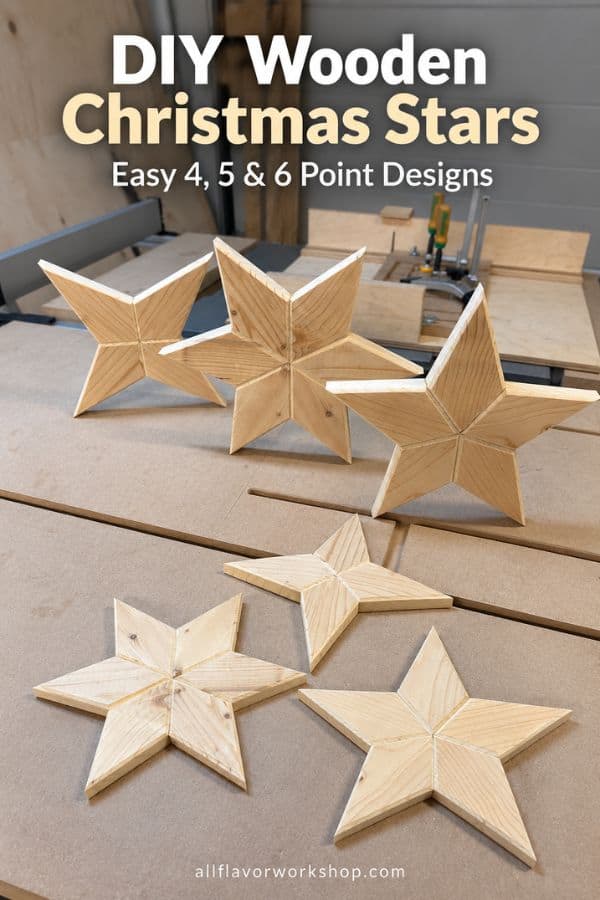
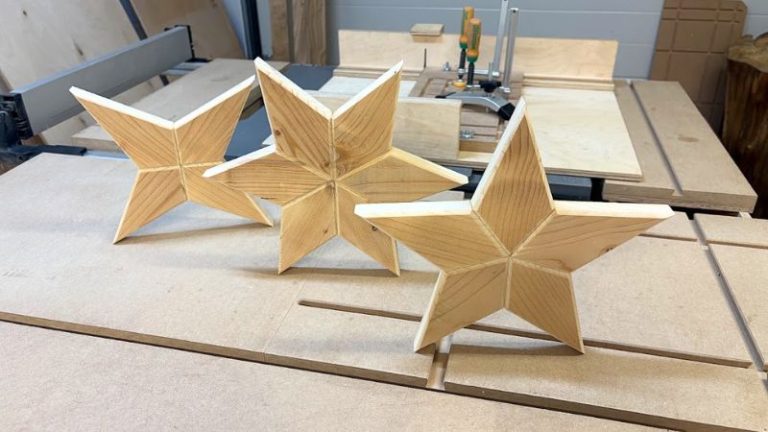
I wanted to make a few simple wooden stars for Christmas, but instead of cutting a star shape from a single board, I decided to build them from individual wooden pieces joined together in the center.
I made three versions:
- a 4-point star
- a 5-point star
- a 6-point star
All three are made from spruce. I did not use particularly expensive or perfect wood for these. My main goal was to work out the cutting process and, most importantly, get the angles right.
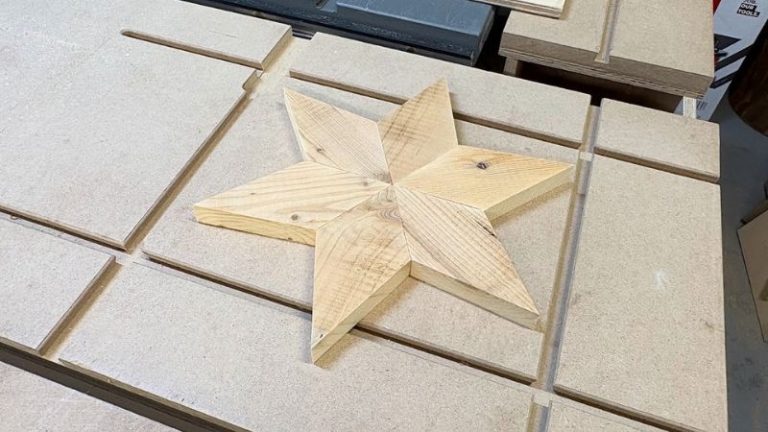
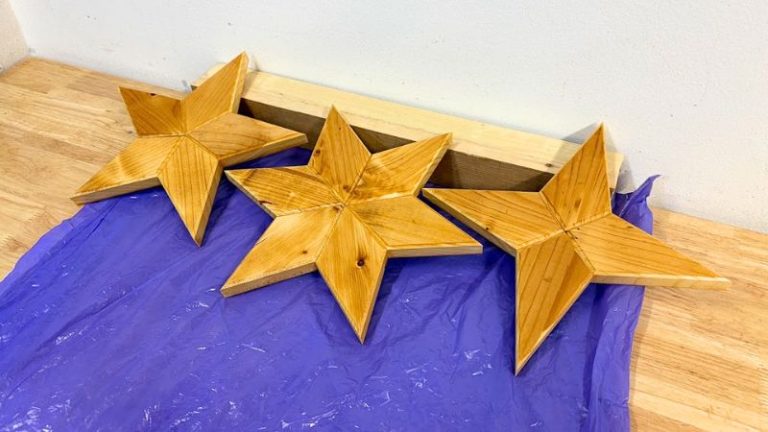
But I actually really like how the spruce turned out. The visible grain, a few knots, chamfered edges, and mineral-oil finish give the stars a natural, slightly rustic look that works really well as a Christmas decoration.
The process for all three stars is basically the same. What changes is the angle.
For the center of the star:
- 4-point star → 90° center angle → 45° cutting setup
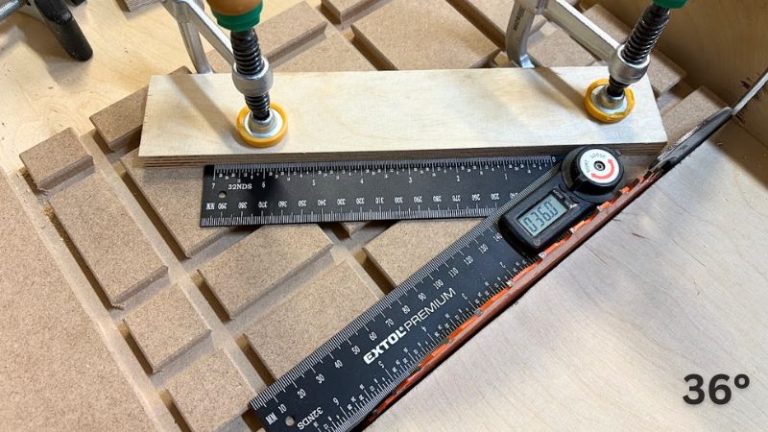
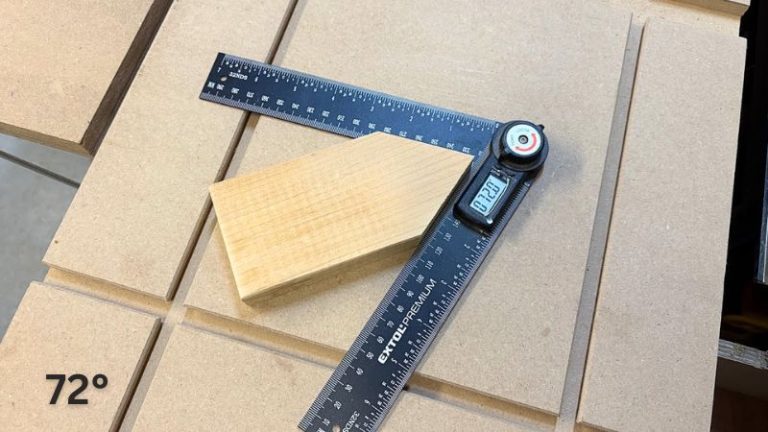
- 5-point star → 72° center angle → 36° cutting setup
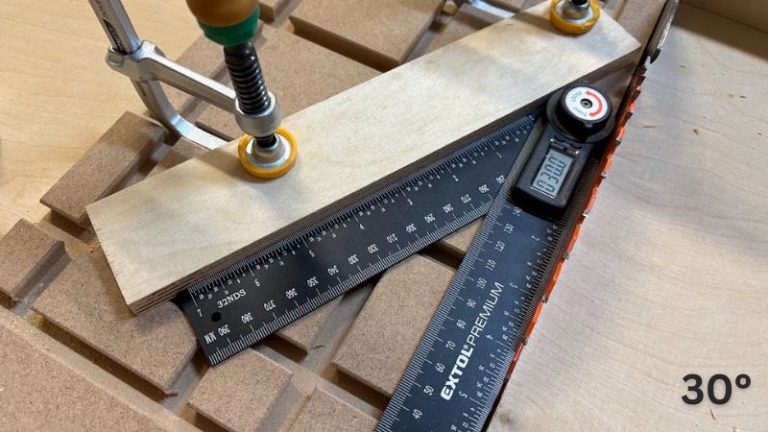
- 6-point star → 60° center angle → 30° cutting setup
Once that first setup is accurate, making several matching pieces becomes quite straightforward.
For these stars, I used my DIY Table Saw Angle Jig attached to my Table Saw Sled. It lets me lock smaller pieces at almost any angle and make repeatable cuts without holding the workpiece close to the blade.
Table of Contents
- Wooden Star Sizes and Angles
- Materials and Tools
- Why I Use a Table Saw
- Understanding the Two Cuts
- Let’s Start Building!
- Step 1: Prepare the Wooden Blanks
- Step 2: Set the Center Angle
- Step 3: Cut the Inner Point
- Step 4: Cut the Outer Star Point
- Step 5: Repeat for the 4, 5 & 6 Point Stars
- Make a 4-Point Wooden Star
- Make a 5-Point Wooden Star
- Make a 6-Point Wooden Star
- Step 6: Chamfer the Edges
- Step 7: Glue the Star Together
- Step 8: Sand and Finish
- How to Fix Gaps Between Star Pieces
- Can You Make Stars With More Points?
- Wrap-Up
- Frequently Asked Questions
*Safety is your responsibility. Make sure you know what you’re doing and take all necessary safety precautions while working with power tools. Safety comes first!
Wooden Star Sizes and Angles
I started every star with the same size wooden blanks:
150 × 75 × 19 mm (about 5-7/8 × 2-15/16 × 3/4 in)
The finished sizes are approximately:
| Star | Number of Pieces | Center Angle | Cutting Angle | Finished Size |
|---|---|---|---|---|
| 4 Point | 4 | 90° | 45° | 280 × 280 mm (about 11 × 11 in) |
| 5 Point | 5 | 72° | 36° | 250 × 260 mm (about 9-7/8 × 10-1/4 in) |
| 6 Point | 6 | 60° | 30° | 280 × 250 mm (about 11 × 9-7/8 in) |
The most important numbers here are the angles. The overall star size is much more flexible. You can make the blanks shorter, longer, narrower, or wider and still use the same basic method.
Materials and Tools
Tools
- Table saw – Link
- Table Saw Sled
- DIY Table Saw Angle Jig
- Router – Link
- Digital Angle Finder – Link
- MicroJig Matchfit – Link
- MicroJig Dovetail Clamps – Link
- Chamfer router bit – Link
- Table saw blade – Link
- Push block – Link
- One-hand clamps – Link
- Benchtop Router Table
- DIY Sanding Block
✅ Check all the tools I use here
As an Amazon Associate, I may earn from qualifying purchases at no extra cost to you.
📌 Save THIS PIN to your Board on Pinterest!
Why I Use a Table Saw
A lot of wooden stars are made with a miter saw. That certainly works.
For these stars, however, I prefer the table saw. The main reason is my Table Saw Angle Jig. It attaches to the table saw sled and lets me clamp the workpiece at almost any angle.
That gives me a stable platform where:
- the workpiece is locked in position
- the cutting angle can be set precisely
- a stop controls the position
- repeated pieces can be cut with the same setup
- my hands stay away from the blade
This becomes particularly useful with the smaller pieces used to make the stars. I also use small supporting angle jigs during the second set of cuts. These hold the already-cut point firmly and keep every workpiece in the same position.
For a broader comparison between the two tools, you can also see Miter Saw vs Table Saw.
Understanding the Two Cuts
Each wooden blank receives two sets of cuts. This is the easiest way to think about the process.
First Cut: The Center of the Star
The first two cuts create the inner point. These cut surfaces eventually meet in the middle of the assembled star. This is the part where accuracy matters most.
For example, with a 4-point star: 360° ÷ 4 = 90°
Each finished piece therefore needs a 90° inner point. Because that point is formed by two matching cuts: 90° ÷ 2 = 45°. So I position the workpiece at 45° to the blade.
The same principle gives us:
- 5 points → 360 ÷ 5 = 72° → 36° per side
- 6 points → 360 ÷ 6 = 60° → 30° per side
I will cover this calculation much more deeply in my separate article on wooden star angles, but these are the numbers you need to build these three stars.
Second Cut: The Outer Point
The second pair of cuts creates the visible outer point of the star. This part is more flexible. You do not need to calculate an exact star length unless you specifically want a precise final dimension.
I place the already-cut inner point into a matching support jig and visually position the opposite end so the blade creates the outer point where I want it.
Each finished component therefore has:
- one inner point forming the center
- one outer point forming the star tip
Let’s Start Building!
The actual process is almost identical for all three stars.
I recommend starting with the 4-point star. It uses the simplest angles and is a good way to understand the method before moving on to five and six points.
How To Make a Wooden Star
Step 1: Prepare the Wooden Blanks
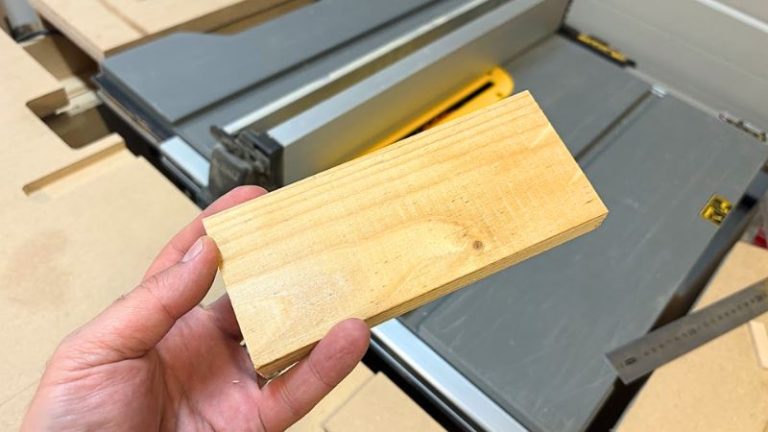
Start by preparing the blanks. Mine are: 150 × 75 × 19 mm (about 5-7/8 × 2-15/16 × 3/4 in)
Try to make them as consistent as possible. The blanks should be:
- straight
- flat
- square
- the same dimensions
This becomes more important than it might seem. A tiny difference between several pieces can eventually show up as a gap once everything meets in the center.
💡TIP: Prepare all the blanks at once using the same table saw setup. Consistent pieces make the later angle cuts much easier to repeat.
Step 2: Set the Center Angle
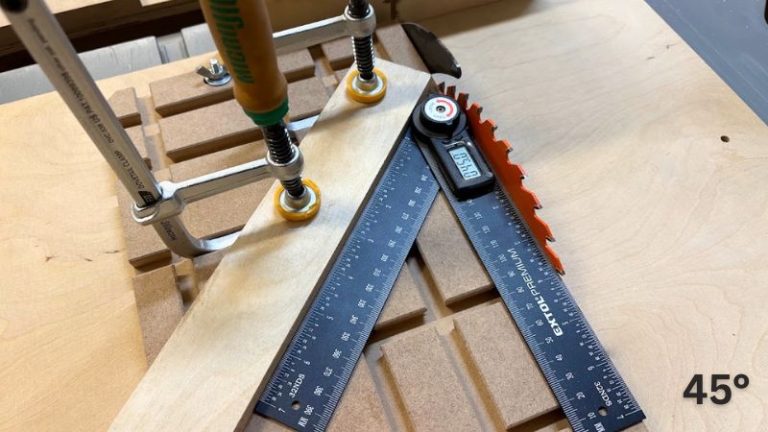
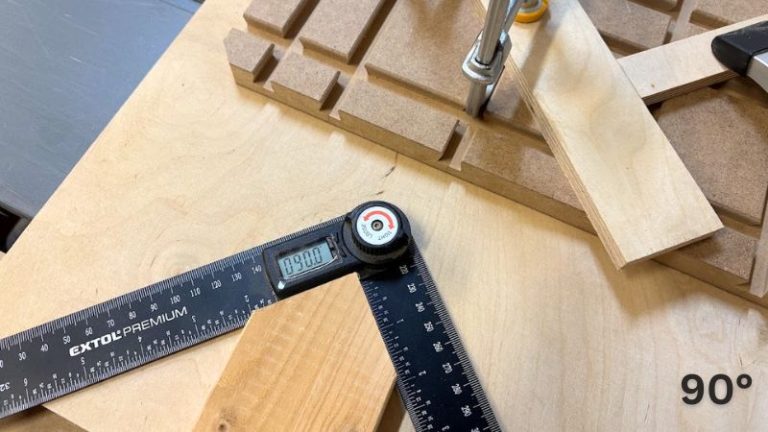
Mount the angle jig on the table saw sled. Then set a straight guide on the clamping matrix. For the 4-point star, I position the guide at 45° to the saw blade.
I use a digital angle finder for this. Once the guide is in the correct position, clamp it firmly to the jig.
Next I add a stop block at 90° to the guide. The stop determines how far the blank enters the blade and makes sure every component is cut in exactly the same position.
I position the cut approximately through the center of the blank. You can also move it slightly beyond the center depending on the proportions you want (this determines the overall length of the point).
NOTE: Once the angle and stop are set correctly, do not change the setup until every matching blank has been cut.
Step 3: Cut the Inner Point
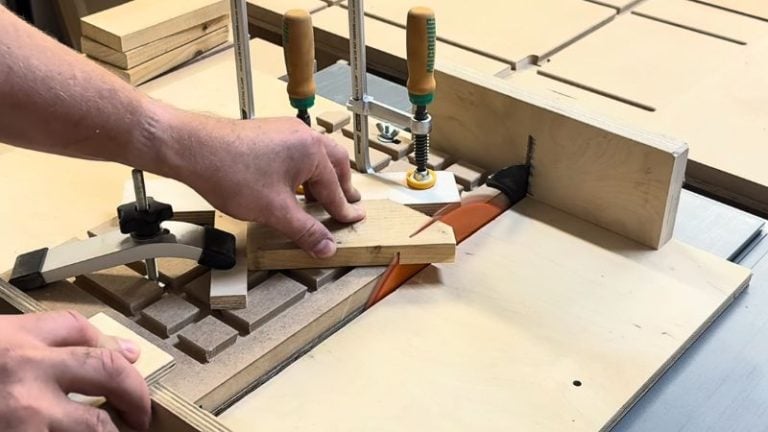
Place the blank against the angled guide and stop block. Secure it and make the first cut.
Then rotate the blank 180° while keeping the same end toward the blade. Place it back against the guide and stop block and make the second cut.
You now have a symmetrical point on one end. For the 4-point star, this point measures 90°. Repeat the exact process for all four blanks before changing anything.
This is one of the biggest advantages of using a fixed setup.Instead of trying to reproduce the angle individually on every component, I set the jig once and repeat the cut.
Step 4: Cut the Outer Star Point
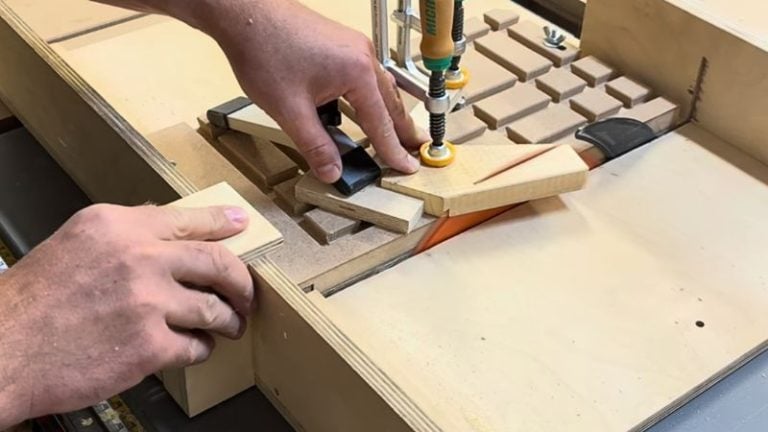
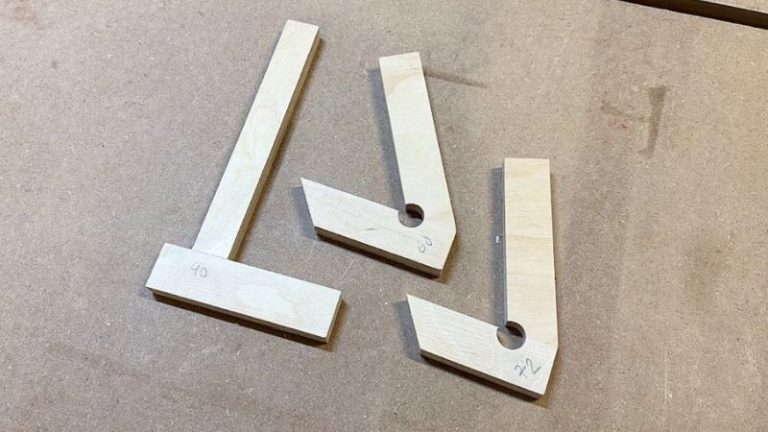
The opposite end becomes the visible star point. For these cuts, I use another small support jig. It consists of two pieces glued together at the same included angle as the inner point.
That means:
- 4-point star → 90° support jig
- 5-point star → 72° support jig
- 6-point star → 60° support jig
The previously cut point fits into this support and locks the component in position. Then I visually align the opposite end around the center of the blank and position the cutting line with the blade.
Make the first cut. Rotate the component 180°. Lock the point into the support jig again. Make the second cut.
You now have one complete star segment: one inner point + one outer point. (looks like a kite). Repeat the same setup for every matching component.
💡TIP: If you need an exact finished star size, mark the outer point beforehand. If the exact size does not matter, you can position it visually and simply keep the setup unchanged for every remaining piece.
Step 5: Repeat for the 4, 5 & 6 Point Stars
Once you understand the process, the other stars are simply variations of the same setup. The only important difference is the center angle.
How to Make a 4-Point Wooden Star
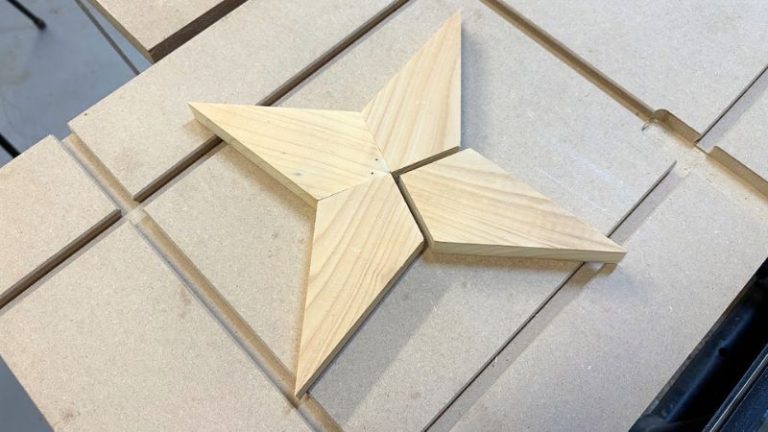
For the 4-point star, use four blanks. The center calculation is: 360° ÷ 4 = 90°. Each inner point therefore needs to be 90°. That means each side is cut at: 45°
I set the straight guide on my Any-Angle jig to 45°, add the stop, and cut both sides of all four components.
For the outer point, I use the 90° support jig. After all four pieces are complete, place their 90° inner points together. They should close around the center and form the full 360°.
My finished 4-point star measures approximately 280 × 280 mm (about 11 × 11 in).
How to Make a 5-Point Wooden Star
The 5-point star follows exactly the same process, but now I need five components. The center calculation is: 360° ÷ 5 = 72°. Each inner point therefore needs a 72° included angle. Each side is 36°. I position the guide at 36° to the blade and cut both sides of all five blanks.
For the outer cuts I use a support jig with a 72° opening. When all five pieces are brought together, the 72° inner points form the complete center.
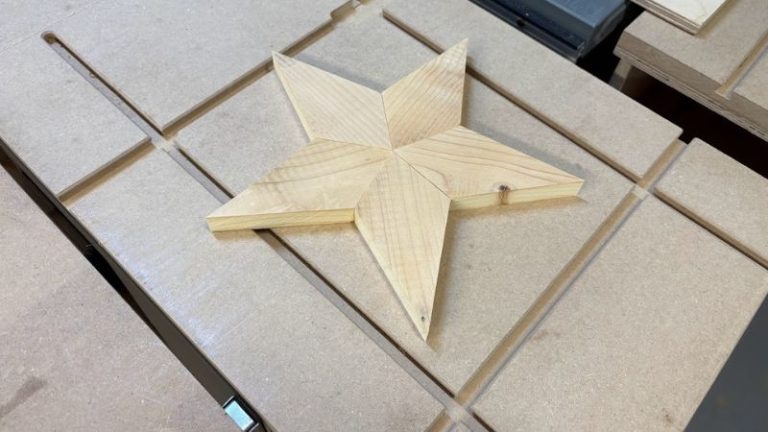
My finished 5-point star is approximately:
250 × 260 mm (about 9-7/8 × 10-1/4 in).
This star is slightly more demanding than the 4-point version because even small angle errors become easier to notice when five pieces meet in the middle.
How to Make a 6-Point Wooden Star
For the 6-point star, I use six blanks. The calculation is: 360° ÷ 6 = 60°. Each inner point is therefore 60°. Each side is cut at 30°. Set the guide to 30° and cut both sides of all six blanks without changing the setup.
Then use a 60° support jig for the outer-point cuts. My finished 6-point star measures approximately:
280 × 250 mm (about 11 × 9-7/8 in).
Because six components meet in the center, accuracy becomes especially important. A very small angle error repeated six times can create a noticeable gap by the time the last piece is installed.
Step 6: Chamfer the Edges
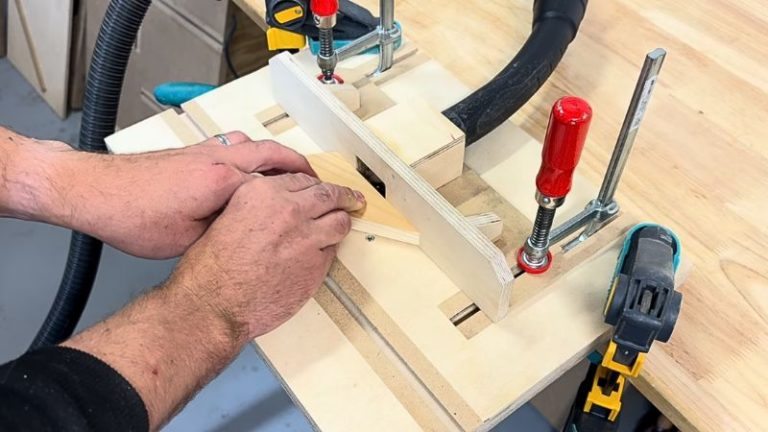
Once all the components are cut, I chamfer the visible edges. I use my Benchtop Router Table with a chamfer bit. This is not strictly necessary. You could leave the edges square.
But I think the chamfer makes a big visual difference. It gives each individual segment more definition and creates shadow lines between the pieces.
It also has another useful effect: small imperfections between the joints become much less noticeable. After routing, I clean up the edges and corners with my DIY Sanding Block.
💡TIP: Do not make the chamfer too aggressive. A small edge treatment is enough to separate the individual pieces visually without making the star look overly carved.
Step 7: Glue the Star Together
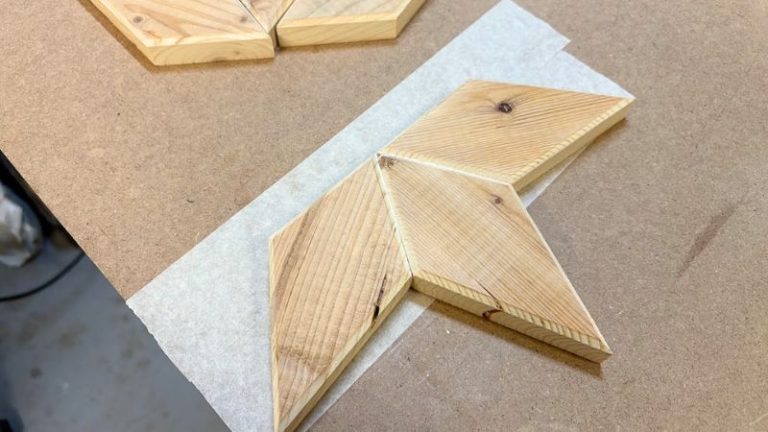
Now bring all the finished pieces together on a flat workbench. I put painter’s tape underneath the star before gluing. This catches glue squeeze-out and keeps the star from becoming glued to the bench.
Apply wood glue to the mating faces and carefully bring the pieces together. Pay particular attention to the center point. Everything should meet as evenly as possible.
- For the 4-point and 6-point stars, I found it easier to glue one half first and then the other half.
- For the 5-point star, I glued all five components together at once because this made it easier to fine-tune the center alignment.
I used glue only. If you wanted extra reinforcement, small screws could be added from the back, but I did not find that necessary for these decorative stars.
NOTE: Clean glue squeeze-out from the chamfers before it fully hardens. Dried glue inside those small V-shaped joints is much more difficult to remove later. Allow the glue to dry fully before sanding.
Step 8: Sand and Finish
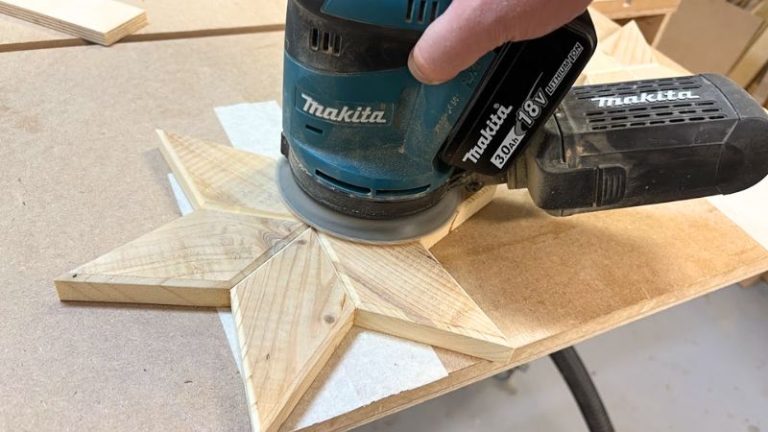
Once the glue is dry, sand the entire star. I use my DIY Sanding Block for the final cleanup. Pay attention to the center, chamfers, and transitions between individual pieces.
For the finish, I used some Clark’s oil I had left over from my cutting board projects. A simple mineral oil is enough here.
The oil slightly darkens the spruce and makes the grain and knots stand out much more clearly. That is actually one of the things I like most about these stars. The inexpensive spruce gives them a very natural, rustic Christmas decoration look.
How to Fix Gaps Between Star Pieces
This is probably the most useful thing I learned while making these. Ideally, all the pieces should close perfectly in the center. But the geometry is unforgiving.
If the gaps are large, your angles are probably wrong. In that case, I would not try to hide them. Correct the jig setup and recut the pieces.
But if you only have a few tiny gaps, there are several ways to improve the result.
1. Adjust the Joint With Sandpaper
Before gluing the pieces together, inspect where the pieces touch. Slowly sand the mating surface in the area preventing the joint from closing. Do this gradually. Sand a little, then test the fit, and sand again if necessary.
Be careful; it is very easy to remove too much material.
2. Chamfer the Edges
The chamfer does more than make the star look better. It creates a deliberate visual break between the pieces. That makes tiny inconsistencies much less obvious.
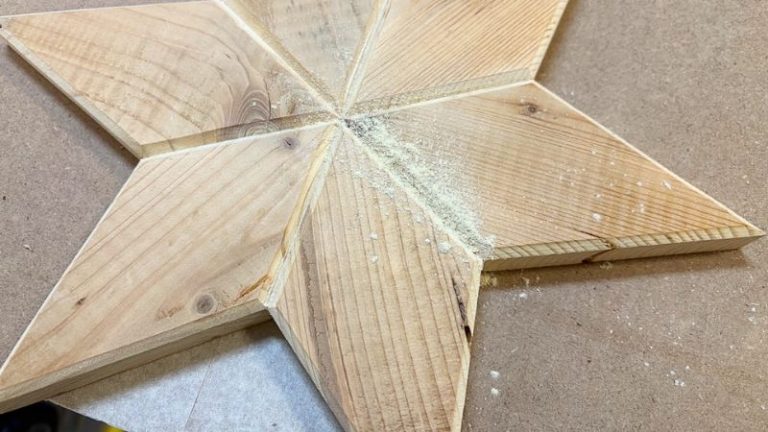
3. Use Sawdust and Glue
For very small gaps, mix fine sawdust from the same wood with a little wood glue. Press the mixture into the gap. Once dry, sand it flush. (Using sawdust from the same wood gives you a closer color match.)
💡TIP: These tricks are for small imperfections. They cannot compensate for an incorrect cutting angle.
Can You Make Stars With More Points?
Yes. That is one of the nice things about this method. The basic principle does not change. You could make:
- 7-point stars
- 8-point stars
- 10-point stars
- larger decorative stars
- small Christmas ornaments
What changes is the angle of the inner point. The general idea is: divide 360° by the number of star points. Then divide that result in half to get the symmetrical cutting angle for each side of the point.
I will cover the full calculation, diagrams, and additional point counts in my separate Wooden Star Angles guide. Once you understand that relationship, you are not really limited to the three designs I made here.
Wrap-Up
I originally made these stars mainly because I wanted to figure out a reliable way to cut the angles accurately and repeat the process. The finished decorations turned out better than I expected.
Spruce is nothing particularly fancy, but the grain, knots, chamfered edges, and oil finish give the stars a natural rustic character that fits Christmas really well.
And once the jig is set correctly, making different stars becomes surprisingly straightforward. The process stays almost exactly the same:
set the angle → cut the center → cut the outer point → repeat → chamfer → glue → finish.
The 4-point star is probably the easiest place to start, and from there you can move to five, six, or even more points using the same principle.
The Table Saw Angle Jig made this project much easier for me because I can lock the smaller pieces at the exact angle I need while keeping the setup stable and repeatable.
I am also working on detailed plans and templates for these wooden stars, which I plan to make available later.
Frequently Asked Questions
What angle do you cut a 4-point wooden star?
For a symmetrical 4-point star, the four inner points need to fill 360°. Each piece therefore has a 90° center point. I make that point using two 45° cuts.
What angle do you cut a 5-point wooden star?
A 5-point star needs five 72° inner points because 360° divided by 5 equals 72°. Each side of the symmetrical point is therefore cut at 36°.
What angle do you cut a 6-point wooden star?
For a 6-point star, divide 360° by 6 to get a 60° inner point. Each side of that point is cut at 30°.
What wood is good for making wooden Christmas stars?
I used spruce because it is inexpensive, easy to work with, and has visible grain and knots that give the finished stars a rustic appearance. Many other softwoods and hardwoods would work as well.
Can I make wooden stars with a table saw?
Yes. I made all three stars on a table saw using a sled and an adjustable angle jig. The setup allows the small workpieces to be clamped securely while making repeatable angled cuts.
How do I fix small gaps in a wooden star?
Small gaps can often be reduced by carefully sanding the mating surfaces, chamfering the visible edges, or filling tiny gaps with a mixture of fine sawdust and wood glue. Large gaps usually indicate that the cutting angles need to be corrected.
