I add rubber feet to my cutting boards almost every time. It’s one of those “small details” that changes how the board feels in daily use — and it also makes the final piece look more finished.
The first reason is grip and handling. A board with feet sits slightly elevated, and combined with side handles it’s just easier to grab, lift, and move around. I really don’t like when a board sits flat on the countertop. Even with handles, it can be awkward to pick up — and if there’s a bit of water or liquid on the counter, the board can almost “stick” to the surface. It feels messy and annoying fast.
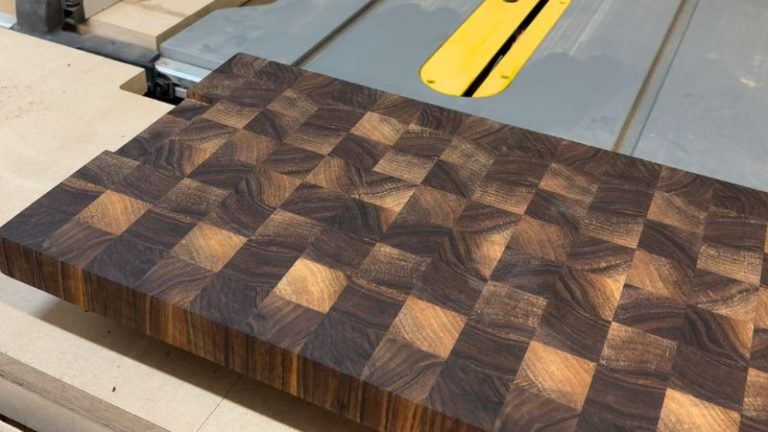
The second reason is the professional look. If you spend time building a thick, nice-looking board (especially an end grain board with all the features), rubber feet are that final touch that makes it look like a proper premium kitchen tool.
And there’s a practical bonus too: feet create airflow under the board. That helps with drying, keeps the underside cleaner, and reduces the chance of moisture sitting under the wood (which can lead to smells, mold, or warping over time).
💡If you’re building more cutting boards and want a repeatable workflow, check out my roundup: Best Jigs for Making Cutting Boards.
Quick Answer (Should You Add Cutting Board Feet?)
Add feet if you want better grip, easier handling, airflow underneath the board, and a more professional look. Feet also help keep the board from “sticking” to a wet countertop and make it easier to pick up.
Skip feet if you’re making a serving board (used on both sides), a small board where feet look awkward, or anything with an uneven underside (like live edge boards) where getting an even layout is hard.
🔗If you’re choosing between face, edge, and end grain boards (and how each behaves in the kitchen), see: Face vs. Edge vs. End Grain: Which Cutting Board Should You Make?
Table of Contents
- Quick Answer (Should You Add Cutting Board Feet?)
- Cutting Board Feet vs No Feet (Grip, Hygiene, Airflow)
- Grip and Safety
- Hygiene and Moisture
- Airflow and Drying
- When I Don’t Use Feet
- How to Install Rubber Feet on a Cutting Board (Step-by-Step)
Step 1: Mark the Foot Positions
Step 2: Predrill the Holes
Step 3: Install the Feet
Step 4: Check Stability (Fix Rocking if Needed) - Common Mistakes When Adding Rubber Feet (And Quick Fixes)
- Wrap-Up
- FAQs: Cutting Board Feet vs No Feet
📌 Save THIS PIN to your Board on Pinterest!
Cutting Board Feet vs No Feet (Grip, Hygiene, Airflow)
Here’s the quick side-by-side comparison so you can decide in 10 seconds whether feet make sense for your board.
| Feature | With Rubber Feet | No Feet | My take |
|---|---|---|---|
| Grip & stability | More grip on the counter, less sliding during prep. | Can slide more (especially on smooth counters). | Feet for daily-use cutting boards. |
| Ease of picking up | Elevated board is easier to grab (especially with handles). | Can feel “stuck” flat on the counter, harder to lift. | Feet make a big difference here. |
| Water on the countertop | Board stays lifted; less chance of sticking to a wet surface. | Can suction/stick slightly when there’s moisture underneath. | Feet win for everyday kitchen mess. |
| Airflow & drying | Air can move underneath; underside dries more evenly. | Underside can stay damp longer if left flat. | Feet help long-term. |
| Hygiene | Less moisture trapped underneath; easier to keep the underside clean. | If left on a wet counter, moisture can sit underneath longer. | Feet are cleaner in real use. |
| Warping risk | Less risk of “damp underside” if the board is left out after washing. | Higher risk if one side stays wet longer than the other. | Feet reduce the risk. |
| Reversible use | Not really reversible (feet dictate the “bottom”). | Fully reversible — both sides usable. | No feet for serving boards. |
| Looks / “premium” feel | More finished, professional look (especially on thick boards). | Clean and simple, but can feel more basic. | Feet elevate the final look. |
| Layout challenges | Needs clean placement and a flat underside. | No hardware or layout needed. | No feet for live edge / uneven bottoms. |
| Best use | Kitchen cutting boards (prep work, moisture, daily use). | Serving boards (cheese, crackers), small boards, reversible boards. | Feet for cutting, no feet for serving. |
Grip and Safety
Rubber feet do two things at once: they add grip, and they make the board easier to handle because it’s slightly elevated. Combined with routed handles, that small lift makes a big difference — the board doesn’t “stick” to the countertop and you can grab it without fighting it.
The bigger safety benefit is what happens over time. Even a well-made board can move a little with seasonal changes. If it twists slightly, one corner lifts and the board starts to rock. In the worst case, both ends lift a bit and the board can actually rotate around its center while chopping. That’s not just frustrating — it’s unsafe.
Feet help prevent that annoying movement, and they also make it easier to fix. If a board twists a little later on, you can often stabilize it by adding a tiny washer under one foot (instead of resurfacing the whole board).
💡 See it in action: Here’s one of my end grain builds where I always use feet: Chaotic End Grain Cutting Board.

Hygiene and Moisture
The hygiene side is pretty simple: feet help keep the underside of the board cleaner and drier.
When a board sits flat on a countertop, any water underneath can get trapped, and the board can stick to the surface. With feet, there’s separation — so water doesn’t pool under the board as easily, and you get a cleaner setup in real kitchen use.
This matters even more for end grain boards. End grain can absorb moisture faster, so anything that helps the board dry evenly (top and bottom) is a win for long-term stability.
Airflow and Drying
Feet create airflow under the board, which helps it dry more evenly — especially after washing.
That sounds like a small thing, but it matters. If the bottom of the board stays damp longer than the top, you’re more likely to see movement over time. Feet don’t magically prevent warping, but they do help reduce the “wet underside” problem and keep the board in a healthier environment.
And again — this is extra useful on thicker boards and end grain boards, where drying takes longer.
💡 Want a full start-to-finish workflow for making boards that stay flat? Check out: Tips for Making Cutting Boards (Face, Edge & End Grain).

When I Don’t Use Feet
For most cutting boards, I add feet almost every time. But there are a few cases where I skip them.
I usually don’t use feet on:
Serving boards (because I like them reversible, and they don’t see much liquid)
Very small boards (feet can look awkward and the layout can feel cramped)
Thin boards meant for drawer storage (feet don’t really fit the purpose)
Live edge / uneven bottoms where getting four feet perfectly aligned is difficult
In those cases, I prefer the board to sit flat, stay simple, and work nicely on both sides.
How to Install Rubber Feet on a Cutting Board (Step-by-Step)
1. What is a ruler marking gauge (and why it helps)?
A ruler marking gauge is basically a layout tool that lets you set an exact offset and then mark consistent lines from an edge. For rubber feet, it’s perfect: once you set it, you can mark every corner quickly, cleanly, and repeatably — no guessing, no measuring each corner separately, and your feet end up perfectly aligned.
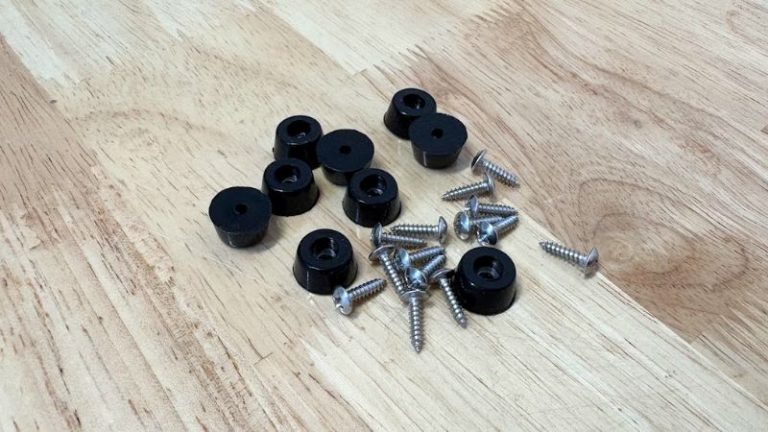
2. Hardware I use (sizes)
I typically use rubber feet around 15–20 mm in diameter and 8–13 mm tall (roughly 0.6″–0.8″ wide and 0.3″–0.5″ tall). That size is wide enough to grip, and tall enough that you can easily get your fingers under the board. For screws, I use M2, M4 × 12, 16 mm.
💡 If you want to make the exact ruler marking gauge I use (and mark feet perfectly every time), check out my Ruler Marking Gauge Jig build — I also have plans for it.
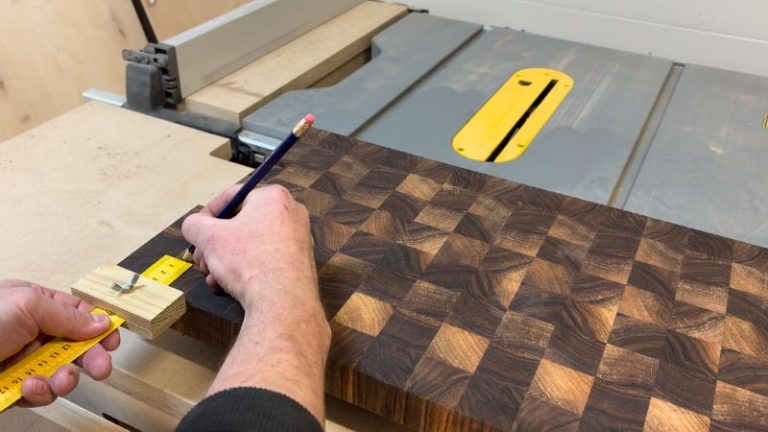
Step 1: Mark the foot positions
Start by deciding how far from the edges you want the feet. I usually place them about 20–40 mm from the edges, depending on board size (bigger boards = slightly further in).
One important rule: don’t go closer than 15 mm from the edge — if the screw is too close, you increase the chance of splitting.
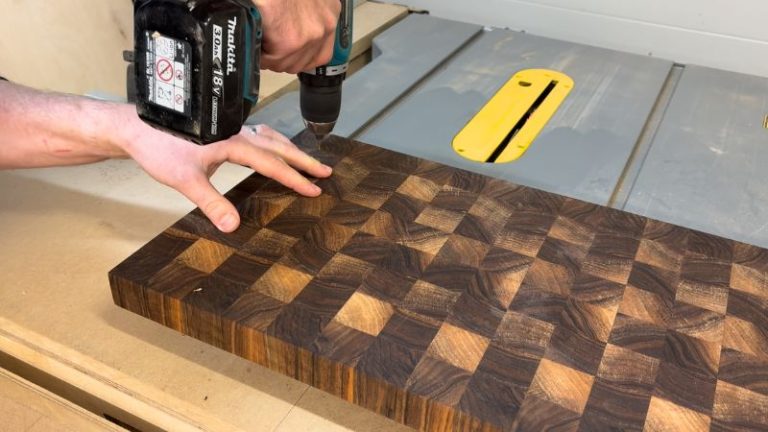
Step 2: Predrill the holes
Predrill shallow holes for your screw size. This step matters — screws can crack the board if you drive them into hardwood without a pilot hole.
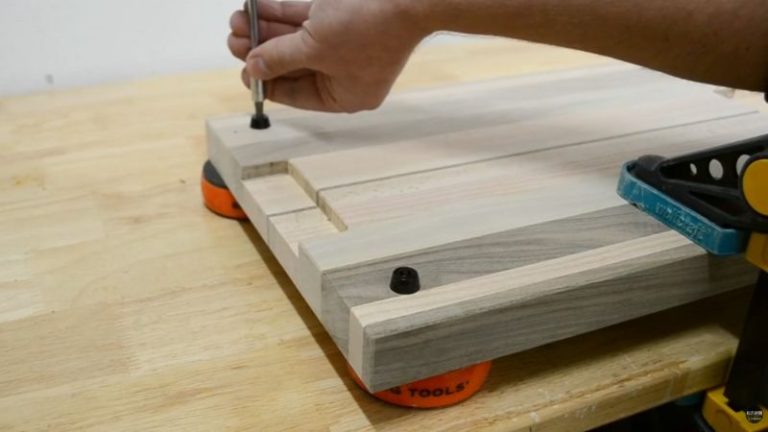
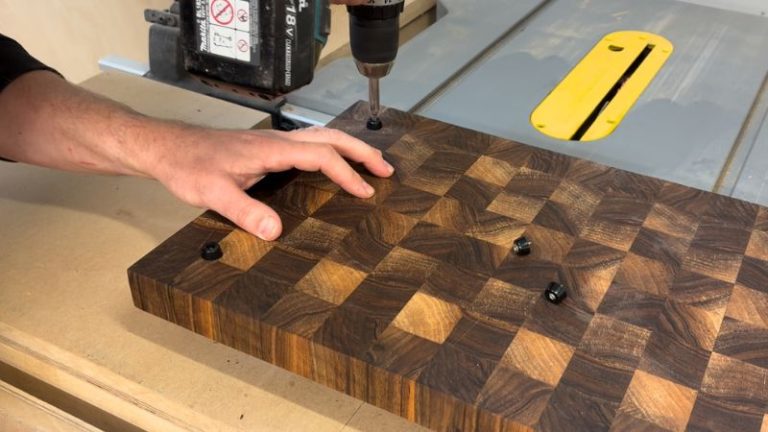
Step 3: Install the feet
Screw the feet in firmly, but don’t overtighten. You want them secure, not crushed.
Step 4: Check stability (and fix rocking if needed)
Put the board on a flat countertop and test it. If it doesn’t rock, you’re done.
If it rocks, find which corner is high/low and add a thin washer between the foot and the board to level it out.
Common Mistakes When Adding Rubber Feet (And Quick Fixes)
Most problems with cutting board feet come down to placement, predrilling, and leveling — here’s how to fix them fast.
| Mistake / Problem | What happens | Quick fix | How to prevent it |
|---|---|---|---|
| Feet placed too close to the edge | Higher chance of splitting, weak bite for the screw. | Move the feet inward and re-drill; plug old holes if needed. | Keep feet at least 15 mm from any edge. |
| Feet too far in (unstable corners) | Board can still feel “tippy” near the corners when chopping. | Reposition feet slightly closer to the corners. | Use a balanced layout: typically 20–40 mm from edges depending on board size. |
| No predrilling | Screw can crack the wood or force the foot to sit crooked. | Back the screw out and predrill properly, then reinstall. | Always predrill shallow pilot holes for your screw size. |
| Overtightening the screws | Feet can deform, sit uneven, or lose grip over time. | Loosen slightly and re-seat the foot flat. | Tighten firmly, but stop as soon as the foot is snug. |
| Board rocks after installing feet | The board wobbles on the counter and feels annoying (and unsafe). | Find the rocking corner and add a thin washer under one foot to level it. | Test on a flat countertop before calling it done; keep a few thin washers in the shop. |
| Uneven layout (feet not symmetrical) | Board looks “off” and can feel unbalanced when moving it. | Re-mark using a gauge, then reposition the feet. | Use a ruler marking gauge so all offsets match exactly. |
| Wrong foot size for the board | Small feet can slip; tall feet can feel awkward or look odd on small boards. | Swap to a more suitable size (wider for grip, lower for small boards). | For most cutting boards, ~15–20 mm wide and 8–13 mm tall is a good range. |
| Screws too long | Risk of poking through the top (worst case) or weakening the board. | Replace with shorter screws immediately. | Match screw length to board thickness; M4 × 16 mm works well for many boards but always double-check. |
Wrap-Up
For most cutting boards that live on a kitchen counter, I strongly prefer rubber feet. They simply work: better grip, easier handling, cleaner drying underneath, and they give the board that little extra “premium” feel. And if the board ever twists just a tiny bit over time, feet make it easy to level it again without resurfacing.
What I can’t stand is working on a board that isn’t stable — rocking or slowly turning while you chop. It’s frustrating at best, and honestly, it can get dangerous.
The best part is that installing feet doesn’t take much time. With a ruler marking gauge, you can mark the positions in seconds, then it’s just predrill and screw them in.
💡 If you want the jigs I use for cutting boards (including the ruler marking gauge), check out Best Jigs for Making Cutting Boards. And if you want to see a full build from start to finish — including installing the feet — here’s my complete guide: Walnut DIY End Grain Cutting Board: Complete Step-by-Step Build Guide.
FAQ
1) Should a cutting board have rubber feet?
For most kitchen cutting boards, yes. Rubber feet improve grip, make the board easier to pick up, and help the underside dry by creating airflow. If you want a board that stays stable during prep, feet are a solid upgrade.
2) Do rubber feet make a cutting board more hygienic?
They can. Feet lift the board off the counter so moisture is less likely to sit trapped underneath. That helps the underside dry faster and keeps the “wet countertop” situation from turning into a damp, messy underside.
3) When should you skip feet on a board?
I usually skip feet on serving boards (because I want them reversible), very small boards, thin boards meant for drawer storage, and boards with an uneven underside (like some live edge boards) where feet are hard to align cleanly.
4) Where should rubber feet be placed on a cutting board?
A good starting point is near the corners, typically about 20–40 mm from the edges, depending on board size. I also avoid going closer than 15 mm to the edge to reduce the risk of splitting.
5) What screws should I use for cutting board rubber feet?
It depends on your board thickness, but I commonly use M2 (M4) × 16 mm screws with feet around 15–20 mm diameter and 8–13 mm tall. Always predrill pilot holes and confirm the screw length won’t come through the top.
