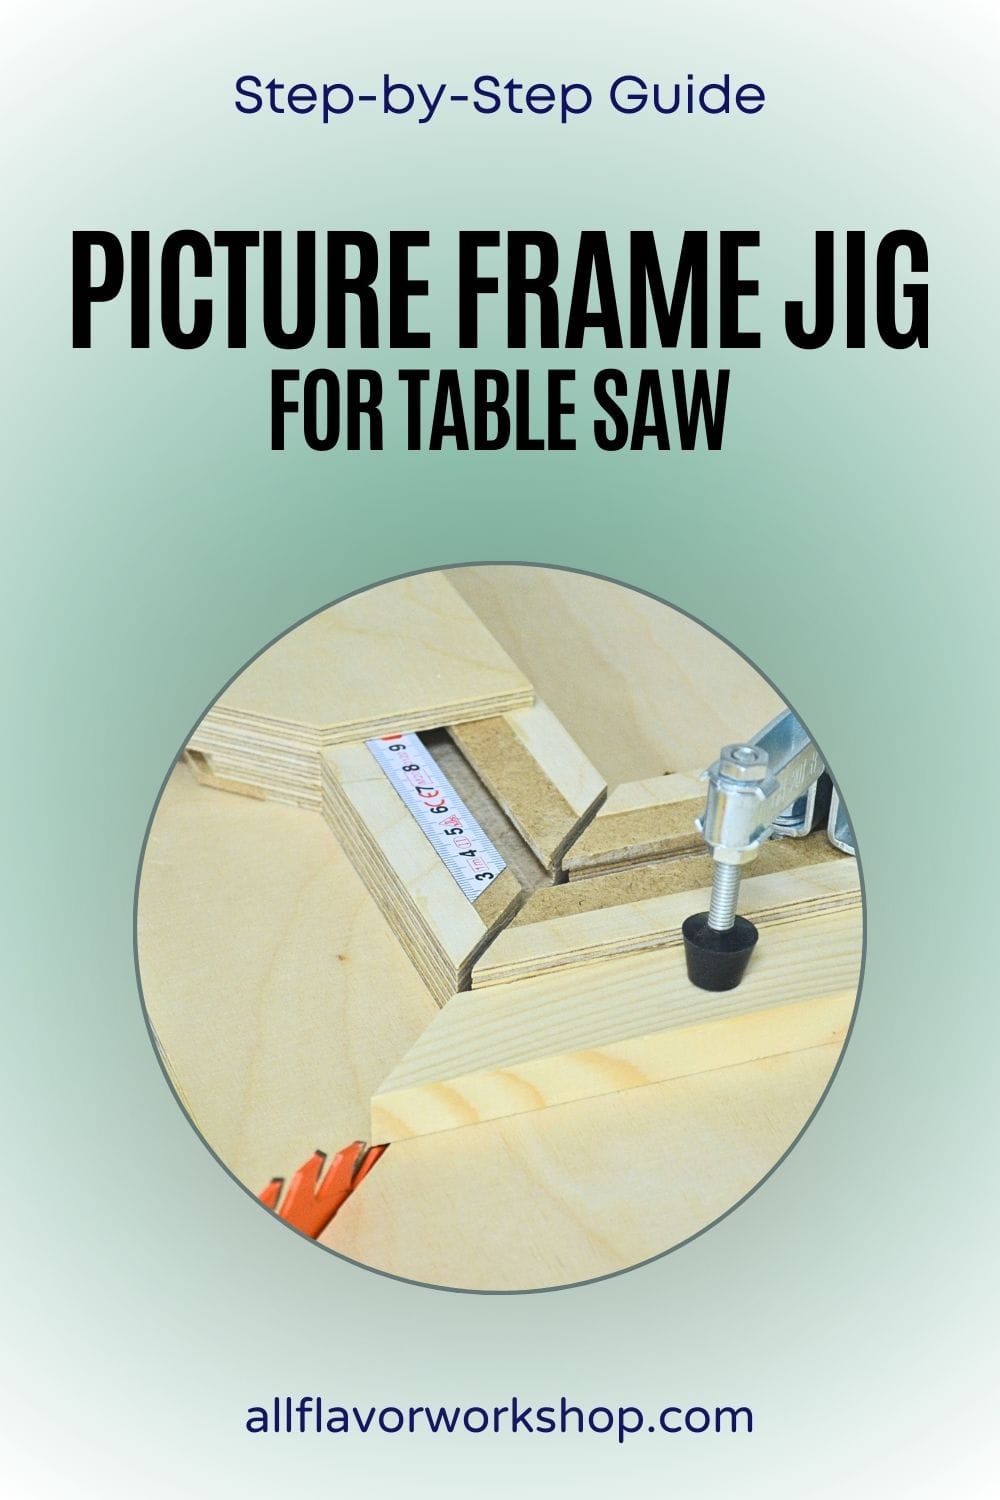
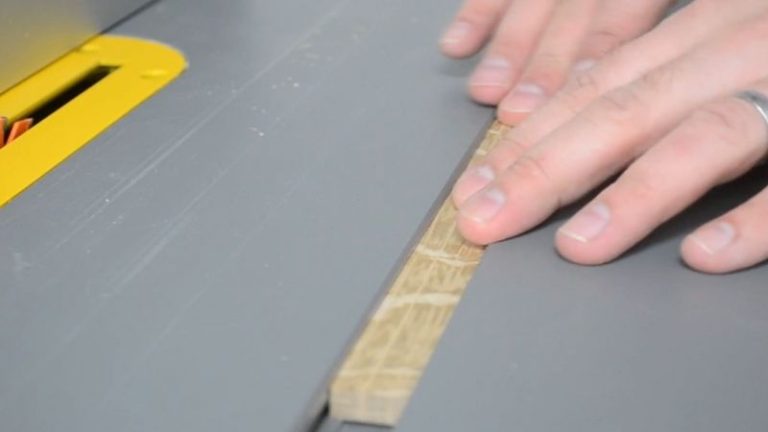
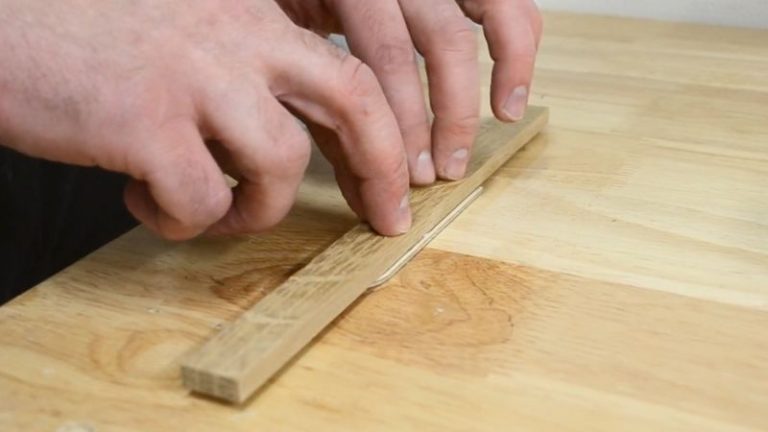
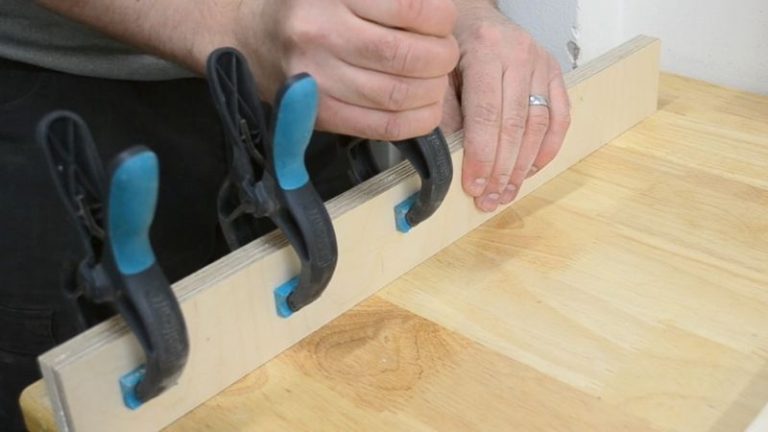
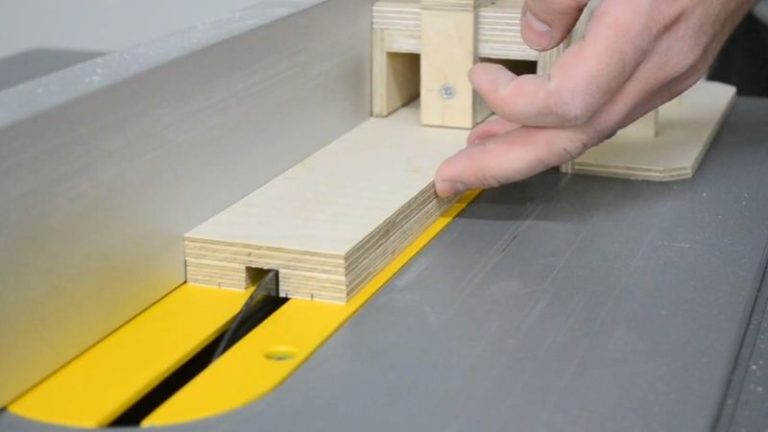
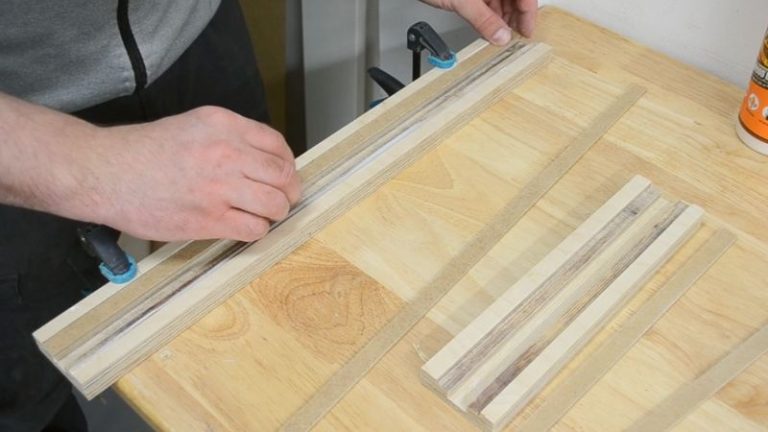
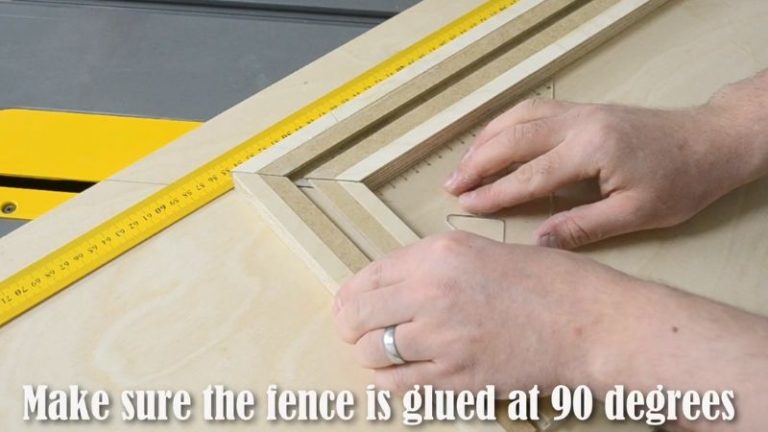
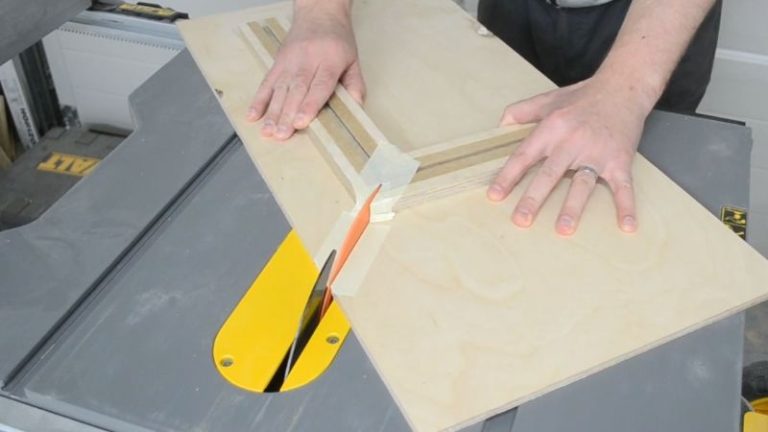
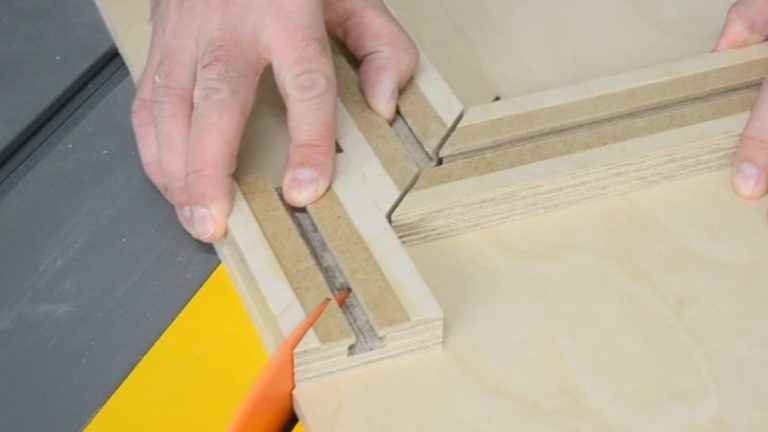
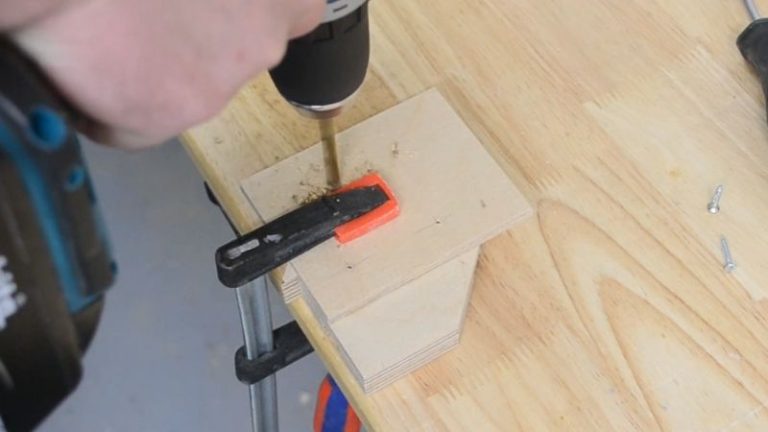
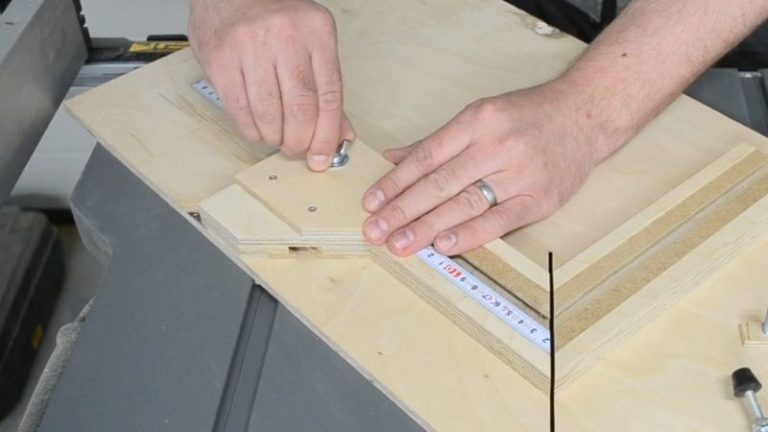
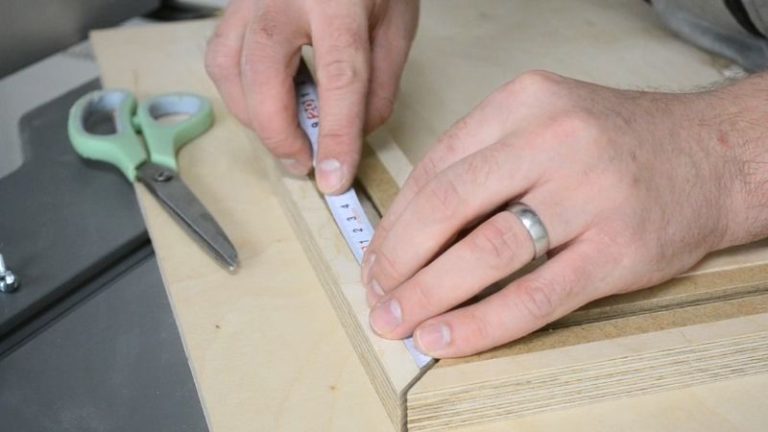
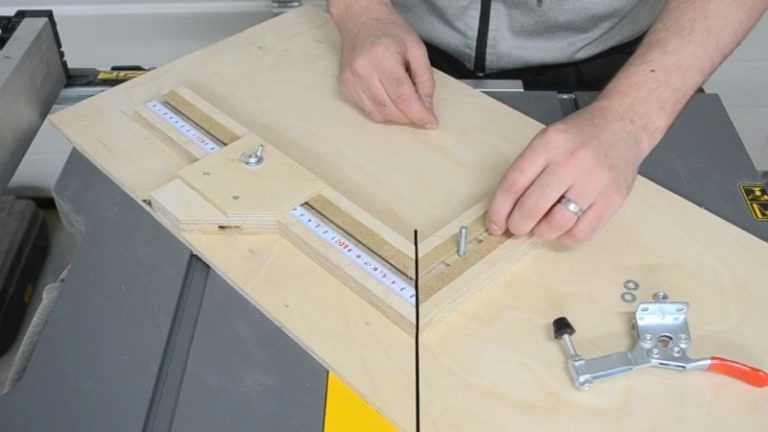
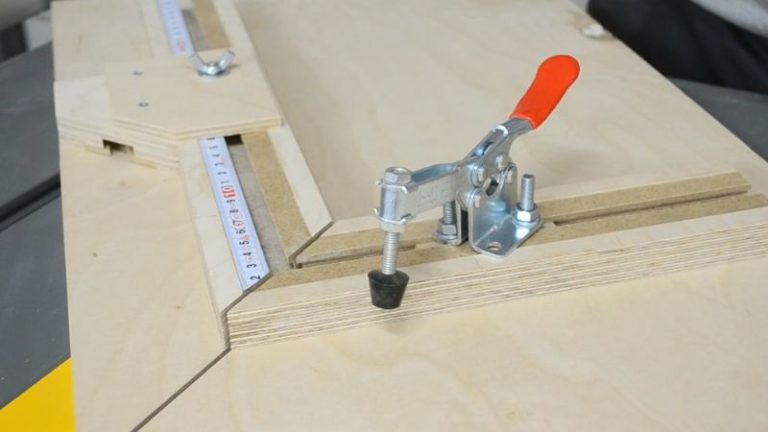
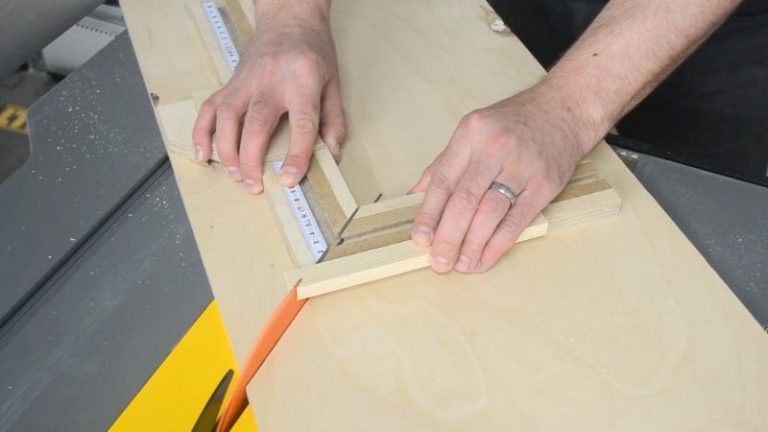
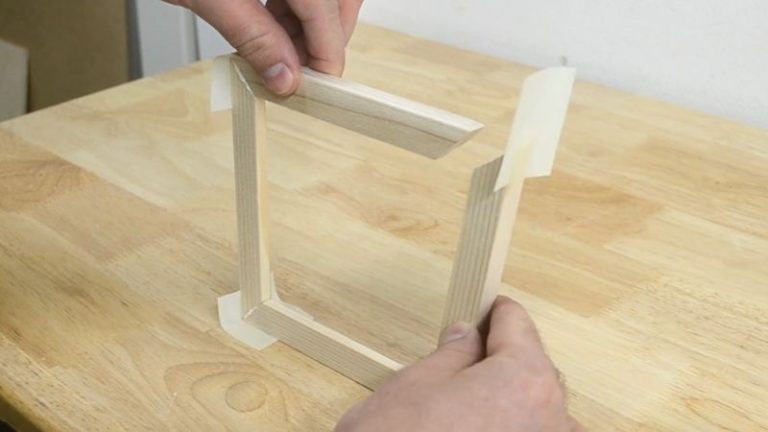
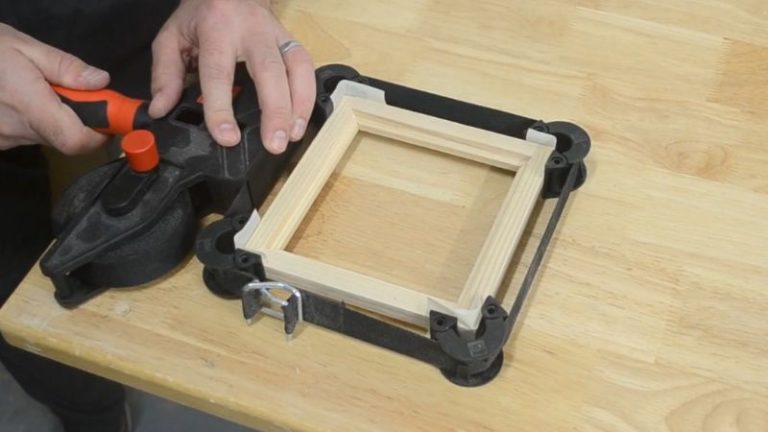
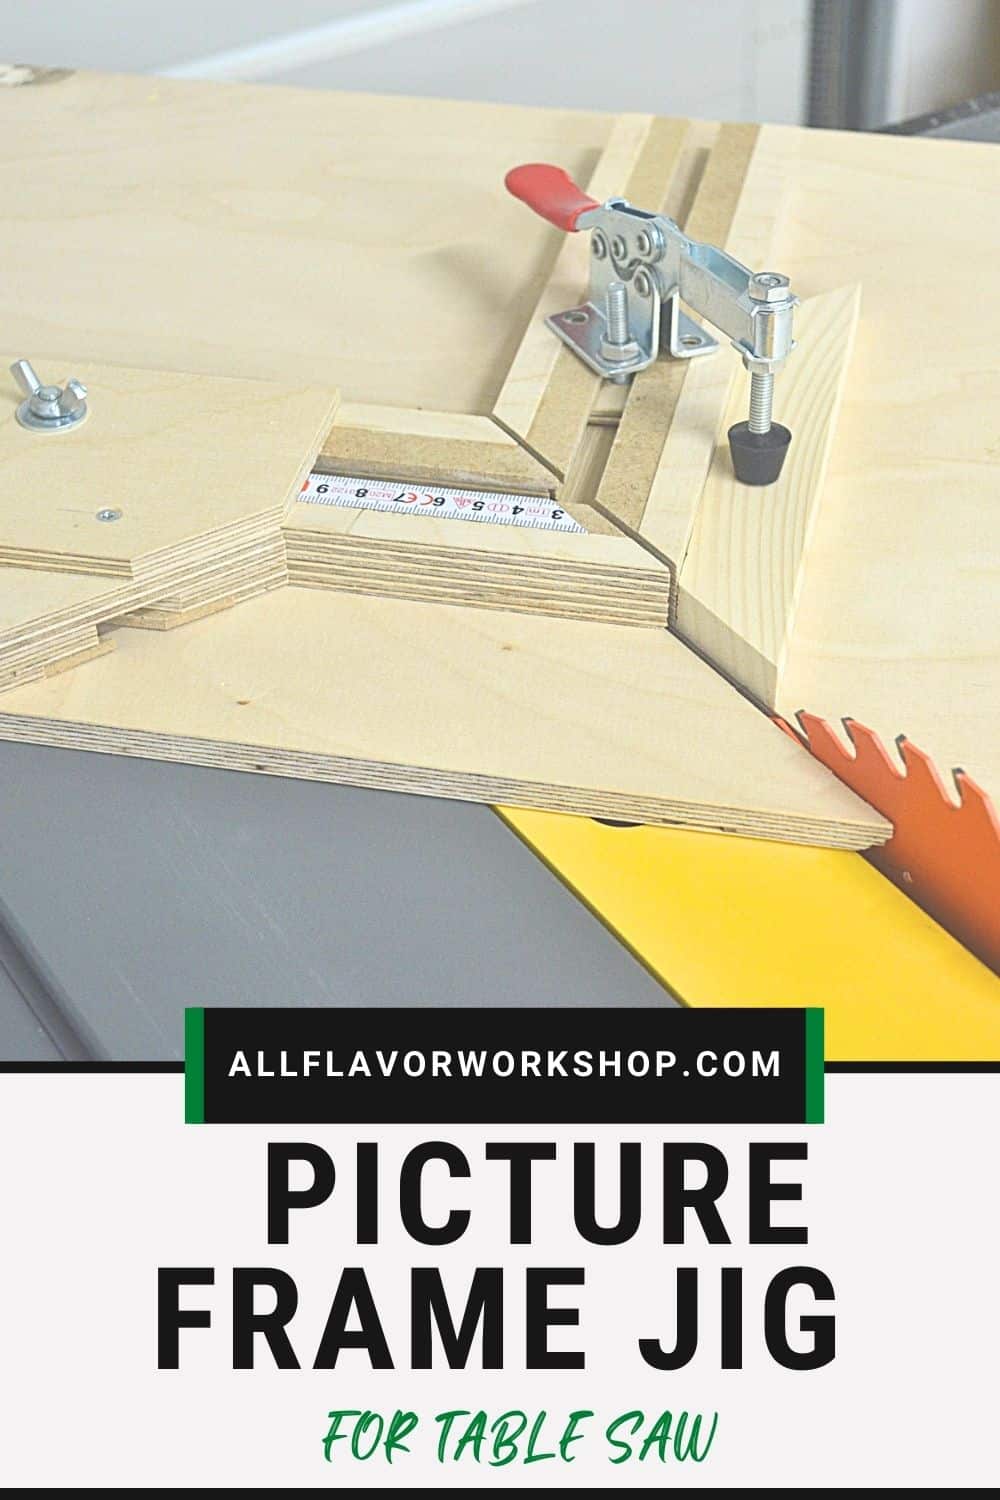
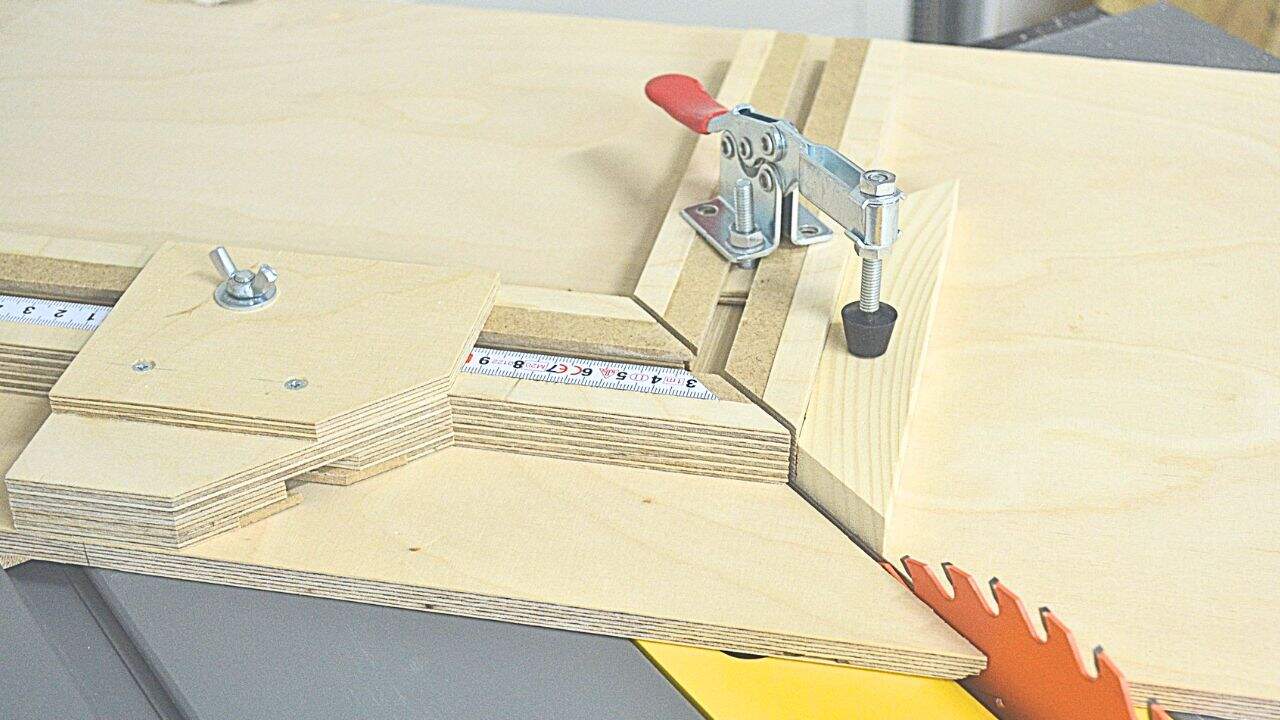
Getting perfect 45° corners on picture frames sounds simple… until you glue everything up and see tiny gaps in the corners. Cutting one side a hair long, measuring from the wrong reference, or bumping your miter gauge can all throw the frame off. That’s why I built a dedicated picture frame jig for the table saw (miter sled) —a jig made specifically for matching miters.
In this build, I’ll show you how I made a full-size picture frame sled with two perpendicular fences (for short and long sides), an adjustable stop block, and a self-adhesive ruler for precise lengths. Once the stop block is set, you can cut frame parts over and over, and they’ll all come out the same size. Both fences have T-tracks, so you can slide the stop block, add hold-down clamps, or add other small accessories.
The jig is built from Baltic birch plywood and MDF, with an oak miter bar underneath that rides in the table saw’s miter slot. The base is about 350 × 700 mm (roughly 13 ¾” × 27 ½”), which gives plenty of support for mid-size/ larger frames. I also have a smaller miter add-on for my main sled, but that one is for quick 45° cuts—this picture frame jig is what I use when I want precise, measured frames.
👉 If you enjoy building accessories for your saw, have a look at my Best Table Saw Jigs for Your Workshop to see how this picture frame jig fits into the bigger jig setup.
Video: Watch the Build
Here’s the full build of the table saw picture frame jig so you can see exactly how the base, fences, stop block, and scale come together before we jump into the step-by-step photos.
I appreciate every YouTube subscriber. It’s free and easy to subscribe to — Click Here To Subscribe. Thank you!
Table of Contents
- Video: Watch the Build
- Tools and Materials
- Why Build a Picture Frame Jig for the Table Saw?
- Let’s Start Building!
Step 1: Building the Picture Frame Jig Base
Step 2: Making and Attaching the Fences
Step 3: Making the Stop Block
Step 4: Finishing the Picture Frame Jig — Scale and Hold-Down Clamp - A Quick Note on Ruler Placement and Rabbet Length
- Setting Up the Picture Frame Jig (and Cutting Your First Frame)
- Wrap-Up: Why I Like This Picture Frame Jig
- FAQs: Picture Frame Jig for the Table Saw
Tools and Materials
This picture frame jig is built mostly from Baltic birch plywood, MDF, and a few hardware pieces.
Here’s what I used in my shop (some of these are affiliate links, which help support my work at no extra cost to you):
Tools:
- Table Saw – link
- Hand Drill – link
- Drill Bit Set – link
- Table Saw Blade – link
- Japanese Ryoba Saw – link
- Self-Adhesive Measuring Tape – link
- Steel Ruler – link
- Digital Protractor – link
- Speed Square – link
- Transparent Triangle – link
- Machinist Square – link
- Toggle Clamps – link
- Strap Clamp – link
- One Hand Clamps – link
- T-track Clamps – link
- Spring Clamps – link
- Mini F-Clamps – link
Materials & Hardware
- Wood Glue – link
- Painters Tape – link
- Sandpaper Sheets – link
- Wood Screws – link
- Baltic birch plywood (base and fences)
- MDF offcuts (fence faces and stop block parts)
- Oak strips (for the miter bar)
- T-track extrusion or homemade T-track (for the fences)
- Bolts, washers, and knobs/wing nuts (for the stop block and accessories)
All the tools I use: here
📌 Save THIS PIN to your Board on Pinterest!

Why Build a Picture Frame Jig for the Table Saw?
You can cut miters with a miter gauge or miter saw, but a dedicated picture frame jig solves three big issues: accuracy, repeatability, and referencing from the rabbet.
For picture frames, the crucial dimension isn’t the outer size—it’s the rabbet that holds the picture, mat, or glass. With this jig, you can set the stop block based on the rabbet length, so you’re cutting to the dimension that actually matters. That’s what gives you frames where the artwork slips in snugly without gaps.
A picture frame jig also:
Cuts both mating miters on the same sled and setup, so they truly meet at 90°.
Provides a large, stable base that supports narrow frame stock during the cut.
Let’s you lock in an adjustable stop block so all short sides and long sides match.
Uses T-tracks in the fences for stop blocks, hold-down clamps, and other add-ons.
My smaller miter attachment is perfect for quick 45° cuts on small parts, but it doesn’t have a long fence, stop block, or scale. This dedicated picture frame jig does—which is why I use it whenever I’m making proper picture frames, sets of matching frames, or anything where tight, gap-free corners really matter.
Let’s Start Building!
This jig is essentially a compact crosscut sled tuned specifically for picture frames. The base is a Baltic birch plywood panel with an oak miter bar underneath that runs in the table saw’s miter slot. On top, we add two perpendicular fences—one for short sides, one for long sides—each with a T-track routed in for the stop block and optional clamps.
We’ll build:
The picture frame jig base
The fence assembly
The stop block
The self-adhesive scale ruler setup
Once everything is aligned and the 45° cuts are dialed in, you’ll have a jig that can cut both short and long frame parts accurately, reference directly from the rabbet, and produce repeatable, matching frame pieces every time.
How to Build a Picture Frame Jig for Table Saw
Step 1: Building the Picture Frame Jig Base
I start by cutting the base panel for the sled. I’m using 12 mm Baltic birch plywood and cut it to 350 × 700 mm (about 13 ¾” × 27 ½”) on my table saw sled so all edges are straight and square.
Next, I cut two oak runners that will ride in the table saw’s miter slots. I carefully sneak up on the width so each runner fits perfectly in the slot—no side-to-side play, but still able to slide smoothly. If needed, I lightly sand the edges.
To glue the runners to the base, I first need to mark their exact position. I place the plywood base on the saw table, roughly where I want it to sit, and lock the table saw fence. Using a carpenter’s square, I rotate the base so it sits at a 45° angle to the fence/blade—this is what gives the jig its picture-frame miter orientation. With the base held in this position, I mark where the runners will land under the base.
Then I flip the base over and glue on the first oak runner along the marked line. The second runner is made in more of a T-shape—wider at the bottom—to prevent the sled from tipping when you pull it far forward for longer frames. (When the frame stock sticks out, it shifts the weight, and that extra support keeps the base seated in the slots.)
Once the glue is dry, I test-fit the sled in the saw’s miter slots. If the runners feel a bit tight, I lightly sand the sides and test again until the sled slides smoothly from front to back without binding or rocking.


Step 2: Making and Attaching the Fences
With the base ready, I move on to the two fences that guide all the cuts. First, I cut the plywood fence pieces to size and glue them into thicker blanks. After the glue dries, I mark the layout for the T-track and cut the slots on the table saw.
The T-track is made from a deeper center slot and two shallower outer slots. I glue two MDF strips into the outer slots—together with the center groove, they form a simple T-track channel for the stop block and clamps.
Tip: Use just enough glue so it doesn’t squeeze into the middle slot. Dried glue in the track is hard to clean out later.
Once the fences are dry, I cut a short piece off the longer fence to use later as the stop block. Then I cut the ends of both the long fence and short fence at 45°, so their miters will meet at the cut line.
To position the fences, I mark the location of the long fence on the base using a ruler marking gauge, and glue it down. Then, using a square, I glue the short fence at a perfect 90° to the long one so their 45° ends meet.
Note: It’s fine to leave a tiny gap between the fence miters—you’ll cut through this area when you make the first kerf.
After the glue cures, I make the first saw cut through the jig, cutting through the base and fence miters and stopping about 2 cm past the fence.
Tip: Cover the cut line with painter’s tape before cutting to help reduce tear-out and keep the kerf edge clean.


Step 3: Making the Stop Block
For the stop block, I reuse the offcut from the longer fence. It already has a 45° end, which is perfect because it lets the frame piece register right up to the mitered corner. I simply flip the offcut upside down so the T-track groove now faces down toward the base.
On top of this offcut, I glue and screw a small plywood connector piece with a drilled hole through it. This hole is for the T-track bolt that runs in the fence. Once assembled, the bolt slides inside the fence T-track, and the block can be moved anywhere along the fence to set your exact frame length. Tighten the knob or wing nut, and the length is locked in.
You can build a second stop block in the same way for the other fence if you want separate stops for short and long frame sides.


Step 4: Finishing the Picture Frame Jig — Scale and Hold-Down Clamp
To finish the picture frame jig, I add two small upgrades that make it much easier to use: a self-adhesive ruler and a hold-down clamp.
First, I stick a self-adhesive measuring tape along the longer fence, starting from the saw kerf. This lets me read the exact frame length directly at the stop block, so I can set the inside (rabbet) dimension quickly and repeat it for multiple frames.
Then I add a hold-down clamp into the fence T-track. This one is optional, but it helps a lot in practice. The clamp locks the workpiece in place so you don’t have to hold it by hand while cutting. It’s mounted with a T-track bolt and knob, and you can move it anywhere along the fence—or swap it between the longer and shorter fences.
In the same way, you can add other accessories to the T-track later—extra stops, auxiliary blocks, or different styles of clamps.


A Quick Note on Ruler Placement and Rabbet Length
When you’re measuring picture frames, you don’t really care about the outside size of the frame—you care about the rabbet length, the space where the picture or mat actually sits. In practice, that means you should set your stop block to the visible opening / rabbet dimension, not just the full frame length. For example, if your picture is 300 × 200 mm, you want the distance from rabbet shoulder to rabbet shoulder to match that, not the outer edges of the molding. Otherwise, your picture might end up loose, too tight, or leave an unexpected border. That’s why the position of the self-adhesive ruler on the fence matters.
Note: In my build, I place the ruler in a specific spot so it already accounts for the offset between the outer frame edge and where the picture actually starts. My pictures don’t start right at the corners—they have a small white border/offset—so the zero point on the scale is set accordingly.
The idea is: once you understand your profile and rabbet offset, you can place the ruler so that when you read, say, “300 mm” at the stop block, you’re actually cutting the correct length for the rabbet / visible area, not just a random outside measurement.
Setting Up the Picture Frame Jig (and Cutting Your First Frame)
Setting the jig starts with the rabbet length, not the outside of the frame. Measure the size of the picture or mat and decide if you want a visible offset/border. That final inside dimension (picture size ± offset) is what you set on the scale and stop block, because that’s the length the rabbet needs to be.
Before cutting real stock, quickly dial in the 45°:
Make a test cut on scrap with the jig.
Fold two offcuts together so the miters meet.
If the corner is open inside or outside, make a tiny fence adjustment and recut until the joint closes cleanly at 90°.
To cut the frame pieces:
First miter: place the frame strip with the rabbet against the shorter fence and cut the first 45°.
Second miter + length: move the strip to the longer fence, push it against the stop block set to your rabbet length, and cut the second miter.
Repeat for all sides. For a square frame, use the same setting on all four pieces. For a rectangular frame, cut two pieces at the “short” setting and two at the “long” one.
For glue-up, add a bit of wood glue to each miter, pull the corners together, secure them with painter’s tape, and tighten everything with a strap clamp until the frame is square. If you want to reinforce and decorate the corners, you can add splines after the glue dries.
👉 For that, I like to use my table saw spline jig—perfect for strengthening picture frame miters with contrasting splines.


Wrap-Up: Why I Like This Picture Frame Jig
For me, this picture frame jig turns what used to be a slightly stressful operation into a simple, repeatable routine. Instead of fussing with a miter gauge and tape measure for every piece, I can set the angle once, dial in the rabbet length on the stop block, and just cut. If I want two or three frames in the same size, they all come out identical, and the corners actually close without those annoying little gaps.
The nice thing is that it’s not limited to frames. At the end of the day, this is a 45° miter sled with good support and a T-track system—so it works just as well for small boxes, molding, trim, and any project where you want clean, repeatable miters. The T-track gives you room to grow: more stops, different clamps, and little add-ons you’ll come up with over time as you use it.
If you enjoyed this build and want to keep upgrading your saw, check out my Best Table Saw Jigs for Your Workshop—this picture frame jig is just one piece of a whole setup that makes cutting safer, more accurate, and honestly a lot more fun.
📌 Ready to build it?
Save THIS PIN to your Board on Pinterest!

FAQs: Picture Frame Jig for the Table Saw
1. Do I really need a picture frame jig, or is a miter gauge enough?
You can cut picture frame miters with a standard miter gauge, but it’s harder to get repeatable, gap-free corners, especially when making more than one frame. A dedicated picture frame jig gives you a fixed 45° setup, a stop block for consistent lengths, and better support for narrow frame stock. That makes it easier to get clean joints and matching parts with less fiddling.
2. Can I use this jig for other projects besides picture frames?
Yes. At its core, this is a 45° miter sled, so it’s useful anytime you need consistent miters: small boxes, trim pieces, molding, decorative strips, or mitered frames for cabinet doors. The T-tracks and adjustable stop block make it handy wherever you want repeatable angled cuts with good workpiece support.
3. How accurate does the 45° angle need to be?
For picture frames, small errors add up quickly—if each miter is off by even half a degree, the corners won’t close. That’s why it’s worth taking a few minutes to dial it in with test cuts on scrap. Cut two miters, fold them together, and check if the corner is open inside or outside. A tiny tweak to the fence and another test cut usually gets you to a clean, tight 90°.
4. What size frames can I make with this jig?
That depends mostly on your base size and how far the frame pieces can extend safely on the sled. With a base around 350 × 700 mm (about 13 ¾” × 27 ½”), you can comfortably make small to medium frames for photos, prints, and posters. Longer frames are possible as long as the workpiece is still well supported and the sled doesn’t tip—this is where a second, “T-shaped” runner really helps.
5. Is the hold-down clamp necessary, or can I just hold the work by hand?
You can hold the workpiece by hand if you’re careful and keep your fingers clear of the blade, but a hold-down clamp is much safer and more consistent. It keeps the frame stock pressed firmly against the fence and base, which reduces chatter and shifting during the cut. Because the clamp rides in the T-track, you can move it where you need it or use it on either fence.

