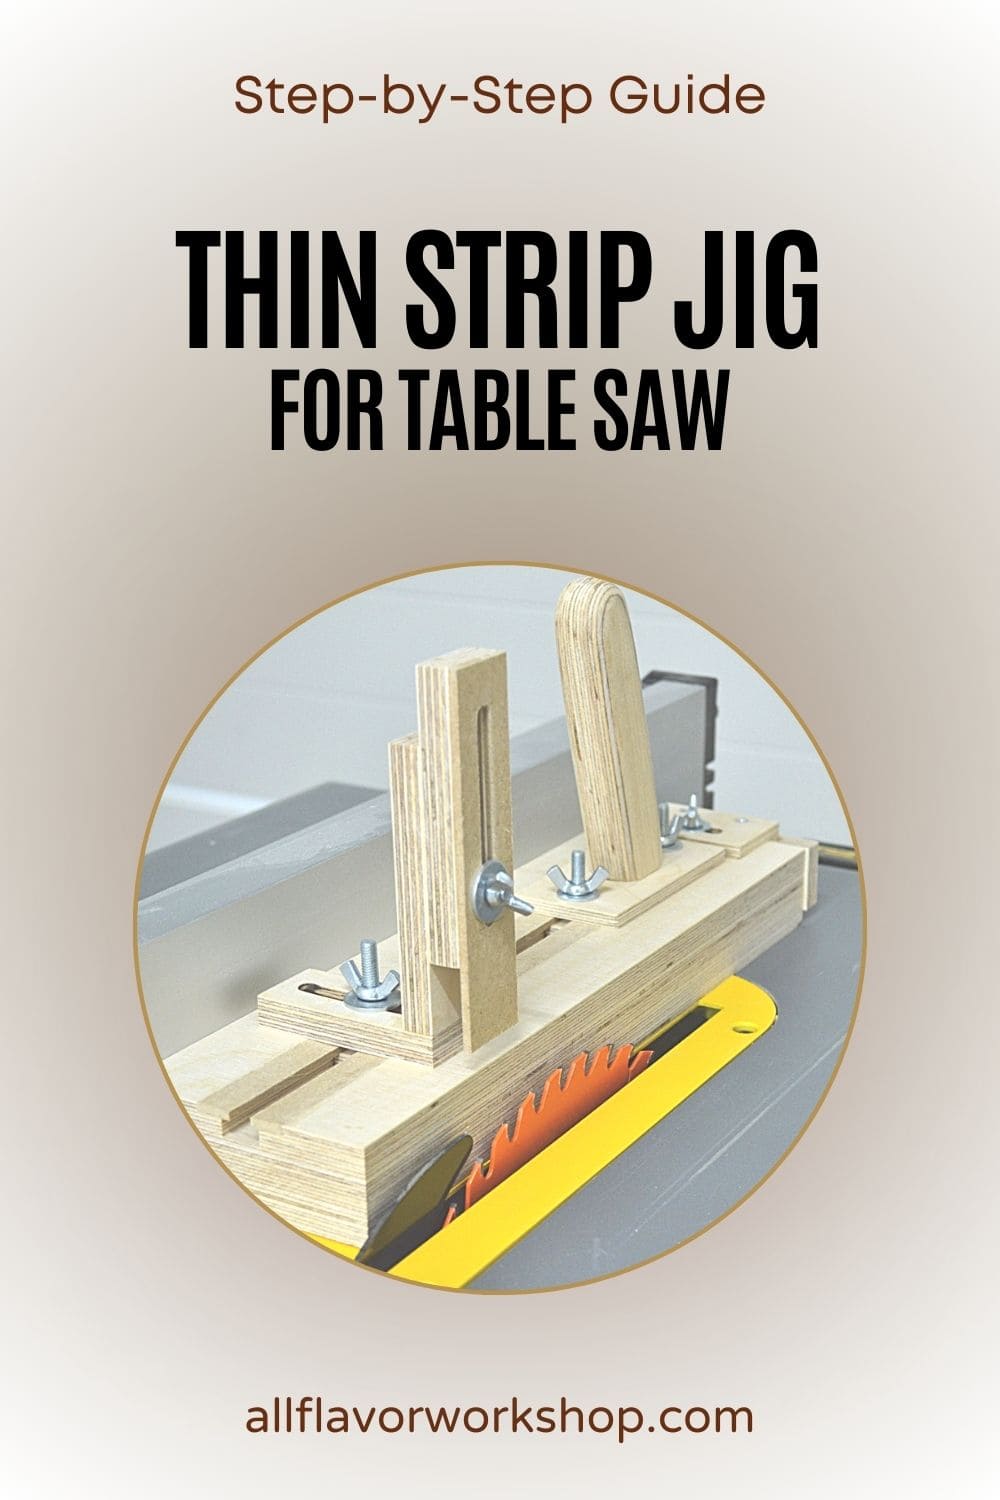
How to Build a Table Saw Thin Strip Jig (Safe, Repeatable Thin Rips)
This guide shows you how to build a table saw thin strip jig that makes cutting thin strips safe, simple, and repeatable. I’ll walk you through the design, the build, and how to set it up for accurate, consistent thin rips on your table saw.
Cutting really thin strips on the table saw looks simple, but in reality it’s often inconsistent and a bit unsafe—especially when you keep sneaking the fence closer to the blade and pushing narrow pieces by hand. Strips vary in width, burning shows up, and your fingers feel way too close.
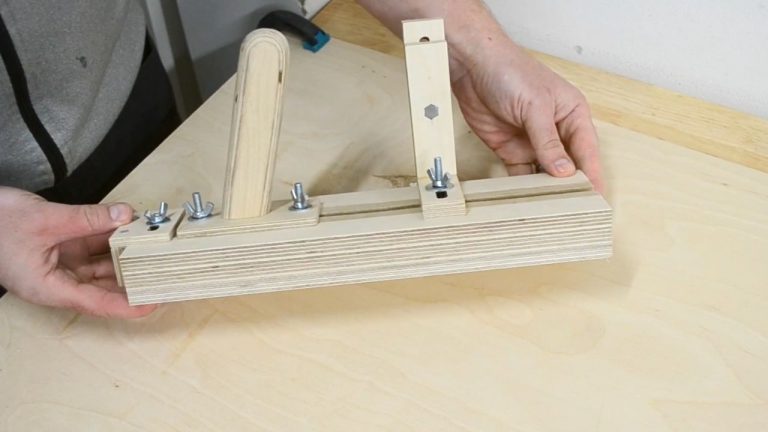
That’s why I built this table saw thin strip jig. It’s a small, easy-to-make jig that costs almost nothing and lets you set the dimension once, then cut uniform thin strips over and over without touching the fence. A hold-down clamp keeps the workpiece pressed to the base, a back stopper supports it from behind, and a handle lets you guide the whole jig smoothly along the fence with your hands well away from the blade.
All the accessories are detachable and adjustable. The hold-down and back stopper ride in a homemade T-track and are fixed with DIY T-track bolts, so you can set them exactly where you need them. The jig handles thin strips from just a few millimetres (about 1/16″–1/8″) up to a few centimetres (around 3/4″–1″). The base is built mainly from 12 mm Baltic birch plywood and MDF, and measures about 33 × 10 × 3.6 cm (roughly 13″ × 4″ × 1 7/16″).
Before we dive into the step-by-step photos, here’s the full build of the table saw thin strip jig so you can see how all the parts fit and work together in real time.
I appreciate every YouTube subscriber. It’s free and easy to subscribe to — Click Here To Subscribe. Thank you!
Let’s Start Building! Step 1: Building the Thin Strip Jig Base Step 2: Making the Thin Strip Jig Handle Step 3: Making the Hold-Down Clamp Step 4: Making the Back Stopper
How to Build a Table Saw Thin Strip Jig — step-by-step jig build for safe, repeatable thin rips.
Why Use a Thin Strip Jig on the Table Saw?
A thin strip jig solves two big problems at once: safety and consistency.
Without a jig, cutting thin strips often means trapping the offcut between the blade and the fence, or standing a bit too close while trying to push a narrow piece past the blade. That’s where burning, pinching, and scary moments usually happen. It also means that every time you want another strip, you’re back to nudging the fence, checking with calipers, and hoping the next cut matches the last one.
With a thin strip jig:
The workpiece is held down and supported by the hold-down and back stopper.
Your hands stay on the handle, away from the blade.
The width of the strip is set by the jig, not by how carefully you adjusted the fence that day.
Once the jig is dialed in, you can run strip after strip at exactly the same thickness.
For anything that needs lots of narrow pieces—edge banding, inlay strips, small frame parts, spacers, slats—this jig turns a stressful operation into a simple, repeatable routine.
Let’s Start Building!
In the build, we’ll break the jig into a few simple parts and assemble them step by step. It’s made from plywood, MDF, a few M6 bolts, wing nuts, and homemade T-track bolts, so it’s a great way to use up offcuts.
Here’s what we’ll cover:
Building the thin strip jig base – cutting the blank, adding the T-track, and sizing it for your saw.
Making the thin strip jig handle – a comfortable handle you can grip firmly while pushing along the fence.
Making the thin strip jig hold-down clamp – an adjustable clamp that keeps the workpiece pressed safely to the base.
Making the thin strip jig back stopper – a solid support that gives the workpiece something to register against.
Assembling the table saw thin strip jig – putting all the parts together, adding the hardware, and dialing in the first setup.
Once the jig is assembled, we’ll set it on the fence and start cutting safe, repeatable thin rips on the table saw.
How to Build a Thin Strip Jig for Table Saw
Step 1: Building the Thin Strip Jig Base
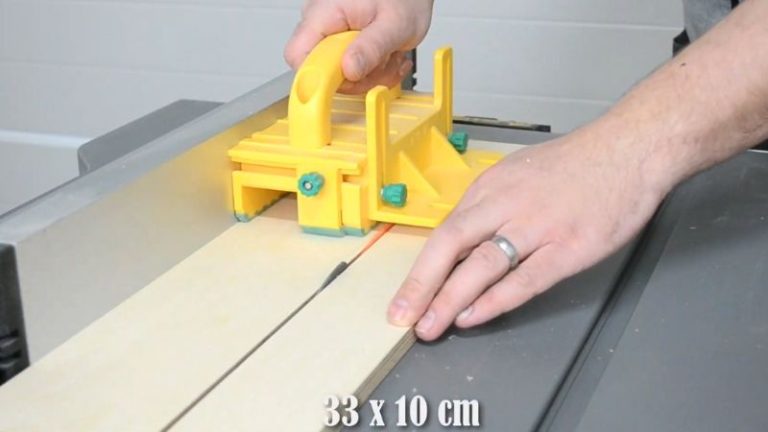
I start by cutting all the base pieces to size. The jig base is made from three plywood strips, each measuring 33 × 10 cm (about 13″ × 4″). I rip them to width on the table saw and then use my table saw sled for the crosscuts so all pieces end up the same length and dead square.
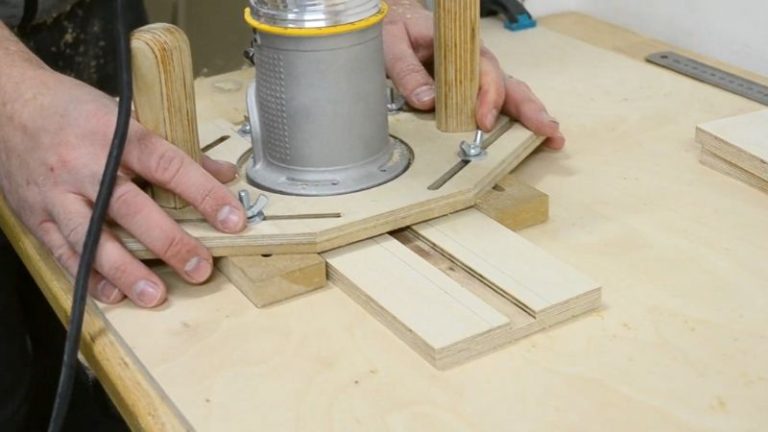
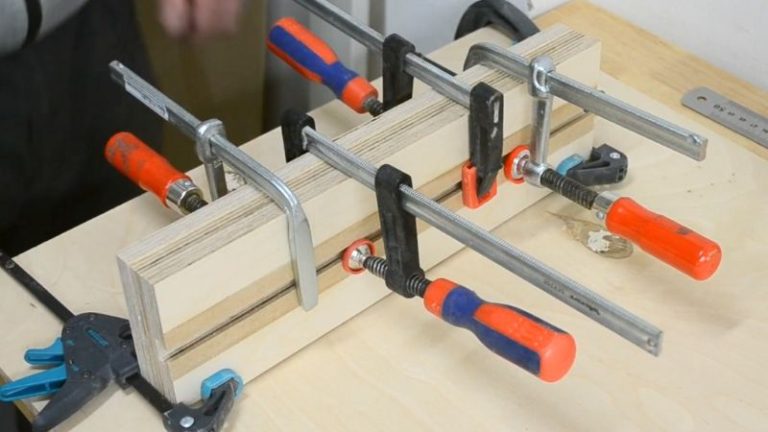
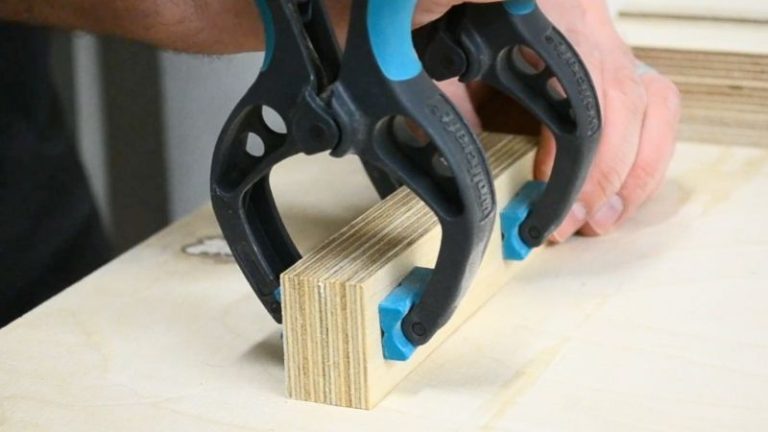
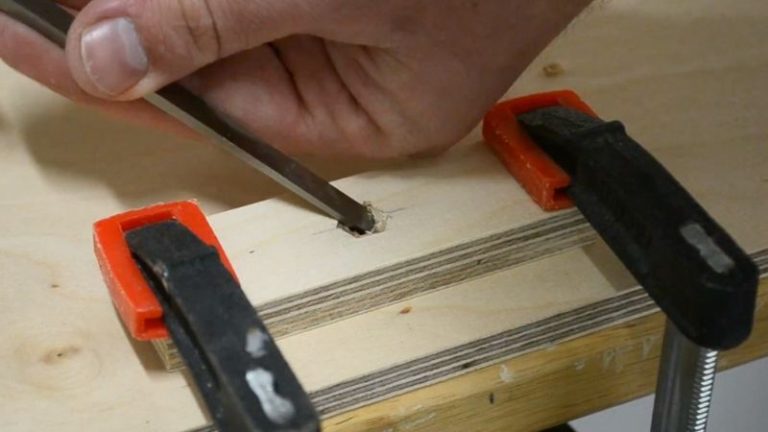
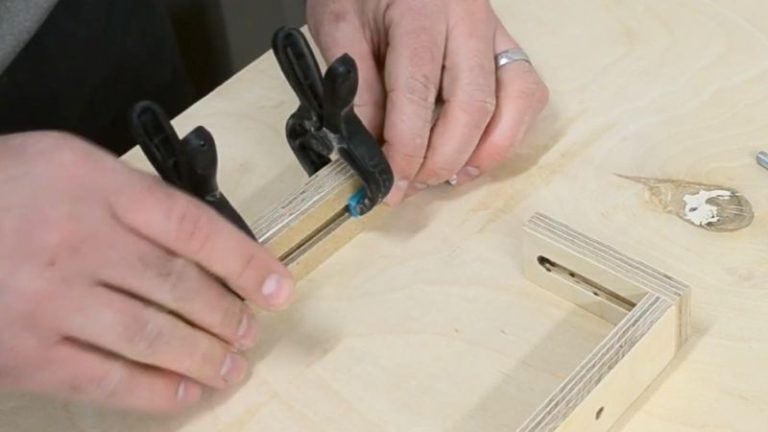
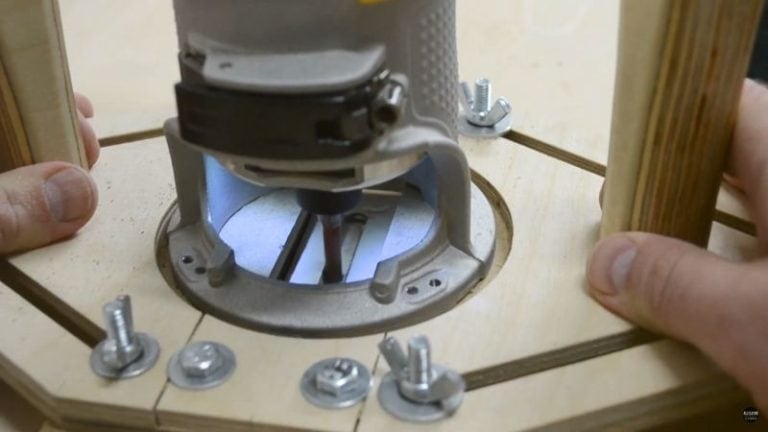
Next, I take one of the three pieces and lay out the lines for the T-track. Using my router multipurpose jig, I route the dadoes that will form the sides of the track. To create the actual T-track, I glue two MDF strips into the side dadoes and clamp them in place until the glue dries.
Tip: Try to keep glue squeeze-out out of the central channel—if it runs into the middle, it’s quite annoying to clean later. You can optionally add a few screws for extra strength (make sure they’re flush).
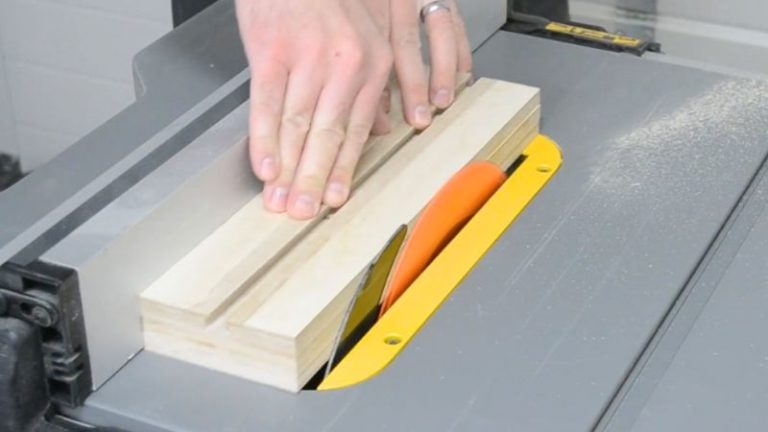
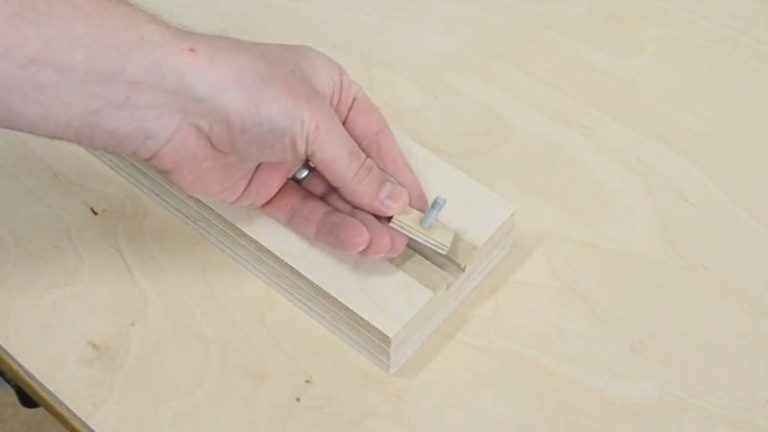
Once the glue is dry, I run the assembled base over the table saw again, taking a very light pass on each side to clean and straighten the edges. Finally, I test the T-track with one of my DIY T-track bolts to make sure it slides smoothly without binding.
I cut three plywood base pieces to 33 × 10 cm (about 13" × 4") so the jig feels compact but stable on the saw.
After marking the layout, I use my router multipurpose jig to cut the dadoes that will form the sides of the T-track.
Two MDF strips are glued into the dadoes to create the T-track—keep glue out of the center so the bolt can slide freely.
A light clean-up pass on the table saw straightens the edges and makes the jig base look crisp and square.
I always test the finished T-track with a DIY T-track bolt to make sure it slides smoothly without binding.
Step 2: Making the Thin Strip Jig Handle
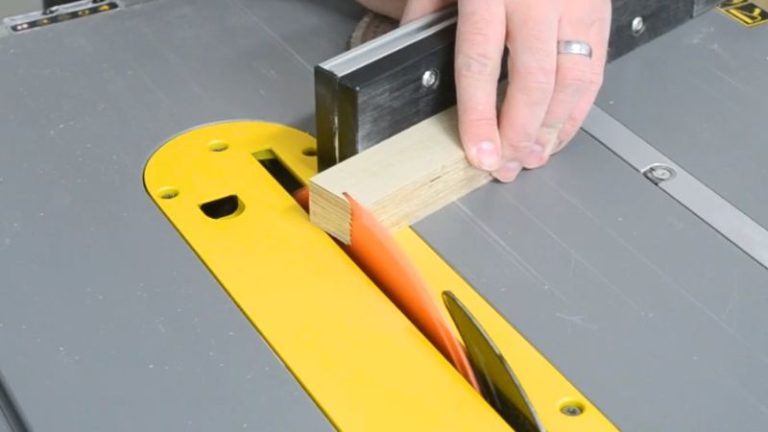
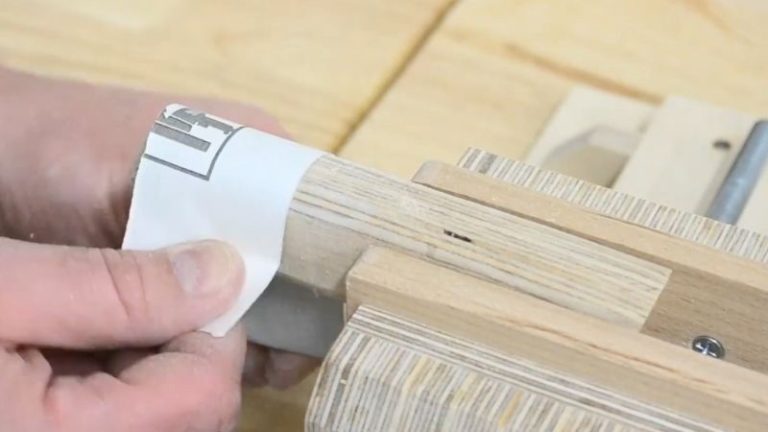
For the handle, I start by cutting two plywood piecesand gluing them together. This blank defines the handle thickness at about 24 mm (roughly 15/16″). Once the glue dries, I cut one end of the blank at a slight angle—so when the handle is mounted on the jig, it leans outwards slightly instead of standing straight up. That small tilt makes the grip much more natural.
With the blank cut to length, I shape the handle. You can round over the edges, soften the corners, and slightly curve the profile—whatever feels best in your hand. After shaping, I glue the handle onto a thin plywood base (about 6.5 mm / 1/4″ thick) and add a screw from the bottom for extra strength.
This plywood base is what actually mounts to the jig. It sits over the T-track and is secured with T-track bolts and wing nuts, so you can slide the handle forward or backward as needed and remove it easily for storage or adjustments.
I glue two plywood pieces together to get a 24 mm (15/16") thick handle blank that feels solid in the hand.
One end of the handle is cut at a slight angle so it leans towards me when mounted, making the grip more comfortable.
I round over the edges and refine the shape so the handle feels comfortable and secure during use.
The handle is glued to a 6.5 mm (1/4") plywood base and secured with a screw from below for extra strength.
The handle mounts into the T-track with T-track bolts and wing nuts, so I can slide and adjust it as needed.
Step 3: Making the Hold-Down Clamp
The hold-down clamp is what keeps the workpiece pressed firmly to the base, so your hands can stay safely on the handle. I start by cutting all the plywood and MDF pieces to size (dimensions from the materials/cut list).
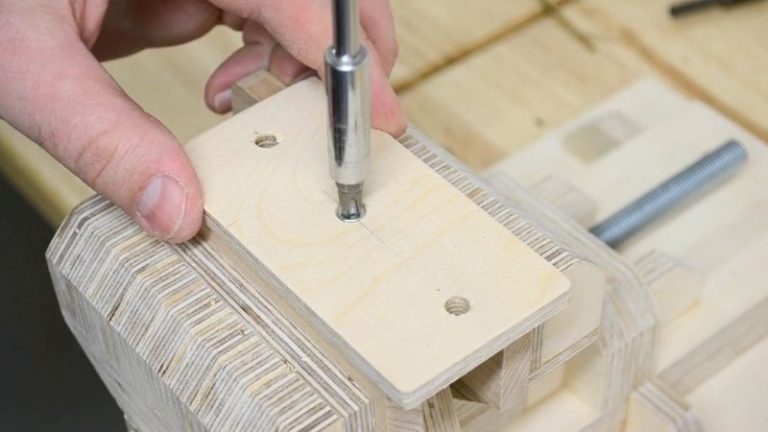
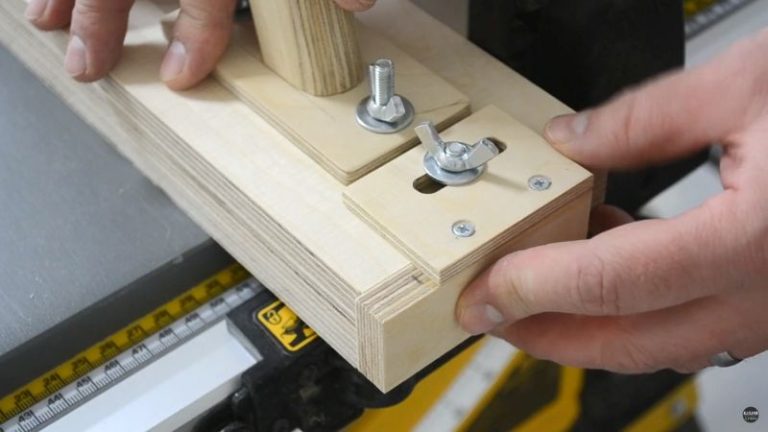
The main vertical piece is cut from plywood. In this part, I carve a hexagon recess to capture a bolt head—this becomes the backbone of the clamp. With the bolt locked into that hexagon and a wing nut on top, the hold-down can move up and down so you can adjust it to different workpiece thicknesses.
The actual clamping face that presses on the workpiece is made from a mix of plywood and thinner MDF. It attaches to the vertical piece and slides up and down along it. That way, you can quickly dial in just enough pressure to hold the strip.
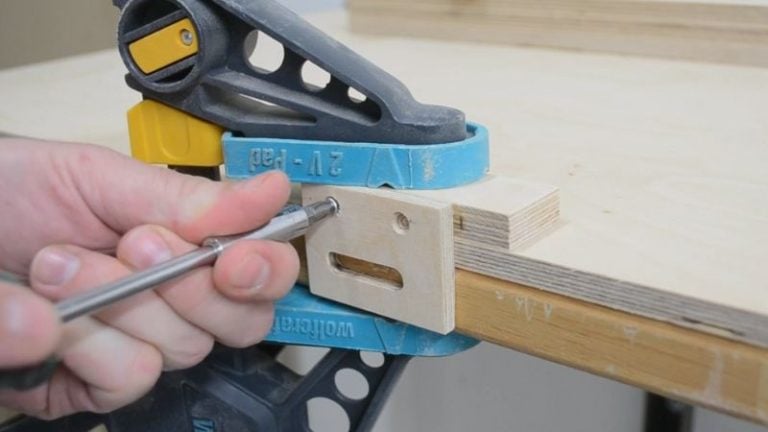
The lower support piece—the one that attaches directly to the jig base—is also made from plywood. Both this base piece and the movable vertical piece get a slot routed through them using my multipurpose router jig. That slot lets the clamp slide along the T-track on the jig base so you can position it exactly where you need it relative to the blade and the fence.
I carve a hexagon recess into the vertical piece so the bolt head locks in place and can’t spin.
The clamping face is made from plywood and MDF and can slide up and down, adjusted with a bolt and wing nut.
Slots in both the base and the vertical arm let the hold-down clamp move and adjust along the T-track.
With the slots routed, the hold-down clamp can slide along the T-track and press the workpiece firmly to the base.
Step 4: Making the Back Stopper
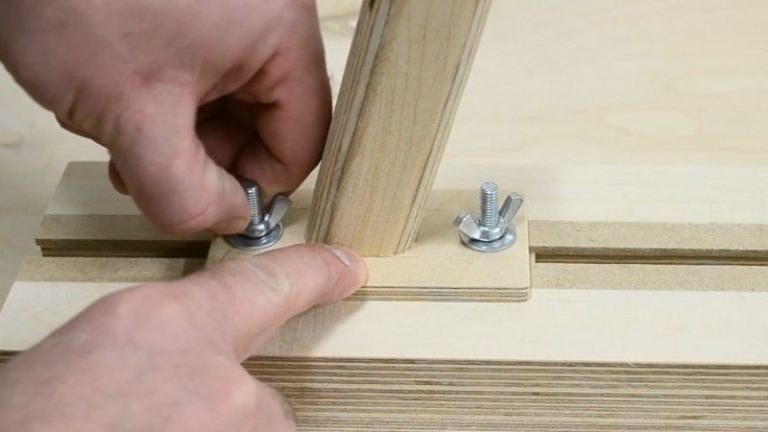
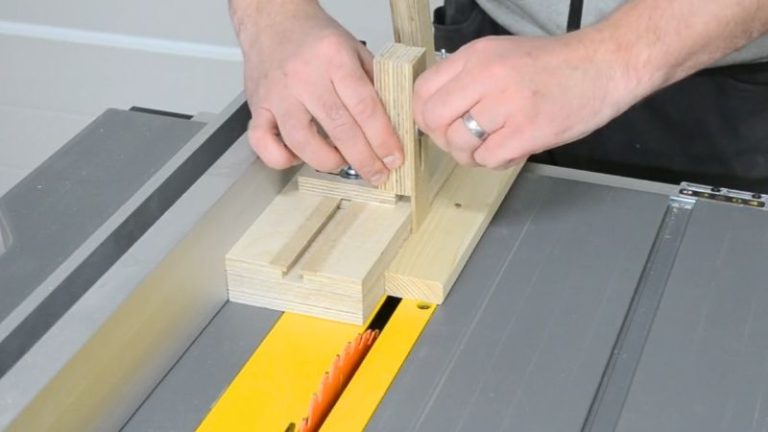
The back stopper gives the workpiece something solid to register against. It’s made from two plywood pieces joined at 90°.
The horizontal piece sits over the T-track and is what attaches to the jig base. The vertical piece sits behind the jig base and supports the workpiece from the back. I joined these two pieces together at a right angle using two screws.
The whole back stopper assembly attaches to the T-track with a bolt and wing nut, so you can slide it sideways to set the exact strip width—from just a few millimetres up to a few centimetres.
The back stopper is just two simple plywood pieces—one attaches to the T-track, the other supports the workpiece from behind.
I join the two pieces at 90° with a couple of screws, making sure the corner is square.
By sliding the back stopper, you can set thin strips from just a few millimetres up to a few centimetres wide.
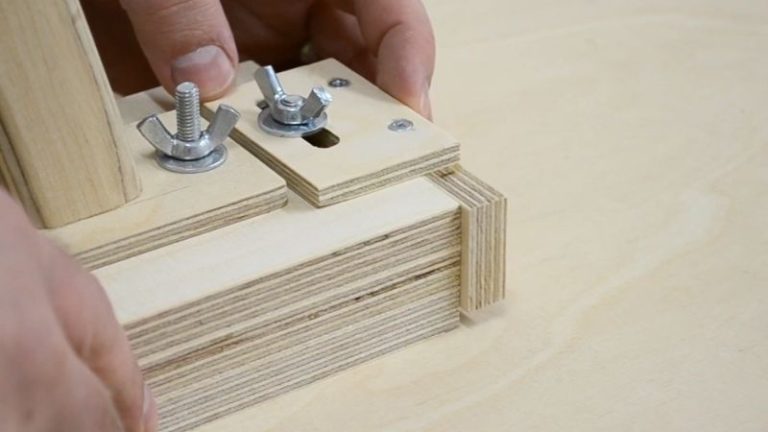
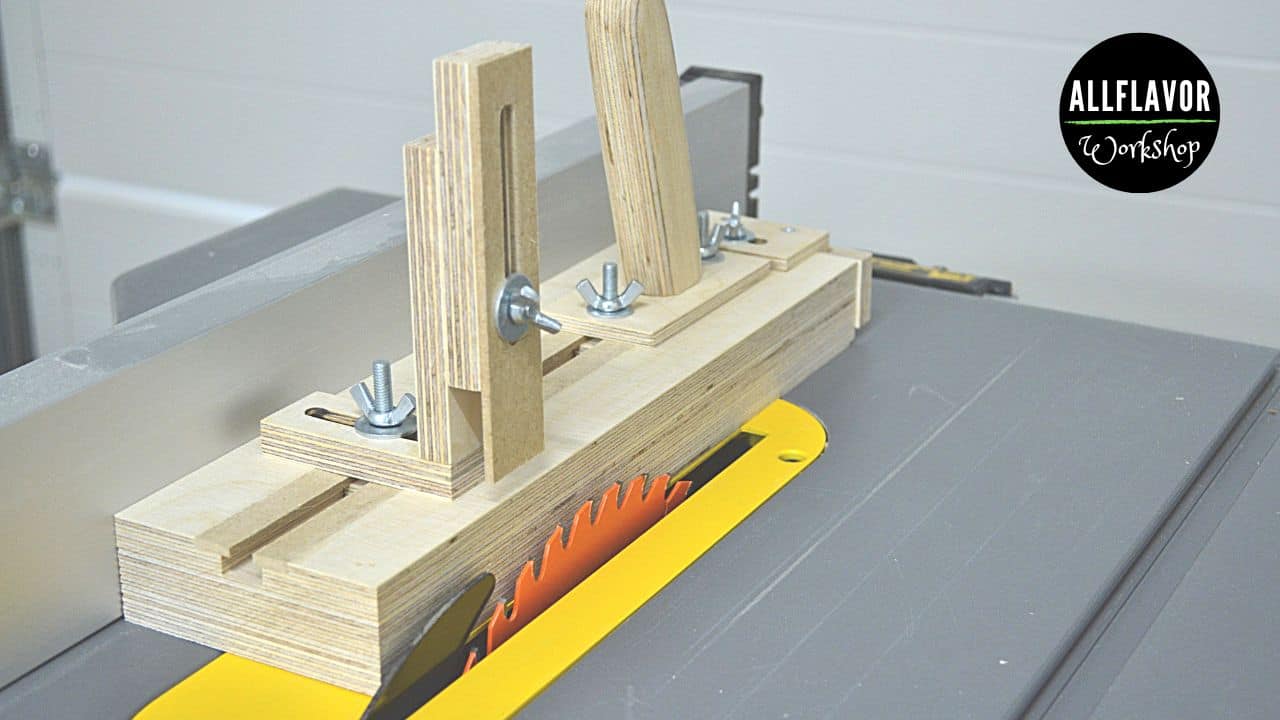
This is what the finished thin strip jig looks like:
Close-up of the DIY table saw thin strip jig, with adjustable T-track hardware that lets you dial in consistent thin strips every time.
Setting Up and Using the Thin Strip Jig
With this jig, you can make repeatable cuts that produce uniform thin strips without constantly touching the fence. The idea is simple: the distance between the blade and the jig defines your strip width, and everything else just keeps the workpiece stable and your hands safe.
1. Set the Strip Width
First, you set the width of the strip you want to cut:
Adjust the table saw fence to roughly where you want it.
Place the thin strip jig against the fence.
Measure the space between the blade and the face of the jig.
Fine-tune the fence until this gap matches your desired strip width.
Lock the fence in position—this stays fixed while you cut all your strips.
Once the fence is locked, you don’t move it again. The jig and back stopper define exactly how wide each thin strip will be.
2. Adjust the Back Stopper and Hold-Down Clamp
Before cutting, there are two main components to set up on the jig:
Set the back stopper
Slide the back stopper along the T-track so it supports the strip you are cutting, but doesn’t interfere with the saw blade.
Tighten the bolt and wing nut to lock it in place.
Adjust the hold-down clamp
Insert your workpiece into the jig in its cutting position.
Slide the hold-down clamp down until it just touches the top of the workpiece.
Tighten the wing nut so it applies a constant downward pressure during the cut.
This setup keeps the workpiece pressed to the base and supported from behind, which helps prevent chatter, shifting, and kickback.
The back stopper supports the strip from behind while the hold-down clamp presses the workpiece firmly to the base.
With the workpiece against the back stopper and under the clamp, everything is locked in for a safe, controlled cut.
3. Make the Cuts
Now you’re ready to start cutting thin strips:
Place your workpiece against the back stopper and under the hold-down clamp.
Start the saw and slowly slide the jig along the fence, letting the blade remove a thin strip between the jig and the blade.
For smaller pieces, use a push stick on the opposite side to help manage the offcut safely.
After each cut, slide the board back against the back stopper and repeat.
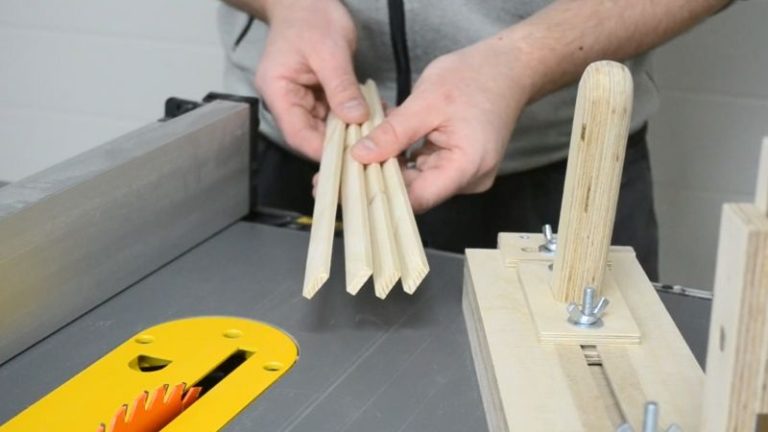
Because the fence and jig stay in the same position, every pass gives you thin strips of exactly the same width.
I slide the jig along the fence to cut each thin strip—no need to touch the fence once it’s set.
The result: a stack of uniform thin strips, all cut safely and repeatably with the table saw thin strip jig.
Wrap-Up: A Small Jig with a Lot of Use
Thin strips show up all over the workshop—inlays, edge banding, shims, spacers, frame parts, slats, trim pieces… I didn’t really appreciate how often I needed them until I started making more detailed projects. Before this jig, cutting thin strips always felt like one of those “hope it goes well” operations.
The jig is quick to make, doesn’t use much material, and once it’s built, the setup is really fast: I set the strip width once, adjust the back stopper and hold-down clamp, and then just feed boards through. The adjustability means I can use it with different stock thicknesses and cut anything from tiny inlay strips to wider slats—all while keeping my hands on the handle and away from the blade.
👉 If you enjoyed this build and want to upgrade your saw even more, check out my Best Table Saw Jigs for Your Workshop—this thin strip jig fits perfectly alongside sleds, crosscut jigs, and other helpers that make table saw work safer and more accurate.
📌 Ready to build it? Save THIS PIN to your Board on Pinterest!
DIY Table Saw Thin Strip Jig — adjustable jig for cutting uniform thin strips on the table saw.
FAQs: Table Saw Thin Strip Jig
1. Is a thin strip jig safer than cutting thin strips against the fence?
Yes, in my experience it’s much safer. With a thin strip jig, the workpiece is held down and supported from behind, and your hands stay on the handle instead of near the blade. You’re not trapping a thin offcut between the blade and fence, which is where burning and kickback usually happen.
2. How thin can I safely cut strips with this jig?
It depends on your saw and blade, but with a good setup you can cut strips down to just a few millimetres (around 1/16″–1/8″). The key is to keep the hold-down clamp adjusted properly and use a sharp, clean blade. For anything extremely thin, take your time and don’t force the cut.
3. What blade should I use for cutting thin strips?
I get the best results with a sharp, fine-tooth blade (for example, a combination or crosscut blade with more teeth). A clean, sharp blade reduces burning and tear-out on very narrow pieces. Whatever blade you use, make sure it’s properly aligned and not dull—that makes a big difference.
4. Can I use this thin strip jig on different board thicknesses?
Yes, that’s the idea. The jig is adjustable: you can slide the hold-down clamp up or down to match the thickness of your workpiece, and move the back stopper along the T-track to set different strip widths. That way you can use the same jig for everything from thin stock and inlay pieces to thicker boards.
Meet the creator of AllFlavor Workshop! As a passionate DIYer and woodworking enthusiast, Lukas is always looking for ways to make things himself rather than buying them off the shelf. With a keen eye for design and a knack for working with wood, Lukas enjoys sharing his craft with others and helping them discover the joy of building. Whether you're an experienced woodworker or a novice looking to try your hand at a new hobby, you're sure to find plenty of inspiration and tips on AllFlavor Workshop.