
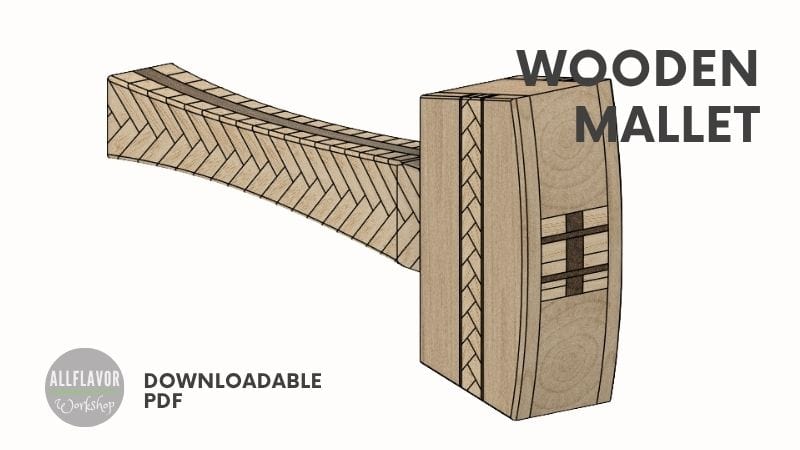
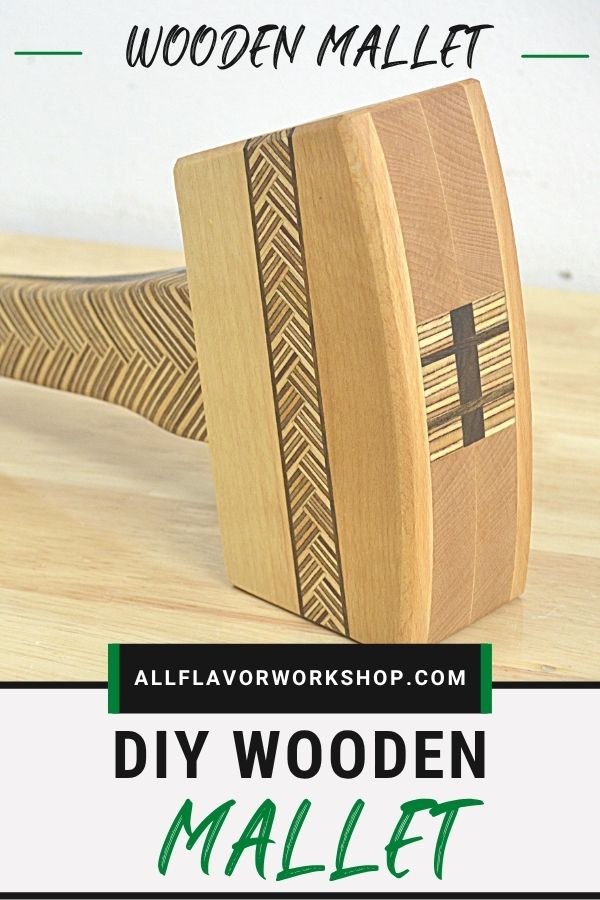
A wooden mallet is one of those workshop tools you end up using all the time — tapping parts into place, nudging assemblies, seating joints, and generally moving things without damaging them. In this guide I’ll show you how to make a wooden mallet step by step, but mine isn’t just functional — I also added a few design details to make it a bit more special.
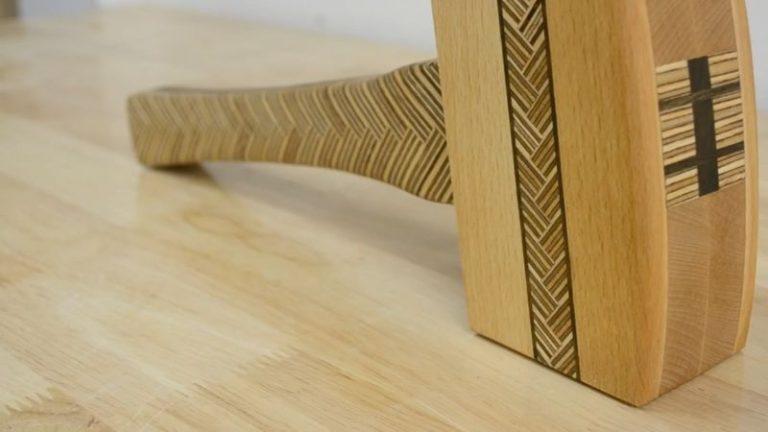
The mallet is made from beech, walnut, and Baltic birch plywood. The main structure is solid hardwood (beech + walnut), and the plywood is there mainly for the decorative pattern. Everything is glued up with wood glue.
The finished size is 32.5 cm overall length, with a head length of 16 cm and a head width of 6 cm. I also cut the sides of the head at angles, which gives it a cleaner look.
And just to be clear — you don’t have to copy the decorative parts. The patterned plywood handle and the plywood strip in the head are optional. You can follow the same process with one hardwood (or just beech + walnut) and still end up with a simple, durable mallet that does the job.
If you want more builds like this (jigs, workshop tools, and downloadable plans), you can find everything in one place here: 👉 See all Woodworking Plans
Video: Watch the Build
If you want to see the whole process in action, here’s the build video — it shows the glue-up, shaping, and the finishing details up close.
I appreciate every YouTube subscriber. It’s free and easy to subscribe to — just Click Here To Subscribe. Thank you!
Table of Contents
- Wooden Mallet Plans
- Materials and Tools Used
- Mallet Design Notes (Size, Wood Choice, and the Optional Decorative Parts)
- Make a Wooden Mallet (Step by Step)
- Step 1: Cut the Handle Pieces (Plywood Pattern + Walnut Core)
- Step 2: Glue the Handle Blank + Prep the Tenon End (Wedge Slots)
- Step 3: Shape the Handle (Final Grip)
- Step 4: Build the Mallet Head + Install the Handle (Glue + Wedges)
- Step 5: Sand and Finish the Mallet (Final Shape + Oil)
- Wrap-Up: A Shop Mallet You’ll Use All the Time
- FAQs: How to Make a Wooden Mallet
*Safety is your responsibility. Make sure you know what you’re doing and take all necessary safety precautions while working with power tools. Safety comes first!
Materials and Tools Used
Here’s everything I used for this wooden mallet build — the three wood types, glue, finish, and the main tools/jigs that made the process easier and more accurate.
Affiliate note: Some links in this post may be affiliate links — they don’t cost you anything extra, but they help support the builds and free guides on AllFlavor Workshop.
Wood
- Beech
- Walnut
- Baltic birch plywood
Other Materials
- Wood Glue — https://amzn.to/48ltKhJ
- Wood Oil — https://amzn.to/48IyQ7p
- Silicon Brush — https://amzn.to/3NPlgaq
- Painters Tape — https://amzn.to/3vCRqzE
- Woodworking Double Sided Tape — https://amzn.to/3tPMGpM
- Sandpaper Sheets — https://amzn.to/41OMx2p
- Sanding Discs — https://amzn.to/4aGaY6r
Tools
- Table Saw — https://amzn.to/47mWiGf
- Router — https://amzn.to/3HbQcOg
- Drill Press — https://amzn.to/3NSA3Bo
- Angle Grinder — https://amzn.to/48K2klD
- Orbit Sander — https://amzn.to/48G9cjL
- Belt Sander — https://amzn.to/4b4XeCd
- Table Saw Blade — https://amzn.to/48maocv
- Push Block — https://amzn.to/3vjQSP7
- Router Flattening Bit — https://amzn.to/3TUJ2pc
- Narex Chisels — https://amzn.to/3tHNJrT
- F-Clamps — https://amzn.to/48ArzY1
- One Hand Clamps — https://amzn.to/48jGxkZ
- Spring Clamps — https://amzn.to/41Nuh9D
- Machinist Square — https://amzn.to/48fT6xw
- Speed Square — https://amzn.to/3RO67Hy
- Drill Bit Set — https://amzn.to/4aI47t3
- L-Angle — https://amzn.to/4aGaT2D
✅ Check all the tools I use here
📌 Save THIS PIN to your Board on Pinterest!
Mallet Design Notes (Size, Wood Choice, and the Optional Decorative Parts)
Before we start cutting, it helps to decide whether you want to build the mallet as a simple hardwood version, or include the decorative plywood details. The plywood patterns look great, but they’re optional — the mallet is fully functional with just beech/walnut (or even one hardwood). The key is keeping the head size comfortable (16 cm long × 6 cm wide) and leaving a little extra material during glue-up so you can square everything up cleanly before shaping.
Let’s Start Building! (before the step-by-step)
I’ll go through the build in the same order I made it: glue up the laminated blank, shape the head and handle, add the angled head faces and optional decorative inlays, then sand and oil the mallet so the beech/walnut contrast really pops.
How to Make a Wooden Mallet
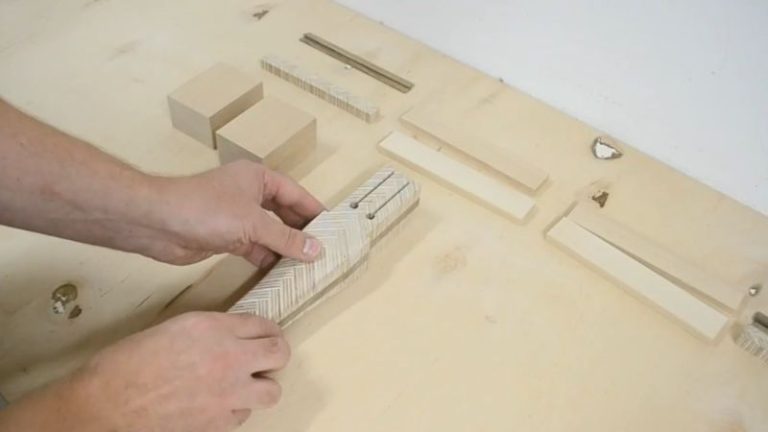
Step 1: Cut the Handle Pieces (Plywood Pattern + Walnut Core)
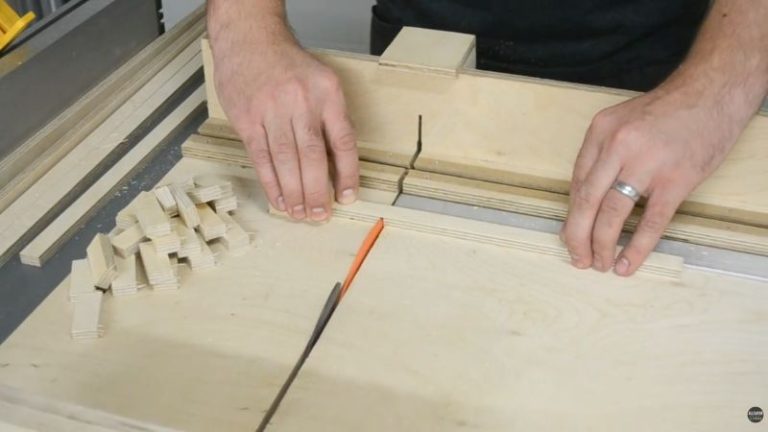
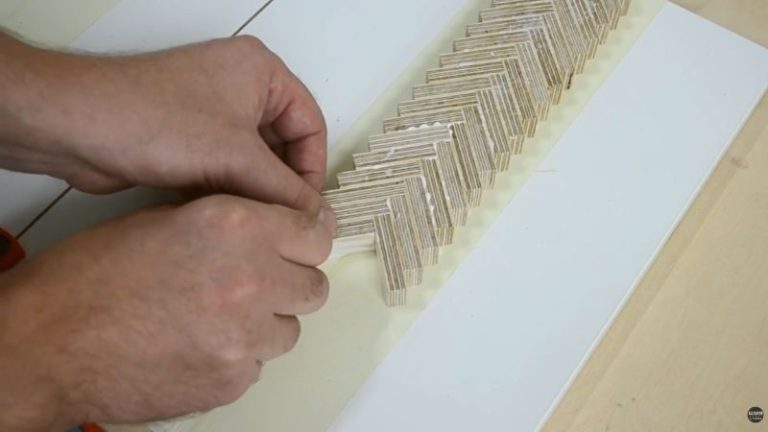
I started with the handle first. The outside layers are made from 9 mm Baltic birch plywood, cut into small blocks that create the patterned look once they’re arranged and glued up.
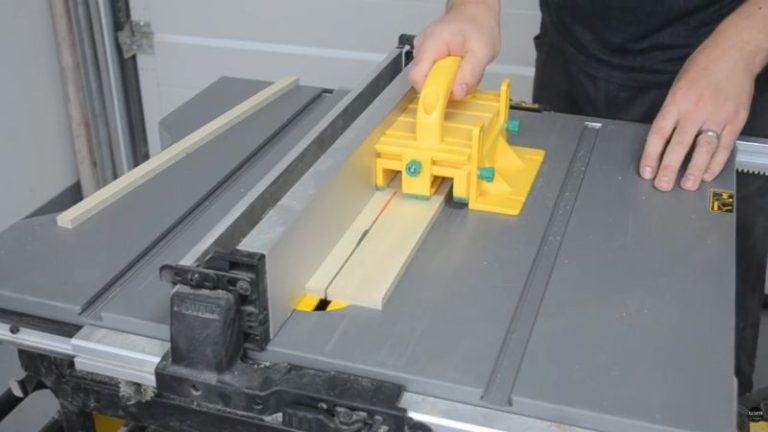
First, I ripped the plywood into 15 mm wide strips — that width later becomes the “thickness” of the pattern layer. Then I crosscut those strips into 40 mm long pieces. I cut a lot of them (around 100 pieces), so I had enough for both outer layers and some extras for mistakes.
For these small repeatable cuts, a table saw + crosscut sled is perfect — you get consistent parts quickly, and it’s much safer than trying to freehand tiny pieces.
After the plywood pieces were done, I cut the walnut core for the middle of the handle. I started from a blank around 330 × 50 × 10 mm and cut it to size on the table saw. If you can, pick a darker walnut — it gives a really nice contrast against the lighter plywood pattern layers.
Tip: Cut more plywood blocks than you think you need. It saves time later and lets you pick the nicest-looking pieces for the visible areas.
Note: Tiny pieces near a spinning blade can be dangerous — use a stop block and a sled, keep your hands far from the blade, and don’t rush this step.

Step 2: Glue the Handle Blank + Prep the Tenon End (Wedge Slots)
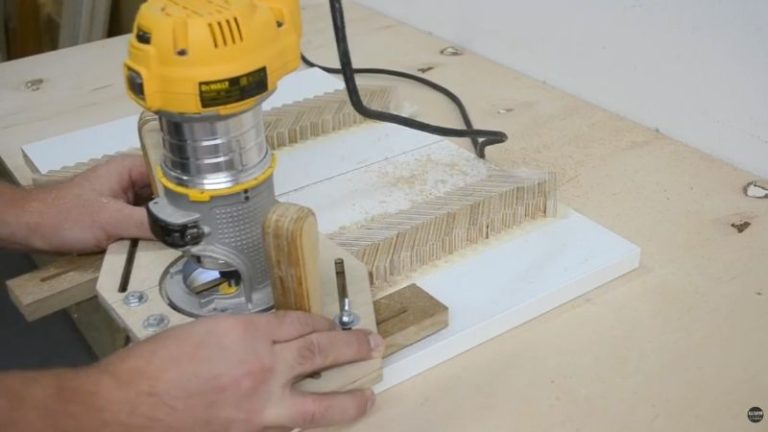
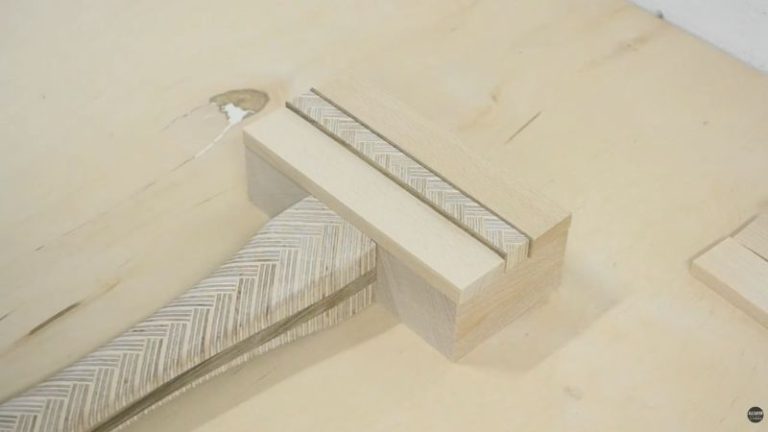
This step is where the handle really starts to take shape. I began by gluing the plywood pieces into a herringbone pattern, one by one, to create two patterned outer panels. Once those panels dried, I flattened them using my multi-function router jig (light passes) and gave them a quick sanding.
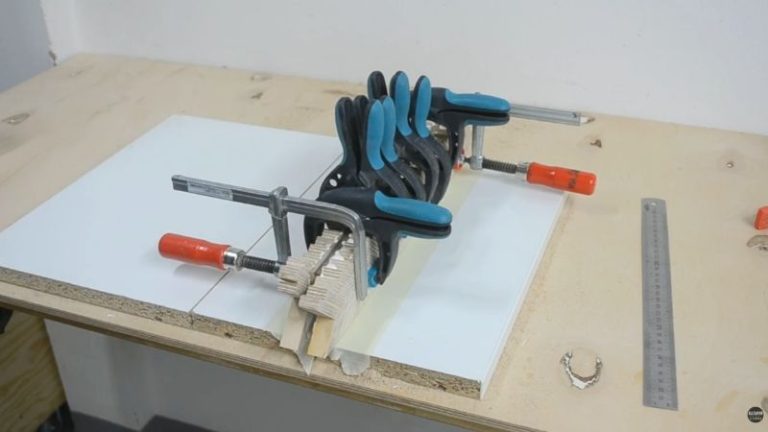
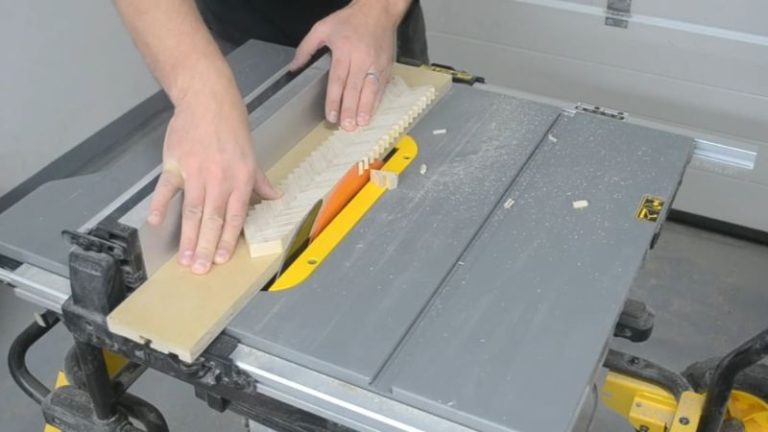
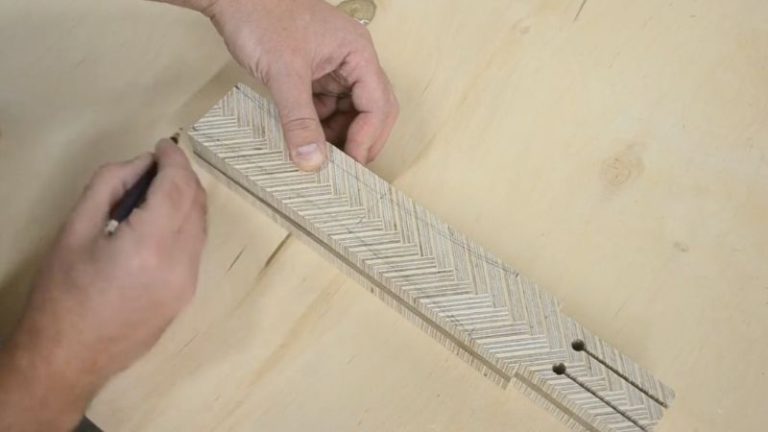
After that, I trimmed the panels to uniform size on the table saw, then glued the full handle blank together: plywood panel + walnut core + plywood panel. With clamps on, I let it cure, then squared the blank by trimming the ends and sides on the table saw. At this point, I had a clean rectangular handle block ready for shaping.
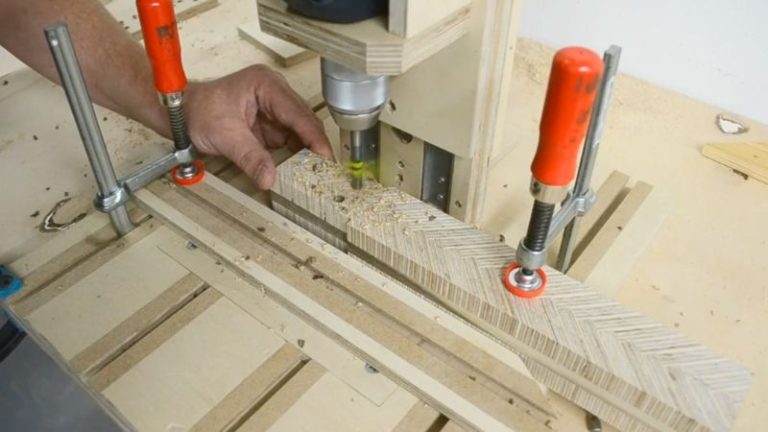
Next, I prepped one end for the head connection. I trimmed that end narrower using a crosscut sled — this becomes the tenon that will go into the mallet head. To prevent cracking later when the wedges go in, I drilled two relief (dilatation) holes on that same end using my drill press stand. Finally, I cut two wedge slots on the table saw using my tenon jig, cutting down from the top until I reached the drilled holes. Those slots are where the wedges will expand the handle inside the head.
Tip: Flattening and squaring the handle blank now saves a ton of time later. If the blank is straight and uniform, everything that follows (head fit + shaping) is much easier.
Note: The relief holes are important — they stop the wedge slots from splitting further down the handle when you drive the wedges in.
Step 3: Shape the Handle (Final Grip)
Now I give the handle its final shape. I start by drawing a few guide lines — nothing fancy, just enough to mark where I want the grip to feel slimmer and more comfortable in the hand.
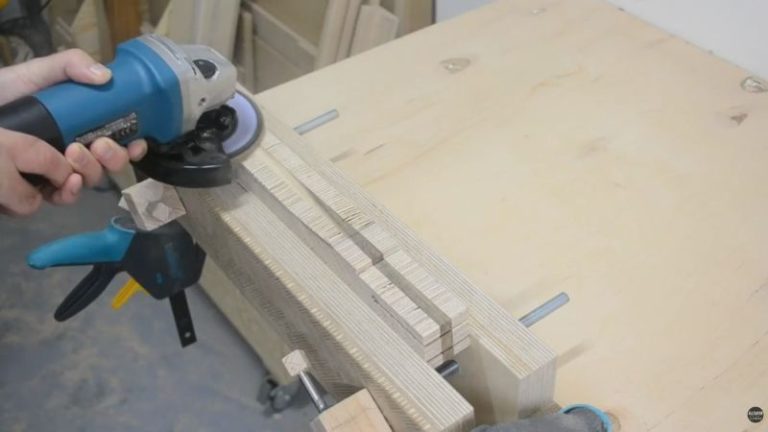
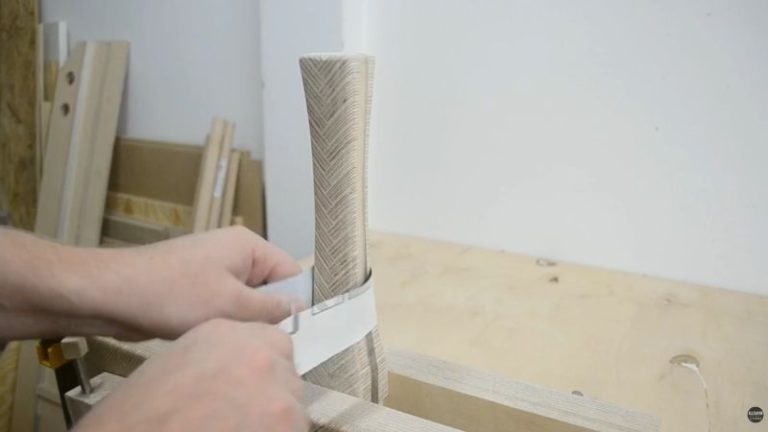
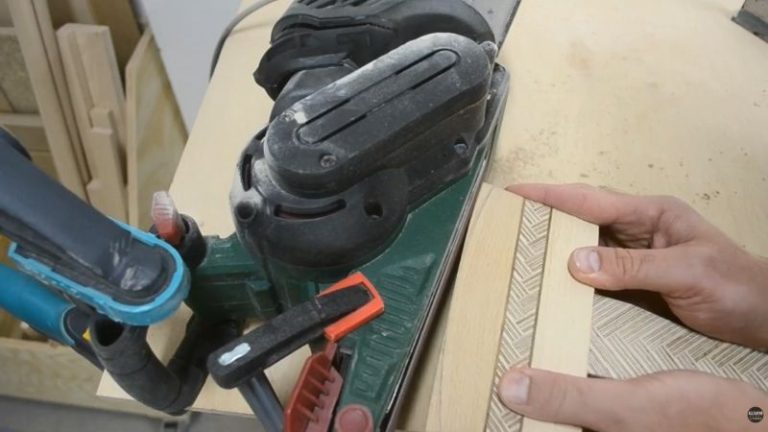
To remove the bulk quickly, I use a grinder and knock off the main corners and excess material. (If you have a band saw, that’s honestly the better option here — faster, cleaner, and way less dust.) Once the rough shape is there, I clamp the handle in my Moxon vise and use sanding sheets to refine it into the final grip shape.
This part is very personal — the “best” handle shape is the one that feels right in your hand. Take your time and keep testing the grip until it feels comfortable. After that, the handle is done and we can move on to the mallet head.
Tip: Don’t aim for perfection immediately. Get the rough shape first, then sneak up on the final comfort with sanding — it’s much easier to control.
Step 4: Build the Mallet Head + Install the Handle (Glue + Wedges)
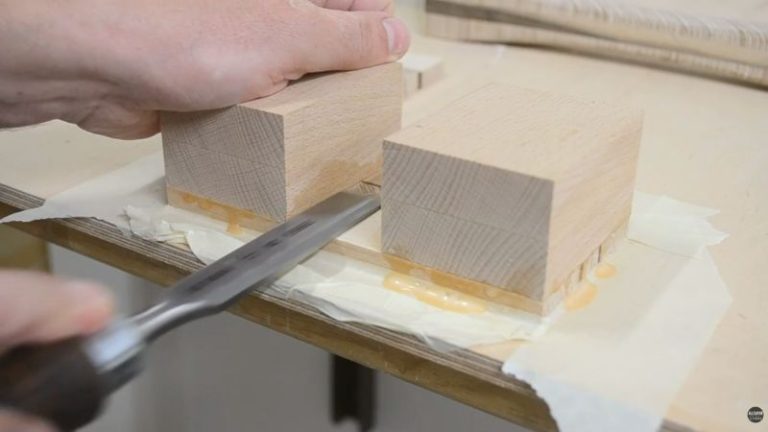
Now we move on to the mallet head — this is where the design really comes together. I start by cutting all the head parts to size on the table saw: two main beech blocks for the head body, plus all the side pieces that build up the “decorative sandwich” on the sides (beech strips, walnut inlays, and the patterned plywood strip).
The plywood patterned strip is made the exact same way as the handle pattern (cut small plywood blocks → glue into pattern → flatten/square). Once I had all the parts ready, I did a dry fit with the handle so I could see the layout and check that everything would line up cleanly.
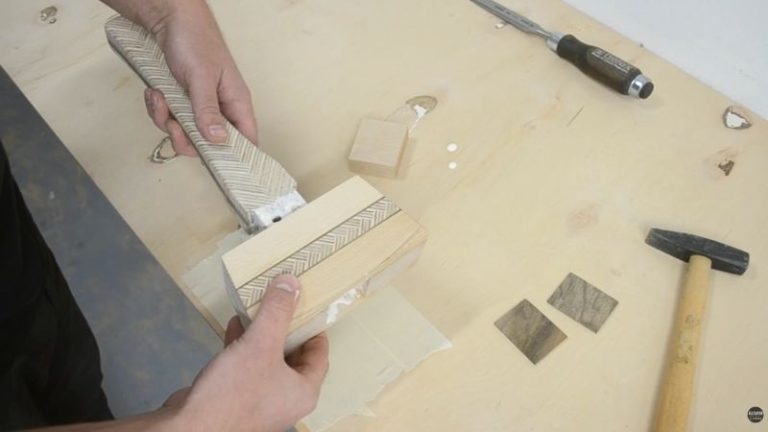
Then I glued the side pieces into panels and sanded them flat. After that, I glued up the head in stages: I glued one side panel to the main beech head pieces first, using the handle as spacing so the opening stays correct. Once that cured, I cleaned up any glue squeeze-out inside the opening with a chisel, then glued on the second side panel and let everything dry.
After the main head block was solid, I cut the head sides at an angle using a table saw sled to give it that cleaner, finished shape.
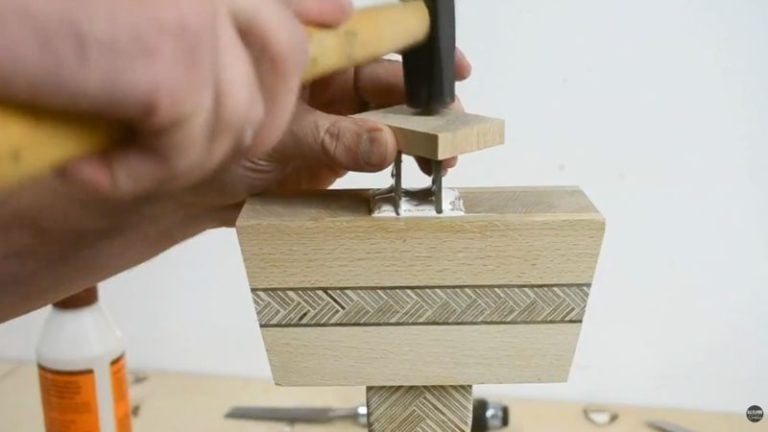
Finally, I assembled the mallet: I applied glue to the handle tenon and inside the head opening, inserted the handle, and drove in the wedges to lock it in place. Then I let the whole mallet cure fully before final shaping and finishing.
Note: Always clean the inside glue squeeze-out before closing the second panel. If dried glue stays inside the opening, the handle fit can become tight or uneven.
Step 5: Sand and Finish the Mallet (Final Shape + Oil)
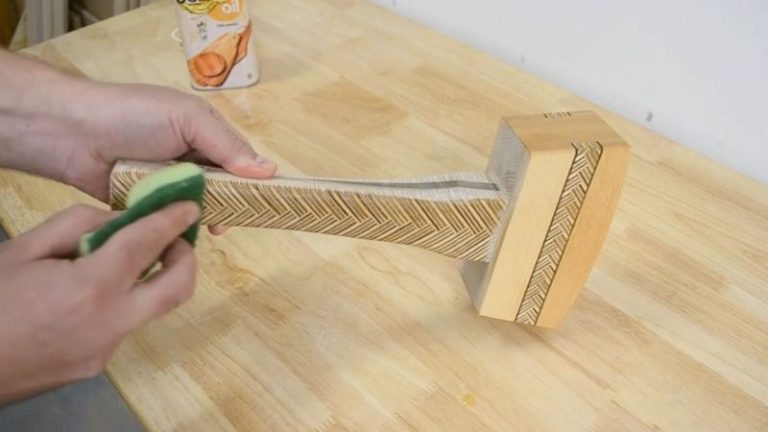
This is the step where the mallet goes from “assembled” to “finished.” First I sand the head down to its final shape, clean up the surfaces, and break all the sharp edges so it feels good in the hand and won’t chip easily. I use a mix of an orbital sander and a belt sander to get the shape right and make the faces smooth, then I work through a few grits until everything feels clean and even.
Once the sanding is done, I oil the mallet with Belinka oil. This is the moment where everything comes alive — the beech, walnut, and plywood patterns pop, the contrast gets stronger, and the mallet starts looking like a finished piece instead of just a block of wood.
And that’s it — the mallet is finished and ready for the shop.
Note: If the surface still feels oily after a coat, wipe off the excess and give it more time to dry before adding another coat.
Wrap-Up: A Shop Mallet You’ll Use All the Time
This mallet is definitely a bit more “tuned up” the way I built it — with the plywood patterns, walnut accents, and the angled head — but you can absolutely follow the same process and make a simpler version from one solid hardwood. Either way, you end up with one of the most useful tools you can have in the shop.
A wooden mallet is perfect for any operation where you need force but don’t want to damage your workpiece — tapping joints together, adjusting assemblies, seating parts, or nudging things into place without leaving metal marks. And it’s also a great “scrap wood” project. If you’ve been building jigs, shop furniture, or cutting boards, you probably already have enough offcuts to make a really nice mallet without buying much extra material.
It’s also one of those builds that’s especially helpful early on when you’re setting up your workshop. Once you have a mallet, you’ll start reaching for it constantly — and having one that feels good in the hand (and looks great) is a nice bonus.
If you want more builds like this (jigs, workshop tools, and downloadable plans), you can find everything in one place here: 👉 Woodworking Plans (All Projects)
FAQs: How to Make a Wooden Mallet
1) What wood is best for a wooden mallet?
Hardwoods are the best choice because they’re durable and hold up to repeated удар (impacts). Beech, maple, ash, oak, and walnut all work well. In my build I used beech and walnut for strength and contrast, and Baltic birch plywood only as a decorative pattern (not as the main striking material).
2) How do you make a wooden mallet strong?
A strong mallet comes down to three things: a solid head, a good handle fit, and a reliable joint. Laminating the head with wood glue creates a very strong blank, and a properly fitted handle that’s expanded with wedges locks the handle in place so it won’t loosen over time.
3) Do I need wedges for a wooden mallet handle?
If you’re fitting the handle through the head, wedges are a great idea. They expand the handle inside the head and make the connection much more secure. Relief holes and wedge slots also help prevent the handle from cracking when the wedges are driven in.
4) What size should a wooden mallet be?
There’s no single “correct” size — it depends on what you use it for. A general shop mallet like mine (about 32.5 cm overall length with a 16 cm head) is a comfortable everyday size. The main goal is a head that feels balanced and a handle that fits your grip.
5) What finish should I use on a wooden mallet?
A simple oil finish works great because it’s easy to apply and keeps the wood looking good. I used Belinka oil. You don’t need a thick film finish — just something that protects the wood and makes it easier to keep clean.
